 |
ROCK FC: GONY 3.2 PBP Commentary |
Undercard bout
|
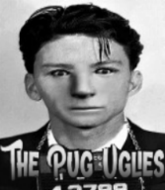
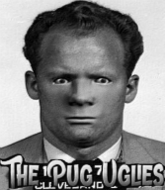
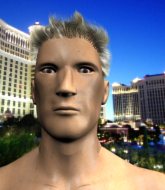
Coming up we have a light heavyweight MMA rules bout between Frankie McGregor (ranked 24476 p4p, 3366 weight class) and Gabe Gambino (ranked 690 p4p, 446 weight class). Over to our ring announcer for the fighter introductions!
 |
|
 |
| 194 cm
18
205
1 - 2 - 0 |
|
194 cm
18
210
2 - 0 - 0 |
BJJ White Belt
Solid Muay Thai
Very strong |
|
BJJ White Belt
Solid Muay Thai
Powerful |
|
| |
|
Ladies and gentlemen. This fight is 3 rounds, in the light heavyweight division.
Introducing the fighter to my left, fighting out of the red corner.
With a record of 1 - 2 - 0, fighting out of London, Frankie McGregor!
And introducing the fighter to my right, fighting out of the blue corner.
With a record of 2 - 0 - 0, fighting out of London, Gabe Gambino!
The judges for this bout are Columbo Gatti, John Kavanagh and Jonathan Paton.

The bell rings for round one and we are underway!
McGregor fakes high and swings low for a body shot but Gambino manages to avoid it.
Gambino takes a jab right on the nose. That must have hurt but he shrugs his shoulders and looks to return the favor.
Gambino displays some good footwork, moving neatly out of range as McGregor throws out the jab.
McGregor throws a jab to the body, straight down the pipe. Boom. That sent Gambino stumbling backwards but he manages to regain his composure quickly.
McGregor misses with a body shot.
Gambino wants to counter with a clinch but McGregor pushes him away.
Gambino cracks McGregor with an open hand slap.
McGregor throws out a loose jab but Gambino uses good head movement to avoid it.
McGregor ducks down and throws a hook to the body but Gambino moves away.
McGregor swings and misses with a shot to the body
and Gambino cracks him with a counter punch right on the button.
McGregor definitely looks more muscular than last time we saw him fight.
Gambino takes a shot to the eye socket. That's gotta hurt.
McGregor takes a body punch that cleary hurt but he's trying not to show any weakness.
This is a great period of action - very entertaining stuff!
The fighters circle momentarily. Gambino darts into range and connects with a nice straight punch.
McGregor takes a really solid shot there but just smiles back and shrugs his shoulders.

Gambino clinches up against the cage.
Gambino looks more muscular than last time we saw him. He must have been on the weights.
Gambino lands a shoulder strike that jolts his opponent's head backwards.
McGregor lands a left hand.
McGregor misses with a punch on the inside.
McGregor tries to land a shot to the body but it's blocked.
Gambino blocking some punches.

That's one minute gone in the round.
McGregor stalling in the clinch but Gambino improves position.
A short body shot lands from Gambino as the two fighters clinch.

McGregor pushes off and circles away, back to the middle of the mat.
Gambino keeping a good distance there, avoiding the body shot.
McGregor misses with a hook. Gambino ducked under it nicely.
McGregor throws a body shot but no joy.
Frankie McGregor seems to be the more aggressive standup fighter in this bout.
Gambino rushes McGregor and pushes him back against the cage in a clinch.
Gambino lands an uppercut.
Gambino can't find room to land a body shot as McGregor controls the action.
McGregor is trying to work out of this bad position, with his back against the cage.
McGregor stalling in the clinch but Gambino improves position.
McGregor throws a head punch that misses.
McGregor is trying to maintain a safe position but Gambino gets an underhook and turns McGregor into the cage.
Gambino blocks a couple of punches on the inside.
McGregor tries to break free but Gambino pushes him back against the cage.
Gambino digs a right hand underneath McGregor's ribcage. McGregor let out a lung full of air as it connected.
Gambino lands a shoulder strike that jolts his opponent's head backwards.
McGregor tries a shoulder strike but it doesn't do any damage.
Gambino scores with a nice hook to the head.
McGregor throws a punch but it's blocked by Gambino.
Gambino scores with a shoulder strike.

That's two minutes gone in the round.
Gambino lands with a short head shot on the inside.
The fans in attendance giving it up for the two fighters, who have really let it all hang out in the last minute or so!
McGregor throws a punch but it's blocked by Gambino.

Gambino breaks the clinch.
Gambino lands with a straight right. McGregor didn't see that one coming.
McGregor takes a swing at Gambino's ribcage but misses.
McGregor is looking to wear down Gambino with body shots, infact he's throwing more body shots than head shots at the moment.
McGregor ducks down and throws a hook to the body but Gambino moves away.
Gambino with a hook.
McGregor throws the left hand but Gambino avoids the punch easily.
McGregor connects with the punch.
McGregor throws a hook but Gambino blocks it.
Gambino wants to counter with a clinch but McGregor pushes him away.
McGregor misses with a shot to the body
and Gambino counters with a good right hand that lands right on the jaw.
McGregor digs a good body shot into Gambino's ribs.
McGregor throws an ugly left hook that misses

and Gambino counters with a crisp right hand that drops McGregor! Gambino lets McGregor back up to his feet, looking for a finish!
 McGregor is rocked! McGregor is rocked!
Gambino digs a good body shot into McGregor's ribs.
Oh McGregor is still all over the place! His legs are completely gone! Will he be able to recover?!!
McGregor is breathing heavily.
McGregor misses with a body shot.
Gambino weaves into range and cracks McGregor right on the temple with a beautiful overhand right! McGregor goes down! He's out cold! Wow, what a beautiful knockout! Gambino is strutting round the canvas like a movie star as the camera bulbs flash frantically.
Ladies and gentlemen, after 2:56 of round 1, we have a winner by way of KO (Punch). Gabe Gambino!
Gabe Gambino bigged himself up after the win. The crowd seemed to love it.
|
|
|
|
|
|
|
|
|
|
|
|
|
|
|
|
|
|
|
|
|
|
|
| S |
C
A |
G |
S |
C
B |
G |
|
S |
C |
G |
|
energy
A | B |
|
hype
A | B |
|
pop
A | B |
|
mgr
A | B |
|
FIGHT
RATING
76% |
|
|
|
|
|
|
|
Undercard bout
|
Coming up we have a light heavyweight MMA rules bout between Thomas O Farrelly (ranked 24483 p4p, 3436 weight class) and D.D Panda (ranked 708 p4p, 455 weight class). Both these guys have really solid chins. Will we see a standup war or will they both decide that a knockout is unlikely and try to win the fight elsewhere?
 |
|
 |
| 188 cm
18
205
1 - 2 - 0 |
|
150 cm
18
205
3 - 0 - 0 |
BJJ Blue Belt
Excellent MT
Granite chin |
|
Good takedowns
Basic striking
Granite chin |
|
| |
|
Ladies and gentlemen. This fight is 3 rounds, in the light heavyweight division.
Introducing the fighter to my left, fighting out of the red corner.
With a record of 1 - 2 - 0, fighting out of London, Thomas O Farrelly!
And introducing the fighter to my right, fighting out of the blue corner.
With a record of 3 - 0 - 0, fighting out of Los Angeles, D.D Panda!
The judges for this bout are Jorge Garcia, David Schapiro and Russell Pearce.
The bell rings for round one and we are underway!

Panda shoots in and gets a takedown into half guard. Panda showed some decent athleticism there.

Panda is looking for a kimura but O Farrelly is holding onto that half guard position, so it's hard for Panda to get the leverage.
O Farrelly tries to kick Panda off but Panda keeps his base steady and stays in half guard.
Panda looking for a kimura but he'll have to free his other leg if he wants to finish that. Perhaps he's just using it as a distraction technique.
Panda is keen to just control but O Farrelly is a slippery customer.
We've had a slow start to the round here - hopefully the action picks up.
O Farrelly trying to control from the bottom.
Panda is working for a submission here. He's got hold of the far side arm and he's looking for a kimura. He's cranking on the arm and he's got it! O Farrelly is tapping out! Ouch, that looked like it hurt!
Ladies and gentlemen, after 1:58 of round 1, we have a winner by way of Submission (Kimura). D.D Panda!
|
|
|
|
|
|
|
|
|
|
|
|
|
|
|
|
|
|
|
|
|
|
|
| S |
C
A |
G |
S |
C
B |
G |
|
S |
C |
G |
|
energy
A | B |
|
hype
A | B |
|
pop
A | B |
|
mgr
A | B |
|
FIGHT
RATING
66% |
|
|
|
|
|
|
|
Undercard bout
|
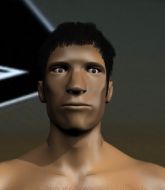
Coming up we have a light heavyweight MMA rules bout between Oliver McCarthy (ranked 5066 p4p, 2676 weight class) and Chris Tycoon (ranked 576 p4p, 358 weight class). Tycoon has chosen STILL BALLIN as his entrance music. These two fighters really are very evenly matched on the feet - it will be fascinating to see who can assert themselves in that aspect of the fight.
 |
|
 |
| 190 cm
18
205
2 - 1 - 0 |
|
187 cm
18
205
2 - 0 - 0 |
BJJ Blue Belt
Counter fighter
Granite chin |
|
BJJ White Belt
Good low kicks
Good gas tank |
|
| |
|
Ladies and gentlemen. This fight is 3 rounds, in the light heavyweight division.
Introducing the fighter to my left, fighting out of the red corner.
With a record of 2 - 1 - 0, fighting out of St Petersburg, Oliver McCarthy!
And introducing the fighter to my right, fighting out of the blue corner.
With a record of 2 - 0 - 0, fighting out of Los Angeles, Chris Tycoon!
The judges for this bout are Eddie Farnsworth, David Schapiro and Lou da Vinci.
The bell rings for round one and we are underway!
McCarthy throws an ugly left hook that misses
and Tycoon finishes the little exchange by landing a big kick to the body.
McCarthy with a body punch. A glancing blow.
McCarthy throws a right hand that misses
and Tycoon counters with a nice low kick that buckles McCarthy's knee momentarily.
McCarthy throws a right hand that misses
and Tycoon counters with a nice kick to the body.
Tycoon has done a lot of speed work in the buildup to this fight.
McCarthy throws a lazy uppercut
and Tycoon counters with a nice low kick that buckles McCarthy's knee momentarily.
Tycoon cracks McCarthy with a right hand to the side of the head.
McCarthy throws a monster uppercut resembling something out of street fighter but it doesn't land.
We've had a slow start to the round here - hopefully the action picks up.
McCarthy misses the shot to the body.
A little jabbing left from Tycoon on the counter but it doesn't find it's target.
Tycoon lands a leg kick. The shin dug right into the meat of the thigh.
McCarthy takes a jab right on the nose. That must have hurt but he shrugs his shoulders and looks to return the favor.
 It looks like Oliver McCarthy has been cut. It looks like Oliver McCarthy has been cut.
That's one minute gone in the round.
Tycoon paws at his opponent with the jab and then lunges in with a straight, right on the button.
Tycoon throws a body kick that digs right into the meat.
McCarthy is breathing heavily.
McCarthy takes a shot to the nose. Hopefully that hasn't broken it.
Tycoon thuds his shin into the meat of McCarthy's side.
Nice body kick from Tycoon.
Tycoon scores with a reasonable looking shot to the body. McCarthy doesn't seem bothered though.
Tycoon sends McCarthy crashing to the mat with a devastating uppercut! Tycoon is motioning to the referee to let McCarthy up. He wants to try and finish this one on the feet!
McCarthy is rocked!
This is a great period of action - very entertaining stuff!
Tycoon scores with a leg kick.
A slapping leg kick lands for Tycoon.
That's two minutes gone in the round.
A cross from Tycoon lands.
Oliver McCarthy's cut is getting worse.
McCarthy seems to be moving with more speed, compared to his last bout. He must have been working on that in the gym.
Tycoon with a nice looking leg kick. You could hear that one land in a back row.
McCarthy walks straight into a right hand from Tycoon - that's dropped him! Tycoon jumps into mount and starts pounding away - can he finish?! More strikes go undefended and the referee has to dive in to save McCarthy from any more punishment! McCarthy complains about the stoppage but falls over as he tries to stand back up, so it was clearly a good stoppage.
Ladies and gentlemen, after 2:23 of round 1, we have a winner by way of TKO (Punches). Chris Tycoon!
Chris Tycoon tried to hype himself up post fight but didn't word it too well and it ended up with him sounding like a bit of a tool.
|
|
|
|
|
|
|
|
|
|
|
|
|
|
|
|
|
|
|
|
|
|
|
| S |
C
A |
G |
S |
C
B |
G |
|
S |
C |
G |
|
energy
A | B |
|
hype
A | B |
|
pop
A | B |
|
mgr
A | B |
|
FIGHT
RATING
62% |
|
|
|
|
|
|
|
Undercard bout
|
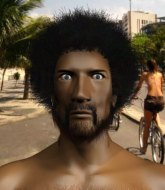
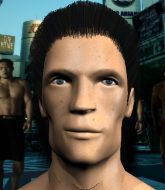
Coming up we have a light heavyweight MMA rules bout between Mickey Featherstone (ranked 3825 p4p, 3649 weight class) and Duck Dodgers (ranked 501 p4p, 488 weight class). Mickey Featherstone is staring across the cage at his opponent, tweaking his nipples... Tweaking his own nipples that is.
 |
|
 |
| 188 cm
18
205
1 - 2 - 0 |
|
193 cm
18
205
2 - 1 - 0 |
Good wrestling
Basic striking
Granite chin |
|
BJJ Blue Belt
Brawler
Heavy handed |
|
| |
|
Ladies and gentlemen. This fight is 3 rounds, in the light heavyweight division.
Introducing the fighter to my left, fighting out of the red corner.
With a record of 1 - 2 - 0, fighting out of London, Mickey Featherstone!
And introducing the fighter to my right, fighting out of the blue corner.
With a record of 2 - 1 - 0, fighting out of Rio de Janeiro, Duck Dodgers!
The judges for this bout are Dean Styles, Russell Pearce and Franklyn Lucas.
The bell rings for round one and we are underway!
A telegraphed takedown attempt from Featherstone is defended easily by Dodgers.
Featherstone tries to score a power double leg takedown but Dodgers sees that one coming and sprawls well. That will dishearten Featherstone somewhat.

Featherstone gets a double leg takedown into Dodgers's guard.
Dodgers has control of Featherstone's left arm, preventing Featherstone from doing any damage.
Featherstone pressing down on his opponent's thigh, looking to pass guard. Dodgers is keeping the position for now.

Featherstone has gone for a leg lock! Dodgers slips out almost immediately though and dives into Featherstone's guard.

We've had a slow start to the round here - hopefully the action picks up.
Dodgers got a little sloppy there for a moment and Featherstone has worked his way into a loose triangle - can he finish it?! No, Dodgers has managed to get both his arms back between Featherstone's legs - danger averted.
Featherstone is active off his back here, looking for submissions.
That's one minute gone in the round.
Featherstone being controlled here, momentarily.
Featherstone working away from the bottom but not quite defensive enough there because Dodgers has passed into half guard!
Dodgers keeping composed on the top, looking to control the action.
Featherstone definitely looks more muscular than last time we saw him fight.
Featherstone looking to work for a kimura from the bottom.
Featherstone actively working from the bottom here.
That's two minutes gone in the round.
The crowd are showing their displeasure at the lack of action as loud boos ring out around the arena.
The fighters are battling for position here. Featherstone manages to regain full guard. Nice work.
Featherstone escapes his hips to the side and looks to be working for an armbar. Dodgers gives him a little smile and shakes his head. No chance.
Featherstone is looking for a triangle here but Dodgers uses the submission attempt to pass into side control.
Featherstone is trying to improve his position.
Dodgers is looking to take a break and control but Featherstone is keeping him honest, looking to work from the bottom.
Featherstone is letting Dodgers control him for a moment.

That's three minutes gone in the round.
Featherstone is trying to control Dodgers's posture but Dodgers avoids it.
Dodgers happy to just control the position for now.
Dodgers working away.
Dodgers trying to control the action but Featherstone is working from the bottom.
Dodgers working away.

That's four minutes gone in the round.
A lull in the action here being met with boos from the crowd.

The ref stands the fighters back up due to a lack of activity.
Featherstone ducks under a wild hook from Dodgers.
Featherstone looks shocked there as he takes a right hand to the temple.
It looks like Mickey Featherstone has been cut.
Featherstone takes a big uppercut there. He seems a bit wobbly but no, he's OK.
Dodgers misses with a wild body shot.
Featherstone fails with an attempt to clinch.
Featherstone closes the distance and takes a jab right on the nose as he does so.
Dodgers stuffs a takedown. It's all about dictating where the fight takes place and Dodgers wants it to stay on the feet.
That's three failed takedown attempts in the round for Mickey Featherstone. That's going to take a lot out of him.
Excellent takedown into side control there by Featherstone.
Featherstone is trying to land an Americana. He has the arm isolated but Dodgers is keeping cool and he's avoided the danger for now.
The crowd thankful this round is nearly over.
Featherstone tries for a kimura but Dodgers is defending well.
And that is the end of the round. The fighters go back to their corners.
Duck Dodgers dominated that round.
The cut man is working on Mickey Featherstone's cut.
That's time! Back to the action!

Featherstone avoids the body shot from Dodgers.
Dodgers lands a powerful looking uppercut that connected with his opponent's jaw.
Featherstone bobs and weaves into range and then changes levels and scores with a nice takedown into side control.
Featherstone tries to advance to mount but Dodgers instead regains half guard.
Featherstone is actively looking for submissions here but good counter grappling here from Dodgers as he works his way to full guard.
Dodgers is pulling down on Featherstone's head. It's preventing any offense from Featherstone, at least for the moment.
We've had a slow start to the round here - hopefully the action picks up.
Featherstone drops back looking for a heel hook - he quickly realises he's not going to get it but Dodgers manages to dive on top of him before he can escape and now Featherstone has Dodgers in his guard.
Featherstone is active off his back here, looking for submissions.
That's one minute gone in the round.
Dodgers got a little sloppy there for a moment and Featherstone has worked his way into a loose triangle - can he finish it?! No, Dodgers has managed to get both his arms back between Featherstone's legs - danger averted.
Dodgers got a little sloppy there for a moment and Featherstone has worked his way into a loose triangle - can he finish it?! No, Dodgers has managed to get both his arms back between Featherstone's legs - danger averted.
Dodgers sneaks a leg through and gets to half guard. That was like a knife through butter how easily he passed Featherstone's guard.
Featherstone looking to work for a kimura from the bottom.
Featherstone has guillotine here! It looks pretty tight! Could this be all over! No, Dodgers escapes and passes into side control at the same time. Nice work there by Dodgers!
The fighters are pressed up against the cage, both looking to find a bit of space to work.
That's two minutes gone in the round.
The crowd are hurling abuse towards the fighters... You can hardly blame them though because there isn't a lot going on in the fight.
Featherstone struggling a bit here.
Featherstone is in a bad position, trying to hold on for dear life but he is really struggling to maintain any sort of control.
Featherstone tries to buck Dodgers off but Dodgers is having none of it.
Featherstone is trying to control Dodgers's posture but Dodgers avoids it.
Featherstone is letting Dodgers control him for a moment.
That's three minutes gone in the round.
What's Featherstone going to do here then? He's in a bit of a pickle.
Featherstone wants to control but Dodgers postures up.
We must be close to a standup if these guys don't pick up the pace.
Featherstone on his back here. We all know that wrestlers don't like being on their back so let's see if Featherstone tries to get out of the position.
Featherstone is trying to get back to half guard.
Dodgers working away.
The referee has stepped in and called for a break in the action. We'll restart on the feet.
Dodgers lands a jab to the nose.
The fighters circle momentarily. Dodgers darts into range and connects with a nice straight punch.
Mickey Featherstone's cut is getting worse.
Dodgers drives through and clinches with Featherstone against the cage.
That's four minutes gone in the round.
Dodgers struggles to land a body shot inside as Featherstone controls his hands.
Dodgers cracks Featherstone with a nice body shot.
Dodgers has been the more effective fighter overall so far.
Featherstone wants the takedown. Dodgers is fighting it off but Featherstone persists and manages to bring the fight to the ground, ending up in Dodgers's guard against the cage.
Featherstone wants to control from the top but Dodgers keeps moving.
Dodgers is avoiding any damage by keeping wrist control.
There's a bit of a scramble here and now Dodgers is on top in guard.
Dodgers advances to half guard.
This is a great period of action - very entertaining stuff!
Featherstone is looking to control Dodgers's leg but it's slowly edging free. Can Featherstone avoid being mounted?
The crowd thankful this round is nearly over.
Featherstone looking for submissions from an awkward position here.
Dodgers passes the half guard and he's now in mount! Big trouble for Featherstone!
And that is the end of the round. The fighters go back to their corners.
Duck Dodgers showed his class in that round. I'd imagine he'll take it on all the scorecards.
The cut man is working on Mickey Featherstone's cut.
That's the end of the round. The referee orders the cornermen out of the cage so we can get back down to business. This is the final round!

Dodgers connects with a good right hand that stumbles Featherstone. Featherstone circles away out of range and recomposes himself.
Featherstone fails with a takedown attempt.
Featherstone closes the distance looking to clinch
and Dodgers counters with a stiff right hand.
Featherstone tries to close the distance and clinch but Dodgers swats him to one side with an open hand palm strike and circles away.
Dodgers fakes a right and follows up with a big left that drops Featherstone to one knee - oooooh, he's wobbly! Featherstone looks to clinch but Dodgers throws him off and pummels him into the canvas! Featherstone taps out under the strikes! The fight is over!
Ladies and gentlemen, after 0:32 of round 3, we have a winner by way of Submission (Strikes). Duck Dodgers!
A relieved looking Duck Dodgers thanked the fans for their support and gave the usual line about them being amazing. They seemed to believe that he actually meant it.
|
|
|
|
|
|
|
|
|
|
|
|
|
|
|
|
|
|
|
|
|
|
|
| S |
C
A |
G |
S |
C
B |
G |
|
S |
C |
G |
|
energy
A | B |
|
hype
A | B |
|
pop
A | B |
|
mgr
A | B |
|
FIGHT
RATING
38% |
|
|
|
|
|
|
|
Undercard bout
|
Coming up we have a light heavyweight MMA rules bout between Manus Murphy (ranked 3069 p4p, 5267 weight class) and Mark Piazza (ranked 409 p4p, 583 weight class). Manus Murphy has the edge in experience - let's see if he can make that count tonight.
 |
|
 |
| 195 cm
18
207
2 - 1 - 0 |
|
185 cm
18
204
1 - 1 - 0 |
Good wrestling
Counter fighter
Self confident |
|
BJJ Blue Belt
Brawler
Powerful |
|
| |
|
Ladies and gentlemen. This fight is 3 rounds, in the light heavyweight division.
Introducing the fighter to my left, fighting out of the red corner.
With a record of 2 - 1 - 0, fighting out of Las Vegas, Manus Murphy!
And introducing the fighter to my right, fighting out of the blue corner.
With a record of 1 - 1 - 0, fighting out of Las Vegas, Mark Piazza!
The judges for this bout are Eddie Farnsworth, Lou da Vinci and Jonathan Paton.
The bell rings for round one and we are underway!
Piazza throws a big shot that misses.
Murphy ducks under a wild hook from Piazza.
As Piazza tries to get set, Murphy tries to push him back and clinch up but Piazza manages to avoid the attempt.
Piazza takes a swing at Murphy's ribcage but misses.
Piazza looks to score with a jab to the body but Murphy is just out of range.
Murphy uses good footwork to avoid the strikes from Piazza.
Piazza throws a shot from downtown. Murphy moves away and avoids it.
Murphy seemed to be looking to counter by closing the distance.
Murphy takes an uppercut right on the jaw but it doesn't phase him.
Murphy tries to clinch there but Piazza circles away.
It seemed like Piazza was going to counter with the hook but didn't fully commit to it.
Murphy wants to clinch.
We've had a slow start to the round here - hopefully the action picks up.
A telegraphed right hand from Piazza misses the target.
Murphy walks into a stiff left hand from Piazza.
Murphy tries to close the distance and clinch up but Piazza swats him away and circles back towards the center.
Piazza swings away with a counter right hand but no contact made.

Murphy fakes with an overhand right and moves in to clinch with Piazza, pushing him back against the cage.
That's one minute gone in the round.
Piazza has had enough of the clinch but Murphy keeps him there for the moment.
Murphy jumps guard but Piazza stands there with Murphy around his waist. Murphy gives up and drops back to his feet. We remain in the clinch.
Murphy tries to pull guard but can't drag his opponent to the mat. Piazza just stands there and leans against the cage.
Piazza tries a body shot but Murphy blocks it.
Piazza breaks from the clinch.
Murphy has closed the distance and engaged Piazza in a clinch.
Piazza tries to work over Murphy's body with a swooping hook but it only glances the target.
Murphy jumps guard but Piazza stands there with Murphy around his waist. Murphy gives up and drops back to his feet. We remain in the clinch.
That's three failed takedown attempts in the round for Manus Murphy. That's going to take a lot out of him.
Murphy ties up his opponent against the cage and manages to drag the fight down to the ground. Murphy no doubt will be looking to work submissions from his guard.
The fighters are pressed up against the cage, both looking to find a bit of space to work.
Piazza wants to stand but Murphy has a closed guard, so he can't escape.
The ref warns both fighters not to hold the cage as they work up against the meshing.
Piazza's corner is telling him to maintain position.
Piazza sneaks a leg through and gets to half guard. That was like a knife through butter how easily he passed Murphy's guard.
The fighters are battling for position here. Murphy manages to regain full guard. Nice work.
Piazza trying to control the position from guard on top but Murphy is wriggling around, looking for whatever he can.
Murphy trying to control the position.
That's two minutes gone in the round.
Piazza pressing down on his opponent's thigh, looking to pass guard. Murphy is keeping the position for now.
Murphy is active off his back here, looking for submissions.
Piazza wanted to stand there but Murphy had control of the position.
Murphy looking for a sweep. Not yet Murphy, not yet.
Piazza is taking a break and basically stalling. The referee will not allow him to do that for long.
Murphy has a loose triangle. He'll be looking to tighten that up but Piazza can see exactly what he's planning and manages to posture up and free himself.
That's three minutes gone in the round.
Murphy keeping full guard, as Piazza tries to pass.
Piazza got a little sloppy there for a moment and Murphy has worked his way into a loose triangle - can he finish it?! No, Piazza has managed to get both his arms back between Murphy's legs - danger averted.
Piazza wants to control from the top but Murphy keeps moving.
Murphy working a defensive guard here.
Piazza avoids a guillotine attempt easily.
Murphy wants to sweep but no luck.
That's four minutes gone in the round.
The crowd are starting to boo a lack of action.
Piazza trying to move into half guard but instead Murphy has managed to sweep!

Murphy trying to control but Piazza is working from the bottom.
Piazza is trying to keep Murphy in close.
Piazza trying to control the position here.
Murphy wants to control from the top but Piazza keeps moving.
Piazza really doesn't want to stay on the ground with Murphy. If he can't get it back to his feet, it's only a matter of time before he'll be tapping out.
The crowd thankful this round is nearly over.
Murphy thinks about going for a leg but decides against it, in order to maintain the position.
Murphy trying to control the position from guard on top but Piazza is wriggling around, looking for whatever he can.
And that is the end of the round. The fighters go back to their corners.
A close round but Mark Piazza will probably get the nod.
That's time! Murphy's corner gives him a slap on the ass as he gets ready to fight.
Piazza loads up on a big right hand but Murphy slips the punch.
Murphy looks to have improved his striking defense since last time we saw him fight.
Murphy slips under a jab from Piazza.
Murphy has Piazza up against the cage in a clinch.
Murphy has not gone for a single takedown so far in this fight, which seems like a very strange tactic when you consider that he has the superior wrestling and BJJ.
Murphy tries to jump guard but he falls flat on his backside. Piazza smiles and moves away.
Murphy tries to clinch there but Piazza circles away.
Murphy tries to close the distance and clinch up against the cage but Piazza paws at him with a jab and circles away.
Piazza connects with a jab.
Piazza throws a poor cross that misses
and Murphy counters by moving into the clinch.
Murphy manages to pull guard.
Murphy is working actively off his back, looking to secure an arm or perhaps work for a triangle.
We've had a slow start to the round here - hopefully the action picks up.
Piazza is trying to tuck his arms in to keep them safe but Murphy has managed to isolate one of them and has got a loose triangle. Piazza is looking to defend but Murphy has done well to lock his legs together - this could be big trouble for Piazza! Murphy pulls down on the head and a little smile comes across his face - he knows he's got it. Yep, Piazza taps out and this one is all over!
Ladies and gentlemen, after 1:57 of round 2, we have a winner by way of Submission (Triangle). Manus Murphy!
Manus Murphy took to the mic in his post fight interview and said 'Ohh, and another Convicted chump goes down like a cheap hooker!'.
|
|
|
|
|
|
|
|
|
|
|
|
|
|
|
|
|
|
|
|
|
|
|
| S |
C
A |
G |
S |
C
B |
G |
|
S |
C |
G |
|
energy
A | B |
|
hype
A | B |
|
pop
A | B |
|
mgr
A | B |
|
FIGHT
RATING
32% |
|
|
|
|
|
|
|
Undercard bout
|
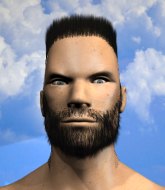
Coming up we have a heavyweight MMA rules bout between Demolition Ax (ranked 3249 p4p, 3228 weight class) and Franjo Boban (ranked 372 p4p, 371 weight class). Franjo Boban will no doubt be trying to keep this one on the feet, where he has a distinct advantage.
 |
|
 |
| 190 cm
25
240
3 - 0 - 0 |
|
193 cm
25
260
1 - 0 - 0 |
Good wrestling
Counter fighter
KO power |
|
BJJ White Belt
Excellent boxer
Heavy handed |
|
| |
|
Ladies and gentlemen. This fight is 3 rounds, in the heavyweight division.
Introducing the fighter to my left, fighting out of the red corner.
With a record of 3 - 0 - 0, fighting out of New York, Demolition Ax!
And introducing the fighter to my right, fighting out of the blue corner.
With a record of 1 - 0 - 0, fighting out of Amsterdam, Franjo Boban!
The judges for this bout are Dean Styles, Russell Pearce and Lou da Vinci.
The bell rings for round one and we are underway!
Boban scores with a nice right hand.
It looks like Demolition Ax has been cut.
Ax has his hands up protecting his head but a hook from Boban finds it's way round the side to connect with Ax's head.
Boban lands a powerful looking uppercut that connected with his opponent's jaw.
Ax shoots in for a takedown but Boban shows good takedown defense there and keeps this one on the feet.
Ax takes a shot right to the liver - Bas would have been proud of that punch.
Ax takes a really solid shot there but just smiles back and shrugs his shoulders.
Demolition Ax's cut is getting worse.
Boban feints and then winds up with a huge right hand that connects perfectly and sends Ax sprawling to the canvas! Ax rolls over backwards and springs off the cage and manages to regain his footing - how acrobatic! Oh, he's still wobbly - can Boban finish him?!
Ax is rocked!
We've seen a great period of action over the last minute or so - credit to both fighters for going all out!
Ax fails with a takedown attempt from distance.
Oh Ax is still all over the place! His legs are completely gone! Will he be able to recover?!!
Ax shoots in for a takedown but Boban shows good takedown defense.
And an attempted straight right on the counter from Boban! But no joy.
That's three failed takedown attempts in the round for Demolition Ax. That's going to take a lot out of him.
Boban circles and sees the opportunity to plant his feet and throw a really nice straight left hand that drops Ax to the canvas! Ax doesn't know where he is but he's trying to survive - Boban keeps piling on the pressure and forces the referee to step in! This one is aaaaaall over!
Ladies and gentlemen, after 0:39 of round 1, we have a winner by way of TKO (Strikes). Franjo Boban!
|
|
|
|
|
|
|
|
|
|
|
|
|
|
|
|
|
|
|
|
|
|
|
| S |
C
A |
G |
S |
C
B |
G |
|
S |
C |
G |
|
energy
A | B |
|
hype
A | B |
|
pop
A | B |
|
mgr
A | B |
|
FIGHT
RATING
100% |
|
|
|
|
|
|
|
Undercard bout
|
Coming up we have a middleweight MMA rules bout between Brian White (ranked 4632 p4p, 24436 weight class) and Sami Rantanen (ranked 557 p4p, 676 weight class). White comes into the arena with Next Contestant blaring out of the sound system. I don't know about you partner, but I'm pumped for this one!
 |
|
 |
| 185 cm
25
195
0 - 0 - 0 |
|
186 cm
26
185
0 - 2 - 0 |
Good takedowns
Basic striking
Granite chin |
|
Good wrestler
Decent boxing
Heavy handed |
|
| |
|
Ladies and gentlemen. This fight is 3 rounds, in the middleweight division.
Introducing the fighter to my left, fighting out of the red corner.
With a record of 0 - 0 - 0, fighting out of New York, Brian White!
And introducing the fighter to my right, fighting out of the blue corner.
With a record of 0 - 2 - 0, fighting out of London, Sami Rantanen!
The judges for this bout are John Kavanagh, John Roberts and Jonathan Paton.
The bell rings for round one and we are underway!
Rantanen fails miserably with a takedown attempt.
White shoots in looking for a takedown but Rantanen manages to keep the fight standing, pushing White's face into the canvas for good measure before circling away.
Rantanen has done a lot of speed work in the buildup to this fight.
Rantanen tries to land with a swinging hook to the body but White was well out of range. Poor timing from Rantanen.
White slips a jab from Rantanen.
White is looking to counter the offense by Rantanen and move into the clinch.
Rantanen throws a combination but it was largely blocked by White.
White fails with a takedown attempt.
Rantanen digs a good body shot into White's ribs.
Rantanen attempts a leg kick but it's missed by a good margin.
Rantanen lands with a nice body punch.
We've had a slow start to the round here - hopefully the action picks up.
White tries to close the distance and clinch but Rantanen swats him to one side with an open hand palm strike and circles away.
White decides to change it up a bit and drives through with a nice takedown into half guard.
White wants to pass the guard but Rantanen is defending well.
This has been an exciting period of action!
White throwing shots but they're hitting the canvas more than the man.
The fighters are pressed up against the cage, both looking to find a bit of space to work.
That's one minute gone in the round.
Rantanen wants to control but White is keeping busy and won't allow it.
Rantanen gets back to full guard.
The ref warns both fighters not to hold the cage as they work up against the meshing.
Rantanen has control of White's left arm, preventing White from doing any damage.
Rantanen controls White momentarily but White frees himself.
Rantanen is in a good position here but he's just trying to control... And he's not even managing to do that successfully.
White with a couple of shots to the head there. Not particularly brutal.
Rantanen wants to stand up but White is controlling him.
Rantanen is working an open guard here, looking to improve his position. No doubt that will leave him open to counters but at least he's being more offensive.
Rantanen preventing the ground and pound from doing any damage.
That's two minutes gone in the round.
There's not a lot going on here and the crowd are letting the fighters know they're not willing to tolerate a lack of action.
White slows down the pace of the fight, as he sits in guard.
Rantanen avoiding any damage from the ground and pound.
Rantanen looking to control.
Rantanen preventing the ground and pound from doing any damage.
White chips away with some ground and pound.
White loading up with the ground and pound but he's missing more than he's landing in this flurry.
White looking to pass the guard.
White working some strikes from top position.
White lands a nice shot whilst sitting in his opponent's guard.
White throws an elbow that misses. Rantanen uses the momentum to reverse the position. He's now in White's guard. Nice move by Rantanen!
The fighters are starting to perspire pretty heavily.
Rantanen throwing strikes from guard but White blocks nicely.
That's three minutes gone in the round.
White utilising some decent striking defenses from the guard, preventing the ground and pound.
Rantanen trying to control the position from guard on top but White is wriggling around, looking for whatever he can.
Rantanen throwing elbows and punches but not connecting, as White works some decent striking defense from the bottom.
Rantanen must be cautious of submissions here, given that his opponent has the superior Jiu Jitsu.
White looking to sweep here. No luck so far.
White trying to control the position here.
White continues to stall.
That's four minutes gone in the round.
The crowd are getting on the fighters' backs, as the pace has dropped off in the last minute or so.
Rantanen trying to control but White is working from the bottom.
Rantanen is trying to tuck his arms in to keep them safe but White has managed to isolate one of them and has got a loose triangle. Rantanen is looking to defend but White has done well to lock his legs together - this could be big trouble for Rantanen! White pulls down on the head and a little smile comes across his face - he knows he's got it. Yep, Rantanen taps out and this one is all over!
Ladies and gentlemen, after 4:31 of round 1, we have a winner by way of Submission (Triangle). Brian White!
During a confident post fight interview, Brian White thanked all his fans. He seemed very genuine when describing how motivated his fans keep him.
|
|
|
|
|
|
|
|
|
|
|
|
|
|
|
|
|
|
|
|
|
|
|
| S |
C
A |
G |
S |
C
B |
G |
|
S |
C |
G |
|
energy
A | B |
|
hype
A | B |
|
pop
A | B |
|
mgr
A | B |
|
FIGHT
RATING
31% |
|
|
|
|
|
|
|
Undercard bout
|
Coming up we have a middleweight MMA rules bout between Wyatt Mcleod (ranked 3907 p4p, 4222 weight class) and Mario Lozano (ranked 494 p4p, 524 weight class). Over to our ring announcer for the fighter introductions!
 |
|
 |
| 183 cm
26
192
2 - 1 - 0 |
|
184 cm
18
186
1 - 0 - 0 |
BJJ Blue Belt
Solid boxing
Good chin |
|
Powerful takedowns
Brawler
Powerful |
|
| |
|
Ladies and gentlemen. This fight is 3 rounds, in the middleweight division.
Introducing the fighter to my left, fighting out of the red corner.
With a record of 2 - 1 - 0, fighting out of Los Angeles, Wyatt Mcleod!
And introducing the fighter to my right, fighting out of the blue corner.
With a record of 1 - 0 - 0, fighting out of New York, Mario Lozano!
The judges for this bout are Alyssa Summers, Bruno Lombardi and Chad Campbell.
The bell rings for round one and we are underway!
Lozano takes a jab right on the kisser.
Mcleod stuffs the takedown.
Lozano drops down and drives through with a powerful takedown into guard.
Mcleod is adopting a defensive guard.
Lozano trying to control the position from guard on top but Mcleod is wriggling around, looking for whatever he can.
Lozano engaging in some classic timewasting tactics.
Mcleod knows he needs to get back to his feet asap. He's simply no match for Lozano on the ground.
Lozano looking to pass the guard.
We've had a slow start to the round here - hopefully the action picks up.
Mcleod looking to hit a scissor sweep but Lozano is one step ahead there.
Lozano is intent on slowing down the pace of the fight, simply looking to control.
That's one minute gone in the round.
Mcleod keeping moving, preventing Lozano from controlling successfully.
We may be looking at a referee standup if the pace doesn't pick up soon.
Lozano might have to switch it up a bit here because his efforts to control Mcleod haven't been going to plan, at least at the current moment in time.
The referee has stepped in and called for a break in the action. We'll restart on the feet.
Lozano dives in for a single leg takedown but Mcleod sprawls and the fighters end up clinched against the cage.
Lozano darts in looking for a takedown but Mcleod gets double underhooks and turns Lozano into the cage.
Wyatt Mcleod has stuffed three takedown attempts in the round now. That's going to take a lot out of Mario Lozano.
Lozano looks for a takedown but Mcleod sprawls well.
Lozano fails with the takedown
and Mcleod counters with a nice body shot.
Lozano goes for a double leg but Mcleod avoids the attempt and the two fighters end up clinched against the cage as Mcleod continues to drive forward.
Mcleod pushes forward with a 1-2 combination that forces Lozano back to the cage. Mcleod follows up with a solid lead hook to the liver.
Mcleod throws a wild body kick that Lozano sees coming a mile off.
That's two minutes gone in the round.
Mcleod lands with a right hand.
Mcleod misses with a half-hearted attempt at a head kick.
Mcleod gets to the clinch - let's see what his plan is here.
Mcleod gets double underhooks and manages to take the fight to the ground.
Wooooo! Give it up for these two warriors! They are putting on a show!
Lozano working away from the bottom but not quite defensive enough there because Mcleod has passed into half guard!
Lozano is trying to maintain the position but Mcleod is very close to passing his half guard.
Lozano looking to work for a kimura from the bottom.
Mcleod not landing any meaningful shots this time.
Mcleod controlling the pace.
That's three minutes gone in the round.
Lozano is looking to improve his position.
Mcleod seems very keen to just sit and control from half guard but Lozano does not like that idea so much and is remaining active off his back.
Lozano trying to control but Mcleod postures up.
Lozano trying to keep hold of his opponent's head but Mcleod manages to pass to mount!
Lozano tries to hold on but Mcleod postures up.
That's four minutes gone in the round.
Lozano is looking to get to half guard.

Mcleod get's back to his feet.
Mcleod clinches up with Lozano and pushes him back against the cage.
Lozano goes for a takedown in the clinch but Mcleod prevents it.
Lozano is trying to work for a single leg takedown but Mcleod pulls him back up using the underhooks.
We've been informed that Lozano has been working hard on his conditioning in the buildup to the fight.
Mcleod gets double underhooks to prevent a takedown attempt from Lozano.
Mcleod looks to be in better condition than last time we saw him fight. Obviously he's been working hard on his cardio.
Mcleod just leaning against Lozano, taking a breather.
The crowd thankful this round is nearly over.
Mcleod successfully pulls guard.
Lozano trying to control the position from guard on top but Mcleod is wriggling around, looking for whatever he can.
And that is the end of the round. The fighters go back to their corners.
Wyatt Mcleod dominated that round.
The fighters get back to their feet, the hooter sounds and we're back to the action!
Mcleod moves into the clinch.
Mcleod has dropped down and is working for a takedown. Lozano is trying to keep an underhook but Mcleod manages to get the takedown into half guard.
Mcleod trying to control the action but Lozano is working from the bottom.
Wyatt Mcleod overall seems to be getting the better of the ground position in the fight so far.
Lozano looking for submissions from an awkward position here.
Lozano is trying to get back to full guard.
Lozano actively working from the bottom here.
We've had a slow start to the round here - hopefully the action picks up.
Lozano looking to work for a kimura from the bottom.
Lozano has hold of a guillotine but he's not going to be able to crank on it really with only half guard, so it's no trouble for Mcleod. Oh but Lozano has got full guard now! Oh boy! This one could be over very soon! Mcleod goes limp - he's gone! Lozano jumps up and celebrates with the crowd - fantastic submission finish!
Ladies and gentlemen, after 1:58 of round 2, we have a winner by way of Submission (Guillotine). Mario Lozano!
|
|
|
|
|
|
|
|
|
|
|
|
|
|
|
|
|
|
|
|
|
|
|
| S |
C
A |
G |
S |
C
B |
G |
|
S |
C |
G |
|
energy
A | B |
|
hype
A | B |
|
pop
A | B |
|
mgr
A | B |
|
FIGHT
RATING
37% |
|
|
|
|
|
|
|
Co-main event
|
Coming up we have a welterweight MMA rules bout between Patrik Mustonen (ranked 2695 p4p, 6463 weight class) and Naghi Ghanbari (ranked 369 p4p, 623 weight class). Over to our ring announcer for the fighter introductions!
 |
|
 |
| 180 cm
26
168
2 - 0 - 0 |
|
185 cm
26
180
2 - 2 - 0 |
BJJ White Belt
Dangerous knees
Granite chin |
|
BJJ White Belt
Excellent MT
Prefers standup |
|
| |
|
Ladies and gentlemen. This fight is 3 rounds, in the welterweight division.
Introducing the fighter to my left, fighting out of the red corner.
With a record of 2 - 0 - 0, fighting out of Las Vegas, Patrik Mustonen!
And introducing the fighter to my right, fighting out of the blue corner.
With a record of 2 - 2 - 0, fighting out of London, Naghi Ghanbari!
The judges for this bout are John Kavanagh, Jonathan Paton and Lou da Vinci.
The bell rings for round one and we are underway!
Ghanbari looks to land a left hand but Mustonen moved out of range nicely.
Ghanbari throws out a token jab with nothing on it.
Ghanbari misses with a straight right.
Ghanbari throws out a token jab with nothing on it.
Mustonen is looking to counter punch.
Mustonen moves out of range as Ghanbari strikes.
A swing and a miss from Ghanbari.
Mustonen rushes Ghanbari and presses him up against the cage.
Mustonen using the Thai plumb to throw knees but Ghanbari has his back arched nicely, preventing the strike.
An uppercut on the inside fails to land for Ghanbari.
We can't be sure of the tactics at this early stage but we have heard that Ghanbari has been working on his takedowns a lot in the buildup to the fight and we can only assume he's going to look to take this to the mat.
Mustonen lands a knee to the body.
Mustonen landing some nice looking knees to the body.
Mustonen with an attempt at a knee that misses.
Ghanbari takes a knee to the side of the body.
Ghanbari looks winded!
Mustonen with the Thai clinch, lands a knee to the head.
Mustonen looking to throw knees to the head but Ghanbari is blocking nicely.
This is a great period of action - very entertaining stuff!
Mustonen with an attempt at a knee that misses.
Mustonen using the Thai plumb to throw knees but Ghanbari has his back arched nicely, preventing the strike.
Mustonen tries a knee to the head but he's missed.
Mustonen tries to land knees in the clinch but Ghanbari avoids the damage to the body.
Mustonen has been talking about how he's improved his wrestling in the run up to the fight so let's see if that's enough to sway the balance.
Mustonen with an attempt at a knee that misses.
Ghanbari managing to block the knees to the body from Mustonen.
That's one minute gone in the round.
Mustonen tries to land a knee to the body but he is off balance and Ghanbari avoids it.
Ghanbari takes a knee to the side of the body.
Ghanbari takes a knee right on the jaw!
Kneeeeees! The crowd are calling for knees to the body. Mustonen obliges.
Ghanbari takes a knee right on the jaw!
Mustonen landing some nice looking knees to the body.
Mustonen with an attempt at a knee that misses.
Ghanbari misses with the head strike.
Mustonen tries to land a knee to the head but Ghanbari blocks with his arms.
Mustonen missing with knees to the body.
Ghanbari misses with a hook from the clinch.
Ghanbari misses with the head strike.
Mustonen lands a nice uppercut.
Mustonen with the Thai clinch. He's looking to land a big knee but he's not managed it this time.
This has been an exciting period of action!
Mustonen misses the knee to the body. Nice hip positioning from Ghanbari.
Mustonen crunches a lovely knee into Ghanbari's ribcage.
Ghanbari has a couple of punches blocked by Mustonen.
Mustonen tries a knee to the head but he's missed.
Ghanbari throws a punch but it's blocked by Mustonen.
That's two minutes gone in the round.
Ghanbari on the defensive, avoiding the knees to the body.
Mustonen landing some nice looking knees to the body.
Mustonen using the Thai clinch to land knees to the body.
Mustonen misses with an elbow strike.
Mustonen lands a good knee to the midsection. Ghanbari won't want to take too many of those.
Mustonen unloads a knee to the mid-section.
Mustonen connects with a nasty looking knee right to Ghanbari's face.
Ghanbari on the defensive, avoiding the knees to the body.
Mustonen lands a knee to the body.
Mustonen pushes Ghanbari back against the cage and unloads with a body punch.
Mustonen trying to land knees to the body.
Ghanbari takes a knee right on the jaw!
Mustonen tries a knee to the head but he's missed.
Ghanbari blocks a knee to the body. He'll have a nicely bruised forearm in the morning.
Mustonen is trying to wear down his opponent with knees to the body.
A left hand lands to the body for Mustonen.
Mustonen lands a knee to the head there! That was nasty!
Knees to the body from Mustonen.
Mustonen with an attempt at a knee that misses.
That's three minutes gone in the round.
Ghanbari takes a knee to the side of the body.
Mustonen tries a knee to the head but Ghanbari blocks it.
Mustonen scores with a knee to the head.
Mustonen with the Thai clinch, lands a knee to the head.
Knees to the body from Mustonen.
Mustonen connects with a knee to the head.
 Ghanbari is rocked! Ghanbari is rocked!
Mustonen unloads a knee to the mid-section. Ghanbari lets out a prehistoric sounding urrrrgh.
Ghanbari is still on wobbly legs! Can Mustonen finish him?
Mustonen lands an uppercut.
A knee to the head by Mustonen.
Mustonen lands a knee to the head there! That was nasty!
The fans in attendance giving it up for the two fighters, who have really let it all hang out in the last minute or so!
Mustonen lands a knee to the body.
Mustonen connects with a knee to the head.
Mustonen landing knees to the body.
Knees in the clinch landing for Mustonen.
Mustonen connects with a knee to the head.
Mustonen scores with a knee to the head.
Ghanbari misses with the head strike.
Mustonen lands a nice shot to the body.
Mustonen landing some nice looking knees to the body.
Mustonen is trying to wear down his opponent with knees to the body.
Ghanbari working aggressively here.
Mustonen pushes off an throws an elbow but Ghanbari leans to the side and avoids it. We're back to clinching against the cage.
Ghanbari takes a knee to the side of the body.
Ghanbari fails to land with a short punch on the inside.
Mustonen connects with a nasty looking knee right to Ghanbari's face.
Ghanbari lands a body shot.
Mustonen with a knee to the head.
An uppercut on the inside fails to land for Ghanbari.
Ghanbari throws a punch but it's blocked by Mustonen.
Mustonen using the Thai clinch to land knees to the body.
Mustonen blocks a punch to the side of the head.
Mustonen landing knees to the body.
Mustonen with a knee to the head.
Mustonen tries a knee to the head but he's missed.
That's four minutes gone in the round.
Ghanbari has a couple of punches blocked by Mustonen.
Mustonen lands a good knee to the midsection. Ghanbari won't want to take too many of those.
Ghanbari throws a head punch that misses.
Mustonen lands a nice knee to the body.
Mustonen landing knees to the head.
A knee to the head by Mustonen.
Mustonen is looking to score with knees to the body. Maybe he'll change it up and go body then head. Ghanbari is defending well for now.
Mustonen blocks a couple of punches on the inside.
Ghanbari takes a knee right on the jaw!
Mustonen using the Thai plumb to throw knees but Ghanbari has his back arched nicely, preventing the strike.
Mustonen blocking some punches.
Mustonen landing some nice looking knees to the body.
Mustonen using the Thai plumb to throw knees but Ghanbari has his back arched nicely, preventing the strike.
The fighters are starting to get sweaty, which will make takedowns a bit more tricky.
Mustonen with the Thai clinch. He's looking to land a big knee but he's not managed it this time.
Ghanbari misses with a hook from the clinch.
Ghanbari working aggressively here.
A nice right hand lands inside from Mustonen.
Ghanbari swings away with an uppercut that misses.
Mustonen with the Thai clinch, lands a knee to the head.
Ghanbari misses with a punch on the inside.
An uppercut on the inside fails to land for Ghanbari.
Ghanbari swings wildly with an uppercut but Mustonen uses good head movement to avoid it.
Knees to the body from Mustonen.
Mustonen connects with a nasty looking knee right to Ghanbari's face.
Ghanbari tries a shoulder strike but it doesn't do any damage.
Mustonen blocks a couple of punches on the inside.
Mustonen with the Thai clinch, lands a knee to the head.
Ghanbari throws a punch but it's blocked by Mustonen.
Mustonen using the Thai clinch to land knees to the body.
Mustonen with the Thai clinch, lands a knee to the head.
Mustonen using the Thai plumb to throw knees but Ghanbari has his back arched nicely, preventing the strike.
Mustonen blocks a punch to the side of the head.
Mustonen using the Thai clinch to land knees to the body.
The crowd are going absolutely nuts as the round comes to an end - what a fantastic round of action!
Ghanbari misses with a short punch on the inside.
Ghanbari throws a punch but it's blocked by Mustonen.
Mustonen scores with a knee to the head.
A head punch on the inside from Ghanbari fails to land.
Knees in the clinch landing for Mustonen.
Mustonen with an attempt at a knee that misses.
Mustonen throws a vicious knee straight up the middle but Ghanbari blocks it with crossed arms.
Ghanbari misses with the head strike.
Mustonen tries a knee to the head but he's missed.
Ghanbari avoiding damage as Mustonen throws knees to the body.
Mustonen tries to land a knee to the head but Ghanbari blocks with his arms.
And that is the end of the round. The fighters go back to their corners.
Patrik Mustonen dominated that round.
The fighters' corners scream their final instructions, as the referee calls time. Here we go, back to the action!
Ghanbari rushes forward with a series of wild hooks but Mustonen moves out of range and avoids them all easily.
Ghanbari seems to have recovered his senses.
Mustonen drives through and clinches with Ghanbari against the cage.
Mustonen missing with knees to the body.
Knees to the body from Mustonen.
Ghanbari blocks a knee to the body. He'll have a nicely bruised forearm in the morning.
Mustonen looking to throw knees to the head but Ghanbari is blocking nicely.
Mustonen missing with knees to the body.
Mustonen struggles to land a body shot inside as Ghanbari controls his hands.
Ghanbari misses with a punch on the inside.
Ghanbari swings away with an uppercut that misses.
Mustonen tries to land a knee to the head but Ghanbari blocks with his arms.
Ghanbari lands a hook that snaps the head of Mustonen backwards.
Mustonen is really dominating this fight. Is there anything that Ghanbari can do to turn this around?
We've had a slow start to the round here - hopefully the action picks up.
Ghanbari misses with the head strike.
Ghanbari blocks a knee to the body. He'll have a nicely bruised forearm in the morning.
Mustonen blocks a couple of punches on the inside.
Ghanbari misses with the head strike.
Mustonen blocks a punch to the side of the head.
Patrik Mustonen has scored more points in the clinch so far.
Ghanbari is breathing heavily.
Mustonen with the Thai clinch. He's looking to land a big knee but he's not managed it this time.
That's one minute gone in the round.
Ghanbari blocks a knee to the body. He'll have a nicely bruised forearm in the morning.
Mustonen misses with a knee to the head.
Ghanbari tries a shoulder strike but it doesn't do any damage.
Ghanbari swings wildly with an uppercut but Mustonen uses good head movement to avoid it.
Ghanbari misses with a hook from the clinch.
Mustonen landing knees to the body.
Mustonen with an attempt at a knee that misses.
Ghanbari swings wildly with an uppercut but Mustonen uses good head movement to avoid it.
Mustonen tries a knee to the head but Ghanbari blocks it.
Mustonen with a knee to the head.
Mustonen landing knees to the body. They look like they could hurt.
Ghanbari swings away with an uppercut that misses.
Mustonen lands a good knee to the midsection. Ghanbari won't want to take too many of those.
Mustonen is trying to wear down his opponent with knees to the body.
Mustonen misses with a knee strike.
Mustonen utilising his Muay Thai to score with a knee to the body.
That's two minutes gone in the round.
Fantastic stuff here - a very entertaining period of action, which has drawn cheers from the crowd.
Mustonen tries a knee to the head but Ghanbari blocks it.
Mustonen with a knee to the head.
Mustonen looking to throw knees to the head but Ghanbari is blocking nicely.
Mustonen with an attempt at a knee that misses.
Ghanbari misses with some punches.
Mustonen misses the knee to the body. Nice hip positioning from Ghanbari.
Mustonen scores with a hook to the body.
Mustonen throws a vicious knee straight up the middle but Ghanbari blocks it with crossed arms.
Ghanbari swings away with an uppercut that misses.
Mustonen throws a knee to the head but misses.
Ghanbari throws a head punch that misses.
Mustonen tries to land knees in the clinch but Ghanbari avoids the damage to the body.
Ghanbari lands with a short shot to the head.
Ghanbari lands with a light punch inside.
Knees to the body from Mustonen.
Mustonen with the Thai clinch. He's looking to land a big knee but he's not managed it this time.
That's three minutes gone in the round.
Mustonen connects with a nasty looking knee right to Ghanbari's face.
Mustonen tries a knee to the head but Ghanbari blocks it.
Mustonen connects with a knee to the head.
With the two fighters working up against the cage, Mustonen just misses with a elbow thrown towards Ghanbari's brow.
Mustonen tries to land knees in the clinch but Ghanbari avoids the damage to the body.
Ghanbari misses with some punches.
Ghanbari misses with the head strike.
Ghanbari lands with a light punch inside.
Mustonen is looking to score with knees to the body. Maybe he'll change it up and go body then head. Ghanbari is defending well for now.
Ghanbari avoiding damage as Mustonen throws knees to the body.
A head punch blocked on the inside by Mustonen.
Mustonen tries to land a knee to the head but Ghanbari blocks with his arms.
A knee to the head by Mustonen.
Mustonen tries to land a knee to the body but he is off balance and Ghanbari avoids it.
Ghanbari throws a punch but it's blocked by Mustonen.
Ghanbari misses with some punches.
Mustonen using the Thai plumb to throw knees but Ghanbari has his back arched nicely, preventing the strike.
That's four minutes gone in the round.
Mustonen throws an elbow that misses.
Ghanbari has a couple of punches blocked by Mustonen.
Mustonen misses with a knee strike.
Wooooo! Give it up for these two warriors! They are putting on a show!
Mustonen using the Thai plumb to throw knees but Ghanbari has his back arched nicely, preventing the strike.
Ghanbari has a couple of punches blocked by Mustonen.
Mustonen with the Thai clinch, lands a knee to the head.
Ghanbari throws a punch but it's blocked by Mustonen.
Mustonen tries to land a knee to the head but misses.
Mustonen tries to land a knee to the body but he is off balance and Ghanbari avoids it.
Mustonen misses with a knee strike.
Ghanbari misses with a hook from the clinch.
Mustonen throws a vicious knee straight up the middle but Ghanbari blocks it with crossed arms.
Ghanbari working aggressively here.
A head punch blocked on the inside by Mustonen.
Mustonen trying to land knees to the body.
Mustonen throws a knee to the head but misses.
Mustonen blocks a punch to the side of the head.
And that is the end of the round. The fighters go back to their corners.
Patrik Mustonen dominated that second round.
The minute break is over - no more time for sponges and pep talks - back to the action! This is the final round!
Mustonen gets a clinch.
Mustonen blocks a punch to the side of the head.
Mustonen missing with knees to the body.
Mustonen connects with a knee to the head.
Ghanbari working aggressively here.
Ghanbari misses with a punch on the inside.
Mustonen connects with a knee to the head.
Ghanbari softening up his opponent with strikes, against the cage.
Ghanbari tries a shoulder strike but it doesn't do any damage.
Ghanbari gets through Mustonen's defenses to land a nice punch to the side of the head.
Ghanbari fails to land with a short punch on the inside.
Ghanbari throws a head punch that misses.
We've had a slow start to the round here - hopefully the action picks up.
Ghanbari softening up his opponent with strikes, against the cage.
Mustonen with the Thai clinch. He's looking to land a big knee but he's not managed it this time.
Mustonen is looking to score with knees to the body. Maybe he'll change it up and go body then head. Ghanbari is defending well for now.
Ghanbari swings away with an uppercut that misses.
Ghanbari takes a big intake of breath there - he's definitely tired.
Mustonen crunches a lovely knee into Ghanbari's ribcage.
The crowd are loving this. Great action here.
Mustonen tries to land a knee to the head but misses.
That's one minute gone in the round.
Ghanbari misses with some punches.
Mustonen with the Thai clinch. He's looking to land a big knee but he's not managed it this time.
Ghanbari scores with a nice hook to the head.
A short uppercut from Ghanbari.
Mustonen utilising his Muay Thai to score with a knee to the body.
Mustonen putting his Muay Thai to good use. He has Ghanbari in a tight clinch and is doing some damage with knees to the body.
Mustonen landing knees to the head.
Mustonen putting his Muay Thai to good use. He has Ghanbari in a tight clinch and is doing some damage with knees to the body.
Mustonen with a knee to the head.
Mustonen working Ghanbari over with knees to the body.
Mustonen lands a good knee to the midsection. Ghanbari won't want to take too many of those.
The fans in attendance giving it up for the two fighters, who have really let it all hang out in the last minute or so!
Mustonen missing with knees to the body.
Mustonen lands a knee to the head.
Mustonen is looking to score with knees to the body. Maybe he'll change it up and go body then head. Ghanbari is defending well for now.
Mustonen blocking some punches.
Mustonen throws a vicious knee straight up the middle but Ghanbari blocks it with crossed arms.
Mustonen tries to land a knee to the head but misses.
That's two minutes gone in the round.
Mustonen throws a vicious knee straight up the middle but Ghanbari blocks it with crossed arms.
Ghanbari makes some space for himself and lands an uppercut.
A knee to the head by Mustonen.
An uppercut on the inside fails to land for Ghanbari.
Mustonen blocks an uppercut.
Mustonen has the Thai clinch. He lands a big knee to the head that stumbles Ghanbari - he's in trouble! Another big knee to the head from Mustonen, and another! Ghanbari is out on his feet - the ref jumps in to save him and ends the fight!
Ladies and gentlemen, after 2:29 of round 3, we have a winner by way of TKO (Knees). Patrik Mustonen!
|
|
|
|
|
|
|
|
|
|
|
|
|
|
|
|
|
|
|
|
|
|
|
| S |
C
A |
G |
S |
C
B |
G |
|
S |
C |
G |
|
energy
A | B |
|
hype
A | B |
|
pop
A | B |
|
mgr
A | B |
|
FIGHT
RATING
100% |
|
|
|
|
|
|
|
Main event
|
Coming up we have a lightweight MMA rules bout between Demolition Smash (ranked 3458 p4p, 3413 weight class) and Vahid Azari (ranked 392 p4p, 386 weight class). Vahid Azari has the better chin. Will he look to stand and bang today?
 |
|
 |
| 175 cm
25
165
2 - 1 - 0 |
|
180 cm
26
160
3 - 2 - 0 |
Decent wrestler
Solid boxing
Very strong |
|
BJJ White Belt
Excellent MT
Heavy handed |
|
| |
|
Ladies and gentlemen. This fight is 3 rounds, in the lightweight division.
Introducing the fighter to my left, fighting out of the red corner.
With a record of 2 - 1 - 0, fighting out of New York, Demolition Smash!
And introducing the fighter to my right, fighting out of the blue corner.
With a record of 3 - 2 - 0, fighting out of New York, Vahid Azari!
The judges for this bout are Lou da Vinci, Bruno Lombardi and Jorge Garcia.
The bell rings for round one and we are underway!
Smash gets cracked with a nice right hand there by Azari.
Azari throws an overhand right that lands on Smash's shoulder, as Smash tries to avoid the shot.
Azari misses with a looping left.

Smash sends Azari crashing to the mat with a devastating uppercut! Smash is motioning to the referee to let Azari up. He wants to try and finish this one on the feet!
Azari throws a jab to the body, straight down the pipe. Boom. That sent Smash stumbling backwards but he manages to regain his composure quickly.
Vahid Azari seems to be the more aggressive standup fighter in this bout.
We've seen a great period of action over the last minute or so - credit to both fighters for going all out!
A left lands for Azari.
Smash jabbing away but nothing is landing.
Azari throws out a token jab with nothing on it.
Azari misses with a body shot. Nice footwork from Smash.
Nice straight punches there by Azari. You know Roy Jones Jr respects the hands of Azari.
Azari swings for the body but Smash moves out of range.
Azari throws an uppercut from half a mile away. Smash sees it coming and avoids it easily.
Nice jab there from Azari.
Azari scores with a reasonable looking shot to the body. Smash doesn't seem bothered though.
Azari fakes high and swings low for a body shot but Smash manages to avoid it.
A little feinted left hand from Smash on the counter but he doesn't commit to it.
Azari fakes a head punch and goes low to the body. Nicely done.
Azari connects with a nice looking jab.
Smash throws a body shot but no joy.
Azari is moving around nicely and scores here with a single head shot.
That's one minute gone in the round.
Azari swings wildly with a right hand that was never going to find it's target.
Smash appears to be looking for a counter punch to the body.
Smash throws a series of punches but Azari moves out of range.
Smash connects with a hook to the side of his opponent's head.
Azari scores with a jab. Smash acknowledges it with a nod of the head.
Smash takes one on the chin but keeps coming.
Azari swings for the body but Smash moves out of range.
A head kick misses from Smash.
Azari defending well as Smash loads up on a big left hand.
Smash gets his head snapped back by a nice shot there.
A big left from Smash misses.
Smash definitely looks more muscular than last time we saw him fight.
Azari misses with a body shot.
Azari thows a left - swing and a miss!
Azari throws the left hand but Smash avoids the punch easily.
Smash scores with a jab to the jaw of his opponent.
This is a great period of action - very entertaining stuff!
Smash thows a left - swing and a miss!
Smash just misses with a punch to the body.
That's two minutes gone in the round.
A cross from Azari lands.
Smash cracks Azari with a good shot that sees him stumbling back into the cage.
Smash on the wrong end of a nice jab.
Smash displays some good footwork, moving neatly out of range as Azari throws out the jab.
Azari is landing a lot of head punches in this opening round! Smash had better start moving his head a bit unless he wants his face to turn into mush.
Azari cracks Smash with a hook to the jaw. Both fighters smile at eachother and high-five before getting back down to business.
Smash takes a big uppercut there. He seems a bit wobbly but no, he's OK.
Smash is rocked!
Azari lands a head shot.
Oh Smash is still all over the place! His legs are completely gone! Will he be able to recover?!!
Azari loads up on a big right hand but Smash slips the punch.
Smash seems to have got his legs back now.
Azari has been working his punching technique in the buildup to the fight and it appears to be paying off.
Smash takes a body punch but keeps moving.
Azari throws out a loose jab but Smash uses good head movement to avoid it.
Smash is looking to counter punch.
Smash throws a head kick but Azari moves out of range.
Azari throws a big shot that misses.
Azari thuds his right hand into Smash's forehead from close range. That could be painful for both fighters.
Smash pulls out of a head kick attempt.
Smash takes a shot to the nose. Hopefully that hasn't broken it.
That's three minutes gone in the round.
Smash misses with an uppercut. Azari saw that one coming.
Smash takes one on the chin but seems OK.
Azari throws a body punch but Smash moves out of range.
Azari scores with a shot to the body.
Azari takes a swing at Smash's ribcage but misses.
Azari looks to land a right hand but Smash moved out of range.
Nice defenses there by Smash.
Smash slips a jab from Azari.
Azari scores with a nice right hand.
Azari throws a hook to the side of Smash's head but Smash sees it coming and ducks under it beautifully.
Smash moves away from the strike by Azari.
Smash throws a couple of head shots and lands with the final one - a decent hook, which struck Azari on the side of the head.
Smash takes a body punch that cleary hurt but he's trying not to show any weakness.
Smash gets cracked with a nice right hand there by Azari.
The crowd cheering loudly, showing their appreciation for the quality fight we're seeing here.
Azari throws a big shot that misses.
That's four minutes gone in the round.
Smash with poor footwork there. He got himself in a bit of a tangle, enabling Azari to score with a decent uppercut.
Smash misses with a hook. Azari ducked under it nicely.
Azari throws a body punch but Smash moves out of range.
Azari jabs Smash right on the nose. Smash blinks but takes it well.
Smash looks to throw the jab but Azari is out of range.
A jab lands there for Azari.
Nice shot lands for Azari.
Azari works Smash's body with a nice hook.
Smash lands with an uppercut that bounces Azari off the cage and back into range.
Nice shot by Azari.
Azari misses with a looping right.
Azari comes forward and lands a shot to the body, then darts back out of range.
As the round comes to an end the crowd are showing their appreciation for a great round of action.
Azari throws a shot from downtown. Smash moves away and avoids it.
Smash swung with a counter right hand that didn't connect.
Smash is really head hunting here, hardly looking to strike to the body at all.
Azari is the aggressor but that punch slipped nicely by Smash.
Smash keeping a good distance there, avoiding the body shot.
Smash was looking to counter that move with a punch but didn't quite pull the trigger.
Smash blocks a jab.
And that is the end of the round. The fighters go back to their corners.
Vahid Azari dominated that round.
The corners get their ten second warning. Both fighters stand from their stools and stare each other down, ready to get back to the action.
Azari blocks a jab.
Azari looks like he wants to counter punch here.
Azari just misses with a punch to the body.
Smash was looking to counter that move with a punch but didn't quite pull the trigger.
Smash takes an uppercut right on the button but keeps his composure.
This fight brought to you by 5M nutrition - it's mmmmm tasty. Nice jab by Azari.
Azari looks to land a left hand but Smash moved out of range nicely.
A cross from Azari lands.
Azari slips a jab from Smash.
Azari uses good footwork to get in and out and land a nice right hand before Smash has time to react.
Azari's jab looks to have found its range, popping Smash under the eye.
Smash pulls out of a head kick attempt.
Azari throws a hook to the side of Smash's head but Smash sees it coming and ducks under it beautifully.
Smash looks like he's developed a pretty tasty lump over his left eye. He'll need to avoid taking much more damage to that.
Azari smiles there as he lands a nice right hand right on the button.
Azari swings wildly with a right hand that was never going to find it's target.
Azari just manages to avoid a counter high kick fromSmash.
This has been an exciting period of action!
Azari walks into a left hand.
Azari with a nice cross.
Azari has been the more effective fighter overall so far.
Smash dips down and scores with a jab to the body.
That's one minute gone in the round.
Smash lunges in with swinging rights and lefts but Azari circles away quickly and effectively.
Smash has his head snapped back a nice jab. A little nod from Smash there as he acknowledges the shot.
Azari throws a jab but it's blocked by Smash.
Azari throws a hook to the body but it doesn't connect.
Azari lands with a straight right. Smash didn't see that one coming.
Azari looks to score with a jab to the body but Smash is just out of range.
Azari just misses with a punch to the body.
Smash misses with a straight right.
Azari getting the better of the striking in that exchange.
Azari lands a glancing blow to the side of Smash's head.
Azari showing good head movement there, avoiding the strikes from Smash.
A telegraphed right hand from Azari misses the target.
Smash staying out of range there.
Smash uses good footwork to avoid the strikes from Azari.
Azari throws a hook but Smash blocks it.
That's two minutes gone in the round.
Azari moves into range and connects with a jab.
We've seen a great period of action over the last minute or so - credit to both fighters for going all out!
Azari misses with a looping right.
Smash moves away from the strike by Azari.
Azari throws a looping overhand right but Smash ducks down to avoid it.
Smash misses the jab.
Azari moves out of range as Smash strikes.
Smash uses good head movement to avoid the hook from Azari.
Jab, jab by Azari - just one landing.
Azari tests Smash's chin there with a solid looking shot.
Azari throws a shot to the body.
Smash throws a hook to the body but it doesn't connect.
Azari misses with a lunging right hand
and Smash counters with a crisp right hand that drops Azari! Smash lets Azari back up to his feet, looking for a finish!
Azari is rocked!
Azari bobs and weaves well there to avoid the strikes.
Azari is still on wobbly legs! Can Smash finish him?
Azari throws a body shot but no joy.
Azari seems to have recovered his senses.
That's three minutes gone in the round.
Smash is the aggressor but that punch slipped nicely by Azari.
Smash lands a big right hand that sends Azari crashing to the mat! Smash stays standing though and waves Azari back to his feet!
Azari lands a beauty of a right hand that gets the crowd cheering.
Smash looks shocked there as he takes a right hand to the temple.
Azari lands a right hook to the body.
The crowd are loving this. Great action here.
Smash slips a jab from Azari.
A big right from Azari misses.
Smash connects with a nice cross there... Azari is looking wobbly and Smash recognises it - he's rushed in and lands two more brutal shots that send Azari to the canvas, out cold! A brutal finish to the fight - Smash jumps onto the cage to celebrate with the crowd!
Ladies and gentlemen, after 3:39 of round 2, we have a winner by way of KO (Punches). Demolition Smash!
|
|
|
|
|
|
|
|
|
|
|
|
|
|
|
|
|
|
|
|
|
|
|
| S |
C
A |
G |
S |
C
B |
G |
|
S |
C |
G |
|
energy
A | B |
|
hype
A | B |
|
pop
A | B |
|
mgr
A | B |
|
FIGHT
RATING
93% |
|
|
|
|
|
|
|
|
|
|

