|
|
PBP Commentary |
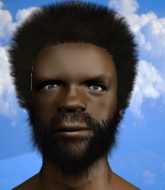
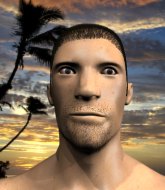
Coming up we have a welterweight MMA rules bout between Obi Uzoma (ranked 0 p4p, 0 weight class) and Asaki Hioko (ranked 0 p4p, 0 weight class). Over to our ring announcer for the fighter introductions!
 |
|
 |
| 185 cm
24
181 lbs
5 - 1 - 0 |
|
178 cm
25
185 lbs
5 - 3 - 0 |
BJJ Purple Belt
Solid boxing
KO power |
|
BJJ Purple Belt
World class boxer
Heavy handed |
|
| |
|
Ladies and gentlemen. This fight is 3 rounds, in the welterweight division.
Introducing the fighter to my left, fighting out of the red corner.
With a record of
5 - 1 - 0, fighting out of Los Angeles, Obi Uzoma!
And introducing the fighter to my right, fighting out of the blue corner.
With a record of
5 - 3 - 0, fighting out of Amsterdam, Asaki Hioko!
The judges for this bout are , Timothy Bukovac and .

The bell rings for round one and we are underway!
Uzoma swings for the body but Hioko moves out of range.
Uzoma takes a body punch that cleary hurt but he's trying not to show any weakness.
Hioko dips down and scores with a jab to the body.
Uzoma tries to clinch there but Hioko circles away.
Hioko lands a with a good body shot.
Nice takedown defense from Hioko. No joy for Uzoma on that attempt.
Uzoma keeping a good distance there, avoiding the body shot.
Hioko fails to land with a series of punches.
Hioko throws a body punch but Uzoma moves out of range.

Uzoma scores with a takedown into Hioko's guard.
Uzoma with a flurry of punches that miss.
Uzoma won't allow Hioko to sweep him here.
Hioko has his hands on Uzoma's head, controlling the position.
This is a great period of action - very entertaining stuff!
Let's hope that Hioko has the urge to step up the pace any second now because for the last 15 or 20 seconds he's just been holding on tight.

That's one minute gone in the round.
Hioko manages to land a sweep and now he's in mount on top!
Hioko trying to control but Uzoma is having none of it.
Hioko looking to control and managing it successfully.
Uzoma is desperately trying to improve his position but Hioko has a good base and remains in mount.

That's two minutes gone in the round.
A few boos can be heard. I'm sure they will multiply if the fighters don't pick up the pace.
Hioko tucks in and makes sure he doesn't lose the dominant position.
Uzoma wants to control but Hioko is having none of it.
Hioko controlling from mount.
Uzoma tries to get back to half guard but can't.
The fighters are pressed up against the cage, both looking to find a bit of space to work.

That's three minutes gone in the round.
Uzoma tries to hold on but Hioko pushes him away.
Hioko tucks in and makes sure he doesn't lose the dominant position.
Uzoma is looking to improve his position but Hioko isn't that keen on the idea.
Hioko can't quite control the action as he would like just now, as Uzoma is looking to escape.
The ref warns both fighters not to hold the cage as they work up against the meshing.

Despite being in the dominant position, Asaki Hioko just isn't active enough and the referee decides to stand the fighters back up.
A swing and a miss from Uzoma.
Uzoma throws an overhand right that lands on Hioko's shoulder, as Hioko tries to avoid the shot.
Uzoma throws a left and a right that both miss
and Hioko counters with an inside leg kick.
Uzoma fails with the takedown
and Hioko counters with a right hand to the body.
Uzoma is breathing heavily.

That's four minutes gone in the round.
No luck for Uzoma with that takedown attempt.
That's three failed takedown attempts in the round for Obi Uzoma. That's going to take a lot out of him.
Good standup being displayed there by Hioko as he connects with a hook.

It looks like Obi Uzoma has been cut.
Hioko scores with a nice one two combo and darts back out of range to avoid anything coming in the opposite direction.
The crowd are loving this. Great action here.

Hioko closes the distance and presses his opponent up against the cage.
A body shot lands from Hioko.
Hioko gets through Uzoma's defenses to land a nice punch to the side of the head.
Hioko lands a nice shot to the body.
A short left from Hioko.
A body shot lands from Hioko.
Hioko throws a hook to the body. More of an arm punch but it's all scoring with the judges.
As the round comes to an end the crowd are showing their appreciation for a great round of action.
The referee is keeping an eye on Hioko - much more stalling and he will separate the fighters.
A body shot lands from Hioko.
Hioko manages to get underhooks and slows down the pace for a moment.
And thats the end of the round the fighters go back to their corners.
Asaki Hioko dominated that round.
The cut man is working on Obi Uzoma's cut.
That's time! Uzoma's corner gives him a slap on the ass as he gets ready to fight.

Uzoma on the wrong end of a nice hook.
Hioko feints and then cracks Uzoma's leading leg with a nice low kick. He's obviously looking to slow Uzoma down.
Hioko is throwing a lot of body shots here, looking to wear down Uzoma rather than just go for the knockout.
Uzoma doesn't succeed with the takedown
and Hioko counters with a straight right hand.
Asaki Hioko seems to be getting the better of the standup.
Uzoma looks for a takedown here. Will he get it? Hioko is fending him off so far but Uzoma persists. Nope, Hioko circles away and we're back to standing.
Hioko fails with an attempt to clinch.
Uzoma shoots in but doesn't get the takedown
and Hioko makes him pay by landing a nice hook to the body before moving out of range.
That's three failed takedown attempts in the round for Obi Uzoma. That's going to take a lot out of him.
Wooooo! Give it up for these two warriors! They are putting on a show!
Hioko throws a leg kick which misses Uzoma's front leg but catches the back leg as Uzoma tries to avoid it.
Uzoma takes one on the chin but seems OK.
Hioko rushes Uzoma and presses him up against the cage.
Both fighters are absolutely exhausted here.
A shot in the inside from Hioko.
Obi Uzoma's cut is getting worse.
That's one minute gone in the round.
Hioko digs a right hand underneath Uzoma's ribcage. Uzoma let out a lung full of air as it connected.
A right handed body shot lands from Hioko.
Hioko lands a body punch.
A right hook to the body lands for Hioko.
Hioko lands an uppercut.
A right handed body shot lands from Hioko.
We've seen a great period of action over the last minute or so - credit to both fighters for going all out!
Hioko makes some space for himself and lands an uppercut.

Hioko escapes the clinch and we're back to striking.
Hioko dips to his left and cracks Uzoma with an uppercut!
A shot to de liver by Hioko. Beautiful body shot.
The fighters circle momentarily. Hioko darts into range and connects with a nice straight punch.
Uzoma on the wrong end of a vicious looking body shot.
Hioko throws an overhand right from the outside, which connects and sends Uzoma stumbling backwards into the cage! Uzoma bounces back off the cage towards Hioko, who cracks him with a two punch combination that drops him to his knees! Hioko lands two more shots before the referee has chance to intervene - what a finish! Hioko celebrates with his corner as the crowd cheer loudly.
Ladies and gentlemen, after 1:49 of round 2, we have a winner by way of TKO (Punches). Asaki Hioko!
|
|
|
|
|
|
|
|
|
|
|
|
|
|
|
|
|
|
|
|
|
|
|
| S |
C
A |
G |
S |
C
B |
G |
|
S |
C |
G |
|
energy
A | B |
|
hype
A | B |
|
pop
A | B |
|
mgr
A | B |
|
FIGHT
RATING
89% |
|
|
|
|
|
|

