|
|
PBP Commentary |
Coming up we have a welterweight MMA rules bout between Jim Babcock (ranked 791 p4p, 1197 weight class) and HayZeus Hiddens (ranked 112 p4p, 159 weight class). Babcock comes to the cage accompanied by Raiders Attack Vault City. Both fighters really staring each other down here, as HayZeus Hiddens enters the cage!
 |
|
 |
| 177 cm
36
180
32 - 21 - 1 |
|
178 cm
40
178
19 - 12 - 1 |
Great wrestler
World class boxer
Granite chin |
|
Olympic wrestler
World class MT
Powerful |
|
| |
|
Ladies and gentlemen. This fight is 3 rounds, in the welterweight division.
Introducing the fighter to my left, fighting out of the red corner.
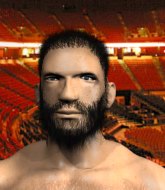
With a record of 32 - 21 - 1, fighting out of Amsterdam, Jim Babcock!
And introducing the fighter to my right, fighting out of the blue corner.
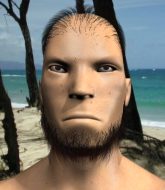
With a record of 19 - 12 - 1, fighting out of London, HayZeus Hiddens!
The judges for this bout are Ren Mimura, Shigeki Fujiwara and Taro Takaoka.

The bell rings for round one and we are underway!

Hiddens forces Babcock back against the cage and clinches.
Hiddens is looking for a takedown.
A quick uppercut on the inside from Hiddens.
Hiddens throws a punch but it's blocked by Babcock.
Hiddens misses with some punches.
Hiddens tries a shoulder strike but it doesn't do any damage.
Hiddens goes for a takedown attempt but Babcock pushes him away and we're back to fighting at a distance.
Babcock displays some good footwork, moving neatly out of range as Hiddens throws out the jab.
Babcock half commits to a counter takedown before pushing away, out of range.
Hiddens moves into the clinch.
Hiddens struggles to land a body shot inside as Babcock controls his hands.
Babcock tries to stall but Hiddens uses the opportunity to gain a better position.
I was talking to Babcock's coach per-fight and he was telling me that they'd been working on the clinch in the runup to this fight.
A quick uppercut on the inside from Hiddens.
Babcock misses with a hook to the ribs.
Babcock works on Hiddens's body with a couple of short punches.
Babcock doesn't land with the attempted body shot.
Hiddens tried to land a shot to the body but connects with Babcock's elbow.
We've had a slow start to the round here - hopefully the action picks up.
Babcock lands a left hand that snaps the head of Hiddens backwards.
Hiddens is trying to drag Babcock to the mat but Babcock just about manages to keep his footing. He used the cage to his advantage there.
Jim Babcock has stuffed three takedown attempts in the round now. That's going to take a lot out of HayZeus Hiddens.
Babcock misses with a body punch.
Hiddens swings wildly with an uppercut but Babcock uses good head movement to avoid it.
A left hand lands to the body for Hiddens.

That's one minute gone in the round.
Hiddens misses with a punch on the inside.
Hiddens scores with a nice hook to the head.
Hiddens goes for a body shot but it's blocked.
Babcock wants to break free. God knows he wants to breaaaak freeee.
Hiddens misses with a shot to the kidneys.

Hiddens wants the takedown. Babcock is fighting it off but Hiddens persists and manages to bring the fight to the ground, ending up in Babcock's guard against the cage.
Babcock looking for a sweep. Not yet Babcock, not yet.

Babcock escapes his hips to the side and looks to be working for an armbar. Hiddens gives him a little smile and shakes his head. No chance.
Babcock is working an open guard here, looking to improve his position. No doubt that will leave him open to counters but at least he's being more offensive.
There's a bit of a scramble here and now Babcock is on top in guard.

Hiddens controls Babcock momentarily but Babcock frees himself.

That's two minutes gone in the round.
Babcock in full guard, throwing the ground and pound. No damage this time.
Hiddens looking to hit a scissor sweep but Babcock is one step ahead there.
Babcock throws a big right hand that misses.
Babcock works over Hiddens with some ground and pound from guard.
Babcock is pushing down on Hiddens's leg trying to pass to half guard. Hiddens is fighting to maintain full guard but Babcock has managed to sneak the leg through.
Babcock wants to free his trapped foot but Hiddens is holding on for dear life with his legs.
The fighters are starting to perspire pretty heavily.
Hiddens wants to improve his position but Babcock is controlling well.
Babcock works his foot free and advances to mount.
Wooooo! Give it up for these two warriors! They are putting on a show!
Hiddens is looking to improve his position but Babcock isn't that keen on the idea.

That's three minutes gone in the round.
Hiddens wants to control but Babcock is having none of it.
Babcock landing strikes from the mount and Hiddens is in trouble!
A nice elbow there by Babcock.
Hiddens blocking the ground and pound.
The fighters are pressed up against the cage, both looking to find a bit of space to work.
Babcock misses with a head shot.
Babcock unloads with some shots from mount but Hiddens bucks and avoids them well.
Babcock lands a big shot there that rocks Hiddens but he's holding on and managing to survive for now.
Babcock throwing shots from mount but they're not landing.
Hiddens defends a decent attempt at a guillotine from Babcock.
Babcock with a couple of short strikes.

That's four minutes gone in the round.
The crowd cheering loudly, showing their appreciation for the quality fight we're seeing here.
Hiddens can't escape the position.
Babcock lands a big shot there that rocks Hiddens but he's holding on and managing to survive for now.
Babcock working away from the top, dropping strikes.
Babcock looking to ground and pound his opponent to a finish here.
Babcock misses with a series of strikes from mount. He'll no doubt be working on his ground and pound when he gets back to the gym.
Babcock scoring with strikes but Hiddens is staying in there.
Babcock fakes a shot to the body and cracks his opponent in the head. Nice ground and pound there!
Babcock throwing sloppy strikes here. Perhaps if he tightened up his striking from such a dominant position, he'd be able to finish easier.
Hiddens keeping his composure momentarily, calmly looking to get back to half guard.
Babcock looking to finish Hiddens with some ground and pound. This is bad for Hiddens!
Hiddens keeping his composure momentarily, calmly looking to get back to half guard.
Babcock lands a nice shot to the head.
And that is the end of the round. The fighters go back to their corners.
Jim Babcock dominated that round.
That's time! Back to the action!

Nice uppercut lands for Hiddens. That snapped Babcock's head back.
Hiddens swings wildly with a right hand that was never going to find it's target.
A big right from Hiddens misses.
Babcock drops down looking for a counter takedown but Hiddens sprawls and moves away.
Hiddens throws a monster uppercut resembling something out of street fighter but it doesn't land.
The fighters circling - Hiddens throws out the jab but it was never going to land.
Hiddens moves out of range as Babcock strikes.
Babcock ducks under an overhand right and circles away with a smile on his face.
Hiddens looks to throw the jab but Babcock is out of range.
Hiddens throws a shot from downtown. Babcock moves away and avoids it.
Hiddens clinches up against the cage.
A right hook to the body lands for Babcock.
We've had a slow start to the round here - hopefully the action picks up.
A left hand lands to the body for Babcock.
Hiddens swings away with an uppercut that misses.
Babcock doesn't land with the attempted body shot.
Hiddens gets the body lock takedown. After a quick scramble, Babcock regains guard.
The ref warns both fighters not to hold the cage as they work up against the meshing.
Babcock looking for a sweep. Not yet Babcock, not yet.
Babcock looks to be working for a triangle here. Oh, it looks like he might have it! Hiddens has picked Babcock up and slammed him! Babcock can't keep hold of the triangle and Hiddens manages to pass to side control!
That's one minute gone in the round.
Babcock is trying to improve his position.
Hiddens is staying tight to Babcock's torso, preventing him from escaping.
Hiddens wants to control but Babcock is keeping him busy.
Babcock tries to get back to half guard but can't.
That's two minutes gone in the round.
The crowd are getting on the fighters' backs, as the pace has dropped off in the last minute or so.
Babcock is working hard here to advance position.
Hiddens lands an elbow.
Hiddens trying to control the position but Babcock is working away.
Hiddens working the head with strikes.
Babcock is looking to regain half guard here but Hiddens keeps moving and retains side control.
That's three minutes gone in the round.
Hiddens gets to mount! Babcock was on the offensive and wasn't defending properly.
Hiddens is landing with some decent strikes but Babcock is trying to advance his position so the referee is letting the fight continue.
Hiddens content just to control the position here.
Hiddens punishing his opponent with strikes.
Babcock regains half guard.
Hiddens is keeping good posture, landing some ground and pound.
Hiddens controlling the pace.
Babcock manages to get to full guard.
That's four minutes gone in the round.
Babcock had isolated an arm as going for a kimura. Hiddens defends it easily.
Hiddens trying to control but Babcock is working from the bottom.
In the pre-fight buildup videos we saw Hiddens working his ground and pound in the gym. So far it seems to be working well.
Babcock had isolated an arm as going for a kimura. Hiddens defends it easily.
Hiddens is frustrating his opponent with some stalling tactics from top position.
The crowd thankful this round is nearly over.
Babcock is active off his back here, looking for submissions.
And that is the end of the round. The fighters go back to their corners.
HayZeus Hiddens showed his class in that round. I'd imagine he'll take it on all the scorecards.
The fighters' corners scream their final instructions, as the referee calls time. Here we go, back to the action! Ladies and gentlemen, this is the final round!

Babcock throws a looping overhand right but Hiddens ducks down to avoid it.
Hiddens fails with an attempt to clinch.
Babcock tries to keep at a distance but Hiddens has taken the fight into the clinch.
Babcock prevents a body shot from Hiddens.
Babcock can't find room to land a body shot as Hiddens controls the action.
Babcock blocking some punches.
Hiddens prevents a body shot from Babcock.
Hiddens gets control of Babcock's arms and successfully pulls guard. Hiddens will no doubt be looking for submissions off his back.
Babcock throws a big right hand that misses.
Babcock looking to pass the guard.
Babcock postures up as if he's going to throw some strikes but drops back for an ankle! Hiddens is in big trouble! He looks ready to tap! But no, he's escaped and dives on top of Babcock, into his guard.

We've had a slow start to the round here - hopefully the action picks up.
Babcock working from the bottom, still in full guard. He's managed to get a loose triangle. Hiddens doesn't seem to be doing much to defend here, obviously he feels comfortable in the position. Hiddens manages to throw the legs off his shoulder and he's back into guard - no problem.
That's one minute gone in the round.
Babcock looking for a guillotine here but Hiddens defends easily.
Babcock is working from a closed guard but he's struggling to control his opponent.
Hiddens engaging in some classic timewasting tactics.
Babcock is looking for a guillotine. You can't force these things though and Hiddens defends well.
Babcock is working the butterfly guard. He manages to land a nice scissor sweep and is now in half guard on the top. Nice move.
That's two minutes gone in the round.
Babcock throwing shots but they're hitting the canvas more than the man.
Hiddens gets back to full guard.
Babcock won't allow Hiddens to sweep him here.
Babcock trying to control the position from guard on top but Hiddens is wriggling around, looking for whatever he can.
Hiddens is working from a closed guard but he's struggling to control his opponent.
Jim Babcock overall seems to be getting the better of the ground position in the fight so far.
That's three minutes gone in the round.
Hiddens is working an open guard here, looking to improve his position. No doubt that will leave him open to counters but at least he's being more offensive.
Babcock pushes down on Hiddens's leg and manages to get into half guard.

Hiddens looking for submissions from an awkward position here.
Babcock tries to pass to full mount but Hiddens defends it.
Hiddens is looking to improve his position.
Babcock throwing punches and elbows but they're not doing any damage.
That's four minutes gone in the round.
A few boos can be heard. I'm sure they will multiply if the fighters don't pick up the pace.
Babcock is thinking about going for an arm triangle but he can't free his leg.
Babcock looking for a kimura but he'll have to free his other leg if he wants to finish that. Perhaps he's just using it as a distraction technique.
Hiddens on the receiving end of some nice ground and pound.
Hiddens is pressing down on Babcock's left leg trying to get back to full guard. He's managed it.
Boooooooooooooooooooo!!! God, this has been a terrible round. Come on you two, sort yourselves out!
A big thud reverberates around the arena there as Babcock accidentally thumps the mat. Hopefully he's not broken his hand.
Hiddens tries to land a sweep but no joy.
Babcock is fighting to break Hiddens's control of his arms but Hiddens is doing a good job of controlling the position at the moment.
And that's the end of the fight!
That was a close round. You could make an argument for either fighter but I would give it to Jim Babcock.
I think Babcock has won this one but let's see what the judges have to say. Over to the ring announcer for the scorecards.
Ladies and gentlemen, after 3 rounds of action, we go to the scorecards for a decision.
Judge Ren Mimura scores the fight 29:28
Judge Shigeki Fujiwara scores the fight 29:28
Judge Taro Takaoka scores the fight 29:28
In favor of your winner, by unanimous decision... Jim Babcock!
Jim Babcock decided to thank the fans in attendance for making a great atmosphere. It seemed to go down pretty well.
|
|
|
|
|
|
|
|
|
|
|
|
|
|
|
|
|
|
|
|
|
|
|
| S |
C
A |
G |
S |
C
B |
G |
|
S |
C |
G |
|
energy
A | B |
|
hype
A | B |
|
pop
A | B |
|
mgr
A | B |
|
FIGHT
RATING
40% |
|
|
|
|
|
|
