|
|
PBP Commentary |
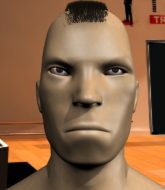
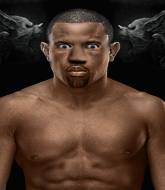
Coming up we have a welterweight MMA rules bout between Wilhelm Bar (ranked 3011 p4p, 2953 weight class) and Hakeem Adderley (ranked 382 p4p, 375 weight class). Adderley has chosen Genesis as his entrance music. There are an array of beautiful celebrities at ringside tonight! I wonder if any of them paid for their tickets.
 |
|
 |
| 189 cm
26
185
10 - 12 - 0 |
|
187 cm
26
177
4 - 4 - 0 |
BJJ Red Belt
Excellent boxer
Cardio machine |
|
Good wrestler
World class boxer
Good gas tank |
|
| |
|
Ladies and gentlemen. This fight is 3 rounds, in the welterweight division.
Introducing the fighter to my left, fighting out of the red corner.
With a record of 10 - 12 - 0, fighting out of London, Wilhelm Bar!
And introducing the fighter to my right, fighting out of the blue corner.
With a record of 4 - 4 - 0, fighting out of Las Vegas, Hakeem Adderley!
The judges for this bout are Colin Fotheringham, Paul Tew and Sam Margolis.

The bell rings for round one and we are underway!
Adderley loads up on a big right hand but Bar slips the punch.
Bar half commits to a counter takedown before pushing away, out of range.

Bar scores a trip takedown into side control. Nice.

Bar tries for an arm triangle. That looks pretty tight to me. Is this one over!?! Possibly, maybe, no Bar has let go of the choke. Obviously it wasn't as tight as we thought!
Bar thinks about going for a far side armbar but bails out and retains the dominant position instead.
Bar working hard here to secure a kimura but he's not really in the right position for it.
We've had a slow start to the round here - hopefully the action picks up.
Bar thinks about going for a far side armbar but bails out and retains the dominant position instead.
Bar is trying to ground and pound but Adderley uses the momentary lack of control by Bar to regain half guard.

That's one minute gone in the round.
Bar is looking for a kimura. It's going to be difficult to finish that from half guard though and Adderley defends it well.
Bar trying to work for an americana but Adderley has managed to regain full guard.
Adderley is trying to stand up but he's not managed so far.
Bar throwing elbows and punches but not connecting, as Adderley works some decent striking defense from the bottom.
Bar drops back, looking for a kneebar! Adderley looks panicked! The fighters roll across the mat, one looking to finish, one looking to escape. Adderley looks to have wriggled free... Yes, he's got his leg free and he's dived into side control! Good work there from Adderley!

The ref warns both fighters not to hold the cage as they work up against the meshing.
Bar is trying to get back to half guard.

That's two minutes gone in the round.
Adderley tries to stand but Bar is controlling his head.
Bar tries to buck Adderley off but Adderley is having none of it.
The fighters are pressed up against the cage, both looking to find a bit of space to work.
Bar throwing some weak shots from the bottom that do no damage.
Bar is trying to get back to half guard.
Bar looking for a sweep but Adderley has passed into full mount! Oh no!
Bar keeping his composure momentarily, calmly looking to get back to half guard.
Bar bucks up and manages to get a nice reversal! He's in guard on the top - nicely done!
Bar throws a big right hand that misses.

That's three minutes gone in the round.
Adderley utilising some decent striking defenses from the guard, preventing the ground and pound.
Bar passes Adderley's right leg, so he's now in half guard.
Bar thows a wild elbow that connects with the canvas.
Bar throws a big elbow that misses, also allowing Adderley to regain full guard.
Bar passes easily into side control. Nice work.
Bar tries for a kimura. Not really close to a finish though.
Adderley is putting a lot of effort into getting back to his feet here.
Bar thinks about going for a far side armbar but bails out and retains the dominant position instead.

That's four minutes gone in the round.
Bar tries for a kimura. Not really close to a finish though.
Bar looking for an arm triangle but it's way too loose to do anything.
Bar working hard here to secure a kimura but he's not really in the right position for it.
Adderley is trying to get back to his feet.
And that is the end of the round. The fighters go back to their corners.
Wilhelm Bar dominated that round.
That's the end of the round. The referee orders the cornermen out of the cage so we can get back down to business.

A low kick from Adderley misses
and Bar counters with an inside leg kick.
Adderley throws a body punch but Bar moves out of range.
Bar misses with a takedown attempt - Adderley sprawls well and throws a nice strike on the way out which just misses.
Bar closes this distance looking for a takedown but Adderley circles away.
Bar backing away here, and Adderley unleashes a leg kick that just misses.
Adderley throws a right hand that Bar ducks under and follows up with a left that Bar also avoids with ease.
Bar changes levels looking for a counter takedown but doesn't commit.
We've had a slow start to the round here - hopefully the action picks up.
Adderley scoring well with a low kick there.
Bar closes the distance and clinches up with Adderley, looking for a takedown. Bar pushes Adderley against the cage but Adderley circles to the side and manages to break the clinch.
Adderley now looks to counter with a shot at the body.
That's three failed takedown attempts in the round for Wilhelm Bar. That's going to take a lot out of him.
That's one minute gone in the round.
Adderley finds nothing but air with that leg kick attempt.
Adderley defends well against a solid takedown attempt from Bar.
Adderley only half commits to the counter leg kick.
Bar drops his hands and takes a jab to the jaw for his troubles.
Bar goes for a double leg but Adderley avoids the attempt and the two fighters end up clinched against the cage as Adderley continues to drive forward.

Adderley breaks from the clinch.
Bar shoots in for a double leg but Adderley sprawls well. That's going to sap some energy.
Bar uses decent footwork to sidestep a right hand from Adderley.
Adderley misses with a looping right.
Adderley slaps away a takedown attempt from Bar, before circling back to the center of the mat.
That's two minutes gone in the round.
Bar tries for a takedown but Adderley circles away easily
and Adderley counters with a right hand to the body.
Adderley throws an overhand right that lands on Bar's shoulder, as Bar tries to avoid the shot.
Bar blocks a jab.
Adderley throws a lazy right hand but Bar sees it coming a mile off and sidesteps it easily.
Adderley gets caught flat footed, as Bar shoots in with a quick takedown into guard.
That's three minutes gone in the round.
Adderley can't keep his opponent in guard - Bar advances to half guard, no doubt looking to mount.
Bar sitting in half guard, looking to land shots. Adderley defending well though.
Bar is looking for a kimura. It's going to be difficult to finish that from half guard though and Adderley defends it well.
Bar thumps the canvas. Not on purpose obviously - he just missed Adderley's head.
Adderley is looking to escape.
Adderley really doesn't want to stay on the ground with Bar. If he can't get it back to his feet, it's only a matter of time before he'll be tapping out.
Bar is looking for a kimura. It's pretty deep but Adderley still has the half guard so he's probably OK. Oh, Adderley has exploded into a beautiful escape there and after a quick scramble, he's ended up in side control on top! Nice work!
Bar is looking for a sweep.
Adderley tries to stand but Bar is controlling his head.
That's four minutes gone in the round.
Bar tries to slip a leg under to move to half guard but Adderley presses down on the leg and jumps into full mount!
Bar has been looking to land a fair amount of strikes on the ground. He might be looking to soften his opponent up in order to work for a submission.
Bar is wriggling around trying to escape.
Adderley is looking to stand but Bar has his arms wrapped tightly around him, looking to prevent the damage.
Bar is wriggling around trying to escape.
Bar slips a leg in and gets back to half guard.
Bar tries to get to full guard but Adderley has control of the leg.
Bar looking to work for a kimura from the bottom.
Adderley looks more muscular than last time we saw him. He must have been on the weights.
The crowd thankful this round is nearly over.
Adderley is trying to get back to his feet now but his leg is trapped.
And that is the end of the round. The fighters go back to their corners.
Hakeem Adderley showed his class in that round. I'd imagine he'll take it on all the scorecards.
The fighters' corners scream their final instructions, as the referee calls time. Here we go, back to the action! The crowd applaud as we get ready to start the final round!

Bar will have to do better than that with his takedown attempts.
Adderley looks to land a left hand but Bar moved out of range nicely.
Bar tries for a takedown but Adderley sees it coming a mile off and avoids it easily.
Adderley swings away with a counter right hand but no contact made.
Adderley scores with a leg kick.
Bar misses with a takedown attempt. He shot from a bit too far out.
That's three failed takedown attempts in the round for Wilhelm Bar. That's going to take a lot out of him.
We've had a slow start to the round here - hopefully the action picks up.
Bar slips a jab from Adderley.
Bar attempts a counter takedown but Adderley avoids it well and moves away.
Adderley has been the more effective fighter overall so far.
Bar takes a big uppercut there. He seems a bit wobbly but no, he's OK.
That's one minute gone in the round.
Bar has a takedown stuffed.
Adderley throws out a counter right but Bar avoids it with no problem.
Bar looks frustrated there after his takedown attempt is stuffed easily.
Adderley doesn't fully commit to the body shot counter.
Bar looks frustrated there after his takedown attempt is stuffed easily.
Adderley lands a two punch combo.
Bar looks to have improved his striking defense since last time we saw him fight.
That's two minutes gone in the round.
Bar goes for a double leg but Adderley avoids the attempt and the two fighters end up clinched against the cage as Adderley continues to drive forward.
Bar wants a takedown.
Adderley manages to break the clinch.
Bar shoots in for a takedown - he's clinched up with Adderley but Adderley pushes him off and we're back to square one.
Adderley scores with a shot to the body.
Bar fails with the takedown
and Adderley cracks him with a counter punch right on the button.
Well,Bar is on his way to losing a decision here. Can he use his experience to pull something off in the closing minutes?
That's three minutes gone in the round.
Adderley lands a powerful looking uppercut that connected with his opponent's jaw.

Bar is rocked!
Adderley drops Bar with a big left hand! Bar is injured, injured bad! Adderley jumps in and finished him with strikes! The fight is over!
Ladies and gentlemen, after 3:23 of round 3, we have a winner by way of TKO (Strikes). Hakeem Adderley!
In his post fight interview, Hakeem Adderley started talking himself up. Luckily his charisma kept the crowd on side and gave him a good reception.
|
|
|
|
|
|
|
|
|
|
|
|
|
|
|
|
|
|
|
|
|
|
|
| S |
C
A |
G |
S |
C
B |
G |
|
S |
C |
G |
|
energy
A | B |
|
hype
A | B |
|
pop
A | B |
|
mgr
A | B |
|
FIGHT
RATING
39% |
|
|
|
|
|
|
