 |
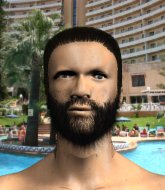
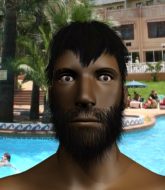
HFL17 Colby vs Natta PBP Commentary |
Undercard bout
|
Coming up we have a super heavyweight MMA rules bout between Ripp Colton (ranked 2275 p4p, 5265 weight class) and Mawunyo Kato (ranked 111 p4p, 202 weight class). Ripp Colton could well score a knockout today. He has the power to get to Mawunyo Kato's chin.
 |
|
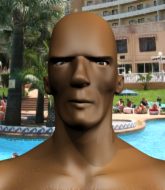 |
| 192 cm
25
265
3 - 0 - 0 |
|
195 cm
20
265
2 - 5 - 0 |
BJJ Brown Belt
Basic striking
Cuts easily |
|
BJJ White Belt
Excellent MT
Heavy handed |
|
| |
|
Ladies and gentlemen. This fight is 3 rounds, in the super heavyweight division.
Introducing the fighter to my left, fighting out of the red corner.
With a record of 3 - 0 - 0, fighting out of Montreal, Ripp Colton!
And introducing the fighter to my right, fighting out of the blue corner.
With a record of 2 - 5 - 0, fighting out of Montreal, Mawunyo Kato!
The judges for this bout are Joseph Jones, Jonathan Paton and Lou da Vinci.

The bell rings for round one and we are underway!

Colton gets a clinch.
Kato is trying to slow down the pace in the clinch, to catch his breath.
Colton is trying to pull guard but Kato has him pressed against the cage.
Kato stalling in the clinch but Colton improves position.
Kato lands a nice uppercut.
Kato should think about turning a few of those tyres round his middle into muscle if he wants people to take him seriously as an athlete.
Kato wants to stall.

Colton has managed to pull guard. Let's see whether he can work an aggressive guard. It will also be interesting to see what tactics Kato uses from the top position.
The ref warns both fighters not to hold the cage as they work up against the meshing.

Colton pushes a forearm under Kato's chin to create some space. He's escaped his hips and pivoted quickly for an armbar! Can he extend the arm? Yes, Kato is tapping out! Damn, that was fast!
Ladies and gentlemen, after 0:39 of round 1, we have a winner by way of Submission (Armbar). Ripp Colton!
|
|
|
|
|
|
|
|
|
|
|
|
|
|
|
|
|
|
|
|
|
|
|
| S |
C
A |
G |
S |
C
B |
G |
|
S |
C |
G |
|
energy
A | B |
|
hype
A | B |
|
pop
A | B |
|
mgr
A | B |
|
FIGHT
RATING
100% |
|
|
|
|
|
|
|
Undercard bout
|
Coming up we have a middleweight MMA rules bout between Phillip Personal Space (ranked 2015 p4p, 2126 weight class) and WatchingFrom TheNoseBleeds (ranked 240 p4p, 256 weight class). Rumors backstage are that the fighters have been paid to keep it standing but we know that would never happen in MMA!
 |
|
 |
| 182 cm
26
197
7 - 4 - 0 |
|
179 cm
28
193
6 - 5 - 0 |
Good wrestling
Brawler
Very strong |
|
Good wrestler
Brawler
Powerful |
|
| |
|
Ladies and gentlemen. This fight is 3 rounds, in the middleweight division.
Introducing the fighter to my left, fighting out of the red corner.
With a record of 7 - 4 - 0, fighting out of Los Angeles, Phillip Personal Space!
And introducing the fighter to my right, fighting out of the blue corner.
With a record of 6 - 5 - 0, fighting out of Hilo, WatchingFrom TheNoseBleeds!
The judges for this bout are Joseph Jones, Bruno Lombardi and Jorge Garcia.
The bell rings for round one and we are underway!

TheNoseBleeds fakes an overhand right and shoots for a takedown. Personal Space sprawls well initially but TheNoseBleeds persists and gets the takedown into half guard.
Personal Space wants to get back to full guard.
TheNoseBleeds lands a big shot. The thud that echoes around the arena is like music to the fans' ears.
Nice strikes from TheNoseBleeds there.
TheNoseBleeds trying to control from half guard but Personal Space is working away.
Personal Space wants to get back to full guard.
Personal Space is looking to get back to full guard here but TheNoseBleeds has managed to pass to side control instead.
TheNoseBleeds looks more muscular than last time we saw him. He must have been on the weights.
TheNoseBleeds tries to move into full mount but can't pass Personal Space's legs.
Personal Space taking a bit of punishment here - TheNoseBleeds scoring with strikes.
Personal Space avoids any damage from the ground and pound of TheNoseBleeds.
TheNoseBleeds wants to control but Personal Space is keeping him busy.
Personal Space managing to avoid any damage from the strikes thrown by TheNoseBleeds.

That's one minute gone in the round.
Personal Space is looking for a sweep.
TheNoseBleeds is working Personal Space over with some ground and pound from side control.
TheNoseBleeds wants to control but Personal Space is keeping him busy.
An elbow from TheNoseBleeds crashes against the mat.
TheNoseBleeds working the ground and pound.
TheNoseBleeds landing strikes.
Personal Space struggling a bit here.
Personal Space is being controlled here.
Personal Space struggling a bit here.

TheNoseBleeds is looking for a kimura. He might have it! No, Personal Space has escaped the position, nice work there.

That's two minutes gone in the round.
TheNoseBleeds scoring with punches from side control.
TheNoseBleeds cracks Personal Space with a big right hand but Personal Space just smiles back at him and invites him to have another go.
Personal Space knows he needs to get back to his feet asap. He's simply no match for TheNoseBleeds on the ground.
TheNoseBleeds cracks Personal Space with an elbow. That is naaassty.
TheNoseBleeds working the ground and pound.
The crowd are loving this. Great action here.
TheNoseBleeds wants to control but Personal Space is keeping him busy.
Personal Space tries to bench press TheNoseBleeds off him but TheNoseBleeds keeps the position.
TheNoseBleeds working the ground and pound but Personal Space is defending the strikes.
Personal Space is trying to escape and get back to his feet.
TheNoseBleeds landing a few strikes.
 It looks like Phillip Personal Space has been cut. It looks like Phillip Personal Space has been cut.
TheNoseBleeds lands a decent elbow from side control.
The fighters are pressed up against the cage, both looking to find a bit of space to work.

That's three minutes gone in the round.
Personal Space regains half guard.
Personal Space is trying to maintain the position but TheNoseBleeds is very close to passing his half guard.
TheNoseBleeds is trying for a kimura here. Personal Space looks like he's in a lot of pain... and he's tapping out! TheNoseBleeds wins by kimura!
Ladies and gentlemen, after 3:28 of round 1, we have a winner by way of Submission (Kimura). WatchingFrom TheNoseBleeds!
WatchingFrom TheNoseBleeds decided to thank the fans in attendance for making a great atmosphere. It seemed to go down pretty well.
|
|
|
|
|
|
|
|
|
|
|
|
|
|
|
|
|
|
|
|
|
|
|
| S |
C
A |
G |
S |
C
B |
G |
|
S |
C |
G |
|
energy
A | B |
|
hype
A | B |
|
pop
A | B |
|
mgr
A | B |
|
FIGHT
RATING
45% |
|
|
|
|
|
|
|
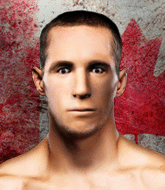
Undercard bout
|
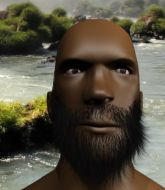
Coming up we have a welterweight MMA rules bout between Lou Leonard (ranked 1365 p4p, 2933 weight class) and William Lewis (ranked 186 p4p, 378 weight class). William Lewis has the better chin. Will he look to stand and bang today?
 |
|
 |
| 225 cm
28
180
7 - 6 - 0 |
|
190 cm
27
182
5 - 8 - 0 |
BJJ White Belt
Excellent boxer
Big right hand |
|
BJJ Purple Belt
Excellent boxer
Heavy handed |
|
| |
|
Ladies and gentlemen. This fight is 3 rounds, in the welterweight division.
Introducing the fighter to my left, fighting out of the red corner.
With a record of 7 - 6 - 0, fighting out of London, Lou Leonard!
And introducing the fighter to my right, fighting out of the blue corner.
With a record of 5 - 8 - 0, fighting out of Los Angeles, William Lewis!
The judges for this bout are Joseph Jones, John Kavanagh and Dean Styles.
The bell rings for round one and we are underway!

Lewis has taken the fight to the clinch.
Leonard tries a shoulder strike but it doesn't do any damage.
Leonard throws a head punch that misses.
Lewis blocking some punches.
I was talking to Leonard's coach per-fight and he was telling me that they'd been working on the clinch in the runup to this fight.
Lewis lands with a short head shot on the inside.
A short right from Leonard on the inside.
Leonard working aggressively here.
Lewis lands with a quick shot inside that doesn't really do much damage.
Lewis struggles to land a body shot inside as Leonard controls his hands.
Lewis lands a right uppercut that snaps the head of Leonard backwards.
A right hand to the body from Lewis.
Leonard really does look like a pencil wearing a pair of gloves. Let's hope he has a gameplan to suit that ridiculous body shape.

Lewis pushes off and circles away, back to the middle of the mat.
Lewis misses with a looping right.
Lewis throws a hook to the body but it doesn't connect.
Leonard swings and misses with a shot to the body
and Lewis counters by clinching up.
We've seen a great period of action over the last minute or so - credit to both fighters for going all out!
Lewis gets control of Leonard's arms and successfully pulls guard. Lewis will no doubt be looking for submissions off his back.
Our spies down at at Shinobi Martial Arts & Ninjutsu inform us that Lewis has really been working on his submissions in the buildup to this fight. Will it pay off?
Lewis is working actively off his back, looking to secure an arm or perhaps work for a triangle.
Lewis is actively looking for submissions from his back. He's worked himself a little space on the bottom and seems to be going for a triangle. No, he's switched into an armbar! That was slick! Leonard rolls with it to try and escape but Lewis cranks on the arm and Leonard is forced to tap out! This one is aaaaaaaaall over!
Ladies and gentlemen, after 1:57 of round 1, we have a winner by way of Submission (Armbar). William Lewis!
A victorious William Lewis thanked his army of followers in his post fight interview, telling people to make sure they follow him on Twitter.
|
|
|
|
|
|
|
|
|
|
|
|
|
|
|
|
|
|
|
|
|
|
|
| S |
C
A |
G |
S |
C
B |
G |
|
S |
C |
G |
|
energy
A | B |
|
hype
A | B |
|
pop
A | B |
|
mgr
A | B |
|
FIGHT
RATING
78% |
|
|
|
|
|
|
|
Undercard bout
|
Coming up we have a lightweight MMA rules bout between Daisuke Toshimichi (ranked 1875 p4p, 1898 weight class) and Ashton Ladd (ranked 231 p4p, 235 weight class). Over to our ring announcer for the fighter introductions!
 |
|
 |
| 176 cm
28
165
7 - 5 - 0 |
|
177 cm
28
155
7 - 4 - 0 |
BJJ White Belt
Excellent boxer
Granite chin |
|
BJJ Brown Belt
Basic striking
Granite chin |
|
| |
|
Ladies and gentlemen. This fight is 3 rounds, in the lightweight division.
Introducing the fighter to my left, fighting out of the red corner.
With a record of 7 - 5 - 0, fighting out of London, Daisuke Toshimichi!
And introducing the fighter to my right, fighting out of the blue corner.
With a record of 7 - 4 - 0, fighting out of New York, Ashton Ladd!
The judges for this bout are Bruno Lombardi, Franklyn Lucas and Jorge Garcia.
The bell rings for round one and we are underway!
Ladd throws a poor cross that misses
and Toshimichi connects with a straight left hand counter down the middle.
Ladd throws a big shot that misses.
Toshimichi throwing a counter right hand but Ladd manages to avoid it.
Ladd takes a shot to the nose. Hopefully that hasn't broken it.
Ashton Ladd seems to be the more aggressive standup fighter in this bout.
Toshimichi scores with a shot to the body.
Toshimichi looks to throw the jab but Ladd is out of range.
Toshimichi lands with a cross.
Ladd misses the shot to the body.
Toshimichi takes a punch right to his stomach. That took the wind out of him momentarily.
A big right from Ladd misses.
A little feinted left hand from Toshimichi on the counter but he doesn't commit to it.
Toshimichi misses with a hook. Ladd ducked under it nicely.
Ladd looks shocked there as he takes a right hand to the temple.
Ladd's hands are dropping dangerously low here and Toshimichi connects clean with a right hook that sends him down to one knee! Ladd scrambles back to his feet.
This is a great period of action - very entertaining stuff!
Ladd throws a looping overhand right but Toshimichi ducks down to avoid it.
Toshimichi cracks Ladd with a nice right hand that draws applause from the crowd.
Ladd slips a jab from Toshimichi.
That's one minute gone in the round.
Ladd avoids a lazy jab quite easily.
A jab from Toshimichi misses.
Ladd fakes high and swings low for a body shot but Toshimichi manages to avoid it.
Toshimichi throws a jab when Ladd was well out of range.
Ladd on the wrong end of a vicious looking body shot.
Toshimichi lands a really nice looking cross but Ladd seems unphased.
Toshimichi scores with a straight right hand, right through his opponent's guard.
Ladd misses with a looping left.
Ladd scores with a nice head shot.
Toshimichi throws a lazy right hand but Ladd sees it coming a mile off and sidesteps it easily.
A shot to the liver by Toshimichi. Beautiful body shot.
Ladd ducks under an overhand right and circles away with a smile on his face.
Toshimichi uses good footwork to avoid the strikes from Ladd.
Toshimichi takes a solid shot to the body. That one hurt him but he's trying not to show it.
That's two minutes gone in the round.
Wooooo! Give it up for these two warriors! They are putting on a show!
Ladd misses the shot to the body.
Toshimichi looks to be in better condition than last time we saw him fight. Obviously he's been working hard on his cardio.
Toshimichi displaying good standup as he scores with a three punch combination.
 It looks like Ashton Ladd has been cut. It looks like Ashton Ladd has been cut.
Toshimichi ducks under an overhand right and circles away with a smile on his face.
Toshimichi just misses with a punch to the body.
Ladd tries to counter by closing the distance.
Toshimichi keeps the fight on the outside.
Ladd ducks down and throws a hook to the body.
Toshimichi misses with an uppercut.
Toshimichi throws a body shot but no joy.
Nice jab there from Toshimichi.
A looping hook to the body misses from Toshimichi. Ladd does a little dance to reset his feet.
A right-left combo lands from Toshimichi.
Ladd loads up on a big right hand but Toshimichi slips the punch.
Toshimichi steps to the side to avoid the strikes from Ladd.
Toshimichi misses with a looping left.
That's three minutes gone in the round.
Ladd keeping his hands up high there, blocking the jab from Toshimichi.
Ladd ducks under a wild hook from Toshimichi.
Ladd is trying to avoid his opponent's strikes and get into the clinch.
Ladd throws a hook but Toshimichi avoids it easily.
It looked like Toshimichi wanted to counter with a hook but didn't fully commit.
Toshimichi is really peppering his opponent's head with punches.
Toshimichi slips under a jab from Ladd.
Toshimichi lands a jab to the head.
Good shot there by Toshimichi.
Toshimichi takes a jab right on the kisser.
Toshimichi lands with a right hand.
Ladd misses the shot to the body.
Ladd misses with a wild body shot.
Toshimichi showing good head movement there, avoiding the strikes from Ladd.
Toshimichi is looking to counter with a shot to the body.
Toshimichi lands a slapping body shot.

That's four minutes gone in the round.
Nice body punch from Toshimichi.
We've seen a great period of action over the last minute or so - credit to both fighters for going all out!
Ladd throws a hard body shot but it just misses.
Ladd scores with a nice head shot.
The fighters circling - Ladd throws out the jab but it was never going to land.
Toshimichi swung with a counter right hand that didn't connect.
Ladd uses some good footwork to avoid the body shot by Toshimichi.
Ladd looks to score with a jab to the body but Toshimichi is just out of range.
Toshimichi bobs and weaves well there to avoid the strikes.
Ladd scores with a jab to the jaw of his opponent.
Toshimichi misses with a hook.
Ladd tries to land with a swinging hook to the body but Toshimichi was well out of range. Poor timing from Ladd.
Ladd fails with an attempt to clinch.
Ladd misses with a few strikes there.
Toshimichi throws a nice hook to the body that draws an oooh from the crowd.
And that is the end of the round. The fighters go back to their corners.
Daisuke Toshimichi dominated that round.
The cut man is working on Ashton Ladd's cut.
The referee calls time. The cornermen exit stage left and we're back to business.

Toshimichi slips under a jab from Ladd.
Toshimichi misses with an uppercut. Ladd saw that one coming.
Toshimichi sets himself, and Ladd steps forward looking for the clinch! Toshimichi avoids it this time.
A punch lands to the side of Ladd 's head but he takes it in his stride.
Ladd throws a predictable looking body shot
and Toshimichi counters with a crisp hook to the side of the head.
Ladd connects with a hook to the side of his opponent's head.
Toshimichi is really dominating this fight. Is there anything that Ladd can do to turn this around?
Nice defenses there by Ladd.
Daisuke Toshimichi is winning the standup battle so far.
Ladd looks to score with a jab to the body but Toshimichi is just out of range.
Toshimichi is looking to counter with a shot to the body.
The fighters circle momentarily. Ladd darts into range and connects with a nice straight punch.
Ladd looks more muscular than last time we saw him. He must have been on the weights.
The fight stays on the outside here - Ladd looks like he's thinking about clinching though.
We've had a slow start to the round here - hopefully the action picks up.
Toshimichi misses with a hook.
Ladd tries to counter by closing the distance.
Toshimichi throws a hook but Ladd avoids it easily.
Ladd misses with a body shot
and Toshimichi counters with a quick right hand to the jaw.
Ladd fails with an attempt to clinch.
That's one minute gone in the round.
Toshimichi moves away from the strike by Ladd.
Ladd misses with a straight right.
Both these guys seem content to just stand up and trade with each other but Ladd might want to think about changing up his gameplan a bit because over the course of the fight, Toshimichi has got the better of the exchanges.
Ladd closes the distance and pushes Toshimichi back into the cage.
Ladd misses with a hook from the clinch.
Ladd throws a punch but it's blocked by Toshimichi.
Toshimichi blocks a punch to the side of the head.
Ladd jumps guard but Toshimichi stands there with Ladd around his waist. Ladd gives up and drops back to his feet. We remain in the clinch.
Toshimichi manages to get underhooks and slows down the pace for a moment.
Some stalling of biblical proportions here from Ladd.
Toshimichi tries a body shot but Ladd blocks it.
Ladd struggles to land a body shot inside as Toshimichi controls his hands.
That's two minutes gone in the round.
A right handed body shot lands from Ladd.
A shot in the inside from Toshimichi.
Ladd misses with a hook from the clinch.
A body shot lands from Toshimichi.
Ladd misses with a hook from the clinch.
Toshimichi misses with a punch on the inside.

Toshimichi breaks the clinch and we return to the middle of the mat.
Toshimichi throws a body shot but no joy.
Ladd throws the left hand but Toshimichi avoids the punch easily.
Toshimichi tries to move into range but Ladd moves to the side and lands with a nice right hand.
Ladd gets his head snapped back by a nice shot there.
Wooooo! Give it up for these two warriors! They are putting on a show!
Nice uppercut there from Toshimichi.
Toshimichi misses with a straight left.
That's three minutes gone in the round.
Ladd rushes in with a sloppy looking punch
and Toshimichi counters with a good right hand that lands right on the jaw.
A telegraphed right hand from Ladd misses the target.
Good shot there by Toshimichi.
Ladd tries to clinch but Toshimichi is having none of it.
Ladd swings widly with a right hand
and Toshimichi counters with a stiff right hand.
Toshimichi scores with a body shot.
Toshimichi uses good footwork to get in and out, landing a nice hook.
Toshimichi lands a right hook to the body.
Toshimichi with a nice cross.
Toshimichi slips a jab from Ladd.
Ladd misses with an uppercut. Toshimichi saw that one coming.
Toshimichi throws the left hand but Ladd avoids the punch easily.
Toshimichi cracks a nice hook into Ladd's ribs.
That's four minutes gone in the round.
This is a great period of action - very entertaining stuff!
Toshimichi throws a jab when Ladd was well out of range.
Ladd tries to counter by closing the distance.
Toshimichi scores with a hook to the body. Ladd takes a step back and tries to catch his breath.
Ladd has a pretty nasty looking mouse under his right eye.
Ladd misses with a jab to the body
and Toshimichi counters nicely by changing levels and landing a hook to the body.
Ladd ducks down and throws a hook to the body.
Toshimichi shakes his hands off, looking to compose himself, but takes a jab to the jaw whilst he does it.
Toshimichi pushing out the jab but it's not landing.
Ladd misses the body punch
and Toshimichi counters with a straight right hand.
Toshimichi connects with the punch.
Toshimichi connects with a lovely jab that went straight through the gap between Ladd's hands.
Toshimichi throws out a powerful jab.
Ladd lands a beauty of a right hand that gets the crowd cheering.
Toshimichi dips down and scores with a jab to the body.
Ladd clinches up with Toshimichi and pushes him back against the cage.
And that is the end of the round. The fighters go back to their corners.
Daisuke Toshimichi dominated that second round.
The cut man is working on Ashton Ladd's cut.
That's the end of the round. The referee orders the cornermen out of the cage so we can get back down to business. And we move into the final round!

Toshimichi lands a nice shot that snaps Ladd's head back.
Ladd steps to the side to avoid the strikes from Toshimichi.
Ladd wants to counter with a clinch but Toshimichi pushes him away.
Toshimichi throws a big shot that misses.
Ladd is the aggressor but that punch slipped nicely by Toshimichi.
A big right from Toshimichi misses.
Ladd throws a lazy right hand but Toshimichi sees it coming a mile off and sidesteps it easily.
Toshimichi uses good head movement to avoid the hook from Ladd.
Ladd has taken the fight to the clinch.
Ladd fails to pull the fight into his guard.
We've had a slow start to the round here - hopefully the action picks up.
Ladd blocking some punches.
Toshimichi lands a body shot.
Ladd tries to pull guard but Toshimichi forces him back to his feet, against the cage.
Ladd lands punches inside but they're not really causing much damage.
Toshimichi is leaning against Ladd and scores with a nice uppercut to the body.
That's one minute gone in the round.
Toshimichi taking a break, stalling in the clinch.
Ladd tried to land a shot to the body but connects with Toshimichi's elbow.
Toshimichi misses with a punch on the inside.
Ladd is struggling to control the position.
Ladd fails to land with a short punch on the inside.
Toshimichi breaks the clinch.
Toshimichi keeping a good distance there, avoiding the body shot.
Ladd throws a hard body shot but it just misses.
Toshimichi scores with a jab to the body.
Toshimichi scores with a straight right hand, right through his opponent's guard.
Toshimichi throws a jab to the body, straight down the pipe. Boom. That sent Ladd stumbling backwards but he manages to regain his composure quickly.
Toshimichi connects with a jab.
That's two minutes gone in the round.
Toshimichi throws out a loose jab but Ladd uses good head movement to avoid it.
Toshimichi uses some good footwork to avoid the body shot by Ladd.
Toshimichi ducks down and throws a hook to the body but Ladd moves away.
Toshimichi looks shocked there as he takes a right hand to the temple.
Toshimichi missing with a left hand there. Ladd was out of range so wasted energy throwing that one.
Nice body punch from Ladd.
We've seen a great period of action over the last minute or so - credit to both fighters for going all out!
Ladd throws a poor cross that misses
enabling Toshimichi to counter with a crisp jab.
Toshimichi connects with a body shot that sends Ladd's belly button to the back.
Ladd takes a really solid shot there but just smiles back and shrugs his shoulders.
Ladd misses with a body shot.
It looked like Toshimichi wanted to counter with a hook but didn't fully commit.
Nice defenses there by Toshimichi.
It looked like Toshimichi wanted to counter with a hook but didn't fully commit.
Ladd closes the distance looking to clinch
and Toshimichi cracks him with a counter punch right on the button.
Ashton Ladd has stepped it up - he knows he needs a finish here!
That's three minutes gone in the round.
Toshimichi throws a body shot but no joy.
Toshimichi fakes high and swings low for a body shot but Ladd manages to avoid it.
Toshimichi avoids the body shot from Ladd.
Nice body punch from Toshimichi.
Ladd throws a jab but it's blocked by Toshimichi.
A telegraphed right hand from Ladd misses the target.
Ladd throws out a loose jab but Toshimichi uses good head movement to avoid it.
Ladd throws a right hand that misses
and Toshimichi counters with a good right hand that lands right on the jaw.
Ladd throws a right hand that misses
and Toshimichi counters with a lovely straight right hand!
Ladd swings wildly with a right hand that was never going to find it's target.
Nice uppercut there from Toshimichi.
Ladd tries to clinch but is not successful on this occasion.
That's four minutes gone in the round.
Ladd takes a jab right on the nose. That must have hurt but he shrugs his shoulders and looks to return the favor.
Toshimichi lands a slapping body shot.
Toshimichi scores with a jab to the jaw of his opponent.
This is a great period of action - very entertaining stuff!
Toshimichi avoids the body shot from Ladd.
Ladd ducks under a wild hook from Toshimichi.
Ladd throws a big shot that misses.
Daisuke Toshimichi is fighting for a decision here - he's started to take the cautious approach.
Ladd ducks right into an uppercut from Toshimichi.
Ladd misses with an uppercut. Toshimichi saw that one coming.
Toshimichi lands a head shot.
Ladd takes a really solid shot there but just smiles back and shrugs his shoulders.
Ladd is looking to clinch but Toshimichi is avoiding it.
Ladd ducks right into an uppercut from Toshimichi.
And that's the end of the fight!
Daisuke Toshimichi showed his dominance in that final round.
Well I reckon that's a shut out for Toshimichi, winning every round. Will the judges agree? They are the ones who matter, even if they are often depressingly incompetent. Over to the ring announcer for the scorecards.
Ladies and gentlemen, after 3 rounds of action, we go to the scorecards for a decision.
Judge Bruno Lombardi scores the fight 30:27
Judge Franklyn Lucas scores the fight 30:27
Judge Jorge Garcia scores the fight 30:27
In favor of your winner, by unanimous decision... Daisuke Toshimichi!
A relieved looking Daisuke Toshimichi thanked the fans for their support and gave the usual line about them being amazing. They seemed to believe that he actually meant it.
|
|
|
|
|
|
|
|
|
|
|
|
|
|
|
|
|
|
|
|
|
|
|
| S |
C
A |
G |
S |
C
B |
G |
|
S |
C |
G |
|
energy
A | B |
|
hype
A | B |
|
pop
A | B |
|
mgr
A | B |
|
FIGHT
RATING
67% |
|
|
|
|
|
|
|
Undercard bout
|
Coming up we have a lightweight MMA rules bout between Jing Xin Yi (ranked 835 p4p, 1767 weight class) and Chris McCocker (ranked 114 p4p, 219 weight class). The key to victory for Jing Xin Yi has got to be keeping the fight on the feet.
 |
|
 |
| 178 cm
28
165
9 - 4 - 0 |
|
175 cm
28
155
11 - 7 - 0 |
Decent wrestler
Excellent MT
Granite chin |
|
Good wrestler
Counter fighter
Determined |
|
| |
|
Ladies and gentlemen. This fight is 3 rounds, in the lightweight division.
Introducing the fighter to my left, fighting out of the red corner.
With a record of 9 - 4 - 0, fighting out of Los Angeles, Jing Xin Yi!
And introducing the fighter to my right, fighting out of the blue corner.
With a record of 11 - 7 - 0, fighting out of Las Vegas, Chris McCocker!
The judges for this bout are Steve Montenegro, John Roberts and Columbo Gatti.
The bell rings for round one and we are underway!
We've got one fighter who appears to only be looking to counter and the other not looking particularly aggressive either, so we could be in for a dull fight.
McCocker avoids the head kick by Xin Yi.
McCocker throws a counter combo.
Jing Xin Yi seems to be the more aggressive standup fighter in this bout.
Xin Yi looks to land a right hand but McCocker moved out of range.
And an attempted straight right on the counter from McCocker! But no joy.
Xin Yi throws a head kick but McCocker moves out of range.
Xin Yi scores with a body shot.
Xin Yi definitely looks more muscular than last time we saw him fight.
A head kick misses from Xin Yi.
As Xin Yi backs off McCocker throws a huge counter combo but Xin Yi manages to avoid it all.
We've had a slow start to the round here - hopefully the action picks up.
A head kick misses from Xin Yi.
McCocker is loading up here, looking for a big counter of his own.
That's one minute gone in the round.
McCocker avoids the head kick by Xin Yi.
Xin Yi tries a head kick but it misses.
Xin Yi throws the kick towards the body but McCocker avoids it.
Xin Yi tries a head kick but it misses.
Xin Yi tries a head kick but it misses.
McCocker blocks a head kick by Xin Yi.
McCocker throws out a counter right but Xin Yi avoids it with no problem.
That's two minutes gone in the round.
Xin Yi throws a right hand that misses
and McCocker counters with a lovely straight right hand!
Xin Yi tries a head kick but it misses.
As Xin Yi backs off McCocker throws a huge counter combo but Xin Yi manages to avoid it all.
Xin Yi misses with a left hand
enabling McCocker to counter with a crisp jab.
McCocker takes a jab right on the nose. That must have hurt but he shrugs his shoulders and looks to return the favor.
Xin Yi tries to land a body kick
and McCocker cracks him with a counter punch right on the button.
McCocker blocks a head kick by Xin Yi.
That's three minutes gone in the round.
Xin Yi throws a head kick that misses and slips in the process. He scrambles back to his feet and the fighters circle.
McCocker looked like he wanted to counter with a punch but didn't throw it.
A head kick by Xin Yi misses
and McCocker counters with a good right hand that lands right on the jaw.
Xin Yi tries a switch kick but it misses it's target.
McCocker unleashes a big counter combination but Xin Yi bobs and weaves and avoids any damage.
Xin Yi tries a switch kick but it misses it's target.
McCocker has his head snapped back a nice jab. A little nod from McCocker there as he acknowledges the shot.
McCocker displays some good footwork, moving neatly out of range as Xin Yi throws out the jab.
McCocker unleashes a big counter combination but Xin Yi bobs and weaves and avoids any damage.
That's four minutes gone in the round.
Xin Yi throws a head kick that misses.
McCocker avoids the head kick by Xin Yi.
Despite the aggression on McCocker's face he doesn't fully commit to the counter.
Xin Yi connects with a high kick.
Xin Yi throws an uppercut from half a mile away. McCocker sees it coming and avoids it easily.
Despite the aggression on McCocker's face he doesn't fully commit to the counter.
The crowd thankful this round is nearly over.
A jab from Xin Yi misses.
McCocker avoids the head kick by Xin Yi.
And that is the end of the round. The fighters go back to their corners.
Jing Xin Yi dominated that round.
That's time! Xin Yi's corner gives him a slap on the ass as he gets ready to fight.
Xin Yi scores with a head kick.
Xin Yi throws a sloppy head kick
and McCocker counters with a stiff right hand.
Xin Yi lands a front kick.
We are yet to see a takedown attempt from McCocker in the fight. On paper you would think he is the more dominant ground fighter so let's see if these unusual tactics pay off.
Xin Yi throws a lazy head kick
and McCocker counters with a good right hand that lands right on the jaw.
We've had a slow start to the round here - hopefully the action picks up.
A combination from Xin Yi does no damage.
McCocker unleashes a big counter combination but Xin Yi bobs and weaves and avoids any damage.
Xin Yi misses with a half-hearted attempt at a head kick.
As Xin Yi backs off McCocker throws a huge counter combo but Xin Yi manages to avoid it all.
That's one minute gone in the round.
Xin Yi throws a sloppy head kick
and McCocker counters with a two punch combo.
Xin Yi swings for the body but McCocker moves out of range.
It seemed like McCocker was going to counter with the hook but didn't fully commit to it.
Xin Yi throws a sloppy head kick and McCocker moves out of range easily.
Xin Yi throws a sloppy head kick
and McCocker counters with a quick right hand to the jaw.
Nice defenses there by McCocker.
Xin Yi swings away but doesn't land with a series of punches.
McCocker throws a counter combo.
That's two minutes gone in the round.
McCocker blocks a head kick by Xin Yi.
McCocker unleashes a big counter combination but Xin Yi bobs and weaves and avoids any damage.
McCocker takes a kick to the side of the head.
Both fighters are looking to counter, which isn't making for the most exciting fight in the world.
Xin Yi throws a head kick but McCocker moves out of range.
McCocker looked like he wanted to counter with a punch but didn't throw it.
Xin Yi throws a head kick that misses.
Xin Yi misses with a half-hearted attempt at a head kick.
McCocker is looking for the big counter here.
Xin Yi throws a lazy head kick
and McCocker counters with a straight right hand.
That's three minutes gone in the round.
Xin Yi scores with a hook to the body. McCocker takes a step back and tries to catch his breath.
Xin Yi throws a head kick but McCocker moves out of range.
McCocker is loading up here, looking for a big counter of his own.
McCocker ducks under a wild hook from Xin Yi.
A little jabbing left from McCocker on the counter but it doesn't find it's target.
Xin Yi misses with a right hand
and McCocker counters with a three punch combination, finished off with a leg kick. Nice work.
Xin Yi falls off balance throwing a combination
and McCocker counters with a lovely straight right hand!
That's four minutes gone in the round.
McCocker avoids the head kick by Xin Yi.
Xin Yi tries a switch kick but it misses it's target.
McCocker is loading up here, looking for a big counter of his own.
A head kick by Xin Yi misses
and Xin Yi takes a counter punch right on the button for his troubles.
Xin Yi misses with a looping left.
McCocker is looking for the big counter here.
The crowd thankful this round is nearly over.
Xin Yi scores with a nice body kick.
And that is the end of the round. The fighters go back to their corners.
That was a close second round but I would say that Jing Xin Yi will probably get the nod.
The referee calls time. The cornermen exit stage left and we're back to business. This is the final round!
Xin Yi throws a head kick but McCocker moves out of range.
A head kick by Xin Yi misses
and McCocker counters with a series of strikes. Xin Yi will be more careful next time no doubt.
Xin Yi misses with a lunging right hand
letting McCocker counter with a right hand.
Both these guys seem content to just stand up and trade with each other but McCocker might want to think about changing up his gameplan a bit because over the course of the fight, Xin Yi has got the better of the exchanges.
Xin Yi tries a head kick but it misses.
We've had a slow start to the round here - hopefully the action picks up.
McCocker blocks a head kick by Xin Yi.
McCocker throws a counter combo.
Xin Yi throws a lazy right hand but McCocker sees it coming a mile off and sidesteps it easily.
That's one minute gone in the round.
Xin Yi throws a head kick that misses.
Despite the aggression on McCocker's face he doesn't fully commit to the counter.
Xin Yi throws a body kick but he wasn't in range.
McCocker throws a counter combo.
A head kick misses from Xin Yi.
As Xin Yi backs off McCocker throws a huge counter combo but Xin Yi manages to avoid it all.
A head kick misses from Xin Yi.
McCocker unleashes a big counter combination but Xin Yi bobs and weaves and avoids any damage.
Xin Yi pivots, looking for a leg kick but McCocker is out of range and Xin Yi settles back down.
McCocker is loading up here, looking for a big counter of his own.
McCocker might want to mix his strikes up a bit more. He's just going for head shots at the moment and that can become a bit predictable.
Xin Yi lands a kick to the ribs of his opponent. Nice work there - in and out in a flash.
That's two minutes gone in the round.
Xin Yi moves into range and connects with a jab.
Xin Yi throws an off balance right hand
and McCocker counters with a nice uppercut.
McCocker avoids a lazy jab quite easily.
Xin Yi tries a head kick but it misses.
McCocker throws out a counter right but Xin Yi avoids it with no problem.
Xin Yi jabbing away but nothing is landing.
As Xin Yi backs off McCocker throws a huge counter combo but Xin Yi manages to avoid it all.
Xin Yi is really dominating this fight. Is there anything that McCocker can do to turn this around?
McCocker checks a leg kick nicely.
That's three minutes gone in the round.
Xin Yi misses with a head kick.
Despite the aggression on McCocker's face he doesn't fully commit to the counter.
Xin Yi lands with a thumping leg kick.
McCocker moves out of range of the body kick from Xin Yi.
Xin Yi tries a switch kick but it misses it's target.
As Xin Yi backs off McCocker throws a huge counter combo but Xin Yi manages to avoid it all.
Xin Yi tries a switch kick but it misses it's target.
That's four minutes gone in the round.
Xin Yi throws a sloppy head kick
and McCocker connects with a straight left hand counter down the middle.
Xin Yi throws a head kick that connects with a bit of head and a bit of hand.
Both fighters are breathing heavily.
Xin Yi throws a head kick but McCocker moves out of range.
Despite the aggression on McCocker's face he doesn't fully commit to the counter.
Xin Yi throws a head kick that misses.
McCocker unleashes a big counter combination but Xin Yi bobs and weaves and avoids any damage.
Boooooooooooooooooooo!!! God, this has been a terrible round. Come on you two, sort yourselves out!
Xin Yi takes a swing at McCocker's ribcage but misses.
A little jabbing left from McCocker on the counter but it doesn't find it's target.
Chris McCocker has stepped it up - he knows he needs a finish here!
Xin Yi lands with a slapping head kick.
And that's the end of the fight!
Jing Xin Yi showed his dominance in that final round.
Well Xin Yi has outscored his opponent in every aspect of the fight today. Only a scarily incompetent judge or two will keep him from a well deserved win... Over to the ring announcer for the scorecards.
Ladies and gentlemen, after 3 rounds of action, we go to the scorecards for a decision.
Judge Steve Montenegro scores the fight 30:27
Judge John Roberts scores the fight 30:27
Judge Columbo Gatti scores the fight 30:27
In favor of your winner, by unanimous decision... Jing Xin Yi!
|
|
|
|
|
|
|
|
|
|
|
|
|
|
|
|
|
|
|
|
|
|
|
| S |
C
A |
G |
S |
C
B |
G |
|
S |
C |
G |
|
energy
A | B |
|
hype
A | B |
|
pop
A | B |
|
mgr
A | B |
|
FIGHT
RATING
34% |
|
|
|
|
|
|
|
Undercard bout
|
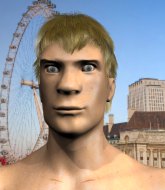
Coming up we have a welterweight MMA rules bout between Joe Diddy (ranked 916 p4p, 1325 weight class) and RollBack TheNineteenth (ranked 126 p4p, 180 weight class). Diddy's entrance music is lvl99ROIDMAGE. A fine choice. RollBack TheNineteenth acknowledges the crowd's support as he enters the cage.
 |
|
 |
| 170 cm
20
174
12 - 7 - 0 |
|
183 cm
28
170
8 - 4 - 0 |
BJJ Brown Belt
Basic striking
Granite chin |
|
Decent wrestler
Excellent boxer
Powerful |
|
| |
|
Ladies and gentlemen. This fight is 3 rounds, in the welterweight division.
Introducing the fighter to my left, fighting out of the red corner.
With a record of 12 - 7 - 0, fighting out of Sydney, Joe Diddy!
And introducing the fighter to my right, fighting out of the blue corner.
With a record of 8 - 4 - 0, fighting out of Hilo, RollBack TheNineteenth!
The judges for this bout are Dean Styles, John Kavanagh and John Roberts.
The bell rings for round one and we are underway!
Nice uppercut there from TheNineteenth.
Diddy steps to the side to avoid the strikes from TheNineteenth.
Diddy scores with a nice takedown into half guard. Let's see what he's got on the ground.
The ref warns both fighters not to hold the cage as they work up against the meshing.

TheNineteenth has managed to escape just enough to sneak back to his feet but Diddy is on him like a limpet, forcing TheNineteenth back against the cage.
TheNineteenth breaks the clinch and we return to the middle of the mat.
TheNineteenth looks more muscular than last time we saw him. He must have been on the weights.
TheNineteenth keeps the fight on the outside.
TheNineteenth swats away the attempt to clinch by Diddy.
Diddy gets his takedown attempt stuffed easily
and TheNineteenth counters with a stiff right hand.
Fantastic stuff here - a very entertaining period of action, which has drawn cheers from the crowd.
Diddy shoots and misses
letting TheNineteenth counter with a right hand.
Diddy shoots in looking for a double leg takedown. TheNineteenth defends it nicely.
That's three failed takedown attempts in the round for Joe Diddy. That's going to take a lot out of him.
TheNineteenth misses with a hook. Diddy ducked under it nicely.
TheNineteenth is using his reach advantage to land shots from outside his opponent's range.
Diddy misses the shot to the body.
TheNineteenth throws out a counter right but Diddy avoids it with no problem.
No luck for Diddy with that takedown attempt.
Diddy doesn't react quick enough there as he takes a shot to the body.
That's one minute gone in the round.
Diddy with a lazy takedown attempt
and TheNineteenth counters with a crisp hook to the side of the head.
Nice takedown defense from TheNineteenth. No joy for Diddy on that attempt.
TheNineteenth throws out a counter right but Diddy avoids it with no problem.
RollBack TheNineteenth is looking to keep the fight on the feet at all costs.
Diddy fails with the takedown
and TheNineteenth counters with a stiff right hand.
TheNineteenth jabs. That one connects to the head of his opponent.
Diddy with a poor takedown
and TheNineteenth counters with a quick right hand to the jaw.
Diddy doesn't succeed with the takedown
enabling TheNineteenth to counter with a crisp jab.
Diddy avoids a lazy jab quite easily.
Diddy misses with a looping right.
Diddy just misses with a punch to the body.
TheNineteenth might want to mix his strikes up a bit more. He's just going for head shots at the moment and that can become a bit predictable.
TheNineteenth lands an overhand left. A wild punch that just about connected.
 Diddy is rocked! Diddy is rocked!
Diddy walks right into a perfectly timed right hook and goes down hard! He's out cold! The ref cradles Diddy limp body while TheNineteenth jumps on to the cage and waves to the roaring crowd. Wow that was just a brutal knockout!
Ladies and gentlemen, after 1:47 of round 1, we have a winner by way of KO (Punch). RollBack TheNineteenth!
An out of breath RollBack TheNineteenth thanked his loyal fans in his post fight interview, giving them credit for his success over the course of his career.
|
|
|
|
|
|
|
|
|
|
|
|
|
|
|
|
|
|
|
|
|
|
|
| S |
C
A |
G |
S |
C
B |
G |
|
S |
C |
G |
|
energy
A | B |
|
hype
A | B |
|
pop
A | B |
|
mgr
A | B |
|
FIGHT
RATING
71% |
|
|
|
|
|
|
|
Undercard bout
|
Coming up we have a featherweight MMA rules bout between Kyril Mostakaev (ranked 1773 p4p, 1035 weight class) and Small Richard (ranked 155 p4p, 99 weight class). Kyril Mostakaev had a look across the cage there at his opponent. He definitely means business
 |
|
 |
| 165 cm
28
153
13 - 7 - 0 |
|
160 cm
28
146
12 - 4 - 0 |
BJJ Brown Belt
Counter fighter
Cardio machine |
|
Good wrestler
Counter fighter
Good gas tank |
|
| |
|
Ladies and gentlemen. This fight is 3 rounds, in the featherweight division.
Introducing the fighter to my left, fighting out of the red corner.
With a record of 13 - 7 - 0, fighting out of London, Kyril Mostakaev!
And introducing the fighter to my right, fighting out of the blue corner.
With a record of 12 - 4 - 0, fighting out of London, Small Richard!
The judges for this bout are John Kavanagh, Chad Campbell and Anthony Taglia.
The bell rings for round one and we are underway!
Mostakaev has taken the fight to the clinch.
Richard is fighting off a takedown attempt but Mostakaev is just too persistent for him and manages to trip Richard to the mat. Richard regains guard as soon as the fighters hit the mat.
Mostakaev trying to control but Richard is working from the bottom.
Mostakaev controls the pace of the fight for a moment.
Richard has his foot on Mostakaev's thigh. He's trying to push off and get in position for a triangle, I think. Mostakaev works his way back into a safe position though.
Mostakaev trying to control but Richard is working from the bottom.
Mostakaev stands up and looks to throw the legs aside to pass to side control. Richard swivels though and keeps the full guard.
We've had a slow start to the round here - hopefully the action picks up.
Mostakaev is stalling in the full guard.
That's one minute gone in the round.
Mostakaev is sitting in close to Richard's body. Richard has gone for a guillotine from the bottom. Oh damn, that looks pretty tight! Mostakaev is panicking - it looks like this one could be all over! Yes, Mostakaev is tapping! That was a very nice submission by Richard.
Ladies and gentlemen, after 1:19 of round 1, we have a winner by way of Submission (Guillotine). Small Richard!
Small Richard thanked the fans post fight for their support.
|
|
|
|
|
|
|
|
|
|
|
|
|
|
|
|
|
|
|
|
|
|
|
| S |
C
A |
G |
S |
C
B |
G |
|
S |
C |
G |
|
energy
A | B |
|
hype
A | B |
|
pop
A | B |
|
mgr
A | B |
|
FIGHT
RATING
52% |
|
|
|
|
|
|
|
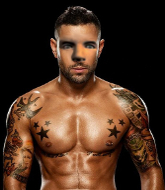
Co-main event
|
Coming up we have a heavyweight MMA rules bout between Demassive Thibodeaux (ranked 918 p4p, 250 weight class) and Wang Jang Jai (ranked 109 p4p, 36 weight class). Jang Jai is bobbing his head along to his entrance song: Snake Shadow. Demassive Thibodeaux has a significant reach advantage - let's see if he can make it count.
 |
|
 |
| 206 cm
27
274
9 - 3 - 0 |
|
190 cm
27
265
15 - 1 - 0 |
BJJ White Belt
Excellent MT
Cardio machine |
|
Good wrestler
Decent boxing
Granite chin |
|
| |
|
Ladies and gentlemen. This fight is 3 rounds, in the heavyweight division.
Introducing the fighter to my left, fighting out of the red corner.
With a record of 9 - 3 - 0, fighting out of , Demassive Thibodeaux!
And introducing the fighter to my right, fighting out of the blue corner.
With a record of 15 - 1 - 0, fighting out of London, Wang Jang Jai!
The judges for this bout are Lou da Vinci, Steve Montenegro and Alyssa Summers.
The bell rings for round one and we are underway!
Jang Jai cracks Thibodeaux with a right hand to the side of the head.
It looks like Demassive Thibodeaux has been cut.
Thibodeaux throws a jab to the body, straight down the pipe. Boom. That sent Jang Jai stumbling backwards but he manages to regain his composure quickly.
Jang Jai defending well as Thibodeaux loads up on a big left hand.
Jang Jai throws a looping overhand right but Thibodeaux ducks down to avoid it.
Thibodeaux throwing a counter right hand but Jang Jai manages to avoid it.
Thibodeaux throws a looping overhand right but Jang Jai ducks down to avoid it.
Jang Jai throws a body shot but no joy.
A counter left hand to the body from Thibodeaux misses its target.
A big left from Jang Jai misses.
A little feinted left hand from Thibodeaux on the counter but he doesn't commit to it.
Thibodeaux fakes high and swings low for a body shot but Jang Jai manages to avoid it.
Wang Jang Jai seems to be the more aggressive standup fighter in this bout.
Jang Jai scores with a nice right hand.
Thibodeaux uses decent footwork to sidestep a right hand from Jang Jai.
A counter left hand to the body from Thibodeaux misses its target.
We've had a slow start to the round here - hopefully the action picks up.
A big left from Jang Jai misses.
Jang Jai misses with a left hand
and Thibodeaux counters with a crisp hook to the side of the head.
Thibodeaux slips under a jab from Jang Jai.
This fight brought to you by 5M nutrition - it's mmmmm tasty. Nice jab by Jang Jai.
That's one minute gone in the round.
Thibodeaux fakes low and throws an overhand right that catches Jang Jai on the side of the head.
Jang Jai looks to land a left hand but Thibodeaux moved out of range nicely.
Thibodeaux is looking to counter with a shot to the body.
Thibodeaux lands a jab to Jang Jai's midsection.
Thibodeaux definitely looks more muscular than last time we saw him fight.
Jang Jai misses with a hook. Thibodeaux ducked under it nicely.
Thibodeaux throwing a counter right hand but Jang Jai manages to avoid it.
Thibodeaux takes a jab right on the nose. That must have hurt but he shrugs his shoulders and looks to return the favor.
Demassive Thibodeaux's cut is getting worse.
Jang Jai throws a hook to the side of Thibodeaux's head but Thibodeaux sees it coming and ducks under it beautifully.
Thibodeaux swung with a counter right hand that didn't connect.
Jang Jai throws a good cross that connects.
Jang Jai misses with a hook.
Jang Jai throws a right hand that misses
and Thibodeaux counters with a straight punch to the midsection.
Jang Jai swings widly with a right hand
and Thibodeaux counters with a right hand to the body.
Jang Jai looks winded!
Jang Jai throws a combination that misses

and Thibodeaux counters with a nice right hand that sends Jang Jai toppling to the canvas! Jang Jai scrambles and gets back to his feet - can Thibodeaux finish him?!
It looks like Wang Jang Jai has been cut.
Fantastic stuff here - a very entertaining period of action, which has drawn cheers from the crowd.
Thibodeaux lands an uppercut out of nowhere! Jang Jai falls backwards - clearly groggy! Thibodeaux dives in and finishes the fight with more strikes for a TKO finish!
Ladies and gentlemen, after 2:59 of round 1, we have a winner by way of TKO (Strikes). Demassive Thibodeaux!
|
|
|
|
|
|
|
|
|
|
|
|
|
|
|
|
|
|
|
|
|
|
|
| S |
C
A |
G |
S |
C
B |
G |
|
S |
C |
G |
|
energy
A | B |
|
hype
A | B |
|
pop
A | B |
|
mgr
A | B |
|
FIGHT
RATING
69% |
|
|
|
|
|
|
|
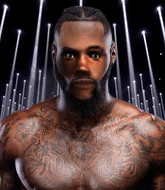
Main event
|
Coming up we have a bantamweight MMA rules bout between Colby Taylor (ranked 166 p4p, 459 weight class) and Marco Natta (ranked 13 p4p, 40 weight class). This should be fireworks!
 |
|
 |
| 170 cm
27
145
16 - 1 - 1 |
|
170 cm
28
145
9 - 1 - 0 |
BJJ Brown Belt
Basic striking
Granite chin |
|
BJJ Brown Belt
Basic striking
Powerful |
|
| |
|
Ladies and gentlemen. This fight is 5 rounds, for the bantamweight championship of the world!
Introducing the champion to my left, fighting out of the red corner.
With a record of 16 - 1 - 1, fighting out of Montreal, Colby Taylor!
And introducing the challenger to my right, fighting out of the blue corner.
With a record of 9 - 1 - 0, fighting out of Montreal, Marco Natta!
The judges for this bout are Eddie Farnsworth, Chad Campbell and Lou da Vinci.
The bell rings for round one and we are underway!
The fight stays on the outside here - Taylor looks like he's thinking about clinching though.
Colby Taylor seems to be the more aggressive standup fighter in this bout.
Taylor clinches up with Natta and pushes him back against the cage.
Taylor manages to pull guard.
There's a bit of a scramble here and now Taylor is on top in guard.

Taylor definitely looks more muscular than last time we saw him fight.
Natta can't do much from the bottom at the moment, as Taylor controls the pace.
Natta looks more muscular than last time we saw him. He must have been on the weights.
Taylor has controlled the position for a good 20 seconds, which will no doubt be starting to frustrate his opponent.
This is a sustained period of stalling by Taylor.
We've had a slow start to the round here - hopefully the action picks up.
Natta is trying to keep Taylor in close.
Taylor is frustrating his opponent with some stalling tactics from top position.
That's one minute gone in the round.
Natta is controlling Taylor's posture.
Taylor wants to control from the top but Natta keeps moving.
Taylor passes easily into side control. Nice work.
Natta is positioning himself to get back to half guard.
Taylor trying to control the position but Natta is working away.
That's two minutes gone in the round.
The crowd are showing their displeasure at the lack of action as loud boos ring out around the arena.
The referee asks Taylor politely if he wouldn't mind getting on with it and actually doing something. Taylor prefers to stall for the moment though.
Natta is trying to get back to half guard.
Taylor slows the pace down.
Taylor laying and praying for a moment but Natta takes advantage and regains half guard.
Taylor prevents Natta from improving his position.
The referee calls for the fighters to work.
That's three minutes gone in the round.
Natta is looking to control Taylor's leg but it's slowly edging free. Can Natta avoid being mounted?

The referee decides to stand the fighters back up.
Taylor wants to clinch.
Taylor lunges in with an uppercut that skims his opponent's chin.
A swing and a miss from Natta.
Natta throws a body shot but no joy.
Taylor throws a big shot that misses.
Natta throws out a token jab with nothing on it.
Taylor is looking to clinch but Natta is avoiding it.
Taylor tries to close the distance and clinch up against the cage but Natta paws at him with a jab and circles away.
Taylor throws an uppercut from half a mile away. Natta sees it coming and avoids it easily.
Taylor clobbers Natta with an overhand right that has the crowd gasping. That made a horrendous noise.
Natta keeps the fight on the outside.
Taylor moves into range and clinches up with Natta.
Taylor pulls Natta into guard.
Natta pushes down on Taylor's leg and manages to get into half guard.
That's four minutes gone in the round.
Taylor is pressing down on Natta's left leg trying to get back to full guard. He's managed it.
The ref warns both fighters not to hold the cage as they work up against the meshing.
Taylor keeping moving, preventing Natta from controlling successfully.
Taylor looking for submissions from the bottom but instead Natta passes into side control.
Taylor can't do much from the bottom here.
Boooooooooooooooooooo!!! God, this has been a terrible round. Come on you two, sort yourselves out!
Natta working hard here to secure a kimura but he's not really in the right position for it.
This has been an exciting period of action!
Taylor tries to bench press Natta off him but Natta keeps the position.
And that is the end of the round. The fighters go back to their corners.
Colby Taylor dominated that round.
The fighters get back to their feet, the hooter sounds and we're back to the action!
Taylor closes the distance and clinches.
Taylor goes for a body shot but it's blocked.
Natta jumps guard but his hands slip and he falls flat on his back. Well, he's made himself look a right mug there, as Taylor walks away with a smile on his face. Natta gets slowly back to his feet and shakes his head.
Taylor wings a very wild body shot but it does the job and lands to the midsection.
Taylor is looking to clinch.
Taylor connects with a looping left hand that seems like it dazed Natta momentarily.
Taylor wants to clinch up but Natta keeps it at a distance.
Taylor throws a jab when Natta was well out of range.
Taylor is looking to clinch but Natta is avoiding it.
Natta fails in his attempt to clinch.
Natta doesn't manage to clinch there - Taylor circles away.
A big left from Natta misses.
Taylor scores with a shot to the body.
Natta tries to clinch up against the cage, rushing in to close the distance. Taylor manages to break the clinch and circles back to the middle of the mat.
Taylor was looking to counter that move with a punch but didn't quite pull the trigger.
Taylor is looking to take this fight into the clinch.
We've had a slow start to the round here - hopefully the action picks up.
Natta takes a jab on the nose there. A little bit of blood seems to be coming out. Hopefully that won't affect his breathing.
Natta throws a lazy right hand but Taylor sees it coming a mile off and sidesteps it easily.
Taylor fails with an attempt to clinch.
Taylor wants to clinch up but Natta keeps it at a distance.
Nice straight punches there by Taylor. You know Roy Jones Jr respects the hands of Taylor.
That's one minute gone in the round.
Taylor throws the left hand but Natta avoids the punch easily.
Colby Taylor is winning the standup battle so far.
A swing and a miss from Natta.
Taylor seemed to be looking to counter by closing the distance.
Taylor is looking to take this fight into the clinch.
Taylor just misses with a punch to the body.
Natta tries to close the distance and clinch but Taylor swats him to one side with an open hand palm strike and circles away.
Natta tries to close the distance and clinch but Taylor swats him to one side with an open hand palm strike and circles away.
Taylor is really dominating this fight. Is there anything that Natta can do to turn this around?
Taylor ducks down and throws a hook to the body.
Taylor fakes and then throws a beautiful body shot. Natta looks a bit winded and takes a step backwards to take a breath.
Nice shot lands for Taylor.
Taylor tries to clinch but is not successful on this occasion.
Natta misses the shot to the body.
Taylor tries to clinch but is not successful on this occasion.
Natta takes a swing at Taylor's ribcage but misses.
Natta on the wrong end of an overhand right that came out of nowhere.
Taylor tries to close the distance and clinch up but Natta swats him away and circles back towards the center.
Natta misses the shot to the body.
Taylor works Natta's body with a nice hook.
Natta needs to keep his hands up - Taylor had a free shot at his head there.
Wow, both these guys are really going for it!
Taylor lunges at Natta with a hook that half lands and is half blocked by Natta's hand.
That's two minutes gone in the round.
Wooooo! Give it up for these two warriors! They are putting on a show!
Taylor closes the distance and clinches.
A short uppercut from Taylor.
Natta tries to jump guard but he falls flat on his backside. Taylor smiles and moves away.
Taylor tries to clinch but Natta moves out of range.
Natta looks to score with a jab to the body but Taylor is just out of range.
Taylor lands a jab.
Natta looks to score with a jab to the body but Taylor is just out of range.
The fight stays on the outside here - Taylor looks like he's thinking about clinching though.
Natta on the wrong end of a nice hook.
Taylor scores with a body shot.
Taylor thuds his right hand into Natta's forehead from close range. That could be painful for both fighters.
Taylor scores with a decent looking hook.
Taylor tries to clinch up.
Natta keeping a good distance there, avoiding the body shot.
Taylor takes the fight into the clinch.
Taylor lands on the inside with an uppercut.
Taylor looking to stall.
That's three minutes gone in the round.
Taylor scores with a shot to the side of Natta's head.
Taylor lands a hook to the side of the head.
A bit of stalling here from Taylor.
Natta has managed to pull guard. Let's see whether he can work an aggressive guard. It will also be interesting to see what tactics Taylor uses from the top position.
Natta can't do much from the bottom at the moment, as Taylor controls the pace.
Natta keeping full guard, as Taylor tries to pass.
Taylor slows down the pace of the fight, as he sits in guard.
Taylor pressing down on his opponent's thigh, looking to pass guard. Natta is keeping the position for now.
A real slowdown in the pace of the fight for a moment, as Natta holds on and takes a little breather.
That's four minutes gone in the round.
Taylor postures up.
Taylor pressing down on his opponent's thigh, looking to pass guard. Natta is keeping the position for now.
Taylor controlling from the top position.
The ref stands the fighters back up due to a lack of activity.
Taylor tries to clinch but is not successful on this occasion.
Natta keeps the fight on the outside.
Natta looks to score with a jab to the body but Taylor is just out of range.
Taylor keeps the fight on the outside.
Taylor is looking to counter with a shot to the body.
Taylor scores with a jab.
Natta fails in his attempt to clinch.
Natta takes a really solid shot there but just smiles back and shrugs his shoulders.
Taylor takes the fight into the clinch.
And that is the end of the round. The fighters go back to their corners.
Colby Taylor dominated that second round.
Well, the break between rounds is over. Let's get back to the scrappin!
Natta throws a hook to the body but it doesn't connect.
Taylor is looking to counter punch.
Taylor has Natta up against the cage in a clinch.
Natta takes a shot to the head.
Natta misses with the head strike.
A short right from Taylor.
Natta throws a punch but it's blocked by Taylor.
Natta misses with a punch to the body.
Taylor lands a right hand.
Taylor goes for a body shot but it's blocked.
Taylor lands a right hand that snaps the head of Natta backwards.
Taylor blocks an uppercut.
Taylor lands a left hand that snaps the head of Natta backwards.
Taylor lands a hook that snaps the head of Natta backwards.
Natta throws a head punch that misses.
Taylor lands a hook that snaps the head of Natta backwards.
The crowd are loving this. Great action here.
Natta misses with a punch to the body.
Taylor blocks a punch to the side of the head.
Taylor tries a body shot but Natta blocks it.
Taylor is trying to pull guard but Natta turns him against the cage and we stay in the clinch.
Taylor can't find room to land a body shot as Natta controls the action.
Taylor tries to pull guard but Natta holds him up against the cage and eventually Taylor drops back down to his feet.
That's one minute gone in the round.
Taylor lands a right uppercut that snaps the head of Natta backwards.
Taylor avoiding damage.
Natta blocks a couple of punches on the inside.
Taylor lands with a left to the head.
Natta misses with a hook to the ribs.
Taylor cracks Natta with a nice body shot.
A head punch on the inside from Natta fails to land.
Still in the clinch, Taylor scores with a nice short uppercut.
Taylor jumps guard and drags Natta to the mat. He's obviously going to be looking for submissions off his back.
The fighters are pressed up against the cage, both looking to find a bit of space to work.
Taylor keeping moving, preventing Natta from controlling successfully.
Natta looking to sit in guard and control but Taylor gets the butterfly guard and sweeps. He's now in the guard on the top.
Taylor tries to free his leg and advance position but Natta is retaining full guard.
That's two minutes gone in the round.
A real slowdown in the pace of the fight for a moment, as Natta holds on and takes a little breather.
Taylor wants to pass the guard but Natta is keeping the position.
Taylor seems content to control from guard here. He's going to have to remain active though if he doesn't want to get stood back up.
Taylor pressing down on his opponent's thigh, looking to pass guard. Natta is keeping the position for now.
Natta trying to keep a closed guard but Taylor is proving a slippery customer.
Natta is looking for a triangle but Taylor pushes his legs off easily.
That's three minutes gone in the round.
Taylor stays in close to Natta's body and controls the position.
Taylor trying to control but Natta is working from the bottom.
Taylor is just sitting in guard, looking to avoid any submissions.
The ref stands the fighters back up due to a lack of activity.
Taylor lands the left hand.
Taylor gets in close and instigates a clinch.
Natta jumps guard but Taylor turns him against the cage and keeps the fight standing.
A short right from Taylor.
Taylor lands a body punch - he's looking to wear down Natta.
That's four minutes gone in the round.
Taylor manages to pull guard. Let's see whether he can land a sub off his back.
Taylor not looking particularly offensive just at the moment.
Taylor working from the bottom, still in full guard. He's managed to get a loose triangle. Natta doesn't seem to be doing much to defend here, obviously he feels comfortable in the position. Natta manages to throw the legs off his shoulder and he's back into guard - no problem.
Taylor is looking for a guillotine. You can't force these things though and Natta defends well.
Natta pushing down on Taylor's thigh, trying to pass to half guard. He's managed it... Nice work.
Natta trying to control the pace.
Natta is trying to control the action in half guard but Taylor is working away on the bottom, looking perhaps to get back to full guard.
And that is the end of the round. The fighters go back to their corners.
Colby Taylor clearly takes that round.
That's the end of the interval. I'm sure that seemed a lot quicker than a minute for our two fighters! Back to the action.

Nice cross by Taylor.
Taylor gets in close and instigates a clinch.
Natta tries to work over Taylor's body with a swooping hook but it only glances the target.
Natta jumps into guard, dragging Taylor to the mat.
Natta keeping moving, preventing Taylor from controlling successfully.
Taylor controls the pace of the fight for a moment.
We've had a slow start to the round here - hopefully the action picks up.
Natta keeping moving, preventing Taylor from controlling successfully.
Natta seems keen to control Taylor's posture.
Natta trying to keep a closed guard but Taylor is proving a slippery customer.
That's one minute gone in the round.
Natta being controlled here, momentarily.
The referee has decided to stand the fighters back up, so we'll restart on the feet.
Taylor moves out of range of the strikes.
Taylor ducks under an overhand right and circles away with a smile on his face.
Boom, another hit is landed. "You're gunna get knocked out" taunts Taylor, as that shot connected.
Taylor moves into the clinch.
An uppercut on the inside fails to land for Natta.
Natta struggles to land a body shot inside as Taylor controls his hands.
Natta jumps guard but Taylor stands there with Natta around his waist. Natta gives up and drops back to his feet. We remain in the clinch.
Taylor works on Natta's body with a couple of short punches.
That's two minutes gone in the round.
Taylor fails to pull the fight into his guard.
Natta has managed to pull guard. Let's see whether he can work an aggressive guard. It will also be interesting to see what tactics Taylor uses from the top position.
Natta not looking particularly offensive just at the moment.
Taylor seems content to control from guard here. He's going to have to remain active though if he doesn't want to get stood back up.
Taylor wants to control from the top but Natta keeps moving.
Taylor controls from within his opponent's guard.
That's three minutes gone in the round.
Taylor wants to pass the guard but Natta is keeping the position.
Natta is trying to control the position from the bottom.
Taylor trying to control the position from guard on top but Natta is wriggling around, looking for whatever he can.
The ref stands the fighters back up due to a lack of activity.
Taylor is looking to clinch.
Taylor throws a body punch but Natta moves out of range.
Natta throws out a loose jab but Taylor uses good head movement to avoid it.
Natta moves forwards but Taylor connects with a nice, crisp jab.
That's four minutes gone in the round.
My god... these two guys really need to pick up the pace or everyone will leave to go get a beer.
Taylor ducks under a wild hook from Natta.
Natta swings and misses with a hook to the body.
Taylor moves in looking to clinch but Natta pushes him off.
Taylor fakes a jab and then connects with a hook.
Natta throws a hook but Taylor avoids it easily.
Natta has closed the distance and engaged Taylor in a clinch.
Taylor struggles to land a body shot inside as Natta controls his hands.
Natta throws a head punch that misses.
An uppercut on the inside fails to land for Natta.
Taylor lands with a short head shot on the inside.
Taylor blocks an uppercut.
Taylor makes some space for himself and lands an uppercut.
Taylor scores with a shoulder strike.
Taylor lands a hook to the side of the head.
Taylor jumps guard but Natta stands there with Taylor around his waist. Taylor gives up and drops back to his feet. We remain in the clinch.
The crowd thankful this round is nearly over.
Natta swings away with an uppercut that misses.
Natta tries to take the fight to the ground by pulling guard but can't manage it.
Natta jumps guard but his hands slip and he falls flat on his back. Well, he's made himself look a right mug there, as Taylor walks away with a smile on his face. Natta gets slowly back to his feet and shakes his head.
Colby Taylor has stuffed three takedown attempts in the round now. That's going to take a lot out of Marco Natta.
Natta throws the left hand but Taylor avoids the punch easily.
And that is the end of the round. The fighters go back to their corners.
Colby Taylor had his way with Marco Natta in that round.
That's time! Taylor's corner gives him a slap on the ass as he gets ready to fight. This is the final round!

Jab by Taylor.
Taylor is looking to take this fight into the clinch.
Natta swings for the body but Taylor moves out of range.
Natta has a pretty nasty looking mouse under his right eye.
Natta drops his hands and takes a jab to the jaw for his troubles.
Taylor moves in looking to clinch but Natta pushes him off.
A swing and a miss from Natta.
The crowd cheers as Taylor lands an impressive looking overhand right. Natta doesn't seem phased though.
Taylor clinches up with Natta and pushes him back against the cage.
Taylor stalling here - the referee won't stand for too much of that.
With the fighters clinched against the cage, Taylor creates a bit of distance for himself and scores with a nice uppercut.
Colby Taylor has scored more points in the clinch so far.
Taylor lands a nice uppercut.
We've had a slow start to the round here - hopefully the action picks up.
Taylor swings away with an uppercut that misses.
Taylor lands a body shot in the clinch.
Taylor doesn't land with the attempted body shot.
Taylor lands a right hand that snaps the head of Natta backwards.
Taylor can't find room to land a body shot as Natta controls the action.
Taylor scores with a shoulder strike.
The crowd are loving this. Great action here.
Natta tries to pull guard but Taylor forces him back to his feet, against the cage.
That's one minute gone in the round.
Taylor jumps guard and drags Natta to the mat. He's obviously going to be looking for submissions off his back.
Natta trying to pass the guard but can't manage it just yet.
Taylor working a defensive guard here.
Natta wants to control from the top but Taylor keeps moving.
Taylor trying to keep a closed guard but Natta is proving a slippery customer.
Taylor is looking for a triangle but Natta pushes his legs off easily.
Natta postures up.
Marco Natta has stepped it up - he knows he needs a finish here!
That's two minutes gone in the round.
The crowd are hurling abuse towards the fighters... You can hardly blame them though because there isn't a lot going on in the fight.
Taylor working away from the bottom but not quite defensive enough there because Natta has passed into half guard!
Natta is looking for a kimura here.
Taylor wants to improve his position but Natta is controlling well.
Taylor is defending against the submission attempts here by Natta.
That's three minutes gone in the round.
Taylor is refusing to be controlled, as Natta sits in half guard.
Taylor is looking to sinch up a guillotine here but Natta pulls his head out easily.
Colby Taylor is fighting for a decision here - he's started to take the cautious approach.
Taylor keeps control of the position for the meantime.
The ref stands the fighters back up due to a lack of activity.
Natta on the wrong end of a nice hook.
Taylor connects with a right hand. Natta shakes it off.
That's four minutes gone in the round.
Natta misses with a straight left.
Taylor tries to clinch but Natta is having none of it.
Natta is trying to avoid his opponent's strikes and get into the clinch.
Taylor lands a glancing blow to the side of Natta's head.
Natta throws a hook to the body but it doesn't connect.
Natta thows a left - swing and a miss!
As Natta tries to get set, Taylor tries to push him back and clinch up but Natta manages to avoid the attempt.
Taylor lunges in with an uppercut that skims his opponent's chin.
Taylor fails with an attempt to clinch.
Natta wants to counter the offense by Taylor and move into the clinch position.
Taylor lands with a straight right. Natta didn't see that one coming.
Natta looks to score with a jab to the body but Taylor is just out of range.
Taylor rushes Natta and pushes him back against the cage in a clinch.
Taylor blocks an uppercut.
Natta pulls guard.
Fantastic stuff here - a very entertaining period of action, which has drawn cheers from the crowd.
Taylor is frustrating his opponent with some stalling tactics from top position.
The crowd thankful this round is nearly over.
Natta is active off his back here, looking for submissions.
And that's the end of the fight!
Colby Taylor showed his dominance in that final round.
Well Taylor has outscored his opponent in every aspect of the fight today. Only a scarily incompetent judge or two will keep him from a well deserved win... Over to the ring announcer for the scorecards.
Ladies and gentlemen, after 5 rounds of action, we go to the scorecards for a decision.
Judge Eddie Farnsworth scores the fight 50:45
Judge Chad Campbell scores the fight 50:45
Judge Lou da Vinci scores the fight 50:45
In favor of your winner, by unanimous decision... Colby Taylor!
Colby Taylor retains his bantamweight title!
Our winner, Colby Taylor, made sure he spent some time buttering up the crowd during his post fight interview, which will no doubt bring him a few more fans.
|
|
|
|
|
|
|
|
|
|
|
|
|
|
|
|
|
|
|
|
|
|
|
| S |
C
A |
G |
S |
C
B |
G |
|
S |
C |
G |
|
energy
A | B |
|
hype
A | B |
|
pop
A | B |
|
mgr
A | B |
|
FIGHT
RATING
43% |
|
|
|
|
|
|
|
|
|
|
