 |
AFC #6 PBP Commentary |
Undercard bout
|
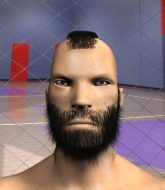
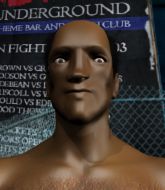
Coming up we have a welterweight MMA rules bout between Saheem Urman (ranked 3682 p4p, 5464 weight class) and Fighter Two (ranked 450 p4p, 563 weight class). The fight MMA fans around the world have waited their entire lives for!
 |
|
 |
| 177 cm
19
180
3 - 0 - 0 |
|
185 cm
19
175
1 - 0 - 0 |
BJJ Blue Belt
Brawler
Very strong |
|
BJJ Blue Belt
Excellent boxer
Determined |
|
| |
|
Ladies and gentlemen. This fight is 3 rounds, in the welterweight division.
Introducing the fighter to my left, fighting out of the red corner.
With a record of 3 - 0 - 0, fighting out of London, Saheem Urman!
And introducing the fighter to my right, fighting out of the blue corner.
With a record of 1 - 0 - 0, fighting out of Las Vegas, Fighter Two!
The judges for this bout are Paulsen Ambrosius, Paul Aken and Saam Ante.

The bell rings for round one and we are underway!
Two lands a powerful looking uppercut that connected with his opponent's jaw.
Two defending well as Urman loads up on a big left hand.
Two lands a glancing blow to the side of Urman's head.
Two moves into range and connects with a jab.
Two defends well against a solid takedown attempt from Urman.
Two stuffs a takedown. It's all about dictating where the fight takes place and Two wants it to stay on the feet.
Urman's hands are dropping dangerously low here and Two connects clean with a right hook that sends him down to one knee! Urman scrambles back to his feet.

Urman shoots in and gets a takedown into Two's guard.
Urman throws an elbow that misses. Two uses the momentum to reverse the position. He's now in Urman's guard. Nice move by Two!

The fans in attendance giving it up for the two fighters, who have really let it all hang out in the last minute or so!
Urman being controlled here, momentarily.
Urman trying to control the position.
Two stopping the sweep attempt from Urman.

That's one minute gone in the round.
Urman looking to control the pace of the fight rather than finish it.
Urman tries to land a sweep but no joy.
Urman is trying to keep Two in close.
Urman wants to sweep here but Two controlling him for the moment.
Urman is trying to keep Two in close.
Two trying to pass the guard but can't manage it just yet.

That's two minutes gone in the round.
The crowd are hurling abuse towards the fighters... You can hardly blame them though because there isn't a lot going on in the fight.
Two won't allow Urman to sweep him here.
Two is intent on slowing down the pace of the fight, simply looking to control.

The referee has stepped in and called for a break in the action. We'll restart on the feet.
Urman definitely looks more muscular than last time we saw him fight.
Two sizes up Urman with a pawing jab and scores with a straight right down the middle.
Urman looks to land a left hand but Two moved out of range nicely.
Urman drops his hands momentarily and Two takes advantage with a crisp shot to the head.
Urman changes levels and looks for a double leg takedown. Two tries to avoid it but Urman manages to keep hold of a leg and drag Two to the ground. Two escapes though and pops straight back up to his feet.
That's three failed takedown attempts in the round for Saheem Urman. That's going to take a lot out of him.
Urman misses with a straight right.
Two has used his reach advantage pretty well so far tonight.
Urman fails with the takedown
and Two cracks him with a counter punch right on the button.
Urman takes a jab right on the nose. That must have hurt but he shrugs his shoulders and looks to return the favor.
Two lands a powerful looking uppercut that connected with his opponent's jaw.
 Urman is rocked! Urman is rocked!
Urman swings away with a body shot that misses
and Two counters with a huge left! Urman is in big trouble! He's backing up but Two isn't giving him chance to recover. Under a barage of punches the ref has to step in to save Urman from any more damage. A dominating finish by Two!
Ladies and gentlemen, after 2:57 of round 1, we have a winner by way of TKO (Strikes). Fighter Two!
|
|
|
|
|
|
|
|
|
|
|
|
|
|
|
|
|
|
|
|
|
|
|
| S |
C
A |
G |
S |
C
B |
G |
|
S |
C |
G |
|
energy
A | B |
|
hype
A | B |
|
pop
A | B |
|
mgr
A | B |
|
FIGHT
RATING
41% |
|
|
|
|
|
|
|
Undercard bout
|
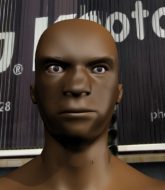
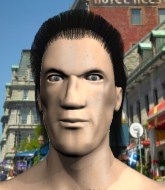
Coming up we have a welterweight MMA rules bout between Bjorn Lothbrok (ranked 5361 p4p, 3434 weight class) and Chris Zeal (ranked 553 p4p, 433 weight class). Zeal has chosen War eye as his entrance music. Both fighters look fresh as a daisy as they make their way towards the cage.
 |
|
 |
| 186 cm
19
175
1 - 0 - 0 |
|
165 cm
26
171
3 - 3 - 0 |
BJJ Blue Belt
Excellent boxer
Intelligent |
|
Decent wrestler
Counter fighter
Knockout power |
|
| |
|
Ladies and gentlemen. This fight is 3 rounds, in the welterweight division.
Introducing the fighter to my left, fighting out of the red corner.
With a record of 1 - 0 - 0, fighting out of Las Vegas, Bjorn Lothbrok!
And introducing the fighter to my right, fighting out of the blue corner.
With a record of 3 - 3 - 0, fighting out of Montreal, Chris Zeal!
The judges for this bout are Albert Achterberg, Saam Ante and Radbod Blank.
The bell rings for round one and we are underway!

Zeal tries to keep at a distance but Lothbrok has taken the fight into the clinch.
Zeal tries to pull guard but Lothbrok holds him up against the cage and eventually Zeal drops back down to his feet.
Lothbrok is struggling to control the position.
Lothbrok working aggressively here.
Zeal being controlled against the cage.
Zeal prevents a body shot from Lothbrok.
We've had a slow start to the round here - hopefully the action picks up.
Zeal is looking for a takedown up against the cage. Lothbrok gets underhooks though and prevents the takedown attempt.
Zeal jumps guard but Lothbrok stands there with Zeal around his waist. Zeal gives up and drops back to his feet. We remain in the clinch.
Bjorn Lothbrok has stuffed three takedown attempts in the round now. That's going to take a lot out of Chris Zeal.
Zeal blocks an uppercut.
Zeal blocks a couple of punches on the inside.
That's one minute gone in the round.
Lothbrok struggles to land a body shot inside as Zeal controls his hands.
Zeal blocks a body shot from Lothbrok.
Lothbrok throws a punch but it's blocked by Zeal.
Lothbrok makes some space for himself and lands an uppercut.
Zeal jumps guard but his hands slip and he falls flat on his back. Well, he's made himself look a right mug there, as Lothbrok walks away with a smile on his face. Zeal gets slowly back to his feet and shakes his head.
Lothbrok ducks low and lands a nice hook to the body of his opponent.
Lothbrok throws a nice hook to the body that draws an oooh from the crowd.
Bjorn Lothbrok is looking to keep the fight on the feet at all costs.
Lothbrok throws an overhand right that lands on Zeal's shoulder, as Zeal tries to avoid the shot.
Zeal takes a shot to the nose. Hopefully that hasn't broken it.
Lothbrok changes levels and scores with a jab to the body.
Zeal takes a body punch but keeps moving.
That's two minutes gone in the round.
Lothbrok with a body punch. A glancing blow.
Lothbrok jabs. That one connects to the head of his opponent.
This has been an exciting period of action!
Lothbrok misses the shot to the body.
Lothbrok stuns Zeal with a nice body shot, before stepping back out of range.
Lothbrok with a nice cross.
BOOM! Lothbrok lands a beautiful left hook that drops Zeal. Zeal tries to recover but Lothbrok is having none of it, landing more punishing shots from mount. One final crushing shot and Zeal lies motionless on the canvas. The fight is over!
Ladies and gentlemen, after 2:44 of round 1, we have a winner by way of TKO (Strikes). Bjorn Lothbrok!
Chris Zeal was interviewed post fight and said 'I got no time to jibba-jabba'.
|
|
|
|
|
|
|
|
|
|
|
|
|
|
|
|
|
|
|
|
|
|
|
| S |
C
A |
G |
S |
C
B |
G |
|
S |
C |
G |
|
energy
A | B |
|
hype
A | B |
|
pop
A | B |
|
mgr
A | B |
|
FIGHT
RATING
39% |
|
|
|
|
|
|
|
Undercard bout
|
Coming up we have a welterweight MMA rules bout between Lui Mora (ranked 3137 p4p, 6363 weight class) and Isoa Tawake (ranked 391 p4p, 604 weight class). Lui Mora had a look across the cage there at his opponent. He definitely means business
 |
|
|
| 177 cm
25
175
3 - 0 - 0 |
|
193 cm
18
185
1 - 2 - 0 |
Good wrestling
Basic striking
Hates pizza |
|
BJJ Blue Belt
Excellent MT
Determined |
|
| |
|
Ladies and gentlemen. This fight is 3 rounds, in the welterweight division.
Introducing the fighter to my left, fighting out of the red corner.
With a record of 3 - 0 - 0, fighting out of New York, Lui Mora!
And introducing the fighter to my right, fighting out of the blue corner.
With a record of 1 - 2 - 0, fighting out of Amsterdam, Isoa Tawake!
The judges for this bout are Radbod Blank, Aafke Stam and Albert Achterberg.
The bell rings for round one and we are underway!
Tawake swings wildly with a right hand that was never going to find it's target.
Tawake throws a nice outside leg kick.
Mora looks to land a left hand but Tawake moved out of range nicely.
Lui Mora seems to be the more aggressive standup fighter in this bout.
Mora misses with a lunging right hand
enabling Tawake to counter with a crisp jab.
Mora misses with a jab to the body
letting Tawake counter with a right hand.
Tawake misses with a hook
and Mora counters with a nice double leg into side control. Tawake won't be happy with that.
Mora taking a breather here.
Tawake tries to work a leg under to get back to half guard but Mora wriggles his own leg back out and remains in side control.
Tawake tries to control but end up mounted... ooooh, that's bad.
Mora sitting in mount, just looking to control for the moment.
Tawake really doesn't want to stay on the ground with Mora. If he can't get it back to his feet, it's only a matter of time before he'll be tapping out.
This has been an exciting period of action!
Tawake taking shots to the head.
That's one minute gone in the round.
Mora punishing his opponent with strikes.
Mora is still in mount, landing shots to his trapped opponent. Tawake can't stay in a position like this for much longer.
Tawake is wriggling around trying to escape.
Mora has his opponent pinned against the cage, landing some nasty ground and pound that is really making a bit of a mess out of Tawake's face.
Mora prevents Tawake from getting the reversal.
Mora tucks in and makes sure he doesn't lose the dominant position.
The fighters are pressed up against the cage, both looking to find a bit of space to work.
Mora lands a nice shot to the head.
The ref warns both fighters not to hold the cage as they work up against the meshing.
Mora tucks in and makes sure he doesn't lose the dominant position.
Mora has been looking to land a fair amount of strikes on the ground. He might be looking to soften his opponent up in order to work for a submission.
Tawake is hanging on here. He's in a desperate position.
That's two minutes gone in the round.
The referee warns Tawake that he has to improve his position here as he takes two more clean shots to the head.
Tawake is working to get back to half guard.
Mora scoring with strikes but Tawake is staying in there.
Tawake felt the need to train up his defensive grappling in the buildup to the fight. Presumably he was expecting to be in a difficult position like this, so let's see if he can get out of it.
The fans in attendance giving it up for the two fighters, who have really let it all hang out in the last minute or so!
Tawake is looking to get to half guard.
Mora controlling from mount.
The fighters are starting to get a bit slippery now, which will make submissions a bit more difficult.
Mora seems to have a rather negative gameplan on the ground. He seems keen to just score the takedown and hold down Tawake for as long as he can get away with.

That's three minutes gone in the round.
Tawake manages to regain half guard. Good work.
Tawake is not content to let Mora control the position.
Tawake slips a foot under and gets full guard. Nice work.
Mora wants to control from the top but Tawake keeps moving.
Tawake looking to sweep here. No luck so far.
Mora stays in close to Tawake's body and controls the position.
Tawake tries to land a sweep but no joy.

That's four minutes gone in the round.
Neither fighter has done anything of merit for a good minute or two here and the crowd are not happy about it.
Tawake trying to punch from his back but it's not doing any damage.
Tawake wants to sweep here but Mora controlling him for the moment.
Mora might be looking to lock onto one of his opponent's long limbs for a submission, whilst we're on the ground.
Mora with a nice head shot there.
Tawake tries to land a sweep but no joy.
Mora content to strike from guard, landing some decent shots.
Mora passes into half guard.
Mora has freed up his trapped foot and advances to mount.
Mora can't quite control the action as he would like just now, as Tawake is looking to escape.
Mora dominating with strikes here.
Tawake is trying desperately to improve position.
And that is the end of the round. The fighters go back to their corners.
Lui Mora dominated that round.
That's time! Back to the action!

Nice jab there from Tawake.
Tawake ducks down and throws a hook to the body.
Mora closes the distance but Tawake moves to the side
and Mora takes a counter punch right on the button for his troubles.
Mora shoots in for a double leg but Tawake sprawls well. That's going to sap some energy.
Mora looks to have improved his striking defense since last time we saw him fight.
A telegraphed takedown attempt from Mora is defended easily by Tawake.
We've had a slow start to the round here - hopefully the action picks up.
Tawake looks to score with a jab to the body but Mora is just out of range.
Mora shoots in but doesn't get the takedown
and Tawake counters with a straight right hand.
That's three failed takedown attempts in the round for Lui Mora. That's going to take a lot out of him.
That's one minute gone in the round.
Tawake lands an overhand right.
Mora throws a body punch but Tawake moves out of range.
Tawake bobs and weaves well there to avoid the strikes.
Mora misses with a body shot.
Mora shakes his hands off, looking to compose himself, but takes a jab to the jaw whilst he does it.
Nice takedown defense from Tawake. No joy for Mora on that attempt.
Nice uppercut there from Tawake.
Mora is rocked!
Mora misses with a takedown
and Tawake counters with a big left hand that crumples Mora! He was out before he hit the floor! Brutal knockout!
Ladies and gentlemen, after 1:46 of round 2, we have a winner by way of KO (Punch). Isoa Tawake!
Isoa Tawake thanked the fans post fight for their support.
|
|
|
|
|
|
|
|
|
|
|
|
|
|
|
|
|
|
|
|
|
|
|
| S |
C
A |
G |
S |
C
B |
G |
|
S |
C |
G |
|
energy
A | B |
|
hype
A | B |
|
pop
A | B |
|
mgr
A | B |
|
FIGHT
RATING
43% |
|
|
|
|
|
|
|
Undercard bout
|
Coming up we have a featherweight MMA rules bout between Aziz Mehamedov (ranked 3828 p4p, 3154 weight class) and Elim Garak (ranked 294 p4p, 247 weight class). Elim Garak told me before the fight that he's been watching a lot of DVDs so let's see if that helps him in this one! I can't wait to find out!
 |
|
 |
| 176 cm
20
155
1 - 0 - 0 |
|
170 cm
20
145
2 - 0 - 0 |
Good wrestling
Solid boxing
Cardio machine |
|
Excellent grappler
Counter fighter
Powerful |
|
| |
|
Ladies and gentlemen. This fight is 3 rounds, in the featherweight division.
Introducing the fighter to my left, fighting out of the red corner.
With a record of 1 - 0 - 0, fighting out of Sydney, Aziz Mehamedov!
And introducing the fighter to my right, fighting out of the blue corner.
With a record of 2 - 0 - 0, fighting out of Las Vegas, Elim Garak!
The judges for this bout are Radbod Blank, Paulsen Ambrosius and Wagner Zegers.
The bell rings for round one and we are underway!
Garak's hands are dropping dangerously low here and Mehamedov connects clean with a right hook that sends him down to one knee! Garak scrambles back to his feet.

Garak clinches with his opponent.

Garak has managed to pull guard. Let's see whether he can work an aggressive guard. It will also be interesting to see what tactics Mehamedov uses from the top position.
Mehamedov being controlled here momentarily.
The ref warns both fighters not to hold the cage as they work up against the meshing.
Garak trying to control the position.
Mehamedov is just sitting in guard, looking to avoid any submissions.

Garak has his foot on Mehamedov's thigh. He's trying to push off and get in position for a triangle, I think. Mehamedov works his way back into a safe position though.
Mehamedov definitely looks more muscular than last time we saw him fight.
We've had a slow start to the round here - hopefully the action picks up.
Garak working for a triangle but Mehamedov defends it easily.
Mehamedov passes easily into side control. Nice work.
That's one minute gone in the round.
Garak can't do much from the bottom here.
Garak tries to work a leg under to get back to half guard but Mehamedov wriggles his own leg back out and remains in side control.
Mehamedov controlling the position from side mount.
The ground and pound from Mehamedov seems to be hitting the mat more than his opponent.
Garak is letting Mehamedov control him for a moment.
Mehamedov continues to stall.
The fighters are pressed up against the cage, both looking to find a bit of space to work.
Garak is trying to get back to half guard.
That's two minutes gone in the round.
The crowd are showing their displeasure at the lack of action as loud boos ring out around the arena.
Garak is being controlled here.
Garak sneaks a leg under to get back to half guard.
Garak regains full guard. Nicely done.
Mehamedov's corner is telling him to maintain position.
Garak is looking for a guillotine. You can't force these things though and Mehamedov defends well.
Garak has a loose triangle. He'll be looking to tighten that up but Mehamedov can see exactly what he's planning and manages to posture up and free himself.
Mehamedov is stalling in the full guard.
That's three minutes gone in the round.
Garak is working actively off his back, looking to secure an arm or perhaps work for a triangle.
Mehamedov with a couple of shots to the head there. Not particularly brutal.
Mehamedov controls from within his opponent's guard.
Garak is trying to control the position from the bottom.
That's four minutes gone in the round.
The crowd are showing their displeasure at the lack of action as loud boos ring out around the arena.
Mehamedov is just sitting in guard, looking to avoid any submissions.
Mehamedov avoids a guillotine attempt easily.
Mehamedov throws a strike but Garak rolls with it and manages to sweep. Now he's in guard on top.
Garak loading up with the ground and pound but he's missing more than he's landing in this flurry.
Garak thinks about going for a leg but decides against it, in order to maintain the position.
Boooooooooooooooooooo!!! God, this has been a terrible round. Come on you two, sort yourselves out!
Garak postures up in Mehamedov's guard and throws a big left but Mehamedov blocks it.
Mehamedov lands a beautiful sweep and he's now moved into his opponent's guard.

And that is the end of the round. The fighters go back to their corners.
A close round but Elim Garak will probably get the nod.
The fighters' corners scream their final instructions, as the referee calls time. Here we go, back to the action!
Mehamedov looks to throw the jab but Garak is out of range.
Garak steps in looking to clinch after the strikes miss from Mehamedov.
Mehamedov cracks Garak with a good jab.
Mehamedov throws a body shot but no joy.
Garak feints the counter takedown.
Mehamedov connects with a single shot there.
Aziz Mehamedov seems to be the more aggressive standup fighter in this bout.
Garak on the wrong end of an overhand right that came out of nowhere.
 It looks like Elim Garak has been cut. It looks like Elim Garak has been cut.
This fight brought to you by 5M nutrition - it's mmmmm tasty. Nice jab by Mehamedov.
 Garak is rocked! Garak is rocked!
Mehamedov is really dominating this fight. Is there anything that Garak can do to turn this around?
Garak gets his head snapped back by a nice shot there.
Garak is still on wobbly legs! Can Mehamedov finish him?
Mehamedov takes a swing at Garak's ribcage but misses.
A big left from Mehamedov misses.
Mehamedov misses with a straight right.
Garak seems to have recovered his senses.
Garak fakes high and shoots in for a takedown but Mehamedov avoids it really well and circles away.
That's one minute gone in the round.

Mehamedov throws a big overhand right that connects, sending Garak tumbling to the canvas!
Garak is trying to keep Mehamedov in close.
Mehamedov seems content to control from guard here. He's going to have to remain active though if he doesn't want to get stood back up.
That's two minutes gone in the round.
Garak is working actively off his back, looking to secure an arm or perhaps work for a triangle.
Mehamedov seems content to control from guard here. He's going to have to remain active though if he doesn't want to get stood back up.
That's three minutes gone in the round.
Garak working from the bottom, still in full guard. He's managed to get a loose triangle. Mehamedov doesn't seem to be doing much to defend here, obviously he feels comfortable in the position. Mehamedov manages to throw the legs off his shoulder and he's back into guard - no problem.
Mehamedov is just sitting in guard, looking to avoid any submissions.
More hug and hope from Mehamedov.
Mehamedov wants to pass the guard but Garak is keeping the position.
The referee has decided to stand the fighters back up, so we'll restart on the feet.
Mehamedov scores with a straight right hand, right through his opponent's guard.
That's four minutes gone in the round.
Neither fighter has done anything of merit for a good minute or two here and the crowd are not happy about it.
A swing and a miss from Mehamedov.
Mehamedov lands a pitter patter jab to the forehead of his opponent.
Mehamedov takes a swing at Garak's ribcage but misses.
A cross from Mehamedov lands.
Mehamedov lands a jab to the nose.
Garak displays some good footwork, moving neatly out of range as Mehamedov throws out the jab.
A jab from Mehamedov misses.
Garak is definitely looking for the counter takedowns here.
A jab from Mehamedov misses.
Garak on the wrong end of a nice jab.
Garak is looking to clinch but Mehamedov is avoiding it.
Garak wants to clinch up but Mehamedov keeps it at a distance.
Mehamedov throws a jab when Garak was well out of range.
And that is the end of the round. The fighters go back to their corners.
Aziz Mehamedov dominated that second round.
The cut man is working on Elim Garak's cut.
That's time! Back to the action! Let's hear some noise people - this is the final round!

Mehamedov throws a hook but Garak blocks it.
Mehamedov moving in and out of range nicely, whilst landing the scoring shot.
Mehamedov fakes low and throws an overhand right that catches Garak on the side of the head.
Garak ducks under an overhand right and circles away with a smile on his face.
Garak uses good head movement to avoid the hook from Mehamedov.
Aziz Mehamedov is winning the standup battle so far.
A telegraphed right hand from Mehamedov misses the target.
Garak on the wrong end of a decent looking cross there.
Garak doesn't manage to clinch there - Mehamedov circles away.
A little feinted left hand from Mehamedov on the counter but he doesn't commit to it.
We've had a slow start to the round here - hopefully the action picks up.
Mehamedov throws out a token jab with nothing on it.
Mehamedov misses with a looping right.
Mehamedov scores with a crisp jab that stopped Garak in his tracks.
Mehamedov looks to score with a jab to the body but Garak is just out of range.
That's one minute gone in the round.
Mehamedov throws a hook but Garak blocks it.
Mehamedov misses with a lunging right hand
and Garak counters with a takedown into side control! That could mean trouble for Mehamedov!
Mehamedov struggling a bit here.
Mehamedov stops Garak from passing to mount.
Garak thinks about going for a far side armbar but bails out and retains the dominant position instead.
Garak scores with a couple of nice shots to the head there. The referee takes a look at Mehamedov to see if he's OK.
Mehamedov tries to buck Garak off but Garak is having none of it.
That's two minutes gone in the round.
A lull in the action here.
Garak wants to control but Mehamedov is keeping him busy.
Garak throws a knee to the body but it doesn't do much damage.
Mehamedov is looking for a sweep.
In the pre-fight buildup videos we saw Garak working his ground and pound in the gym. He isn't landing a great percentage of his ground strikes so far though.
Mehamedov can't do much from the bottom here.
Mehamedov taking a bit of punishment here - Garak scoring with strikes.
Garak in side control, throwing shots but Mehamedov defends.
Mehamedov struggling a bit here.
That's three minutes gone in the round.
Mehamedov dodges the ground and pound from Garak.
Mehamedov gets one leg under and gets the fight to half guard.
Mehamedov wants to control but Garak is keeping busy.
Garak sitting in half guard, looking to land shots. Mehamedov defending well though.
Garak missing with the ground and pound from half guard.
Garak is nestled in close to Mehamedov, controlling him well. He's worked in a nice elbow to the side of the head as well, for good measure.
Garak wants to control but Mehamedov is keeping him busy.
Garak wants to free his trapped foot but Mehamedov is holding on for dear life with his legs.
Garak is trying to work for a kimura but Mehamedov is defending well.
That's four minutes gone in the round.
Ground and pound from Garak.
Garak wants to pass the guard but Mehamedov is defending well.
Mehamedov is defending against the submission attempts here by Garak.
Mehamedov is trying to control but can't.
And that's the end of the fight!
I would just about give that final round to Elim Garak.
I think Garak has won this one but let's see whether the judges agree with me. Over to the ring announcer for the scorecards.
Ladies and gentlemen, after 3 rounds of action, we go to the scorecards for a decision.
Judge Radbod Blank scores the fight 28:28
Judge Paulsen Ambrosius scores the fight 28:28
Judge Wagner Zegers scores the fight 28:28
The fight is ruled a draw!
|
|
|
|
|
|
|
|
|
|
|
|
|
|
|
|
|
|
|
|
|
|
|
| S |
C
A |
G |
S |
C
B |
G |
|
S |
C |
G |
|
energy
A | B |
|
hype
A | B |
|
pop
A | B |
|
mgr
A | B |
|
FIGHT
RATING
34% |
|
|
|
|
|
|
|
Undercard bout
|
Coming up we have a lightweight MMA rules bout between Stefano Del Monte (ranked 2625 p4p, 5462 weight class) and Ragnar Lothbrok (ranked 328 p4p, 508 weight class). Over to our ring announcer for the fighter introductions!
 |
|
 |
| 180 cm
26
160
5 - 1 - 0 |
|
183 cm
19
160
1 - 0 - 0 |
BJJ Blue Belt
Excellent boxer
Very strong |
|
BJJ Blue Belt
Excellent boxer
Determined |
|
| |
|
Ladies and gentlemen. This fight is 3 rounds, in the lightweight division.
Introducing the fighter to my left, fighting out of the red corner.
With a record of 5 - 1 - 0, fighting out of Amsterdam, Stefano Del Monte!
And introducing the fighter to my right, fighting out of the blue corner.
With a record of 1 - 0 - 0, fighting out of Las Vegas, Ragnar Lothbrok!
The judges for this bout are Saam Ante, Albert Achterberg and Aafke Stam.
The bell rings for round one and we are underway!
The fighters circling - Lothbrok throws out the jab but it was never going to land.
Del Monte bobs and weaves and unloads with a good uppercut.
Lothbrok swings for the body but Del Monte moves out of range.
A looping hook to the body misses from Lothbrok. Del Monte does a little dance to reset his feet.
Del Monte is looking to counter the offense by Lothbrok and move into the clinch.
Del Monte stuns Lothbrok with a nice body shot, before stepping back out of range.
Del Monte moves out of range as Lothbrok strikes.
Lothbrok uses some good footwork to avoid the body shot by Del Monte.
Del Monte throws a shot to the body.
Lothbrok catches Del Monte with a nice straight right. He seems pissed - ooooh, it's on now! On like donkey kong!
Del Monte lands with a straight right. Lothbrok didn't see that one coming.
Del Monte lands with a right hand.
Del Monte throws a big shot that misses.
Del Monte misses with an uppercut.
The crowd cheering loudly, showing their appreciation for the quality fight we're seeing here.
Lothbrok fakes a jab and then connects with a hook.
Nice defenses there by Lothbrok.
Nice uppercut there from Del Monte.
Lothbrok lands a jab to the head.
That's one minute gone in the round.
Lothbrok misses with an uppercut. Del Monte saw that one coming.
Del Monte cracks Lothbrok with a good jab.
Del Monte throws a body punch but Lothbrok moves out of range.
Lothbrok steps to the side to avoid the strikes from Del Monte.
Del Monte on the wrong end of an overhand right that came out of nowhere.
Del Monte misses with a hook.
Lothbrok scores with a sloppy punch to the body. Not much technique there but it did the business.
A lazy left from Del Monte finds it's target.
Lothbrok lands with an overhand left.
Lothbrok loads up on a big right hand but Del Monte slips the punch.
Lothbrok ducks low and lands a nice hook to the body of his opponent.
Del Monte keeping a good distance there, avoiding the body shot.
Del Monte sizes up Lothbrok with a pawing jab and scores with a straight right down the middle.
Del Monte looks to be in better condition than last time we saw him fight. Obviously he's been working hard on his cardio.
The crowd are loving this. Great action here.
Del Monte misses with a jab to the body
and Lothbrok holds on and brings the fighters into a clinch.
Lothbrok lands punches inside but they're not really causing much damage.
That's two minutes gone in the round.
Lothbrok lands a left hand that snaps the head of Del Monte backwards.
Del Monte fails to pull guard.
Lothbrok makes some space for himself and lands an uppercut.
A short left from Lothbrok.
A short right from Lothbrok on the inside.
Lothbrok lands a body shot.
Del Monte tries to jump guard but he falls flat on his backside. Lothbrok smiles and moves away.
Del Monte misses with a right hand
and Lothbrok counters with a crisp hook to the side of the head.
Del Monte scores with a decent looking hook.
Del Monte drops his hands and takes a jab to the jaw for his troubles.
A punch lands to the side of Del Monte 's head but he takes it in his stride.
Lothbrok misses with a few strikes there.
Del Monte connects with a nice looking jab.
Del Monte gets tackled into the cage by Lothbrok. Lothbrok maintains the clinch.
Lothbrok stays in close to his opponent and throws a right hand to the body.
Del Monte fails to pull guard.
That's three failed takedown attempts in the round for Stefano Del Monte. That's going to take a lot out of him.
Lothbrok working some nice short punches in the clinch.
Del Monte is trying to pull guard but being pressed up against the cage enables Lothbrok to keep the fight standing.
That's three minutes gone in the round.
A right hook to the body lands for Lothbrok.
Del Monte jumps guard but Lothbrok stands there with Del Monte around his waist. Del Monte gives up and drops back to his feet. We remain in the clinch.
Del Monte tries to pull guard but Lothbrok won't allow it.
Del Monte tries to pull guard but Lothbrok holds him up against the cage and eventually Del Monte drops back down to his feet.
Del Monte fails to pull the fight into his guard.
Del Monte tries to pull guard but Lothbrok forces him back to his feet, against the cage.
Del Monte jumps guard but Lothbrok turns him against the cage and keeps the fight standing.
Lothbrok lands an uppercut.
Lothbrok content to slow the pace in the clinch.
Lothbrok lands punches inside but they're not really causing much damage.
Del Monte is trying to pull guard but Lothbrok turns him against the cage and we stay in the clinch.
Lothbrok presses Del Monte against the cage and delivers a mid-strength body shot.
Lothbrok lands with a short shot to the head.
Del Monte tries to jump guard but he falls flat on his backside. Lothbrok smiles and moves away.
Del Monte swings wildly with a right hand that was never going to find it's target.
A little jabbing left from Lothbrok on the counter but it doesn't find it's target.
Lothbrok jabs at Del Monte's body.
Lothbrok avoids the body shot from Del Monte.
Lothbrok takes an uppercut right on the jaw but it doesn't phase him.
That's four minutes gone in the round.
Del Monte uses good footwork to get in and out, landing a nice hook.
Fantastic stuff here - a very entertaining period of action, which has drawn cheers from the crowd.
Lothbrok scores with a straight right hand, right through his opponent's guard.
Del Monte has his hands up protecting his head but a hook from Lothbrok finds it's way round the side to connect with Del Monte's head.
Lothbrok lands with an uppercut that bounces Del Monte off the cage and back into range.
Lothbrok lands with a hook. Del Monte tried to avoid it but it clipped the top of his head.
Del Monte thows a left - swing and a miss!
Lothbrok looked like he wanted to counter with a punch but didn't throw it.
Lothbrok misses with a looping left.
Del Monte uses decent footwork to sidestep a right hand from Lothbrok.
A big right from Del Monte misses.
Del Monte misses with a hook.
A big left from Del Monte misses.
Lothbrok throws out a counter right but Del Monte avoids it with no problem.
The crowd applaud the fighters' efforts here as the round comes to an end.
Del Monte misses with a wild body shot.
Nice defenses there by Lothbrok.
Lothbrok now looks to counter with a shot at the body.
Lothbrok moves out of range as Del Monte strikes.
Lothbrok looked like he wanted to counter with a punch but didn't throw it.
Del Monte moves his head to the side to avoid a jab but walks straight into a cross.
And that is the end of the round. The fighters go back to their corners.
Ragnar Lothbrok dominated that round.
The corners get their ten second warning. Both fighters stand from their stools and stare each other down, ready to get back to the action.
Lothbrok misses with a hook. Del Monte ducked under it nicely.
Lothbrok keeping a good distance there, avoiding the body shot.
Lothbrok connects with a lovely right hand, straight down the pipe.
Del Monte misses the shot to the body.
Lothbrok throws the left hand but Del Monte avoids the punch easily.
Del Monte throws a hook to the body but it doesn't connect.
Del Monte uses good head movement to avoid the hook from Lothbrok.
Del Monte throws a hook but Lothbrok blocks it.
A jab from Del Monte does it's job there.
Lothbrok throws a lazy right hand but Del Monte sees it coming a mile off and sidesteps it easily.
Del Monte looks to score with a jab to the body but Lothbrok is just out of range.
We've had a slow start to the round here - hopefully the action picks up.
Lothbrok slips under a jab from Del Monte.
Del Monte avoids the body shot from Lothbrok.
The fighters circling - Lothbrok throws out the jab but it was never going to land.
Lothbrok fakes and then throws a beautiful body shot. Del Monte looks a bit winded and takes a step backwards to take a breath.
Del Monte gets cracked with a nice right hand there by Lothbrok.
That's one minute gone in the round.
Lothbrok has his hands up protecting his head but a hook from Del Monte finds it's way round the side to connect with Lothbrok's head.
Lothbrok slips a jab from Del Monte.
It seemed like Lothbrok was going to counter with the hook but didn't fully commit to it.
Lothbrok ducks under an overhand right and circles away with a smile on his face.
Del Monte throws an overhand right that lands on Lothbrok's shoulder, as Lothbrok tries to avoid the shot.
A looping hook to the body misses from Del Monte. Lothbrok does a little dance to reset his feet.
Del Monte throws a body punch but Lothbrok moves out of range.
Del Monte misses with a hook to the body
and Lothbrok counters with a shot to the ribs. That looked like it hurt.
Del Monte avoids the body shot from Lothbrok.
Ragnar Lothbrok seems to be getting the better of the standup.
Lothbrok lands a right hook to the body.
Stefano Del Monte seems to be the more aggressive standup fighter in this bout.
Del Monte lands a body shot.
Lothbrok has been the more effective fighter overall so far.
Lothbrok lands a beauty of a right hand that gets the crowd cheering.
Lothbrok defending well as Del Monte loads up on a big left hand.
Del Monte takes a shot to the eye socket. That's gotta hurt.
A jab from Del Monte misses.
That's two minutes gone in the round.
Good exchange - Lothbrok coming out on top.
This has been an exciting period of action!
Del Monte ducks under an overhand right and circles away with a smile on his face.
Del Monte thuds a left hand into Lothbrok's body.
Del Monte uses good head movement to avoid the hook from Lothbrok.
Lothbrok blocks a jab.
Lothbrok scores with a decent looking hook.
Lothbrok cracks Del Monte with a nice right hand that draws applause from the crowd.
A slow jab from Lothbrok misses its intended target.
Del Monte lands with a straight right. Lothbrok didn't see that one coming.
Lothbrok paws at his opponent with the jab and then lunges in with a straight, right on the button.
Del Monte is rocked!
Lothbrok uses good footwork to get in and out and land a nice right hand before Del Monte has time to react.
Oh Del Monte is still all over the place! His legs are completely gone! Will he be able to recover?!!
Del Monte throws an ugly left hook that misses
and Lothbrok counters with a lovely straight right hand!
Del Monte keeping his hands up high there, blocking the jab from Lothbrok.
Del Monte is trying to close the distance and clinch up, after that failed offence from Lothbrok.
Del Monte throws a shot from downtown. Lothbrok moves away and avoids it.
It seemed like Lothbrok was going to counter with the hook but didn't fully commit to it.
A jab from Del Monte misses.
We've been informed that Lothbrok has been working hard on his conditioning in the buildup to the fight.
That's three minutes gone in the round.
Lothbrok moving in and out of range nicely, whilst landing the scoring shot.
Lothbrok throws a hard body shot but it just misses.
A looping hook to the body misses from Del Monte. Lothbrok does a little dance to reset his feet.
The fighters circling - Del Monte throws out the jab but it was never going to land.
Lothbrok pounces like a tiger and cracks Del Monte with a vicious hook! Del Monte is down but not out! Lothbrok follows up with more strikes forcing the ref to jump in and stop it!
Ladies and gentlemen, after 3:22 of round 2, we have a winner by way of TKO (Punches). Ragnar Lothbrok!
|
|
|
|
|
|
|
|
|
|
|
|
|
|
|
|
|
|
|
|
|
|
|
| S |
C
A |
G |
S |
C
B |
G |
|
S |
C |
G |
|
energy
A | B |
|
hype
A | B |
|
pop
A | B |
|
mgr
A | B |
|
FIGHT
RATING
76% |
|
|
|
|
|
|
|
Undercard bout
|
Dylan Batt had a terrible time trying to make weight. After initially coming in at 185.8, he had two hours to make the official fight weight. Stepping on the scales for a second time, he still failed to make the required weight and after much deliberation, his fight with Gunt Jernit was cancelled. |
|
|
|
Undercard bout
|
Coming up we have a featherweight MMA rules bout between Massimo Berretta (ranked 2521 p4p, 3109 weight class) and Frank Marino (ranked 205 p4p, 243 weight class). The crowd giving both fighters a great reception on their way into the arena. That's good to see.
 |
|
 |
| 175 cm
26
149
5 - 0 - 0 |
|
179 cm
26
153
5 - 2 - 0 |
Good wrestling
Solid boxing
KO power |
|
BJJ White Belt
Excellent boxer
Powerful |
|
| |
|
Ladies and gentlemen. This fight is 3 rounds, in the featherweight division.
Introducing the fighter to my left, fighting out of the red corner.
With a record of 5 - 0 - 0, fighting out of Montreal, Massimo Berretta!
And introducing the fighter to my right, fighting out of the blue corner.
With a record of 5 - 2 - 0, fighting out of New York, Frank Marino!
The judges for this bout are Aafke Stam, Paulsen Ambrosius and Daniel Blasius.
The bell rings for round one and we are underway!
Berretta is looking to clinch but Marino is avoiding it.
Marino swings away with a counter right hand but no contact made.
Berretta tries to clinch but is not successful on this occasion.
Berretta misses with a jab to the body
and Marino counters with a straight right hand.
Berretta tries to clinch but Marino moves out of range.
Berretta ducks down and throws a hook to the body but Marino moves away.
Marino tries to land with a swinging hook to the body but Berretta was well out of range. Poor timing from Marino.
Berretta throws a jab when Marino was well out of range.
Marino is looking for the big counter here.
Marino throws a hook but Berretta avoids it easily.
Berretta tries to clinch but Marino moves out of range.
We've had a slow start to the round here - hopefully the action picks up.
Marino avoids the clinch attempt nicely.
Marino is clearly trying to counter these attacks from Berretta with a body shot.
Marino works the jab nicely.
Berretta tries to close the distance and clinch up against the cage but Marino paws at him with a jab and circles away.
Marino avoids the clinch attempt nicely.
Berretta has his head slapped from side to side by a 3 punch combination. That must have hurt him.
That's one minute gone in the round.
Berretta tries to land with a swinging hook to the body but Marino was well out of range. Poor timing from Berretta.
Marino looks like he wants to counter punch here.
Marino looks more muscular than last time we saw him. He must have been on the weights.
Berretta throws a right hand that misses
and Marino counters with a two punch combo.
Marino misses with a hook.
Marino comes forward and lands a shot to the body, then darts back out of range.
Marino avoids the body shot from Berretta.
Marino is clearly trying to counter these attacks from Berretta with a body shot.
Berretta doesn't manage to clinch there - Marino circles away.
Marino lands with an uppercut that bounces Berretta off the cage and back into range.
Berretta throws a body punch but Marino moves out of range.
Marino uses good footwork to avoid the strikes from Berretta.
Marino throws a shot to the body.
Berretta is looking to clinch.
Berretta comes forward and lands a shot to the body, then darts back out of range.
That's two minutes gone in the round.
Berretta darts in trying to clinch
enabling Marino to counter with a crisp jab.
This is a great period of action - very entertaining stuff!
Marino bobs and weaves well there to avoid the strikes.
Marino staying out of range there.
Berretta fails with an attempt to clinch.
Berretta defending well as Marino loads up on a big left hand.
Marino avoids the body shot from Berretta.
Berretta wants to clinch up but Marino keeps it at a distance.
Berretta tries to clinch up.
Berretta fakes high and swings low for a body shot but Marino manages to avoid it.
Berretta is looking to clinch.
That's three minutes gone in the round.
Marino swings away but doesn't land with a series of punches.
Marino lands a slapping body shot.
Berretta fakes a jab and then connects with a hook.
Marino circles away from the clinch attempt.
Marino punishes Berretta's body with a nice straight punch.
Berretta wants to clinch up but Marino keeps it at a distance.
Marino looked like he wanted to counter with a punch but didn't throw it.
Berretta misses with a body shot.
Marino uses good footwork to avoid the strikes from Berretta.
Marino works over Berretta's head and body with a nice combination.
Marino defending well as Berretta loads up on a big left hand.
Marino swings away with a counter right hand but no contact made.
Berretta wants to clinch
and Marino counters with a nice uppercut.
Berretta looks to be in better condition than last time we saw him fight. Obviously he's been working hard on his cardio.
Berretta fails in his attempt to clinch.
That's four minutes gone in the round.
This is a great period of action - very entertaining stuff!
Marino connects with a hook to the side of his opponent's head.
Berretta moving in and out of range nicely, whilst landing the scoring shot.
Berretta closes the distance looking to clinch
and Berretta takes a counter punch right on the button for his troubles.
Berretta is rocked!
Berretta tries to clinch but Marino moves away
and Marino counters with a right hand to the body.
Marino misses with a body shot.
Berretta wants to take advantage of his opponent's missed offense by moving into the clinch.
Berretta drops his hands and takes a jab to the jaw for his troubles.
Oh Berretta is still all over the place! His legs are completely gone! Will he be able to recover?!!
Marino misses with a looping left.
Berretta seems to have got his legs back now.
Marino blocks a jab.
Marino misses the shot to the body.
Marino will need to tighten up his combinations if he doesn't want to gas himself out, swinging at thin air.
And that is the end of the round. The fighters go back to their corners.
Frank Marino dominated that round.
The fighters' corners scream their final instructions, as the referee calls time. Here we go, back to the action!
Berretta wants to clinch but Marino slips to the side
and Marino counters with a straight right hand.
Berretta swings and misses with a hook to the body.
Berretta cracks a nice hook into Marino's ribs.
Marino goes to the watering hole and comes back with a big thumbs up from the judges as he scores a three punch combo.
Berretta has not gone for a single takedown so far in this fight, which seems like a very strange tactic when you consider that he has the superior wrestling and BJJ.
Berretta misses with an uppercut. Marino saw that one coming.
Berretta keeping his hands up high there, blocking the jab from Marino.
Marino gets cracked there but stands up to it.
Marino tries to land with a swinging hook to the body but Berretta was well out of range. Poor timing from Marino.
Berretta swings for the body but Marino moves out of range.
And an attempted straight right on the counter from Marino! But no joy.
We've had a slow start to the round here - hopefully the action picks up.
Marino changes levels and scores with a jab to the body.
Berretta tries to clinch there but Marino circles away.
Marino let fly with a counter punch to the body but it didn't land.
Marino connects with a jab and follows up with a big overhand right! Oh that's hurt Berretta! He's out on his feet! Marino rushes in and drops Berretta with another big right hand, forcing the referee to stop the fight!
Ladies and gentlemen, after 1:58 of round 2, we have a winner by way of TKO (Punches). Frank Marino!
A less than humble Frank Marino misjudged his post fight interview somewhat and came across a little too arrogant whilst trying to hype up his own abilities.
|
|
|
|
|
|
|
|
|
|
|
|
|
|
|
|
|
|
|
|
|
|
|
| S |
C
A |
G |
S |
C
B |
G |
|
S |
C |
G |
|
energy
A | B |
|
hype
A | B |
|
pop
A | B |
|
mgr
A | B |
|
FIGHT
RATING
51% |
|
|
|
|
|
|
|
Co-main event
|
Coming up we have a middleweight MMA rules bout between Nicholas Spence (ranked 2475 p4p, 2126 weight class) and Kai Gold (ranked 319 p4p, 281 weight class). Spence comes to the cage accompanied by Flashpoint. These two fighters really are very evenly matched on the feet - it will be fascinating to see who can assert themselves in that aspect of the fight.
 |
|
 |
| 189 cm
26
196
4 - 0 - 0 |
|
186 cm
19
198
3 - 0 - 0 |
Decent wrestler
Counter fighter
Cardio machine |
|
Good wrestler
Brawler
Good gas tank |
|
| |
|
Ladies and gentlemen. This fight is 3 rounds, in the middleweight division.
Introducing the fighter to my left, fighting out of the red corner.
With a record of 4 - 0 - 0, fighting out of Montreal, Nicholas Spence!
And introducing the fighter to my right, fighting out of the blue corner.
With a record of 3 - 0 - 0, fighting out of Montreal, Kai Gold!
The judges for this bout are Albert Achterberg, Radbod Blank and Daniel Blasius.
The bell rings for round one and we are underway!
Gold connects with a jab.
Spence punishes Gold's body with a nice straight punch.
Gold throws out a loose jab but Spence uses good head movement to avoid it.
Spence closes the distance and pushes Gold back into the cage.
Spence gets double underhooks to prevent a takedown attempt from Gold.
Spence with an attempt at a knee that misses.
Gold tries to work over Spence's body with a swooping hook but it only glances the target.
The two fighters are working to gain dominance in the clinch.
Gold throws a punch but it's blocked by Spence.
Spence misses with a knee strike.
We've had a slow start to the round here - hopefully the action picks up.
Gold takes a knee right on the jaw!
It looks like Kai Gold has been cut.
Gold is working hard here but doesn't seem to be able to control effectively, up against the cage.
Gold goes for a body shot but it's blocked.
Gold misses with a hook to the ribs.
That's one minute gone in the round.
Gold tries to stall but Spence uses the opportunity to gain a better position.
Gold wants a takedown but no success here.
Gold lands a left hand that snaps the head of Spence backwards.
 It looks like Nicholas Spence has been cut. It looks like Nicholas Spence has been cut.
Spence tries a knee to the head but he's missed.
Gold looks more muscular than last time we saw him. He must have been on the weights.
Spence lands a knee to the head there! That was nasty!
Gold has picked Spence up - he's going for a ride! Gold dumps his opponent to the mat with a thud and settles into half guard.
Gold looks towards his corner to check for any instructions. The corner give him nothing to work with, so he cracks Spence with a short hammerfist. I guess that's as good as any advice he could get in this position.
Spence is doing well to control the position and prevent Gold from advancing to side control.
Gold misses with a head shot. Spence uses the momentum to regain guard.
Gold trying to control but Spence is working from the bottom.
Spence looks to be in better condition than last time we saw him fight. Obviously he's been working hard on his cardio.
Spence on his back here. We all know that wrestlers don't like being on their back so let's see if Spence tries to get out of the position.
Gold works over Spence with some ground and pound from guard.
That's two minutes gone in the round.
Gold lands a couple of digs.
Spence working the defensive guard well to avoid strikes from Gold.
Spence has control of Gold's left arm, preventing Gold from doing any damage.
Gold missing there with some ground and pound from the guard.
Gold sneaks a leg through and gets to half guard. That was like a knife through butter how easily he passed Spence's guard.
Fantastic stuff here - a very entertaining period of action, which has drawn cheers from the crowd.
Gold thows a wild elbow that connects with the canvas.
Gold missing with the ground and pound from half guard.
Gold tries to pass to full mount but Spence defends it.
Spence is trying to maintain the position but Gold is very close to passing his half guard.
Gold drops an elbow to the side of Spence's head.
That's three minutes gone in the round.
Gold throwing shots but Spence is blocking nicely.
Spence keeping his head moving to avoid the ground and pound.
Gold not landing any meaningful shots this time.
Gold throwing shots but Spence is blocking nicely.
Gold throwing punches and elbows but they're not doing any damage.
Gold takes advantage of the dominant position to land a couple of big hammer fists.
Gold working the head and body with strikes.
Spence is trying to defend against the ground and pound but Gold scores with a couple of nice shots.
Gold thows a huge punch but Spence dodges it nicely.
Gold thumps the canvas. Not on purpose obviously - he just missed Spence's head.
Gold thows a wild elbow that connects with the canvas.
Gold is looking to pass the guard... He's managed it - he's now in full mount!
Gold has the superior BJJ but he's also working some ground strikes into his gameplan.
Gold looking to finish Spence with some ground and pound. This is bad for Spence!
That's four minutes gone in the round.
Gold lands a big elbow - Spence is in trouble! More strikes from the mount and Spence is forced to tap out!
Ladies and gentlemen, after 4:28 of round 1, we have a winner by way of Submission (Strikes). Kai Gold!
A pretty intense looking Kai Gold took the opportunity post-fight to ask for a shot at the title.
Nicholas Spence was interviewed post fight and said 'Destiny is that which we are drawn towards and fate is that which we run into'.
|
|
|
|
|
|
|
|
|
|
|
|
|
|
|
|
|
|
|
|
|
|
|
| S |
C
A |
G |
S |
C
B |
G |
|
S |
C |
G |
|
energy
A | B |
|
hype
A | B |
|
pop
A | B |
|
mgr
A | B |
|
FIGHT
RATING
38% |
|
|
|
|
|
|
|
Main event
|
Coming up we have a light heavyweight MMA rules bout between Miles Levesque (ranked 3371 p4p, 2466 weight class) and Michael Murdoch (ranked 477 p4p, 377 weight class). Over to our ring announcer for the fighter introductions!
 |
|
 |
| 194 cm
20
210
1 - 0 - 0 |
|
190 cm
25
215
3 - 1 - 0 |
BJJ Brown Belt
Basic striking
Cardio machine |
|
BJJ Brown Belt
Brawler
Granite chin |
|
| |
|
Ladies and gentlemen. This fight is 3 rounds, in the light heavyweight division.
Introducing the fighter to my left, fighting out of the red corner.
With a record of 1 - 0 - 0, fighting out of Montreal, Miles Levesque!
And introducing the fighter to my right, fighting out of the blue corner.
With a record of 3 - 1 - 0, fighting out of Helsinki, Michael Murdoch!
The judges for this bout are Aafke Stam, Saam Ante and Radbod Blank.
The bell rings for round one and we are underway!
Murdoch doesn't manage to clinch there - Levesque circles away.
Murdoch tries to clinch up.
Levesque closes the distance and looks for a trip takedown... aaaand he's got it - Levesque lands in his opponent's guard.
Levesque is pushing down on Murdoch's leg trying to pass to half guard. Murdoch is fighting to maintain full guard but Levesque has managed to sneak the leg through.
Murdoch has found himself in a tricky position here. He's been working his transitions in training so let's see if he can work his way out of it.

Murdoch is defending against the submission attempts here by Levesque.
Murdoch wants to get back to full guard.
Levesque is looking for a kimura. It's going to be difficult to finish that from half guard though and Murdoch defends it well.
Levesque is trying to work for a kimura but Murdoch is defending well.
We've had a slow start to the round here - hopefully the action picks up.
Murdoch trying to control from the bottom.
Murdoch won't allow Levesque to pass to mount.
That's one minute gone in the round.
Murdoch moves his hips nicely and gets into full guard.
Murdoch throwing his legs up looking for a triangle.
Murdoch looking to control.
Levesque prevents Murdoch from getting back to his feet.
Levesque tries to free his leg and advance position but Murdoch is retaining full guard.
Murdoch looking for submissions from the bottom here. Moving his hips around, possibly looking for an armbar.
The fighters are starting to perspire pretty heavily.
Murdoch looking for submissions from the bottom but instead Levesque passes into side control.
Levesque looking for an arm triangle but it's way too loose to do anything.
That's two minutes gone in the round.
Levesque tries for a kimura but Murdoch is defending well.
Murdoch is positioning himself to get back to half guard.
Levesque working hard here to secure a kimura but he's not really in the right position for it.
Levesque looks to be in better condition than last time we saw him fight. Obviously he's been working hard on his cardio.
You can see the frustration on Murdoch's face, being in this tough position on the bottom.
Levesque tries for an arm triangle. That looks pretty tight to me. Is this one over!?! Possibly, maybe, no Levesque has let go of the choke. Obviously it wasn't as tight as we thought!
Murdoch manages to work his way to half guard, despite Levesque's best efforts.
The ref warns both fighters not to hold the cage as they work up against the meshing.
That's three minutes gone in the round.
Murdoch is looking to control Levesque's leg but it's slowly edging free. Can Murdoch avoid being mounted?
Levesque is working for submissions here but there's nothing on.
Levesque is just sitting in half guard, waiting for something to happen.
Levesque works his foot free and advances to mount.
Levesque wants to finish this one by submission but Murdoch is holding onto his waist, trying to prevent any attacks from Levesque.
Levesque wants to control the pace but Murdoch is squirming around nicely.
Murdoch tries to lock up and control but Levesque gives him a forearm to the face and pushes him away.
Levesque moves into side control, trying to work for a kimura. That looks painful! Will he finish!!?? No, Murdoch has worked his arm free - good work by Murdoch!
That's four minutes gone in the round.
Murdoch is trying to get back to half guard.
Levesque looking for an arm triangle but it's way too loose to do anything.
Levesque tries to move into full mount but can't pass Murdoch's legs.
Murdoch struggling a bit here.
Murdoch is not content to let Levesque control the position.
Boooooooooooooooooooo!!! God, this has been a terrible round. Come on you two, sort yourselves out!
Levesque tries for a kimura. Not really close to a finish though.
Murdoch is looking to regain half guard here but Levesque keeps moving and retains side control.
And that is the end of the round. The fighters go back to their corners.
Miles Levesque dominated that round.
The referee calls time. The cornermen exit stage left and we're back to business.
Murdoch tries to clinch but is not successful on this occasion.
Levesque decides to change it up a bit and drives through with a nice takedown into half guard.
Murdoch is looking to sinch up a guillotine here but Levesque pulls his head out easily.
Levesque is working for submissions here but there's nothing on.
Levesque seems to be working for a kimura but Murdoch defends the submission attempt.
Levesque is working for a submission of some sort.
Levesque wants to lay and pray for a moment but Murdoch keeps working.
We've had a slow start to the round here - hopefully the action picks up.
Levesque is pressing down on Murdoch's thigh, looking to free his foot. Murdoch is holding on for now.
Levesque is trying to control. Murdoch wants to improve his position but can't escape this time.
That's one minute gone in the round.
Murdoch is trying to maintain the position but Levesque is very close to passing his half guard.
Murdoch is trying to stand up here but Levesque is controlling him well.
Levesque is trying to work for a kimura. This could be trouble! No, Murdoch has managed to free his arm - good work.
Murdoch wants to get back to his feet.
Levesque seems to be working for a kimura but Murdoch defends the submission attempt.
Levesque is looking to take a break and control but Murdoch is keeping him honest, looking to work from the bottom.
Murdoch actively working from the bottom here.
Murdoch is looking to improve his position.
Levesque is looking for a kimura here.
That's two minutes gone in the round.
Neither fighter has done anything of merit for a good minute or two here and the crowd are not happy about it.
Murdoch looking for submissions from an awkward position here.
Levesque is sneakily working for an arm triangle but Murdoch sees it coming and defends easily.
Murdoch looking to work for a kimura from the bottom.
Murdoch is looking to control Levesque's leg but it's slowly edging free. Can Murdoch avoid being mounted?
Levesque is working for a submission of some sort.
Levesque is trying for a guillotine from the top but the pressure isn't in the right place so Murdoch is just riding it out for now. Levesque eventually gives up the hold.
That's three minutes gone in the round.
Levesque wants to control but Murdoch is keeping him busy.
Murdoch is trying to maintain the position but Levesque is very close to passing his half guard.
Murdoch tries to roll over but Levesque keeps him under control.
Levesque maintaining the dominant position here and is working for a kimura. He's locked it up! Murdoch could be in real trouble here! He's trying to wriggle out but Levesque has cracked it and Murdoch is screaming in pain - he's tapped out! Great finish by Levesque!
Ladies and gentlemen, after 3:52 of round 2, we have a winner by way of Submission (Kimura). Miles Levesque!
A relieved looking Miles Levesque thanked the fans for their support and gave the usual line about them being amazing. They seemed to believe that he actually meant it.
|
|
|
|
|
|
|
|
|
|
|
|
|
|
|
|
|
|
|
|
|
|
|
| S |
C
A |
G |
S |
C
B |
G |
|
S |
C |
G |
|
energy
A | B |
|
hype
A | B |
|
pop
A | B |
|
mgr
A | B |
|
FIGHT
RATING
28% |
|
|
|
|
|
|
|
|
|
|

