 |
LAFC Fight Night 5 PBP Commentary |
Undercard bout
|
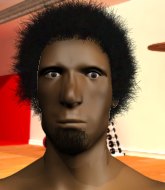
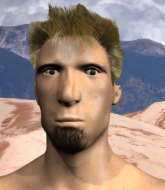
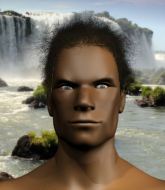
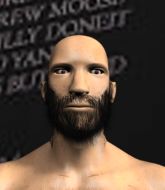
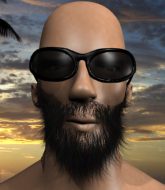
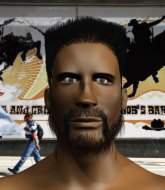
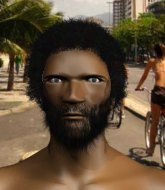
Coming up we have a lightweight MMA rules bout between Asher Barnes (ranked 3950 p4p, 3540 weight class) and Bodie Helix (ranked 423 p4p, 389 weight class). The atmosphere really building for this one as we go over to our ring announcer for the fighter introductions!
 |
|
 |
| 178 cm
23
160
3 - 3 - 0 |
|
179 cm
23
170
1 - 3 - 0 |
BJJ Brown Belt
Excellent boxer
Granite chin |
|
Good wrestler
World class boxer
Heavy handed |
|
| |
|
Ladies and gentlemen. This fight is 3 rounds, in the lightweight division.
Introducing the fighter to my left, fighting out of the red corner.
With a record of 3 - 3 - 0, fighting out of Las Vegas, Asher Barnes!
And introducing the fighter to my right, fighting out of the blue corner.
With a record of 1 - 3 - 0, fighting out of Las Vegas, Bodie Helix!
The judges for this bout are Jack Bonds, Percy O'Donnell and Timothy Bukovac.

The bell rings for round one and we are underway!
Helix swings and misses with a hook to the body.
Barnes half commits to a counter takedown before pushing away, out of range.

Helix darts in and clinches Barnes up against the cage.
Barnes effectively controlling the action here.
Barnes tries to work over Helix's body with a swooping hook but it only glances the target.
Barnes tried to land a shot to the body but connects with Helix's elbow.
Helix presses Barnes against the cage and delivers a mid-strength body shot.
Helix is pressed up against the cage. Barnes has hold of a leg and is looking to drag Helix down to the mat. Helix avoids the attempt though and has circled away. We're back to striking at a distance.
Helix misses with a hook.
Helix throws out a token jab with nothing on it.
Helix misses with a looping right.
Barnes appears to be looking for a counter takedown.

Helix shoots in and scores a nice double leg takedown into half guard.
Barnes holds on for dear life, maintaining half guard for now.
Helix content to sit in half guard and control for a moment.
Barnes wants to improve his position but Helix is controlling well.

That's one minute gone in the round.
Helix seems content to maintain position for now, rather than mounting any offense.
Barnes is trying to get back to full guard.
Barnes regains full guard. Nicely done.
Barnes is working an open guard here, looking to improve his position. No doubt that will leave him open to counters but at least he's being more offensive.
Barnes is trying to control the position from the bottom.
Helix is intent on slowing down the pace of the fight, simply looking to control.

That's two minutes gone in the round.
Well. There's a bit of a lull in the action here and the crowd are starting to get restless.
Barnes working a defensive guard here.
Barnes is working an open guard here, looking to improve his position. No doubt that will leave him open to counters but at least he's being more offensive.
Helix seems content to control from guard here. He's going to have to remain active though if he doesn't want to get stood back up.
The referee wants the fighters to be more active or he's going to reset them on the feet.
Barnes working a defensive guard but Helix manages to pass into side control anyway.
Helix creates a bit of distance and throws down some hard shots.
Helix scores with a couple of short elbows.
Barnes is trying to get back to half guard.
Barnes sneaks back into half guard.
Helix scores with a couple of good hammerfists.

That's three minutes gone in the round.
Barnes gets back to full guard.
There's a bit of a scramble here and now Barnes is on top in guard.

Barnes wants to control from the top but Helix keeps moving.
Barnes postures up to throw the ground and pound strikes but they don't connect.
Helix wants to control here, rather than go for any submissions from the bottom. At least for now.
Barnes connects with a couple of short punches.
Barnes postures up to throw the ground and pound strikes but they don't connect.
Barnes trying to pass the guard but can't manage it just yet.
We get told so often about how wrestlers don't like to be on their backs. Let's see if Helix can do anything to dispel that myth.

That's four minutes gone in the round.
Helix looking to control the pace of the fight rather than finish it.
Barnes postures up and scores with a shot to the body and a follow up elbow to the head.
Barnes trying to control but Helix is working from the bottom.
Barnes is fighting to break Helix's control of his arms but Helix is doing a good job of controlling the position at the moment.
Helix utilising some decent striking defenses from the guard, preventing the ground and pound.
The crowd thankful this round is nearly over.
Helix is working from a closed guard but he's struggling to control his opponent.
Barnes throwing strikes but missing.
And that is the end of the round. The fighters go back to their corners.
Bodie Helix dominated that round.
OK. That's time! The bell goes and we're back to the action.

Barnes throws a body punch but Helix moves out of range.
Helix throws a hook but Barnes blocks it.
Helix misses with a straight right.
Barnes appears to be looking for a counter takedown.
Helix fakes high and swings low for a body shot but Barnes manages to avoid it.
Helix misses with a body kick.
Helix swings for the body but Barnes moves out of range.
Helix lands a nice shot to the body.
Helix throws an uppercut from half a mile away. Barnes sees it coming and avoids it easily.
Barnes misses with a looping right.
Barnes ducks under a wild hook from Helix.
Helix fakes with the hands and throws a leg kick but Barnes is out of range.
Barnes attempts a counter takedown but Helix avoids it well and moves away.
We've had a slow start to the round here - hopefully the action picks up.
Helix throws a poor cross that misses

and Barnes counters with a shoot takedown into half guard.
Barnes is keen to just control but Helix is a slippery customer.
Helix trying to control here.
Barnes seems to be taking a bit of a break to think of his next move. He lands a short punch in the meantime.
That's one minute gone in the round.
Helix is working for an escape here. He's hooked one of Barnes's legs and he's managed to sneak out and take Barnes's back!
Helix is not going to allow Barnes to sit and survive in this position.
Helix is throwing strikes from the back here. Oh that last one was to the back of the head. Helix gets a warning from the referee. He throws another strike to the back of the head straight away though and the referee has seen enough. He breaks up the two fighters and stands them back up. Helix gets a real talking to here and is lucky not to get a point deducted. Helix apologises and we restart here on the feet.
Helix has been the more effective fighter overall so far.
Barnes is looking to clinch.
Barnes is moving around nicely and scores here with a single head shot.
Helix scores with a shot to the body.
Barnes throws a body punch but Helix moves out of range.
Barnes is looking light on his feet compared to last time was saw him fight.
Barnes misses with a hook.
Helix swings away but doesn't land with a series of punches.
Helix throws a jab but it's blocked by Barnes.
Nice body punch from Barnes.
Barnes uses some good footwork to avoid the body shot by Helix.
Barnes drops down looking for a counter takedown but Helix sprawls and moves away.
Helix looking to take his opponent's legs away with the low kicks.
Barnes misses with a body shot. Nice footwork from Helix.
That's two minutes gone in the round.
This is a great period of action - very entertaining stuff!
Helix throws a hook to the body but it doesn't connect.
Helix waving his hands out in front of him, looking to distract Barnes.
Barnes attempts a counter takedown but Helix avoids it well and moves away.
Helix throws a body punch but Barnes moves out of range.
Barnes half commits to a counter takedown before pushing away, out of range.
Barnes ducks under a wild hook from Helix.
Barnes moves out of range of the strikes.
Helix gets his head snapped back by a nice shot there.
Barnes misses with a right hand
letting Helix counter with a right hand.
Helix works his jab well there, keeping his opponent at a distance.
Barnes displays some good footwork, moving neatly out of range as Helix throws out the jab.
Barnes tries to counter with a takedown but Helix is quick to defend against it.
Barnes misses the shot to the body.
Barnes scores with a jab to the body.
Helix throws a big shot that misses.
Helix tries to work over Barnes's front leg with a kick but Barnes checks it.
Helix jabbing away but nothing is landing.
Barnes defending well as Helix loads up on a big left hand.
That's three minutes gone in the round.
Barnes throws a hard body shot but it just misses.
Barnes misses with a hook.
Helix fakes high and swings low for a body shot but Barnes manages to avoid it.
Helix connects with a body shot.
Helix pivots as if he's going to throw a leg kick but stops half way.
Bodie Helix seems to be getting the better of the standup.
Barnes misses with a body shot.
Helix wants to counter the offense by Barnes and move into the clinch position.
Helix scores with a kick to the midsection.
Helix misses with a body shot. Nice footwork from Barnes.
Barnes throws a jab when Helix was well out of range.
Helix misses with a shot to the body
and Barnes counters with a nice shoot takedown that brings the fighters to the ground.
Helix lands a beautiful sweep and he's now moved into his opponent's guard.

Barnes wants to sweep here but Helix controlling him for the moment.
That's four minutes gone in the round.
The crowd cheering loudly, showing their appreciation for the quality fight we're seeing here.
Helix trying to control the position from guard on top but Barnes is wriggling around, looking for whatever he can.
Helix really doesn't want to stay on the ground with Barnes. If he can't get it back to his feet, it's only a matter of time before he'll be tapping out.
Helix is frustrating his opponent with some stalling tactics from top position.
Barnes throwing some rather feeble looking strikes off his back.
Helix must be cautious of submissions here, given that his opponent has the superior Jiu Jitsu.
Barnes wants to sweep here but Helix controlling him for the moment.
Helix content to strike from guard, landing some decent shots.
And that is the end of the round. The fighters go back to their corners.
Bodie Helix showed his class in that round. I'd imagine he'll take it on all the scorecards.
The fighters get back to their feet, the hooter sounds and we're back to the action! This is the final round!

Helix swings for the body but Barnes moves out of range.
Barnes drops down looking for a counter takedown but Helix sprawls and moves away.
Barnes misses with a wild body shot.
Helix wants to counter with a clinch but Barnes pushes him away.
Barnes doesn't manage to clinch there - Helix circles away.
A slapping body kick lands there for Helix.
Nice uppercut there from Barnes.
Barnes takes a solid shot to the body. That one hurt him but he's trying not to show it.
Helix scores with a jab.
Helix misses with a body shot.
Helix tries to land with a swinging hook to the body but Barnes was well out of range. Poor timing from Helix.
Helix defending well as Barnes loads up on a big left hand.
Barnes backing away here, and Helix unleashes a leg kick that just misses.
We've had a slow start to the round here - hopefully the action picks up.
Barnes throws a nice looking combination but Helix bobs and weaves to avoid any damage.
Barnes throws a combination that misses
and Helix counters with a nice uppercut.
Barnes bobs and weaves well there to avoid the strikes.
Barnes keeping a good distance there, avoiding the body shot.
Barnes misses the shot to the body.
That's one minute gone in the round.
Barnes staying out of range there.
Helix ducks down and throws a hook to the body but Barnes moves away.
Helix throws a poor cross that misses
and Barnes decides to take the opportunity to score a takedown. He's landed in Helix's guard.
Barnes wants to control from the top but Helix keeps moving.
Helix is working the butterfly guard. He manages to land a nice scissor sweep and is now in half guard on the top. Nice move.
Barnes has hold of Helix's hands but Helix slips his arm to the side and lands an elbow.
Bodie Helix has got the better of the ground game so far.
Barnes works his way to full guard. Good work.
Helix won't allow Barnes to sweep him here.
Helix controls from within his opponent's guard.
Helix wants to control from the top but Barnes keeps moving.
Helix controls the pace of the fight for a moment.
That's two minutes gone in the round.
Barnes working the defensive guard well to avoid strikes from Helix.
Helix's corner is telling him to maintain position.
Barnes looking to sweep here. No luck so far.
Helix showing good wrestling skills to control the position.

Barnes has a loose triangle. He'll be looking to tighten that up but Helix can see exactly what he's planning and manages to posture up and free himself.
Helix is intent on slowing down the pace of the fight, simply looking to control.
Barnes is working the butterfly guard. He manages to land a nice scissor sweep and is now in half guard on the top. Nice move.
That's three minutes gone in the round.
Barnes scores with a couple of good hammerfists.
Helix wants to improve his position but Barnes is controlling well.
Helix blocking the ground and pound attempt from Barnes.
Helix is working for an escape here. He's hooked one of Barnes's legs and he's managed to sneak out and take Barnes's back!
Helix lands an elbow to the side of the head.
Helix doesn't have the hooks in and Barnes manages to turn into his guard.
Barnes forces his way into half guard.
Barnes prevents Helix from standing back up.
Helix tries to get to full guard but Barnes has control of the leg.
Barnes missing with some ground and pound from the half guard.
That's four minutes gone in the round.
Helix is holding on to half guard well.
Barnes thows a wild elbow that connects with the canvas.
Helix avoiding damage under a succession of punches from Barnes.
Barnes not landing any meaningful shots this time.
Helix makes his way to full guard. A much better position for Helix.
Barnes wants to control from the top but Helix keeps moving.
Helix controlling the position.
There's a bit of a scramble here and now Helix is on top in guard.
Asher Barnes has stepped it up - he knows he needs a finish here!
The fans in attendance giving it up for the two fighters, who have really let it all hang out in the last minute or so!
Helix is frustrating his opponent with some stalling tactics from top position.
And that's the end of the fight!
I would just about give that final round to Bodie Helix.
I've got Helix winning every round here. Surely the decision will go his way and he'll pick up a well deserved decision victory. Over to the ring announcer for the scorecards.
Ladies and gentlemen, after 3 rounds of action, we go to the scorecards for a decision.
Judge Jack Bonds scores the fight 27:30
Judge Percy O'Donnell scores the fight 27:30
Judge Timothy Bukovac scores the fight 27:30
In favor of your winner, by unanimous decision... Bodie Helix!
|
|
|
|
|
|
|
|
|
|
|
|
|
|
|
|
|
|
|
|
|
|
|
| S |
C
A |
G |
S |
C
B |
G |
|
S |
C |
G |
|
energy
A | B |
|
hype
A | B |
|
pop
A | B |
|
mgr
A | B |
|
FIGHT
RATING
44% |
|
|
|
|
|
|
|
Undercard bout
|
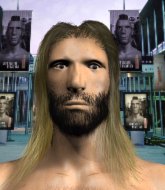
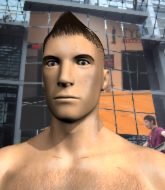
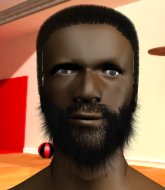
Coming up we have a light heavyweight MMA rules bout between Chunk Liddell (ranked 3525 p4p, 24070 weight class) and Pudd Nelson (ranked 446 p4p, 693 weight class). Nelson is bouncing up and down as he enters the arena, backed by Desperado - Eagles. Pudd Nelson has the better chin. Will he look to stand and bang today?
 |
|
 |
| 190 cm
28
215
6 - 5 - 0 |
|
190 cm
22
210
0 - 4 - 0 |
BJJ Purple Belt
Basic striking
KO power |
|
BJJ Purple Belt
World class boxer
Powerful |
|
| |
|
Ladies and gentlemen. This fight is 3 rounds, in the light heavyweight division.
Introducing the fighter to my left, fighting out of the red corner.
With a record of 6 - 5 - 0, fighting out of Hilo, Chunk Liddell!
And introducing the fighter to my right, fighting out of the blue corner.
With a record of 0 - 4 - 0, fighting out of Amsterdam, Pudd Nelson!
The judges for this bout are Frank Antenori, Jack Bonds and Timothy Bukovac.
The bell rings for round one and we are underway!
Nelson scores with a nice strike.
Nelson cracks Liddell with an open hand slap.
Nelson's corner calls for a 1-2. Nelson obliges with the 1 part as he scores the single shot and moves back out of range.
Nelson stuffs the takedown attempt from Liddell. Liddell gets slowly back to his feet.
Liddell has his head snapped back a nice jab. A little nod from Liddell there as he acknowledges the shot.
Nelson lands with a cross.
Liddell throws a lazy right hand but Nelson sees it coming a mile off and sidesteps it easily.
Liddell takes a really solid shot there but just smiles back and shrugs his shoulders.
Liddell is looking to chop away at Nelson's legs.
A telegraphed takedown attempt from Liddell is defended easily by Nelson.
A jab from Nelson finds it's way through Liddell's defenses.
We've seen a great period of action over the last minute or so - credit to both fighters for going all out!
Nelson throws a couple of head shots and lands with the final one - a decent hook, which struck Liddell on the side of the head.
Pudd Nelson seems to be the more aggressive standup fighter in this bout.
Liddell shoots for a double leg takedown but Nelson sprawls well. He's pushed Liddell's face into the mat and manages to get back to his feet relatively easily.
That's three failed takedown attempts in the round for Chunk Liddell. That's going to take a lot out of him.
Liddell tries to move into range but Nelson moves to the side and lands with a nice right hand.
That's one minute gone in the round.
Jab by Nelson.
Liddell takes a jab right on the nose. That must have hurt but he shrugs his shoulders and looks to return the favor.
Nelson catches Liddell with a nice straight right. He seems pissed - ooooh, it's on now! On like donkey kong!
Liddell gets cracked with a nice right hand there by Nelson.
Liddell tries to move into range but Nelson moves to the side and lands with a nice right hand.
Nelson lands a head shot.
 Liddell is rocked! Liddell is rocked!
Liddell looks up at the clock. Bad move! Nelson lands a right hand from hell, dropping Liddell. Nelson pounces and finishes the fight with a flurry of punches and elbows.
Ladies and gentlemen, after 1:26 of round 1, we have a winner by way of TKO (Strikes). Pudd Nelson!
A victorious Pudd Nelson thanked his army of followers in his post fight interview, telling people to make sure they follow him on Twitter.
|
|
|
|
|
|
|
|
|
|
|
|
|
|
|
|
|
|
|
|
|
|
|
| S |
C
A |
G |
S |
C
B |
G |
|
S |
C |
G |
|
energy
A | B |
|
hype
A | B |
|
pop
A | B |
|
mgr
A | B |
|
FIGHT
RATING
73% |
|
|
|
|
|
|
|
Undercard bout
|
Coming up we have a welterweight MMA rules bout between Ray Ruthlessness (ranked 5426 p4p, 3920 weight class) and Thufir Hawat (ranked 545 p4p, 468 weight class). Ruthlessness's entrance music is Meek Mill - Going Bad (feat. Drake). A fine choice. Well, the cameraman is lingering on a pretty young lady for a bit too long there. Keep your eyes on the prize buddy or you'll miss the fighter intros!
 |
|
 |
| 182 cm
24
175
6 - 9 - 0 |
|
185 cm
23
178
6 - 7 - 0 |
Good wrestling
Excellent boxer
Very quick |
|
Good wrestler
Excellent MT
Granite chin |
|
| |
|
Ladies and gentlemen. This fight is 3 rounds, in the welterweight division.
Introducing the fighter to my left, fighting out of the red corner.
With a record of 6 - 9 - 0, fighting out of Las Vegas, Ray Ruthlessness!
And introducing the fighter to my right, fighting out of the blue corner.
With a record of 6 - 7 - 0, fighting out of Los Angeles, Thufir Hawat!
The judges for this bout are Percy O'Donnell, Timothy Bukovac and Jack Bonds.
The bell rings for round one and we are underway!
Hawat on the wrong end of a nice jab.
Ruthlessness swings and misses with a hook to the body.
Nice straight punches there by Hawat. You know Roy Jones Jr respects the hands of Hawat.
Hawat ducks under a wild hook from Ruthlessness.
Ruthlessness throws the left hand but Hawat avoids the punch easily.
Ruthlessness dips down and scores with a jab to the body.
Ruthlessness uses good footwork to get in and out, landing a nice hook.
Ruthlessness throws a body shot but no joy.
A slow jab from Ruthlessness misses its intended target.
Hawat chopping away at his opponent's legs.
Hawat throws a hook but Ruthlessness blocks it.
Hawat connects with a right hand. Ruthlessness shakes it off.
Ruthlessness throws an uppercut from half a mile away. Hawat sees it coming and avoids it easily.
We've seen a great period of action over the last minute or so - credit to both fighters for going all out!
Hawat lands a right hook to the body.
Ray Ruthlessness seems to be the more aggressive standup fighter in this bout.
Hawat scores with a head kick. Ruthlessness tried to block it but didn't get his arm up in time.
Ruthlessness throws a body punch but Hawat moves out of range.
Hawat swings and misses with a hook to the body.
Hawat takes a body punch but keeps moving.
Ruthlessness looks to score with a jab to the body but Hawat is just out of range.
Hawat connects with the punch.
Ruthlessness scores with a crisp jab that stopped Hawat in his tracks.
That's one minute gone in the round.
Hawat moves forwards but Ruthlessness connects with a nice, crisp jab.
Ruthlessness throws the left hand but Hawat avoids the punch easily.
Hawat ducks under a wild hook from Ruthlessness.
Ruthlessness swings for the body but Hawat moves out of range.
Good leg kick by Hawat.
Hawat moves away from the strike by Ruthlessness.
Ruthlessness throws a looping overhand right but Hawat ducks down to avoid it.
Hawat staying out of range there.
Ruthlessness throws an overhand right that lands on Hawat's shoulder, as Hawat tries to avoid the shot.
Hawat looking to land some kicks to the body here.
Hawat displays some good footwork, moving neatly out of range as Ruthlessness throws out the jab.
Ruthlessness lands with a right hand.
Ruthlessness connects with a looping right hand.
Ruthlessness swings and misses with a hook to the body.
Ruthlessness throws a lazy uppercut
and Hawat counters with a low kick, right behind Ruthlessness 's knee.
Hawat misses with an uppercut.
Ruthlessness was looking to counter that move with a punch but didn't quite pull the trigger.
Ruthlessness seems to be moving with more speed, compared to his last bout. He must have been working on that in the gym.
Ruthlessness just misses with a punch to the body.
Wooooo! Give it up for these two warriors! They are putting on a show!
Hawat connects with a body shot.
That's two minutes gone in the round.
Ruthlessness throws a jab, cross combination which is slipped
and Hawat counters with a body kick that brings a smile to the face of both fighters.
Ruthlessness throws a jab but it's blocked by Hawat.
Hawat steps to the side to avoid the strikes from Ruthlessness.
Ruthlessness throws a jab when Hawat was well out of range.
A nice side step and Hawat releases a counter shot to the body, but it doesn't find it's home.
Ruthlessness misses with a hook.
Ruthlessness looks to land a right hand but Hawat moved out of range.
It seemed like Hawat was going to counter with the hook but didn't fully commit to it.
Ruthlessness throws a hook to the side of Hawat's head but Hawat sees it coming and ducks under it beautifully.
Ruthlessness misses the shot to the body.
A big right from Ruthlessness misses.
Ruthlessness waving his hands out in front of him, looking to distract Hawat.
Ruthlessness misses with an uppercut.
Ruthlessness slips a jab from Hawat.
Hawat drops his hands momentarily and Ruthlessness takes advantage with a crisp shot to the head.
An inside leg kick from Hawat misses.
A jab from Ruthlessness does it's job there.
Ruthlessness lands the left hand.
Hawat takes one on the chin but keeps coming.
Hawat lands with a cross.
A good leg kick by Hawat.
That's three minutes gone in the round.
Ruthlessness throws a lazy uppercut
and Hawat counters with a crisp hook to the side of the head.
Ruthlessness scores with a big left there. The judges will like that one.
Ruthlessness misses with a lunging right hand
and Hawat counters with a straight right hand.
Ruthlessness cracks Hawat with a nice right hand that draws applause from the crowd.
A bone on bone clash there as Ruthlessness blocks the leg kick.
Ruthlessness sizes up Hawat with a pawing jab and scores with a straight right down the middle.
Ruthlessness lands a straight punch to the body, keeping Hawat at a distance.
Hawat misses with a body kick.
Hawat throws out a leg kick but Ruthlessness moves out of range and Hawat only half commits.
Hawat misses with an attempted mid kick.
Hawat wants to slow Ruthlessness down by chopping away at his legs.
Hawat throws a body shot but no joy.
Ruthlessness misses with a looping left.
Nice straight punches there by Hawat. You know Roy Jones Jr respects the hands of Hawat.
The fans in attendance giving it up for the two fighters, who have really let it all hang out in the last minute or so!
Ruthlessness takes a shot right to the liver - Bas would have been proud of that punch.
Hawat throws a body shot but no joy.
Ruthlessness scores with a nice one two combo and darts back out of range to avoid anything coming in the opposite direction.
Ruthlessness takes a shot right to the liver - Bas would have been proud of that punch.
That's four minutes gone in the round.

Ruthlessness darts in and clinches Hawat up against the cage.
Ruthlessness fails to land with a short punch on the inside.
Ruthlessness gets through Hawat's defenses to land a nice punch to the side of the head.
Ruthlessness lands with a quick shot inside that doesn't really do much damage.
Ruthlessness fails to land with a short punch on the inside.
Ruthlessness goes for a body shot but it's blocked.
Hawat wants to break the clinch but can't.
Ruthlessness lands a hook to the body. It's hard to tell if that hurt Hawat or not.
Ruthlessness lands a body shot.
Ruthlessness tries a shoulder strike but it doesn't do any damage.
Ruthlessness tried to land a shot to the body but connects with Hawat's elbow.
The crowd applaud the fighters' efforts here as the round comes to an end.
Ruthlessness misses with some punches.
Hawat misses with some punches.
A head punch blocked on the inside by Hawat.
And that is the end of the round. The fighters go back to their corners.
Ray Ruthlessness dominated that round.
OK. That's time! The bell goes and we're back to the action.
Hawat scores with a slapping inside leg kick.
Hawat throws a leg kick but Ruthlessness sees it coming and moves out of range.
Ruthlessness connects with a jab.
A telegraphed right hand from Ruthlessness misses the target.
A chopping leg kick lands by Hawat.
Ruthlessness rushes in with a sloppy looking punch
and Hawat counters with a lovely straight right hand!
Ruthlessness fails to land with the punch combination there - jab, cross, hook, miss, miss, miss.
Ray Ruthlessness is winning the standup battle so far.
Hawat swings and misses with a hook to the body.
Ruthlessness throws an overhand right that lands on Hawat's shoulder, as Hawat tries to avoid the shot.
Hawat throws a head kick that misses.
Ruthlessness checks a leg kick.
A counter left hand to the body from Ruthlessness misses its target.
Hawat circles away from the clinch attempt.
Ruthlessness misses with an uppercut. Hawat saw that one coming.
We've had a slow start to the round here - hopefully the action picks up.
Nice shot by Hawat.
Ruthlessness lands a glancing blow to the side of Hawat's head.
The crowd cheering loudly, showing their appreciation for the quality fight we're seeing here.
Ruthlessness jabs. That one connects to the head of his opponent.
Ruthlessness throws a body punch but Hawat moves out of range.
Hawat is the aggressor but that punch slipped nicely by Ruthlessness.
That's one minute gone in the round.
Hawat takes a body punch but keeps moving.
Hawat defending well as Ruthlessness loads up on a big left hand.
Ruthlessness's hands are dropping dangerously low here and Hawat connects clean with a right hook that sends him down to one knee! Ruthlessness scrambles back to his feet.
Hawat misses with a hook. Ruthlessness ducked under it nicely.
Ruthlessness tries to land with a swinging hook to the body but Hawat was well out of range. Poor timing from Ruthlessness.
Ruthlessness avoids a lazy jab quite easily.
Hawat slips a jab from Ruthlessness.
Ruthlessness slips a jab from Hawat.
Hawat fakes low and throws an overhand right that catches Ruthlessness on the side of the head.
Hawat misses with a looping right.
Ruthlessness moves out of range of the leg kick from Hawat.
Hawat misses with a low kick.
Hawat avoids the body shot from Ruthlessness.
Ruthlessness getting the better of the striking in that exchange.
Hawat throws a low kick, looking for Ruthlessness's leg but Ruthlessness calmly moves out of range.
Hawat misses with a low kick.
The sound of bone on bone echoes around the arena as Ruthlessness checks a leg kick.
Ruthlessness works his jab well there, keeping his opponent at a distance.
That's two minutes gone in the round.
This has been an exciting period of action!
Ruthlessness throws a nice looking combination but Hawat bobs and weaves to avoid any damage.
The fighters are going at a pretty good pace and they're both starting to sweat now.
Ruthlessness takes a body punch that cleary hurt but he's trying not to show any weakness.
Ruthlessness throws a hook but Hawat avoids it easily.
Ruthlessness lands a jab to the head.
Ruthlessness scores with the left hand. Hawat knows he should have avoided that one.
Hawat doesn't react quick enough there as he takes a shot to the body.
Ruthlessness tries to clinch but Hawat is having none of it.
Hawat feints a counter leg kick.
Ruthlessness lands a nice hook to Hawat's body. Hawat takes it in his stride and looks to land his own strikes.
Ruthlessness takes a swing at Hawat's ribcage but misses.
Nice shot by Hawat.
Hawat throws a leg kick that misses.
Ruthlessness misses the shot to the body.
Ruthlessness throws a hard body shot but it just misses.
Hawat shakes his hands off, looking to compose himself, but takes a jab to the jaw whilst he does it.
Ruthlessness lands with a nice body punch.
Hawat misses with an uppercut. Ruthlessness saw that one coming.
Hawat tries to land a front kick but Ruthlessness steps back. That was a bit too telegraphed.
That's three minutes gone in the round.
A big left from Ruthlessness misses.
Hawat takes a punch to the jaw and another one to the bread basket.
 It looks like Thufir Hawat has been cut. It looks like Thufir Hawat has been cut.
Hawat needs to keep his hands up - Ruthlessness had a free shot at his head there.
Ruthlessness has his head snapped back a nice jab. A little nod from Ruthlessness there as he acknowledges the shot.
Hawat has a pretty nasty looking mouse under his right eye.
Ruthlessness scores with a crisp jab that stopped Hawat in his tracks.
Ruthlessness gets in close and instigates a clinch.
Ruthlessness is really dominating this fight. Is there anything that Hawat can do to turn this around?
A head punch on the inside from Ruthlessness fails to land.
Ruthlessness misses with some punches.
A short right from Hawat on the inside.
Ruthlessness tries a shoulder strike but it doesn't do any damage.
Hawat blocks a punch to the side of the head.
Hawat lands with a light punch inside.
The fans in attendance giving it up for the two fighters, who have really let it all hang out in the last minute or so!
Ruthlessness tries to work over Hawat's body with a swooping hook but it only glances the target.

Hawat breaks from the clinch.
Ruthlessness misses with a straight left.
Ruthlessness lands a jab.
That's four minutes gone in the round.
Nice defenses there by Hawat.
A looping hook to the body misses from Ruthlessness. Hawat does a little dance to reset his feet.
Ruthlessness cracks Hawat with a good jab.
Ruthlessness moving in and out of range nicely, whilst landing the scoring shot.
Hawat misses with a body shot.
Ruthlessness is looking for a counter combo.
A jab from Hawat does it's job there.
Ruthlessness throws a body shot but no joy.
Ruthlessness misses with a hook. Hawat ducked under it nicely.
Hawat misses with a half-hearted attempt at a head kick.
Hawat doesn't react quick enough there as he takes a shot to the body.
Ruthlessness tries to move into range but Hawat moves to the side and lands with a nice right hand.
Ruthlessness misses with a body shot. Nice footwork from Hawat.
Ruthlessness takes a body punch that cleary hurt but he's trying not to show any weakness.
The crowd applaud the fighters' efforts here as the round comes to an end.
Ruthlessness gets to the clinch - let's see what his plan is here.
Ruthlessness lands with a short shot to the head.
Hawat is trying to break free.
And that is the end of the round. The fighters go back to their corners.
Ray Ruthlessness dominated that second round.
The cut man is working on Thufir Hawat's cut.
That's time! Back to the action! This is the final round!
A nice leg kick from Hawat, right into the meat of the thigh.
Hawat goes for a spinning back kick but it misses.
Ruthlessness with a nice cross.
Ruthlessness fakes high and swings low for a body shot but Hawat manages to avoid it.
Ruthlessness lands with an overhand left.
Ruthlessness blocks a head kick by Hawat.
Hawat uses good footwork to avoid the strikes from Ruthlessness.
Ruthlessness lands a glancing blow to the side of Hawat's head.
Hawat takes a shot right to the bread basket.
Hawat tries a switch kick but it misses it's target.
Ruthlessness throws a shot from downtown. Hawat moves away and avoids it.
Ruthlessness connects with a slap. Keep your fist closed son.
Ruthlessness swings for the body but Hawat moves out of range.
Ruthlessness falls off balance throwing a combination
and Hawat counters with a nice leg kick.
Fantastic stuff here - a very entertaining period of action, which has drawn cheers from the crowd.
Ruthlessness lands a head shot.
Ruthlessness digs a good body shot into Hawat's ribs.
Ruthlessness throws out a loose jab but Hawat uses good head movement to avoid it.
That's one minute gone in the round.
Ruthlessness fails to land with a series of punches.
It seemed like Hawat was going to counter with the hook but didn't fully commit to it.
Hawat on the wrong end of a nice jab.
Hawat missing with a left hand there. Ruthlessness was out of range so wasted energy throwing that one.
Ruthlessness misses with a series of wild punches.
A little jabbing left from Hawat on the counter but it doesn't find it's target.
Hawat misses with an attempted mid kick.
Hawat cracks Ruthlessness with an open hand slap.
Hawat doesn't react quick enough there as he takes a shot to the body.
Hawat jabs. That one connects to the head of his opponent.
Ruthlessness fakes and then throws a beautiful body shot. Hawat looks a bit winded and takes a step backwards to take a breath.
Hawat throws a low kick but Ruthlessness avoids it.
Hawat throws a sloppy head kick and Ruthlessness moves out of range easily.
Hawat throws a body punch but Ruthlessness moves out of range.
A slow jab from Hawat misses its intended target.
Ruthlessness is hobbling a little on that front leg after taking quite a few leg kicks so far in this fight.
Ruthlessness misses with a hook.
Ruthlessness fails with an attempt to clinch.
Thufir Hawat has stepped it up - he knows he needs a finish here!
That's two minutes gone in the round.
Ruthlessness lands a right hook to the body.
Wooooo! Give it up for these two warriors! They are putting on a show!
Hawat lunges at Ruthlessness with a hook that half lands and is half blocked by Ruthlessness's hand.
Hawat tries to land a front kick but Ruthlessness steps back. That was a bit too telegraphed.
Hawat looks to throw the jab but Ruthlessness is out of range.
Ruthlessness moves out of range of the body kick from Hawat.
Ruthlessness takes a swing at Hawat's ribcage but misses.
Hawat throws a jab to the body, straight down the pipe. Boom. That sent Ruthlessness stumbling backwards but he manages to regain his composure quickly.
Ruthlessness cracks Hawat with a nice right hand that draws applause from the crowd.
Ruthlessness throws a couple of head shots and lands with the final one - a decent hook, which struck Hawat on the side of the head.
Hawat has his head snapped back a nice jab. A little nod from Hawat there as he acknowledges the shot.
Ruthlessness throws a right hand that misses
and Hawat counters with a nice leg kick.
Ruthlessness misses with a looping right.
Ruthlessness throws a wild combination but nothing lands.
Hawat keeping a good distance there, avoiding the body shot.
Hawat now looks to counter with a shot at the body.
Both fighters are breathing heavily.
Ruthlessness throws an overhand right that lands on Hawat's shoulder, as Hawat tries to avoid the shot.
Hawat takes one on the chin but seems OK.
Hawat misses with a head kick.
That's three minutes gone in the round.
Hawat lands a nice shot that snaps Ruthlessness's head back.
Hawat misses with an uppercut.
Ruthlessness jabs. That one connects to the head of his opponent.
Hawat slips a straight right by Ruthlessness.
Hawat fakes a jab and then connects with a hook.
Ruthlessness tests Hawat's chin there with a solid looking shot.
Ruthlessness throws a shot from downtown. Hawat moves away and avoids it.
Ruthlessness throws an ugly left hook that misses
and Hawat counters with a thumping low kick.
Ruthlessness looks to land a left hand but Hawat moved out of range nicely.
Ruthlessness scores with a shot to the body.
Hawat moves out of range as Ruthlessness strikes.
Hawat connects with a looping right hand.
Hawat throws a hook to the body but it doesn't connect.
This is a great period of action - very entertaining stuff!
Hawat paws at his opponent with the jab and then lunges in with a straight, right on the button.
Ruthlessness swings and misses with a hook to the body.
Hawat jabs. That one connects to the head of his opponent.
Ruthlessness is rocked!
That's four minutes gone in the round.
Ruthlessness on the receiving end of a decent leg kick there by Hawat. Hawat obviously looking to wear him down.
Oh Ruthlessness is still all over the place! His legs are completely gone! Will he be able to recover?!!
Hawat throws an uppercut from half a mile away. Ruthlessness sees it coming and avoids it easily.
Hawat uses good head movement to avoid the hook from Ruthlessness.
Ruthlessness throws a shot from downtown. Hawat moves away and avoids it.
Hawat bobs and weaves and then throws a good body kick.
Hawat steps to the side to avoid the strikes from Ruthlessness.
Hawat smiles there as he lands a nice right hand right on the button.
Hawat throws a sloppy head kick and Ruthlessness moves out of range easily.
Hawat looks to land a right hand but Ruthlessness moved out of range.
The fighters circle momentarily. Ruthlessness darts into range and connects with a nice straight punch.
Ruthlessness uses good footwork to avoid the strikes from Hawat.
Hawat throws a nice outside leg kick.
Hawat throws an overhand right that lands on Ruthlessness's shoulder, as Ruthlessness tries to avoid the shot.
Ruthlessness lands an overhand left. A wild punch that just about connected.
A swing and a miss from Ruthlessness.
Hawat ducks right into an uppercut from Ruthlessness.
Ruthlessness seems to have got his legs back now.
The crowd applaud the fighters' efforts here as the round comes to an end.
A big right from Hawat misses.
Hawat misses with a head kick.
Hawat looking to throw a kick but he's pulled out of it.
Ruthlessness blocks a low kick nicely.
And that's the end of the fight!
That was a close round. You could make an argument for either fighter but I would give it to Ray Ruthlessness.
Well Ruthlessness has outscored his opponent in every aspect of the fight today. Only a scarily incompetent judge or two will keep him from a well deserved win... Over to the ring announcer for the scorecards.
Ladies and gentlemen, after 3 rounds of action, we go to the scorecards for a decision.
Judge Percy O'Donnell scores the fight 30:27
Judge Timothy Bukovac scores the fight 29:28
Judge Jack Bonds scores the fight 30:27
In favor of your winner, by unanimous decision... Ray Ruthlessness!
A less than humble Ray Ruthlessness misjudged his post fight interview somewhat and came across a little too arrogant whilst trying to hype up his own abilities.
|
|
|
|
|
|
|
|
|
|
|
|
|
|
|
|
|
|
|
|
|
|
|
| S |
C
A |
G |
S |
C
B |
G |
|
S |
C |
G |
|
energy
A | B |
|
hype
A | B |
|
pop
A | B |
|
mgr
A | B |
|
FIGHT
RATING
90% |
|
|
|
|
|
|
|
Undercard bout
|
Coming up we have a light heavyweight MMA rules bout between Motty Watson (ranked 3444 p4p, 5883 weight class) and Dwayne Mill (ranked 436 p4p, 608 weight class). Fingers crossed for an exciting fight - I'm sure both fighters are looking for a nice under the table bonus!
 |
|
 |
| 185 cm
21
204
5 - 4 - 0 |
|
186 cm
24
213
7 - 9 - 0 |
BJJ White Belt
Great low kicks
Cardio machine |
|
Good takedowns
Counter fighter
Determined |
|
| |
|
Ladies and gentlemen. This fight is 3 rounds, in the light heavyweight division.
Introducing the fighter to my left, fighting out of the red corner.
With a record of 5 - 4 - 0, fighting out of Montreal, Motty Watson!
And introducing the fighter to my right, fighting out of the blue corner.
With a record of 7 - 9 - 0, fighting out of Los Angeles, Dwayne Mill!
The judges for this bout are Timothy Bukovac, Don Winkell and Percy O'Donnell.
The bell rings for round one and we are underway!
Watson misses with an uppercut.
Mill with the counter takedown but Watson avoids it easily.
Watson pulls out of a head kick attempt.
Watson throws a right hand that Mill ducks under and follows up with a left that Mill also avoids with ease.
Mill blocks the body kick.

Watson lands a big head kick that sends Mill tumbling to the mat! Watson takes a step backwards and waves Mill back to his feet - he wants the finish!
 Mill is rocked! Mill is rocked!
It looks like Dwayne Mill has been cut.
Watson moves into range and lands a nice body kick.
Mill is still on wobbly legs! Can Watson finish him?
Mill looks winded!
This has been an exciting period of action!
Watson lands with a jab that stuns his opponent. Mill is looking to close the distance but Watson sees it coming and throws a beautiful knee! Mill crumbles to the mat and that's all she wrote! Let's hope Mill is OK because that was naaaaaasty!
Ladies and gentlemen, after 0:26 of round 1, we have a winner by way of KO (Knee). Motty Watson!
In defeat, Dwayne Mill stepped up to the mic, saying 'Losing is part of learning, this is just a set back and I will return next time fully prepared and ready.'.
|
|
|
|
|
|
|
|
|
|
|
|
|
|
|
|
|
|
|
|
|
|
|
| S |
C
A |
G |
S |
C
B |
G |
|
S |
C |
G |
|
energy
A | B |
|
hype
A | B |
|
pop
A | B |
|
mgr
A | B |
|
FIGHT
RATING
100% |
|
|
|
|
|
|
|
Undercard bout
|
Coming up we have a bantamweight MMA rules bout between Devin Brown (ranked 5169 p4p, 3819 weight class) and Bubba Ribodeaux (ranked 219 p4p, 189 weight class). Devin Brown has the better chin. Will he look to stand and bang today?
 |
|
 |
| 182 cm
28
145
6 - 8 - 0 |
|
160 cm
28
135
5 - 1 - 0 |
BJJ Blue Belt
Excellent boxer
Granite chin |
|
Good takedowns
Basic striking
Determined |
|
| |
|
Ladies and gentlemen. This fight is 3 rounds, in the bantamweight division.
Introducing the fighter to my left, fighting out of the red corner.
With a record of 6 - 8 - 0, fighting out of Los Angeles, Devin Brown!
And introducing the fighter to my right, fighting out of the blue corner.
With a record of 5 - 1 - 0, fighting out of Los Angeles, Bubba Ribodeaux!
The judges for this bout are Jack Bonds, Timothy Bukovac and Don Winkell.
The bell rings for round one and we are underway!
A punch lands to the side of Ribodeaux 's head but he takes it in his stride.
Brown throws the kick towards the body but Ribodeaux avoids it.
Ribodeaux feints the counter takedown.
Brown keeps the fight standing with a nice sprawl.
Brown tried to counter with a leg kick but Ribodeaux avoided it.
Nice jab there from Brown.
Ribodeaux fails miserably with a takedown attempt.
Ribodeaux shoots in and gets a takedown into Brown's guard.
Brown wants to get back to his feet but Ribodeaux is in a dominant position and won't allow it.

Ribodeaux drops back for a leg but he's not going to get it - he lets go and Brown dives on top into guard.
Brown stands up and looks to throw the legs aside to pass to side control. Ribodeaux swivels though and keeps the full guard.
Ribodeaux is throwing his legs up, looking for submissions. Brown is aware though and is defending well.
Fantastic stuff here - a very entertaining period of action, which has drawn cheers from the crowd.
Brown is stalling in the full guard.
Brown is posturing up here but Ribodeaux has hold of an arm and he's gone for an armbar! Brown tries to roll out but it's too tight and Brown has to tap! Slick submission there by Ribodeaux!
Ladies and gentlemen, after 1:59 of round 1, we have a winner by way of Submission (Armbar). Bubba Ribodeaux!
|
|
|
|
|
|
|
|
|
|
|
|
|
|
|
|
|
|
|
|
|
|
|
| S |
C
A |
G |
S |
C
B |
G |
|
S |
C |
G |
|
energy
A | B |
|
hype
A | B |
|
pop
A | B |
|
mgr
A | B |
|
FIGHT
RATING
73% |
|
|
|
|
|
|
|
Undercard bout
|
Coming up we have a featherweight MMA rules bout between Brett Keane (ranked 2826 p4p, 3109 weight class) and Philip Marcus (ranked 297 p4p, 316 weight class). Over to our ring announcer for the fighter introductions!
 |
|
 |
| 175 cm
24
155
7 - 8 - 0 |
|
175 cm
21
148
3 - 2 - 0 |
Good wrestling
Excellent MT
Cardio machine |
|
Good wrestler
Lethal high kicks
Good gas tank |
|
| |
|
Ladies and gentlemen. This fight is 3 rounds, in the featherweight division.
Introducing the fighter to my left, fighting out of the red corner.
With a record of 7 - 8 - 0, fighting out of Los Angeles, Brett Keane!
And introducing the fighter to my right, fighting out of the blue corner.
With a record of 3 - 2 - 0, fighting out of Helsinki, Philip Marcus!
The judges for this bout are Frank Antenori, Don Winkell and Jack Bonds.
The bell rings for round one and we are underway!
Keane moves out of range as Marcus strikes.
Marcus slips under a jab from Keane.
Marcus ducks under an overhand right and circles away with a smile on his face.
Keane dips down and scores with a jab to the body.
Keane has been working on his boxing with his coaches at Crapollas Gym in the buildup to the fight.
Keane misses with a few strikes there.
Keane misses with an uppercut
and Marcus counters with a good low kick that Keane was not able to check.
Keane scores with a straight right hand, right through his opponent's guard.
Marcus keeping his hands up high there, blocking the jab from Keane.
Marcus takes a shot to the eye socket. That's gotta hurt.
Nice shot lands for Keane.
Keane looks to throw the jab but Marcus is out of range.
And an attempted straight right on the counter from Marcus! But no joy.
Keane throws an ugly left hook that misses
enabling Marcus to counter with a crisp jab.
This has been an exciting period of action!
Keane misses with a straight right.
Marcus avoids the body shot from Keane.
Keane uses good head movement to avoid the hook from Marcus.
Marcus connects with a looping left hand that seems like it dazed Keane momentarily.
Keane drops his hands momentarily and Marcus takes advantage with a crisp shot to the head.
Keane pushing out the jab but it's not landing.
That's one minute gone in the round.
Good shot there by Keane.
Nice cross by Marcus.
Keane throws a hook but Marcus blocks it.
Marcus lands with a good body shot.
Marcus moves out of range as Keane strikes.
Keane misses with a body shot.
A lazy left from Marcus finds it's target.
Keane throws a looping overhand right but Marcus ducks down to avoid it.
A slow jab from Keane misses its intended target.
And an attempted straight right on the counter from Marcus! But no joy.
Marcus walks into a jab.
Keane missing with a left hand there. Marcus was out of range so wasted energy throwing that one.
A nice leg kick lands there from Marcus.
Keane looks to throw the jab but Marcus is out of range.
This has been an exciting period of action!
Keane looks to throw the jab but Marcus is out of range.
A big left from Keane misses.
Keane thows a left - swing and a miss!
Marcus bobs and weaves well there to avoid the strikes.
Marcus appears to be waiting to throw a counter punch to the body.
Marcus slips a jab from Keane.
That's two minutes gone in the round.
Marcus avoids a lazy jab quite easily.
Keane avoids the body shot from Marcus.
Marcus throws a shot from downtown. Keane moves away and avoids it.
Marcus looks to throw the jab but Keane is out of range.
Keane rushes in with a sloppy looking punch
and Marcus counters with a nice uppercut.
Marcus throws a body shot but no joy.
Marcus moves away from the strike by Keane.
Keane takes an uppercut right on the jaw but it doesn't phase him.
Keane swinging wildly here.
Marcus slips under a jab from Keane.
Keane lands a jab. Then a cross. Then finally a nice hook to the body. Good work there by Keane.
It looks like Philip Marcus has been cut.
Keane misses with an uppercut.
Keane lands the left hand.
Keane looks to score with a jab to the body but Marcus is just out of range.
Keane takes a swing at Marcus's ribcage but misses.
Marcus has been working his punching technique in the buildup to the fight and it appears to be paying off.
Marcus waving his hands out in front of him, looking to distract Keane.
Brett Keane seems to be the more aggressive standup fighter in this bout.
That's three minutes gone in the round.
Keane avoids a lazy jab quite easily.
A punch combination from Marcus misses.
Marcus throws out a token jab with nothing on it.
Marcus staying out of range there.
Marcus is clearly trying to counter these attacks from Keane with a body shot.
Keane thows a left - swing and a miss!
It seemed like Marcus was going to counter with the hook but didn't fully commit to it.
Keane throws a looping overhand right but Marcus ducks down to avoid it.
And an attempted straight right on the counter from Marcus! But no joy.
Keane looks to land a right hand but Marcus moved out of range.
Marcus looks like he wants to counter punch here.
Marcus lands a nice hook to Keane's body. Keane takes it in his stride and looks to land his own strikes.
Keane scores with a jab.
Marcus ducks under a wild hook from Keane.
Keane throws a hook but Marcus blocks it.
Keane lands a glancing blow to the side of Marcus's head.
A big left from Keane misses.
A telegraphed right hand from Marcus misses the target.
Keane is really head hunting here, hardly looking to strike to the body at all.
Marcus lands a slapping body shot.
Marcus takes a jab right on the kisser.
We've seen a great period of action over the last minute or so - credit to both fighters for going all out!
Keane missing with a left hand there. Marcus was out of range so wasted energy throwing that one.
Keane backing away here, and Marcus unleashes a leg kick that just misses.
That's four minutes gone in the round.
Marcus lands with a hook. Keane tried to avoid it but it clipped the top of his head.
Marcus uses good head movement to avoid the hook from Keane.
Jab, jab by Marcus - just one landing.
Marcus tests Keane's chin there with a solid looking shot.
Keane is rocked!
Marcus circles away before darting back in with a big straight right hand. It connects beautifully and sends Keane tumbling to the canvas! He's out cold! Marcus wins by KO!
Ladies and gentlemen, after 4:22 of round 1, we have a winner by way of KO (Punch). Philip Marcus!
A very excited looking Philip Marcus made sure he remembered to thank all the fans both in the arena and on the internet. He said all the coolest people spend all day on MMA websites, which got a big reaction.
|
|
|
|
|
|
|
|
|
|
|
|
|
|
|
|
|
|
|
|
|
|
|
| S |
C
A |
G |
S |
C
B |
G |
|
S |
C |
G |
|
energy
A | B |
|
hype
A | B |
|
pop
A | B |
|
mgr
A | B |
|
FIGHT
RATING
67% |
|
|
|
|
|
|
|
Co-main event
|
Coming up we have a heavyweight MMA rules bout between Robek Robeksson (ranked 3089 p4p, 2718 weight class) and Pedro Bonzela Franco (ranked 386 p4p, 335 weight class). Pedro Bonzela Franco has the power to score a knockout today if he connects clean with Robek Robeksson's chin.
 |
|
 |
| 225 cm
26
291
5 - 3 - 0 |
|
180 cm
24
261
7 - 7 - 0 |
Powerful takedowns
Solid boxing
Cardio machine |
|
BJJ Purple Belt
Good kicks
Granite chin |
|
| |
|
Ladies and gentlemen. This fight is 3 rounds, in the heavyweight division.
Introducing the fighter to my left, fighting out of the red corner.
With a record of 5 - 3 - 0, fighting out of Rio de Janeiro, Robek Robeksson!
And introducing the fighter to my right, fighting out of the blue corner.
With a record of 7 - 7 - 0, fighting out of Las Vegas, Pedro Bonzela Franco!
The judges for this bout are Timothy Bukovac, Percy O'Donnell and Frank Antenori.
The bell rings for round one and we are underway!
Robeksson scores with a nice strike.
Bonzela Franco shoots in and gets a takedown into half guard. Bonzela Franco showed some decent athleticism there.
Robeksson is looking for a sweep. Bonzela Franco is wise to his cunning plan and keeps the top position.
Robeksson moves into full guard.
The ref warns both fighters not to hold the cage as they work up against the meshing.
Robeksson keeping moving, preventing Bonzela Franco from controlling successfully.
Robeksson definitely looks more muscular than last time we saw him fight.
Robeksson wants to sweep but no luck.
Robeksson pushes a forearm under Bonzela Franco's chin to create some space. He's escaped his hips and pivoted quickly for an armbar! Can he extend the arm? Yes, Bonzela Franco is tapping out! Damn, that was fast!
Ladies and gentlemen, after 0:52 of round 1, we have a winner by way of Submission (Armbar). Robek Robeksson!
Robek Robeksson decided to go for the less than humble approach in his post fight interview, telling everyone how he is going to conquer the world. The crowd seemed to like it when really that sort of approach could have gone either way.
|
|
|
|
|
|
|
|
|
|
|
|
|
|
|
|
|
|
|
|
|
|
|
| S |
C
A |
G |
S |
C
B |
G |
|
S |
C |
G |
|
energy
A | B |
|
hype
A | B |
|
pop
A | B |
|
mgr
A | B |
|
FIGHT
RATING
94% |
|
|
|
|
|
|
|
Main event
|
Coming up we have a super heavyweight MMA rules bout between Imro Rozenblad (ranked 2246 p4p, 2847 weight class) and San Chhay (ranked 86 p4p, 108 weight class). Rozenblad comes to the cage accompanied by Tjatjie - My Life . Both fighters look fresh as a daisy as they make their way towards the cage.
 |
|
 |
| 225 cm
25
300
6 - 1 - 0 |
|
200 cm
20
270
3 - 1 - 0 |
Good wrestling
Basic striking
Very strong |
|
BJJ Blue Belt
Excellent boxer
Good gas tank |
|
| |
|
Ladies and gentlemen. This fight is 5 rounds, in the super heavyweight division.
Introducing the fighter to my left, fighting out of the red corner.
With a record of 6 - 1 - 0, fighting out of Rio de Janeiro, Imro Rozenblad!
And introducing the fighter to my right, fighting out of the blue corner.
With a record of 3 - 1 - 0, fighting out of Helsinki, San Chhay!
The judges for this bout are Percy O'Donnell, Frank Antenori and Jack Bonds.
The bell rings for round one and we are underway!
Chhay staying out of range there.
Chhay misses with a looping left.
Rozenblad gets the takedown into side control.
The ref warns both fighters not to hold the cage as they work up against the meshing.
Chhay is working to avoid the ground and pound but Rozenblad connects with a decent elbow.
Rozenblad working away diligently from side control. Landing strikes effectively there - that will score him some points on the judges scorecards.
Rozenblad works a knee to the body and follows up with a nice elbow to the head.
Rozenblad landing with strikes to the head and body from side control.
Rozenblad scores with a couple of short elbows.
The crowd are loving this. Great action here.
Chhay stops Rozenblad from passing to mount.
Rozenblad will need to keep those long limbs tucked in whilst he's on the ground, to prevent any submissions.
Rozenblad laying and praying for a moment but Chhay takes advantage and regains half guard.
Rozenblad working Chhay over with strikes.
Chhay is rocked!
Rozenblad tries to pass to full mount but Chhay defends it.
Rozenblad is trying to advance to mount but he's lost his balance and Chhay reverses the position - he's now on top in Rozenblad's guard.
That's one minute gone in the round.
Rozenblad tries to land a sweep but no joy.
Rozenblad pulls Chhay in to control the position.
Chhay preventing the sweep.
A real slowdown in the pace of the fight for a moment, as Rozenblad holds on and takes a little breather.
Rozenblad on his back here. We all know that wrestlers don't like being on their back so let's see if Rozenblad tries to get out of the position.
Rozenblad avoiding any damage from the ground and pound.
Rozenblad wants to sweep but no luck.
Rozenblad is pulling down on Chhay's head to control his posture.
That's two minutes gone in the round.
The crowd are showing their displeasure at the lack of action as loud boos ring out around the arena.
Chhay preventing the sweep.
Rozenblad wants to control here, rather than go for any submissions from the bottom. At least for now.
Chhay postures up to throw the ground and pound strikes but they don't connect.
Rozenblad lands a beautiful sweep and he's now moved into his opponent's guard.
Chhay looks more muscular than last time we saw him. He must have been on the weights.
Chhay wants to stand up but Rozenblad is controlling him.
Chhay is looking to stand back up... there's a bit of a scramble and Rozenblad dives into side control.
Chhay regains half guard, as Rozenblad was trying to land strikes.
Rozenblad has freed up his trapped foot and advances to mount.
That's three minutes gone in the round.
Rozenblad is still in mount, landing shots to his trapped opponent. Chhay can't stay in a position like this for much longer.
The fighters are pressed up against the cage, both looking to find a bit of space to work.
Rozenblad postures up and throws a big right hand. BOOM! Right on the button! Chhay is out cold - huge knockout for Rozenblad!
Ladies and gentlemen, after 3:46 of round 1, we have a winner by way of KO (Strikes). Imro Rozenblad!
A relieved looking Imro Rozenblad thanked the fans for their support and gave the usual line about them being amazing. They seemed to believe that he actually meant it.
|
|
|
|
|
|
|
|
|
|
|
|
|
|
|
|
|
|
|
|
|
|
|
| S |
C
A |
G |
S |
C
B |
G |
|
S |
C |
G |
|
energy
A | B |
|
hype
A | B |
|
pop
A | B |
|
mgr
A | B |
|
FIGHT
RATING
36% |
|
|
|
|
|
|
|
|
|
|

