 |
RISE 69: PBP Commentary |
Undercard bout
|
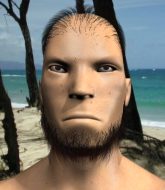
Coming up we have a lightweight MMA rules bout between Tapani Kangas (ranked 5480 p4p, 6279 weight class) and Jair Brown (ranked 533 p4p, 576 weight class). Jair Brown is staring across the cage at his opponent, tweaking his nipples.
 |
|
 |
| 178 cm
20
155
3 - 5 - 0 |
|
178 cm
19
158
0 - 1 - 0 |
BJJ Blue Belt
Excellent boxer
Granite chin |
|
Decent wrestler
Excellent MT
Good gas tank |
|
| |
|
Ladies and gentlemen. This fight is 3 rounds, in the lightweight division.
Introducing the fighter to my left, fighting out of the red corner.
With a record of 3 - 5 - 0, fighting out of Helsinki, Tapani Kangas!
And introducing the fighter to my right, fighting out of the blue corner.
With a record of 0 - 1 - 0, fighting out of London, Jair Brown!
The judges for this bout are Tarja Halkonen, Ben Zyskovitsi and Arvi Lind.

The bell rings for round one and we are underway!
Brown closes the distance and takes a jab right on the nose as he does so.
A punch lands to the side of Kangas 's head but he takes it in his stride.
A big right from Brown misses.
Brown connects with a crisp jab.
Kangas misses the jab.
Kangas throws an overhand right that lands on Brown's shoulder, as Brown tries to avoid the shot.
Kangas takes a swing at Brown's ribcage but misses.
Brown swings away with a counter right hand but no contact made.
Brown connects with a right hand. Kangas shakes it off.
Kangas blocks a jab.
Kangas digs a good body shot into Brown's ribs.
Kangas just misses with a punch to the body.
Kangas has his hands up protecting his head but a hook from Brown finds it's way round the side to connect with Kangas's head.
Brown tries to work over Kangas's front leg with a kick but Kangas checks it.
Brown cracks Kangas with a hook to the jaw. Both fighters smile at eachother and high-five before getting back down to business.
This is a great period of action - very entertaining stuff!
Brown misses with a hook.
Kangas lands a nice looking body shot.
Kangas throws a looping overhand right but Brown ducks down to avoid it.
Brown throws a nice outside leg kick.
Brown is looking to land body kicks.
Brown waving his hands out in front of him, looking to distract Kangas.
Kangas wants to take advantage of his opponent's missed offense by moving into the clinch.

That's one minute gone in the round.
A jab from Kangas finds it's way through Brown's defenses.
Brown looking to land some kicks to the body here.
Brown jabs at Kangas's body.
Brown slips a straight right by Kangas.
Brown appeared to try and counter that last move with a leg kick.
Kangas closes the distance and takes a jab right on the nose as he does so.
A good leg kick by Brown.
Kangas uses good footwork to avoid the strikes from Brown.
Kangas throws an off balance right hand

and Brown counters into the clinch. Nicely done.
Brown lands a hook to the side of the head.
Kangas tries to work over Brown's body with a swooping hook but it only glances the target.
Brown lands on the inside with an uppercut.
Brown blocks a punch to the side of the head.
Kangas misses with some punches.
Brown makes some space for himself and lands an uppercut.
This has been an exciting period of action!
A short right from Brown on the inside.
Brown struggles to land a body shot inside as Kangas controls his hands.
Brown lands a short shot on the inside that snaps the head of Kangas backwards.
Brown throws a blind hook that connects with the side of Kangass head.

That's two minutes gone in the round.
Brown misses with a shot to the kidneys.
A short right from Kangas on the inside.
Kangas misses with a short punch on the inside.
Brown scores with a shot to the side of Kangas's head.
Brown works on Kangas's body with a couple of short punches.
Kangas prevents a body shot from Brown.
Brown softening up his opponent with strikes, against the cage.
Kangas throws a head punch that misses.
Brown scores with an uppercut up the middle.
Brown lands with a quick shot inside that doesn't really do much damage.
Brown works on Kangas's body with a couple of short punches.
Brown lands with a left to the head.
Brown lands a hook that snaps the head of Kangas backwards.
Brown blocks a punch to the side of the head.
Kangas throws a punch but it's blocked by Brown.
A short body shot lands from Brown as the two fighters clinch.
Brown digs a right hand underneath Kangas's ribcage. Kangas let out a lung full of air as it connected.
Kangas is breathing heavily.
Brown stalling in the clinch.
Come on Brown - let's have some action - none of this stalling nonsense.
Kangas misses with a body punch.

That's three minutes gone in the round.
Kangas swings away with an uppercut that misses.
Brown has been looking to improve his clinch game in recent weeks. Kangas seems to have the measure of him in the clinch so far, so let's see if Brown can turn it around.
Brown lands a nice looking hook to the body, against the cage.
A hook to the body from Brown.
Brown tries to throw a body punch but Kangas avoids it by throwing Brown back against the cage.
Brown works on Kangas's body with a couple of short punches.
Brown pushes Kangas back against the cage and unloads with a body punch.
Kangas struggles to land a body shot inside as Brown controls his hands.
Brown throws a blind hook that connects with the side of Kangass head.
A quick uppercut on the inside from Brown.
A left hand lands to the body for Brown.
Brown lands punches inside but they're not really causing much damage.
A right hook to the body lands for Brown.
Brown lands a shoulder strike.
Brown lands with a left to the head.
Brown stalls.
Kangas misses with a shot to the kidneys.
Brown doesn't land with the attempted body shot.
Kangas has a couple of punches blocked by Brown.

That's four minutes gone in the round.
Wooooo! Give it up for these two warriors! They are putting on a show!
Brown lands a shot to the body.
Brown lands a shoulder strike.
Brown throws a blind hook that connects with the side of Kangass head.
A left hand lands to the body for Brown.
Kangas doesn't land with the attempted body shot.
Brown lands a nice shot to the body.
Brown pushes Kangas back against the cage and unloads with a body punch.
Brown lands a nice shot to the body.
With the fighters clinched against the cage, Brown creates a bit of distance for himself and scores with a nice uppercut.
Brown working some nice short punches in the clinch.
Brown lands a hook to the side of the head.
Brown misses with a body punch.
Brown lands a short shot on the inside that snaps the head of Kangas backwards.
Brown scores with a nice hook to the head.
A left hand lands to the body for Brown.
The crowd applaud the fighters' efforts here as the round comes to an end.
A short right from Brown on the inside.
Kangas misses with a shot to the kidneys.
Brown pushes Kangas back against the cage and unloads with a body punch.
Kangas prevents a body shot from Brown.
And that is the end of the round. The fighters go back to their corners.
Jair Brown dominated that round.
Well, the break between rounds is over. Let's get back to the scrappin!

Kangas takes a nasty kick to the mid section... That should keep him thinking. Does he try and block and risk a head kick landing?
Kangas takes a swing at Brown's ribcage but misses.
Kangas misses with a body shot.
Brown moves out of range as Kangas strikes.
Brown gets cracked with a nice right hand there by Kangas.
Brown feints a straight left to the body, then turns around with a flashy move and hits Kangass jaw with a dramatic spinning back fist!
Brown staying out of range there.
Brown throws a nice inside leg kick.
We are yet to see a takedown attempt from Brown in the fight. On paper you would think he is the more dominant ground fighter so let's see if these unusual tactics pay off.
Kangas tries to move into range but Brown moves to the side and lands with a nice right hand.
Brown lands with an uppercut that bounces Kangas off the cage and back into range.
Jair Brown seems to be getting the better of the standup.
Kangas uses decent footwork to sidestep a right hand from Brown.
Kangas looks to score with a jab to the body but Brown is just out of range.
Brown looked like he wanted to counter with a punch but didn't throw it.
Brown feints and then cracks Kangas's leading leg with a nice low kick. He's obviously looking to slow Kangas down.
Brown uses good footwork to get in and out and land a nice right hand before Kangas has time to react.
We've seen a great period of action over the last minute or so - credit to both fighters for going all out!
A telegraphed right hand from Kangas misses the target.
Brown with the inside leg kick.
Brown scores with a nice head shot.
Brown lands with a thumping leg kick.
That's one minute gone in the round.
That kick from Brown tenderised Kangas's leg. Kangas is trying to keep his angry face on.
Brown moves into range and lands a nice leg kick.
Kangas misses with a hook. Brown ducked under it nicely.
Kangas takes an uppercut right on the jaw but it doesn't phase him.
Brown lands an overhand right.
Good leg kick by Brown.
Kangas misses with a straight left.
Kangas moves out of range of the body kick.
Brown fakes high and swings low for a body shot but Kangas manages to avoid it.

Kangas closes the distance and clinches.
Brown lands a left hand.
Kangas blocks a body shot from Brown.
A head punch blocked on the inside by Brown.
Jair Brown seems to be working more effectively in the clinch in the fight so far.
Kangas misses with a punch on the inside.
Brown working some nice short punches in the clinch.
We've seen a great period of action over the last minute or so - credit to both fighters for going all out!
Brown digs a right hand into Kangas's ribs. Those have got to be taking their toll on Kangas's gas tank.
Brown lands a hook that snaps the head of Kangas backwards.
That's two minutes gone in the round.
A short right hand to the side of the head by Brown.
Brown works for underhooks and lands a body shot in the process.
Kangas throws a punch but it's blocked by Brown.
Brown blocks an uppercut.
The pace slowing considerably in the clinch, as Brown takes a break from that fighting nonsense to think about the finer things in life.
Brown lands punches inside but they're not really causing much damage.
Kangas goes for a body shot but it's blocked.
Brown lands a shoulder strike that jolts his opponent's head backwards.
Kangas prevents a body shot from Brown.
Brown scores with a shot to the side of Kangas's head.
Brown lands a right uppercut that snaps the head of Kangas backwards.
Brown lands a hook to the body. It's hard to tell if that hurt Kangas or not.
Brown is working Kangas over against the cage.
Both fighters are absolutely exhausted here.
Brown lands a body punch - he's looking to wear down Kangas.
Brown scores with an uppercut up the middle.
Kangas working aggressively here.
A shot in the inside from Brown.
Brown lands punches inside but they're not really causing much damage.
That's three minutes gone in the round.
Kangas's head jolts backwards as he takes an uppercut right on the button!
A right handed body shot lands from Brown.
Brown digs a right hand into Kangas's ribs. Those have got to be taking their toll on Kangas's gas tank.
Brown lands a left hand.
A left hand lands to the body for Brown.
Kangas takes a shot to the head.
A hook to the body from Brown.
Brown gets through Kangas's defenses to land a nice punch to the side of the head.
A shot in the inside from Brown.
Brown lands a short shot on the inside that snaps the head of Kangas backwards.
Kangas's head jolts backwards as he takes an uppercut right on the button!
Brown lands a hook to the side of the head.
Wooooo! Give it up for these two warriors! They are putting on a show!
A left hand lands to the body for Brown.
A short body shot lands from Brown as the two fighters clinch.
Brown lands a shoulder strike.
An uppercut to the body lands inside from Brown.
Brown lands a hook that snaps the head of Kangas backwards.
Brown works on Kangas's body with a couple of short punches.
A short right hand to the side of the head by Brown.
That's four minutes gone in the round.
Brown lands punches inside but they're not really causing much damage.
Kangas swings wildly with an uppercut but Brown uses good head movement to avoid it.
Brown lands a left hand that snaps the head of Kangas backwards.
Kangas throws a punch but it's blocked by Brown.
Brown blocking some punches.
Brown lands with a left to the head.
Brown working on landing some head shots here - that one got through nicely.
Brown lands a shoulder strike that jolts his opponent's head backwards.
Brown has been the more effective fighter overall so far.
Brown lands with a good tight uppercut to the head.
Kangas is hobbling a little on that front leg after taking quite a few leg kicks so far in this fight.
Brown lands a short shot on the inside that snaps the head of Kangas backwards.
 Kangas is rocked! Kangas is rocked!
Kangas swings away with an uppercut that misses.
Oh Kangas is still all over the place! His legs are completely gone! Will he be able to recover?!!
Brown lands a shoulder strike that jolts his opponent's head backwards.
Brown stalling in the clinch.
A short body shot lands from Brown as the two fighters clinch.
The crowd applaud the fighters' efforts here as the round comes to an end.
Kangas throws a head punch that misses.
Brown working some nice short punches in the clinch.
Brown creates a bit of space for himself and rocks Kangas with a big uppercut! Kangas tries to clinch up but Brown pushes him back against the cage and lands another monster strike that crumples Kangas to the mat! Kangas covers up and Brown unloads with more strikes until the referee steps in to end the bout!
Ladies and gentlemen, after 4:55 of round 2, we have a winner by way of TKO (Punches). Jair Brown!
|
|
|
|
|
|
|
|
|
|
|
|
|
|
|
|
|
|
|
|
|
|
|
| S |
C
A |
G |
S |
C
B |
G |
|
S |
C |
G |
|
energy
A | B |
|
hype
A | B |
|
pop
A | B |
|
mgr
A | B |
|
FIGHT
RATING
92% |
|
|
|
|
|
|
|
Undercard bout
|
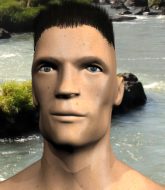
Coming up we have a heavyweight MMA rules bout between Sam Bass (ranked 4189 p4p, 5447 weight class) and Westley Adofo (ranked 485 p4p, 567 weight class). Sam Bass has the edge in experience - let's see if he can make that count tonight.
 |
|
 |
| 200 cm
20
275
1 - 2 - 0 |
|
194 cm
20
265
1 - 0 - 0 |
Good wrestling
Excellent MT
Cardio machine |
|
Decent wrestler
Lethal high kicks
Heavy handed |
|
| |
|
Ladies and gentlemen. This fight is 3 rounds, in the heavyweight division.
Introducing the fighter to my left, fighting out of the red corner.
With a record of 1 - 2 - 0, fighting out of New York, Sam Bass!
And introducing the fighter to my right, fighting out of the blue corner.
With a record of 1 - 0 - 0, fighting out of London, Westley Adofo!
The judges for this bout are Matti Vanhoillinen, Johanna Lukiainen and Ben Zyskovitsi.
The bell rings for round one and we are underway!
Bass tries to score with a low kick but Adofo moves his leg out of the way.
Adofo counters with a body kick.
Adofo takes a jab on the nose there. A little bit of blood seems to be coming out. Hopefully that won't affect his breathing.
Bass steps to the side to avoid the strikes from Adofo.
Adofo works the jab nicely.
Adofo lands with a shot to the body.
Good standup being displayed there by Bass as he connects with a hook.
We've been told by Bass's head coaches at Outlaw MMA that he's been working on his takedown defense in preparation for this fight.
Bass takes a jab on the nose there. A little bit of blood seems to be coming out. Hopefully that won't affect his breathing.
Adofo thuds a left hand into Bass's body.
Adofo moves out of range as Bass strikes.
Bass cracks Adofo with a right hand to the side of the head.
This has been an exciting period of action!
Adofo throws the left hand but Bass avoids the punch easily.
Adofo fakes high and swings low for a body shot but Bass manages to avoid it.
Bass with a hook.
Bass takes a body punch that cleary hurt but he's trying not to show any weakness.
Bass scores with a nice strike.
 Adofo is rocked! Adofo is rocked!
Today's fight clock is brought to you by... OOOH that's a huge shot by Bass! Adofo is in big trouble here - the ref steps in to save him and this one is all over!
Ladies and gentlemen, after 0:55 of round 1, we have a winner by way of TKO (Strikes). Sam Bass!
Sam Bass seemed lost for words in his post fight interview but he remembered to thank his fans and directed everyone to his website.
In defeat, Westley Adofo stepped up to the mic, saying 'I don't know where the ref was looking, that was an unfair stoppage, I demand a rematch!'.
|
|
|
|
|
|
|
|
|
|
|
|
|
|
|
|
|
|
|
|
|
|
|
| S |
C
A |
G |
S |
C
B |
G |
|
S |
C |
G |
|
energy
A | B |
|
hype
A | B |
|
pop
A | B |
|
mgr
A | B |
|
FIGHT
RATING
93% |
|
|
|
|
|
|
|
Undercard bout
|
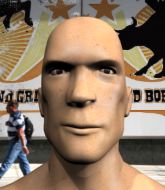
Coming up we have a featherweight MMA rules bout between Somchai Chen (ranked 6572 p4p, 3933 weight class) and Miguel Baez (ranked 472 p4p, 362 weight class). Somchai Chen has the edge in experience - let's see if he can make that count tonight.
 |
|
 |
| 167 cm
19
149
1 - 3 - 0 |
|
170 cm
20
145
2 - 1 - 0 |
BJJ White Belt
Brawler
Good chin |
|
BJJ White Belt
Decent boxing
Good gas tank |
|
| |
|
Ladies and gentlemen. This fight is 3 rounds, in the featherweight division.
Introducing the fighter to my left, fighting out of the red corner.
With a record of 1 - 3 - 0, fighting out of Las Vegas, Somchai Chen!
And introducing the fighter to my right, fighting out of the blue corner.
With a record of 2 - 1 - 0, fighting out of New York, Miguel Baez!
The judges for this bout are Matti Vanhoillinen, Roosa Järviläinen and Ben Zyskovitsi.
The bell rings for round one and we are underway!
Baez takes a step towards his opponent and connects with a left hand, before circling away.
 It looks like Somchai Chen has been cut. It looks like Somchai Chen has been cut.
Chen tries to grapple but his opponent circles
and Baez counters with a shot to the ribs. That looked like it hurt.

Baez drops Chen with a beautiful combination! Chen stares up at his opponent, who ushers him back to his feet - Baez is looking for the KO!
Chen is rocked!
Chen is holding his hands too far apart here. Baez throws a hard, straight punch right down the pipe and BOOM! Chen is out! That punch landed square on the jaw - what a shot!
Ladies and gentlemen, after 0:21 of round 1, we have a winner by way of KO (Punch). Miguel Baez!
After winning the bout, Miguel Baez thanked all his fans and promised he'd do even better in his next fight. The crowd seemed to love his humility.
|
|
|
|
|
|
|
|
|
|
|
|
|
|
|
|
|
|
|
|
|
|
|
| S |
C
A |
G |
S |
C
B |
G |
|
S |
C |
G |
|
energy
A | B |
|
hype
A | B |
|
pop
A | B |
|
mgr
A | B |
|
FIGHT
RATING
100% |
|
|
|
|
|
|
|
Undercard bout
|
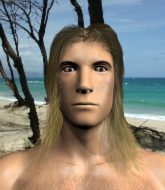
Coming up we have a middleweight MMA rules bout between Taz FeoTeo (ranked 4563 p4p, 3786 weight class) and Jim Fish (ranked 516 p4p, 462 weight class). The atmosphere really building for this one as we go over to our ring announcer for the fighter introductions!
 |
|
 |
| 185 cm
19
190
1 - 0 - 0 |
|
185 cm
18
196
1 - 0 - 0 |
BJJ White Belt
Dangerous knees
Granite chin |
|
BJJ White Belt
Decent boxing
Heavy handed |
|
| |
|
Ladies and gentlemen. This fight is 3 rounds, in the middleweight division.
Introducing the fighter to my left, fighting out of the red corner.
With a record of 1 - 0 - 0, fighting out of London, Taz FeoTeo!
And introducing the fighter to my right, fighting out of the blue corner.
With a record of 1 - 0 - 0, fighting out of Las Vegas, Jim Fish!
The judges for this bout are Tarja Halkonen, Ben Zyskovitsi and Anni Minnemäki.
The bell rings for round one and we are underway!
FeoTeo tries to clinch but Fish is having none of it.
FeoTeo looks to throw the jab but Fish is out of range.
Nice shot lands for Fish.
No joy there for Fish, who threw a few shots but didn't land.
FeoTeo works the jab nicely.
A bone on bone clash there as FeoTeo blocks the leg kick.
Fish swings widly with a right hand
enabling FeoTeo to counter with a crisp jab.
Fish cracks FeoTeo with a hook to the jaw. Both fighters smile at eachother and high-five before getting back down to business.
FeoTeo moves his head to the side to avoid a jab but walks straight into a cross.
Fish thows a left - swing and a miss!
FeoTeo scores with a jab to the body.
FeoTeo looks to land a combination but Fish avoids it well.
The crowd are loving this. Great action here.
FeoTeo takes a swing at Fish's ribcage but misses.
Fish lands a lovely overhand right.
Fish is the aggressor but that punch slipped nicely by FeoTeo.
It appears FeoTeo was looking to counter with a kick there.
Fish lands a jab.
That's one minute gone in the round.
FeoTeo tries to clinch up.
Fish swings away with a counter right hand but no contact made.
FeoTeo is pinned up against the cage taking some big shots here. The referee is looking closely deciding whether he should stop the fight.
Fish throws an uppercut from half a mile away. FeoTeo sees it coming and avoids it easily.
FeoTeo tries to work over Fish's front leg with a kick but Fish checks it.
Fish throws a shot from downtown. FeoTeo moves away and avoids it.
Fish throws an ugly left hook that misses
and Fish takes a counter punch right on the button for his troubles.
 It looks like Jim Fish has been cut. It looks like Jim Fish has been cut.
FeoTeo has been working on his boxing with his coaches at Slaughter Houze in the buildup to the fight.
Fish misses with a lunging right hand
and FeoTeo counters with a nice leg kick.
Nice body kick from FeoTeo.
Fish misses with a kick to the body.
Fish takes a swing at FeoTeo's ribcage but misses.
FeoTeo keeping a good distance there, avoiding the body shot.
FeoTeo moves away from the strike by Fish.
FeoTeo throws a head kick that misses and slips in the process. He scrambles back to his feet and the fighters circle.
Fish throws a jab when FeoTeo was well out of range.
FeoTeo tried to counter with a leg kick but Fish avoided it.
Sloppy strikes from Fish. Those never looked like landing.
Fish might want to mix his strikes up a bit more. He's just going for head shots at the moment and that can become a bit predictable.
That's two minutes gone in the round.
FeoTeo has taken the fight to the clinch.
The crowd are loving this. Great action here.
Fish is trying to work out of this bad position, with his back against the cage.

FeoTeo manages to break the clinch.
Fish walks forward, straight into a front kick from FeoTeo.
FeoTeo walks straight into an uppercut. Luckily it didn't land flush.
Fish rushes in with a sloppy looking punch
and FeoTeo counters with a lovely straight right hand!
FeoTeo slips a straight right by Fish.
Fish changes levels and scores with a jab to the body.
Fish swings for the body but FeoTeo moves out of range.
FeoTeo quickly followed up with a counter body kick but doesn't connect.
Fish misses with an uppercut
and FeoTeo counters with a left to the body.
Fish misses with an uppercut.
It looked like FeoTeo wanted to counter with a hook but didn't fully commit.
Fish throws an ugly left hook that misses
and as Fish loses concentration momentarily, FeoTeo counters with a picture perfect head kick! Fish goes down, out cold! The referee rushed in to check on his condition - I'm sure he'll be ok but that was a massive knockout!
Ladies and gentlemen, after 2:53 of round 1, we have a winner by way of KO (Head Kick). Taz FeoTeo!
Taz FeoTeo decided to thank the fans in attendance for making a great atmosphere. It seemed to go down pretty well.
|
|
|
|
|
|
|
|
|
|
|
|
|
|
|
|
|
|
|
|
|
|
|
| S |
C
A |
G |
S |
C
B |
G |
|
S |
C |
G |
|
energy
A | B |
|
hype
A | B |
|
pop
A | B |
|
mgr
A | B |
|
FIGHT
RATING
53% |
|
|
|
|
|
|
|
Undercard bout
|
Coming up we have a welterweight MMA rules bout between Oumarou Zula (ranked 4196 p4p, 3904 weight class) and Ichiro Sato (ranked 492 p4p, 469 weight class). Both fighters look fresh as a daisy as they make their way towards the cage.
 |
|
 |
| 183 cm
19
179
1 - 3 - 0 |
|
176 cm
20
180
2 - 2 - 0 |
Powerful takedowns
Basic striking
Granite chin |
|
Dangerous GnP
Dangerous knees
Granite chin |
|
| |
|
Ladies and gentlemen. This fight is 3 rounds, in the welterweight division.
Introducing the fighter to my left, fighting out of the red corner.
With a record of 1 - 3 - 0, fighting out of Montreal, Oumarou Zula!
And introducing the fighter to my right, fighting out of the blue corner.
With a record of 2 - 2 - 0, fighting out of London, Ichiro Sato!
The judges for this bout are Tarja Halkonen, Ben Zyskovitsi and Marco Blurström.
The bell rings for round one and we are underway!
Zula misses with a jab to the body
and Sato counters into the clinch. Nicely done.
Sato working Zula over with knees to the body.
Sato with the Thai clinch. He's looking to land a big knee but he's not managed it this time.
Zula definitely looks more muscular than last time we saw him fight.
Sato unloads a knee to the mid-section.
Sato throws a nice elbow but it doesn't land.
Sato looks more muscular than last time we saw him. He must have been on the weights.
Sato lands a nice knee to the body.
Sato tries a knee to the head but he's missed.
Sato blocks an uppercut.
Sato throws a vicious knee straight up the middle but Zula blocks it with crossed arms.
Sato throws an elbow but it misses.
Sato landing knees to the body.
Sato with the Thai clinch, lands a knee to the head.
It looks like Oumarou Zula has been cut.
Sato lands a knee to the head.
Zula is breathing heavily.
This has been an exciting period of action!
A knee to the head by Sato.
Sato misses with a punch on the inside.
Sato scores with a knee to the head.
Sato has a couple of punches blocked by Zula.
Sato landing knees to the body. They look like they could hurt.
That's one minute gone in the round.
Sato with a knee to the head.
Sato connects with a knee to the head.
Zula is rocked!
Sato using the Thai clinch to land knees to the body.
Oh Zula is still all over the place! His legs are completely gone! Will he be able to recover?!!
Sato utilising his Muay Thai to score with a knee to the body.
Sato with a knee to the head.
Knees in the clinch landing for Sato.
Sato lands a knee to the body.
Zula seems to have got his legs back now.
Sato using the Thai clinch to land knees to the body.
Kneeeeees! The crowd are calling for knees to the body. Sato obliges.
We've seen a great period of action over the last minute or so - credit to both fighters for going all out!
Zula blocks an elbow strike from Sato.
Sato scores a nice knee to the body.
Sato lands a knee to the head.
Zula takes a knee right on the jaw!
Oumarou Zula's cut is getting worse.
Sato landing knees to the body.
Sato landing knees to the body.
Sato putting his Muay Thai to good use. He has Zula in a tight clinch and is doing some damage with knees to the body.
Sato using the Thai clinch to land knees to the body.
Sato creates a bit of distance and throws an elbow that only just misses.
That's two minutes gone in the round.
Sato with a knee to the head.

Zula manages to pull guard.
Sato trying to control but Zula is working from the bottom.
Sato distracts Zula with his right hand and drops a big elbow with his other arm.
The ref warns both fighters not to hold the cage as they work up against the meshing.
Sato with a couple of shots to the head there. Not particularly brutal.
Zula has momentary wrist control but Sato slips an elbow through the middle.
Sato is in close to Zula's body, working some short punches and elbows.
Sato lands a couple of elbows.
Zula working a defensive guard here.
Zula managing to control the position.
The fighters are pressed up against the cage, both looking to find a bit of space to work.
Zula throws a couple of weedy looking strikes off his back.
That's three minutes gone in the round.
Sato working from the guard for now, landing some ground and pound.
Sato makes a bit of distance and scores with some ground and pound, still in guard.
Zula working a defensive guard here.
Sato lands a couple of digs.
Sato wants to control from the top but Zula keeps moving.
Sato cracks Zula with a solid left hand.
Sato with a couple of shots to the head there. Not particularly brutal.
Sato is working the ground and pound from guard. He might want to try advancing position though to get more of an impact.
Sato being controlled here momentarily.
Sato trying to control but Zula is working from the bottom.
That's four minutes gone in the round.
Sato arches his back and unloads with a massive left and a right! Zula's eyes roll back into his head, he's out cold! The ref dives in to stop the fight - wow, they were hard shots!
Ladies and gentlemen, after 4:27 of round 1, we have a winner by way of KO (Strikes). Ichiro Sato!
|
|
|
|
|
|
|
|
|
|
|
|
|
|
|
|
|
|
|
|
|
|
|
| S |
C
A |
G |
S |
C
B |
G |
|
S |
C |
G |
|
energy
A | B |
|
hype
A | B |
|
pop
A | B |
|
mgr
A | B |
|
FIGHT
RATING
60% |
|
|
|
|
|
|
|
Undercard bout
|
Coming up we have a middleweight MMA rules bout between Jay Sossy (ranked 3852 p4p, 4383 weight class) and Timo White (ranked 464 p4p, 508 weight class). Sossy comes to the cage accompanied by Sauce it up. Over to our ring announcer for the fighter introductions!
 |
|
 |
| 190 cm
26
193
2 - 1 - 0 |
|
186 cm
26
195
5 - 3 - 0 |
BJJ Purple Belt
Excellent MT
Good chin |
|
BJJ White Belt
Excellent MT
Heavy handed |
|
| |
|
Ladies and gentlemen. This fight is 3 rounds, in the middleweight division.
Introducing the fighter to my left, fighting out of the red corner.
With a record of 2 - 1 - 0, fighting out of Helsinki, Jay Sossy!
And introducing the fighter to my right, fighting out of the blue corner.
With a record of 5 - 3 - 0, fighting out of Helsinki, Timo White!
The judges for this bout are Matti Vanhoillinen, Roosa Järviläinen and Marco Blurström.
The bell rings for round one and we are underway!
White has Sossy up against the cage in a clinch.
Sossy missing with knees to the body.
White swings away with an uppercut that misses.
White leaning his opponent against the cage.
White avoiding damage as Sossy throws knees to the body.
Sossy missing with knees to the body.
White avoiding damage as Sossy throws knees to the body.
White lands a hook to the side of the head.
Sossy tries a knee to the head but White blocks it.
Sossy throws a vicious knee straight up the middle but White blocks it with crossed arms.
We've had a slow start to the round here - hopefully the action picks up.
Sossy trying to land knees to the body.
White misses with a punch to the body.
Sossy is looking to score with knees to the body. Maybe he'll change it up and go body then head. White is defending well for now.
Sossy blocks a punch to the side of the head.
A nice left hand lands by White.
That's one minute gone in the round.
White lands with a left to the head.
Sossy breaks from the clinch.
Sossy scores with a head kick.
White ducks down and throws a hook to the body but Sossy moves away.
Sossy definitely looks more muscular than last time we saw him fight.
The fight moves into the clinch position.
White on the defensive, avoiding the knees to the body.
Nice body punch from White.
White blocks a knee to the body. He'll have a nicely bruised forearm in the morning.
Sossy trying to land knees to the body.
White is struggling to control the position.
Sossy is trying to push White away but White has him pressed against the cage, so he's going nowhere.
White cracks Sossy with a nice body shot.
Sossy working hard to break the clinch.
Nice body punch from White.
That's two minutes gone in the round.
Sossy tries to break the clinch but White is controlling the position.
A short right from White.
Sossy misses the knee to the body. Nice hip positioning from White.
White on the defensive, avoiding the knees to the body.
White keeps the fight in the clinch, despite Sossy's efforts to push away.
Sossy wants to strike at distance but he can't break free of the clinch.
White on the defensive, avoiding the knees to the body.
White lands a short shot on the inside that snaps the head of Sossy backwards.
We've seen a great period of action over the last minute or so - credit to both fighters for going all out!
Sossy has had enough of the clinch and is looking to separate.
Sossy misses the knee to the body. Nice hip positioning from White.

White breaks the clinch.
Sossy wants to slow White down by chopping away at his legs.
The fight moves into the clinch position.
Sossy is looking to score with knees to the body. Maybe he'll change it up and go body then head. White is defending well for now.
That's three minutes gone in the round.
Sossy with the Thai clinch. He's looking to land a big knee but he's not managed it this time.
White lands a right hand.
Sossy tries to land a knee to the head but misses.
Sossy tries to land a knee to the body but he is off balance and White avoids it.
Sossy wants to break the clinch but can't.
White lands a hook to the body. It's hard to tell if that hurt Sossy or not.
Sossy misses the knee to the body. Nice hip positioning from White.
White lands with a right to the head.
White displaying some good clinch control by pressing Sossy up against the cage.
White scores with a shoulder strike.
Sossy throws a vicious knee straight up the middle but White blocks it with crossed arms.
Sossy misses with a knee to the head.
Sossy has had enough of the clinch and is looking to separate.
White on the defensive, avoiding the knees to the body.
That's four minutes gone in the round.
Sossy scores a nice knee to the body.
Good body shot from White.
Sossy has had enough of the clinch and is looking to separate.
White lands a nice uppercut.
White managing to block the knees to the body from Sossy.
White lands a body shot.
This is a great period of action - very entertaining stuff!
A left hand lands to the body for White.
Sossy is breathing heavily.
Sossy wants to break the clinch but can't.
White prevents Sossy from breaking the clinch.
White leaning his opponent against the cage.
Sossy wants to break free. God knows he wants to breaaaak freeee.
Sossy tries to land a knee to the head but misses.
White avoiding damage as Sossy throws knees to the body.
And that is the end of the round. The fighters go back to their corners.
A close round but Timo White will probably get the nod.
Well, the break between rounds is over. Let's get back to the scrappin!
White rushes Sossy and pushes him back against the cage in a clinch.
Sossy wants to break free. God knows he wants to breaaaak freeee.
White scores with a shoulder strike.
Sossy is trying to break the clinch but White is controlling him.
White misses with a shot to the kidneys.
Sossy tries to land a knee to the body but he is off balance and White avoids it.
Sossy tries to land knees in the clinch but White avoids the damage to the body.
Sossy is trying to break the clinch but White is controlling him.
White avoiding damage as Sossy throws knees to the body.
White managing to block the knees to the body from Sossy.
An uppercut to the body lands inside from White.
We've had a slow start to the round here - hopefully the action picks up.
Sossy misses with a knee strike.
White avoiding damage as Sossy throws knees to the body.
White managing to block the knees to the body from Sossy.
A short body shot lands from White as the two fighters clinch.
Good body shot from White.
That's one minute gone in the round.
Sossy tries to land knees in the clinch but White avoids the damage to the body.
Both fighters are absolutely exhausted here.
White lands a body punch in the clinch.
A body shot lands from White.
Timo White seems to be working more effectively in the clinch in the fight so far.
Sossy takes a shot to the head.
White lands a right uppercut that snaps the head of Sossy backwards.
White lands a body punch in the clinch.
White breaks the clinch and we return to the middle of the mat.
White closes the distance and presses his opponent up against the cage.
White blocks a knee to the body. He'll have a nicely bruised forearm in the morning.
White will no doubt start fighting again in a minute but for now he's just having a little rest, leaning Sossy up against the cage.
Sossy trying to land knees to the body.
White lands a shot to the body.
White has been the more effective fighter overall so far.
White blocks a knee to the body. He'll have a nicely bruised forearm in the morning.
White works for underhooks and lands a body shot in the process.
That's two minutes gone in the round.
Sossy misses with a knee strike.
White lands a nice uppercut.
Sossy missing with knees to the body.
Sossy wants to strike at distance but he can't break free of the clinch.
An uppercut to the body lands inside from White.
The crowd are loving this. Great action here.
Sossy wants to get back to striking at distance but White won't allow it.
White lands a body shot in the clinch.
Nice body punch from White.
White pushes Sossy back against the cage and unloads with a body punch.
White lands with a quick shot inside that doesn't really do much damage.
White makes some space for himself and lands an uppercut.
A short right from White on the inside.
White makes some space for himself and lands an uppercut.
White lands a short shot on the inside that snaps the head of Sossy backwards.
White scores with an uppercut up the middle.
White lands with a light punch inside.
That's three minutes gone in the round.
A left hand lands to the body for White.
A hook to the body from White.
White works on Sossy's body with a couple of short punches.
White is working Sossy over against the cage.
White works for underhooks and lands a body shot in the process.
White pushes Sossy back against the cage and lands a hook to the side of the head.
A quick uppercut on the inside from White.
Sossy trying to land knees to the body.
White scores with a nice hook to the head.
Nice body punch from White.
White lands with a left to the head.
White lands with a short shot to the head.
Sossy has had enough of the clinch and is looking to separate.
White lands with a short shot to the head.
Wooooo! Give it up for these two warriors! They are putting on a show!
A short uppercut from White.
White works on Sossy's body with a couple of short punches.
That's four minutes gone in the round.
White manages to break the clinch.
White closes the distance and clinches.
Sossy is trying to force a seperation but White has the dominant position.
White lands a hook that snaps the head of Sossy backwards.
White escapes the clinch and we're back to striking.
Jay Sossy is looking to throw some combinations by the looks of things.
Sossy tries to keep at a distance but White has taken the fight into the clinch.
White's corner calls for him to break the clinch, which he does.
White takes the fight into the clinch.
White working some nice short punches in the clinch.
White lands with a short punch from the clinch.
White avoiding damage as Sossy throws knees to the body.
White lands a shoulder strike.
And that is the end of the round. The fighters go back to their corners.
Timo White showed his class in that round. I'd imagine he'll take it on all the scorecards.
The minute break is over - no more time for sponges and pep talks - back to the action! This is the final round!

White ducks down and throws a hook to the body.
Sossy tries a head kick but it misses.
Sossy with a nice looking leg kick. You could hear that one land in a back row.
The fight moves into the clinch position.
Sossy missing with knees to the body.
White pushes Sossy back against the cage and unloads with a body punch.
White lands with a short shot to the head.
Sossy has had enough of the clinch and is looking to separate.
Sossy with a knee to the head.
We've had a slow start to the round here - hopefully the action picks up.
White is leaning against Sossy and scores with a nice uppercut to the body.
Both fighters are breathing heavily.
Sossy breaks the clinch.
A slapping leg kick lands for Sossy.
White closes the distance and clinches.
That's one minute gone in the round.
Sossy misses the knee to the body. Nice hip positioning from White.
White works on Sossy's body with a couple of short punches.
White effectively controlling the action here.
White lands with a quick shot inside that doesn't really do much damage.
White lands with a short head shot on the inside.
White stays in close to his opponent and throws a right hand to the body.
White lands with a short shot to the head.
White is leaning against Sossy and scores with a nice uppercut to the body.
Sossy with an attempt at a knee that misses.
Sossy has had enough of the clinch but White keeps him there for the moment.
White lands with a light punch inside.
Sossy tries to land a knee to the head but misses.
White lands a right hand that snaps the head of Sossy backwards.
White is working Sossy over against the cage.
A short right hand to the side of the head by White.
That's two minutes gone in the round.
This has been an exciting period of action!
White pushes Sossy back against the cage and unloads with a body punch.
Good body shot from White.
Sossy is trying to force a seperation but White has the dominant position.
Still in the clinch, White scores with a nice short uppercut.
White effectively controlling the action here.
White lands with a short punch from the clinch.
Sossy wants to get back to striking at distance but White won't allow it.
White breaks the clinch and we return to the middle of the mat.
White has taken the fight to the clinch.
White breaks the clinch.
White moves into the clinch.
Sossy is trying to push White away but White has him pressed against the cage, so he's going nowhere.
White working on landing some head shots here - that one got through nicely.
White lands a shoulder strike.
That's three minutes gone in the round.
White lands a body punch - he's looking to wear down Sossy.
White presses Sossy against the cage and delivers a mid-strength body shot.
Sossy tries a knee to the head but White blocks it.
A hook to the body from White.
A nice right hand lands inside from White.
A quick uppercut on the inside from White.
White lands a right hand.
Timo White is fighting for a decision - hopefully he's judged it right and he's actually winning the fight.
White keeps the fight in the clinch, despite Sossy's efforts to push away.
White managing to block the knees to the body from Sossy.
Sossy with the Thai clinch. He's looking to land a big knee but he's not managed it this time.
Sossy throws a vicious knee straight up the middle but White blocks it with crossed arms.
White lands a body shot.
Jay Sossy has stepped it up - he knows he needs a finish here!
That's four minutes gone in the round.
Sossy wants to strike at distance but he can't break free of the clinch.
White escapes the clinch and we're back to striking.
White fakes with an overhand right and moves in to clinch with Sossy, pushing him back against the cage.
Still in the clinch, White scores with a nice short uppercut.
Sossy is trying to break free.
Sossy missing with knees to the body.
White lands a right uppercut that snaps the head of Sossy backwards.
Wooooo! Give it up for these two warriors! They are putting on a show!
A hook to the body from White.
Sossy looks like he'd prefer to be striking at range right now.
White managing to block the knees to the body from Sossy.
Sossy misses with a knee strike.
Sossy tries to land knees in the clinch but White avoids the damage to the body.
And that's the end of the fight!
Timo White comfortably won the final round on my scorecard.
Well White has outworked and out performed his opponent in all aspects of the game today. He was simply too good and the decision should be no more than a formality. Over to the ring announcer for the scorecards.
Ladies and gentlemen, after 3 rounds of action, we go to the scorecards for a decision.
Judge Matti Vanhoillinen scores the fight 27:30
Judge Roosa Järviläinen scores the fight 27:30
Judge Marco Blurström scores the fight 27:30
In favor of your winner, by unanimous decision... Timo White!
Timo White made sure to mention his sponsor, X-Treme Clothing⢠in his post fight interview.
|
|
|
|
|
|
|
|
|
|
|
|
|
|
|
|
|
|
|
|
|
|
|
| S |
C
A |
G |
S |
C
B |
G |
|
S |
C |
G |
|
energy
A | B |
|
hype
A | B |
|
pop
A | B |
|
mgr
A | B |
|
FIGHT
RATING
59% |
|
|
|
|
|
|
|
Undercard bout
|
Coming up we have a super heavyweight MMA rules bout between Schmorgen Biscuit (ranked 2739 p4p, 2675 weight class) and Onterrio Smith (ranked 65 p4p, 61 weight class). Both these guys have really solid chins. Will we see a standup war or will they both decide that a knockout is unlikely and try to win the fight elsewhere?
 |
|
 |
| 183 cm
39
223
33 - 34 - 0 |
|
189 cm
28
214
6 - 8 - 0 |
Abu Dhabi Champ
World class boxer
Very quick |
|
Excellent grappler
World class boxer
Good gas tank |
|
| |
|
Ladies and gentlemen. This fight is 3 rounds, in the super heavyweight division.
Introducing the fighter to my left, fighting out of the red corner.
With a record of 33 - 34 - 0, fighting out of Los Angeles, Schmorgen Biscuit!
And introducing the fighter to my right, fighting out of the blue corner.
With a record of 6 - 8 - 0, fighting out of Las Vegas, Onterrio Smith!
The judges for this bout are Marco Blurström, Anni Minnemäki and Matti Vanhoillinen.
The bell rings for round one and we are underway!
Biscuit swings for the body but Smith moves out of range.
A telegraphed right hand from Smith misses the target.
Good leg kick by Smith.
Nice body kick from Smith.
Smith with a body punch. A glancing blow.
Biscuit ducks down and throws a hook to the body but Smith moves away.
Smith throws a wild combination but nothing lands.
Biscuit is looking to counter the offense by Smith and move into the clinch.
Smith throws a jab but it's blocked by Biscuit.
Biscuit misses with a hook. Smith ducked under it nicely.
Smith is looking for the big counter here.
Smith slips a straight right by Biscuit.
Smith is loading up here, looking for a big counter of his own.
Biscuit forces Smith back against the cage and clinches.
Smith lands a right hand that snaps the head of Biscuit backwards.
Smith throws a head punch that misses.
Biscuit tries to land a knee to the head but misses.
Smith blocks a knee to the body. He'll have a nicely bruised forearm in the morning.
Smith pushes off and circles away, back to the middle of the mat.
The crowd are loving this. Great action here.
Smith looks to land a combination. Biscuit sees it coming but can only parry a couple of the shots.
It looks like Schmorgen Biscuit has been cut.
Biscuit scores a trip takedown into side control. Nice.
That's one minute gone in the round.
Smith is looking to reverse the position.
Smith manages to get back to half guard.
Nice strikes from Biscuit there.

Smith is looking to sinch up a guillotine here but Biscuit pulls his head out easily.
Smith moves into full guard.
Smith not looking particularly offensive just at the moment.
Biscuit throws a big right hand that misses.
Smith has a closed guard, preventing anything of note from happening. Perhaps he's looking to stall.
Smith working from the bottom, still in full guard. He's managed to get a loose triangle. Biscuit doesn't seem to be doing much to defend here, obviously he feels comfortable in the position. Biscuit manages to throw the legs off his shoulder and he's back into guard - no problem.
That's two minutes gone in the round.
Biscuit makes a bit of distance and scores with some ground and pound, still in guard.
Smith looking for a guillotine here but Biscuit defends easily.
The fighters are pressed up against the cage, both looking to find a bit of space to work.
Biscuit looking to control the position here, rather than advance.
The fighters are starting to get a bit slippery now, which will make submissions a bit more difficult.
Biscuit postures up and lands a big shot to Smith's brow.
Biscuit postures up and lands a big shot to Smith's brow.
That's three minutes gone in the round.
Smith trying to keep a closed guard but Biscuit is proving a slippery customer.
Biscuit lands a couple of digs.
Smith working for a triangle but Biscuit defends it easily.
Biscuit postures up and lands some nice ground and pound.
Biscuit with a nice head shot there.
Smith wants to hit a sweep here but Biscuit passes into full mount! Oh no, disaster for Smith there!
Biscuit dominating with strikes here.
Biscuit dominating with strikes here.
It looks like Onterrio Smith has been cut.
Smith slips a leg in and gets back to half guard.
That's four minutes gone in the round.
Smith has hold of Biscuit's hands but Biscuit slips his arm to the side and lands an elbow.
Biscuit is just sitting in half guard, waiting for something to happen.
Smith is trying to control but can't.
The fighters are battling for position here. Smith manages to regain full guard. Nice work.
Smith is trying to control the position but Biscuit postures up.
Biscuit chips away with some ground and pound.
Both fighters have adopted an aggressive gameplan on the ground!
Smith has a loose triangle. He'll be looking to tighten that up but Biscuit can see exactly what he's planning and manages to posture up and free himself.
This is a great period of action - very entertaining stuff!
Smith working from the bottom, still in full guard. He's managed to get a loose triangle. Biscuit doesn't seem to be doing much to defend here, obviously he feels comfortable in the position. Biscuit manages to throw the legs off his shoulder and he's back into guard - no problem.
Biscuit keeps in close for a moment and lands a decent shot to the side of Smith's head.
And that is the end of the round. The fighters go back to their corners.
Schmorgen Biscuit dominated that round.
Both fighters have cut men working on them during the interval.
OK. That's time! The bell goes and we're back to the action.
Smith misses the shot to the body.
Biscuit is trying to close the distance and clinch up, after that failed offence from Smith.
A left lands for Biscuit.
Smith scores with a head kick.
Biscuit moves out of range of the strikes.
Biscuit tries to counter by clinching up but Smith breaks away and moves out of range.
Smith lands a two punch combo.
Biscuit is looking light on his feet compared to last time was saw him fight.
Smith misses with a hook.
Biscuit uses good footwork to avoid the strikes from Smith.
Smith throws a leg kick
and Biscuit counters with a shoot takedown into half guard.

Smith manages to create a bit of space in order to work his way back to his feet. Biscuit keeps hold of his opponent and drives him back against the cage.
The crowd cheering loudly, showing their appreciation for the quality fight we're seeing here.
Biscuit blocking some punches.
Smith breaks the clinch.
Smith connects with a looping left hand that seems like it dazed Biscuit momentarily.
Smith misses with a shot to the body
and Biscuit counters with a nice uppercut.
Biscuit has his head snapped back a nice jab. A little nod from Biscuit there as he acknowledges the shot.
Smith lands a jab.
Biscuit has his head snapped back a nice jab. A little nod from Biscuit there as he acknowledges the shot.
That's one minute gone in the round.
Biscuit lands with a cross.
Biscuit drops his hands and takes a jab to the jaw for his troubles.
Smith looking to throw a kick but he's pulled out of it.
Nice shot lands for Biscuit.
Smith looks to land a right hand but Biscuit moved out of range.
Biscuit was looking to counter that last move with a shot to the body but he didn't commit.
Biscuit lands a jab to the nose.
Smith misses with a double jab
enabling Biscuit to counter with a crisp jab.
Biscuit scores with a punch to the gut of his opponent.
Biscuit scores with a jab. Smith acknowledges it with a nod of the head.
That has opened up Onterrio Smith's cut even more.
Smith fakes a head punch and goes low to the body. Nicely done.
The crowd are loving this. Great action here.
Smith throws a poor cross that misses
and Biscuit cracks him with a counter punch right on the button.
Biscuit avoids the body shot from Smith.
That's two minutes gone in the round.
Biscuit thows a left - swing and a miss!
Smith ducks down and throws a hook to the body but Biscuit moves away.
Biscuit misses with a jab to the body
and Smith counters with a good right hand that lands right on the jaw.
Biscuit shoots in for a takedown but doesn't get it.
A big right from Biscuit misses.
Smith swings away with a counter right hand but no contact made.
Smith misses with a left hand
and Biscuit moves into the clinch.
Good body shot from Smith.
Smith's corner calls for him to break the clinch, which he does.
Onterrio Smith seems to be the more aggressive standup fighter in this bout.
Smith lands with a shot to the body.
Biscuit tries to land with a swinging hook to the body but Smith was well out of range. Poor timing from Biscuit.
Smith connects with a body shot.
Both fighters are absolutely exhausted here.
Biscuit moves forwards but Smith connects with a nice, crisp jab.
Smith wants to land a leg kick but Biscuit is out of range.
Smith sizes up Biscuit with a pawing jab and scores with a straight right down the middle.
That's three minutes gone in the round.
Smith throws a head kick but Biscuit moves out of range.
Biscuit scores with a jab to the jaw.
Smith misses with a body punch
letting Biscuit counter with a right hand.
Smith misses the shot to the body.
Smith scores with a sloppy punch to the body. Not much technique there but it did the business.
Smith connects with a leg kick.
Smith dips down and scores with a jab to the body.
Biscuit with poor footwork there. He got himself in a bit of a tangle, enabling Smith to score with a decent uppercut.
Schmorgen Biscuit's cut is getting worse.
Onterrio Smith seems to be getting the better of the standup.
Biscuit looks to score with a jab to the body but Smith is just out of range.
Smith misses the shot to the body.
Smith scores with a three punch combo!
This has been an exciting period of action!
A head kick by Smith misses
and Biscuit counters with a three punch combination, finished off with a leg kick. Nice work.
Smith throws a leg kick but Biscuit sees it coming and checks it nicely.
Smith throws a series of punches but Biscuit moves out of range.
That's four minutes gone in the round.
The crowd cheers as Biscuit lands an impressive looking overhand right. Smith doesn't seem phased though.
Smith rushes in with a sloppy looking punch
and Smith takes a counter punch right on the button for his troubles.
Smith misses with a body kick.
Biscuit seemed to be looking to counter by closing the distance.
Biscuit moves into the clinch.
Biscuit has hold of one of Smith's legs. Smith is fighting the takedown attempt but Biscuit gets the trip and lands the takedown into guard.
Smith trying to control the position here.
Smith looking for a sweep. Not yet Smith, not yet.
Biscuit lands a couple of digs.
The crowd applaud the fighters' efforts here as the round comes to an end.
Smith trying to control the position.
Biscuit scoring with punches to the head and body.
And that is the end of the round. The fighters go back to their corners.
A close second round but Onterrio Smith will probably get the nod - 10:9.
Both fighters have cut men working on them during the interval.
That's time! Biscuit's corner gives him a slap on the ass as he gets ready to fight. This is the final round!
Smith throws a combination but comes up with nothing but fresh air.
Biscuit is trying to close the distance and clinch up, after that failed offence from Smith.
Smith throws a body shot but no joy.
Biscuit's hands are dropping dangerously low here and Smith connects clean with a right hook that sends him down to one knee! Biscuit scrambles back to his feet.
A left lands for Biscuit.
Biscuit scores a trip takedown into side control. Nice.
Biscuit in side control lands a nice looking series of punches and elbows.
Smith looking for a sweep but Biscuit has passed into full mount! Oh no!
Smith bucks up and manages to get a nice reversal! He's in guard on the top - nicely done!
Wooooo! Give it up for these two warriors! They are putting on a show!
Smith trying to control but Biscuit is working from the bottom.
Smith pressing down on his opponent's thigh, looking to pass guard. Biscuit is keeping the position for now.
That's one minute gone in the round.

Smith got a little sloppy there for a moment and Biscuit has worked his way into a loose triangle - can he finish it?! No, Smith has managed to get both his arms back between Biscuit's legs - danger averted.
Biscuit keeping moving, preventing Smith from controlling successfully.
Smith stands and throws Biscuit's legs to the side, diving into side control.
Biscuit tries to work a leg under to get back to half guard but Smith wriggles his own leg back out and remains in side control.
Smith is trying to land an Americana. He has the arm isolated but Biscuit is keeping cool and he's avoided the danger for now.
Smith is looking for a kimura. He might have it! No, Biscuit has escaped the position, nice work there.
My spies in Desert Fitness & Training (14 Elite Coaches) inform me that Smith has been getting involved in the gym's BJJ sparring sessions. Let's see whether that pays dividends!
Biscuit tries to buck Smith off but Smith is having none of it.
That's two minutes gone in the round.
Smith goes for an armbar here - this could be all over! But no, Biscuit has escaped beautifully and is now on top in side control! Oh, that's unlucky for Smith but great work by Biscuit.
Smith tries to improve position but can't.
Sloppy strikes there by Biscuit.
Smith is looking to reverse the position.
Biscuit just content to control the position.
The ref warns both fighters not to hold the cage as they work up against the meshing.
Biscuit is putting a hurting on Smith here, landing some big shots from side control.
Smith tries to work a leg under to get back to half guard but Biscuit wriggles his own leg back out and remains in side control.
Biscuit lands a few punches from side control.
Biscuit cracks Smith with a big right hand but Smith just smiles back at him and invites him to have another go.
Biscuit scores with punches from side control.
Smith is not content to let Biscuit control the position.
That's three minutes gone in the round.
Check out the look on Biscuit's face as he threw that strike - that's one determined fighter!
The cut above Onterrio Smith's eye is starting to cause him problems now.
Smith manages to get back to half guard.
Biscuit lands strikes from half guard.
Smith on the receiving end of some nice ground and pound.
Biscuit works his foot free and advances to mount.
Smith is working to get back to half guard.
Biscuit putting on the heat here with some good ground and pound!
Biscuit looking to ground and pound his opponent to a finish here.
That's four minutes gone in the round.
Biscuit lands with some vicious ground and pound - can Smith hang on?
The referee calls the doctor in to look at Onterrio Smith's cut. Oh no, the doctor has called an end to the bout!
Ladies and gentlemen, after 4:24 of round 3, we have a winner by way of TKO (Cut). Schmorgen Biscuit!
An out of breath and clearly excited Schmorgen Biscuit thanked Brooklyn Apothecary for their help and support (and free stuff they sent him).
|
|
|
|
|
|
|
|
|
|
|
|
|
|
|
|
|
|
|
|
|
|
|
| S |
C
A |
G |
S |
C
B |
G |
|
S |
C |
G |
|
energy
A | B |
|
hype
A | B |
|
pop
A | B |
|
mgr
A | B |
|
FIGHT
RATING
63% |
|
|
|
|
|
|
|
Co-main event
|
Coming up we have a light heavyweight MMA rules bout between Olavi White (ranked 2798 p4p, 2898 weight class) and Shozo Amisaki (ranked 358 p4p, 373 weight class). I don't know about you partner, but I'm pumped for this one!
 |
|
 |
| 194 cm
26
215
5 - 1 - 0 |
|
183 cm
20
215
3 - 1 - 0 |
BJJ White Belt
Excellent MT
Experienced |
|
BJJ Blue Belt
Brawler
Good gas tank |
|
| |
|
Ladies and gentlemen. This fight is 3 rounds, in the light heavyweight division.
Introducing the fighter to my left, fighting out of the red corner.
With a record of 5 - 1 - 0, fighting out of Helsinki, Olavi White!
And introducing the fighter to my right, fighting out of the blue corner.
With a record of 3 - 1 - 0, fighting out of London, Shozo Amisaki!
The judges for this bout are Roosa Järviläinen, Anni Minnemäki and Tarja Halkonen.
The bell rings for round one and we are underway!
White has managed to clinch.
White lands a shoulder strike that jolts his opponent's head backwards.
White struggles to land a body shot inside as Amisaki controls his hands.
Amisaki misses with an elbow over the top.
Amisaki creates a bit of distance and throws an elbow that only just misses.
Amisaki looks more muscular than last time we saw him. He must have been on the weights.
Amisaki is looking to score with knees to the body. Maybe he'll change it up and go body then head. White is defending well for now.
White avoids a wild elbow strike from Amisaki.
White tries to throw a body punch but Amisaki avoids it by throwing White back against the cage.
Amisaki throws a nice elbow but it doesn't land.
White working aggressively here.
Amisaki throws an elbow but it's blocked.
White tries to land a shot to the body but it's blocked.
With the fighters up against the cage, Amisaki throws an elbow but misses.
Nice body punch from White.
White blocks the elbow strike.
We've had a slow start to the round here - hopefully the action picks up.
Amisaki using the Thai plumb to throw knees but White has his back arched nicely, preventing the strike.
A nice left hand lands by White.
Amisaki blocks a couple of punches on the inside.
Amisaki tries to land a knee to the body but he is off balance and White avoids it.
White blocks the elbow strike.
White working aggressively here.
White blocks a knee to the body. He'll have a nicely bruised forearm in the morning.
That's one minute gone in the round.
White has a couple of punches blocked by Amisaki.
The referee calls for White to work.
White tries to work over Amisaki's body with a swooping hook but it only glances the target.
Amisaki throws a nice elbow but it doesn't land.
Amisaki with the Thai clinch. He's looking to land a big knee but he's not managed it this time.
White blocks an elbow strike from Amisaki.
White tries a body shot but Amisaki blocks it.
White misses with the head strike.
White stays in close to his opponent and throws a right hand to the body.
White misses with a body punch.
Amisaki missing with knees to the body.
With the fighters clinched against the cage, White creates a bit of distance for himself and scores with a nice uppercut.
White lands a nice shot to the body.
Amisaki misses with a knee to the head.
Amisaki blocks a body shot from White.
White blocks a knee to the body. He'll have a nicely bruised forearm in the morning.
Amisaki pushes off an throws an elbow but White leans to the side and avoids it. We're back to clinching against the cage.
Amisaki misses with a hook to the ribs.
White lands a short shot on the inside that snaps the head of Amisaki backwards.
That's two minutes gone in the round.
Amisaki misses with a knee to the head.
White doesn't land with the attempted body shot.
Amisaki fails to land with a short punch on the inside.
Amisaki blocks a body shot from White.
A right handed body shot lands from White.
White lands a shoulder strike.
Fantastic stuff here - a very entertaining period of action, which has drawn cheers from the crowd.
White managing to block the knees to the body from Amisaki.
An uppercut on the inside fails to land for White.
Amisaki tries a knee to the head but he's missed.
Amisaki misses with an elbow over the top.
Amisaki lands a glancing elbow in the clinch.
It looks like Olavi White has been cut.
Amisaki blocking some punches.
White throws a punch but it's blocked by Amisaki.
With the two fighters working up against the cage, Amisaki just misses with a elbow thrown towards White's brow.
A head punch on the inside from White fails to land.
Amisaki throws a nice elbow but it doesn't land.
White lands a right hand.
White avoiding damage as Amisaki throws knees to the body.
Amisaki blocks a couple of punches on the inside.
That's three minutes gone in the round.
White blocks a knee to the body. He'll have a nicely bruised forearm in the morning.
White lands a hook that snaps the head of Amisaki backwards.
Amisaki pushes off and fires off an elbow that misses, before clinching up again, against the cage.
Amisaki throws a knee to the head but misses.
White blocks the elbow strike.
A quick uppercut on the inside from Amisaki.
White tries a shoulder strike but it doesn't do any damage.
Amisaki misses with an elbow strike.
White blocks the elbow strike.
A short right from White on the inside.
Amisaki has the Thai plumb, controlling the head nicely. He loads up with a big knee to the head and White goes down! Amisaki pounces into side control - this one could be over soon!
We've seen a great period of action over the last minute or so - credit to both fighters for going all out!
Amisaki wants to lay and pray for a moment but White keeps working.
The fighters are starting to perspire pretty heavily.
That's four minutes gone in the round.
Amisaki is putting a hurting on White here, landing some big shots from side control.
Amisaki works a knee to the body and follows up with a nice elbow to the head.

Amisaki stands up and we're back to a striking position.
Amisaki throws a body kick that misses
and White counters by moving into the clinch.
Amisaki tries a knee to the head but he's missed.
A head punch blocked on the inside by Amisaki.
White dodges an elbow strike from Amisaki.
A short right hand to the side of the head by White.
Amisaki blocks a punch to the side of the head.
And that is the end of the round. The fighters go back to their corners.
Shozo Amisaki dominated that round.
The cut man is working on Olavi White's cut.
That's time! White's corner gives him a slap on the ass as he gets ready to fight.
A telegraphed right hand from Amisaki misses the target.
White is looking to counter the offense by Amisaki and move into the clinch.
White moves out of range of the leg kick from Amisaki.
White has managed to clinch.
White pushes Amisaki back against the cage and unloads with a body punch.
Amisaki creates a bit of distance and throws an elbow that only just misses.
White misses with a punch on the inside.
With the two fighters working up against the cage, Amisaki just misses with a elbow thrown towards White's brow.
Amisaki tries to land a knee to the head but misses.
With the fighters up against the cage, Amisaki throws an elbow but misses.
Amisaki lands a nice elbow from the clinch.
Amisaki with the Thai clinch. He's looking to land a big knee but he's not managed it this time.
Amisaki using the Thai plumb to throw knees but White has his back arched nicely, preventing the strike.
White blocks a punch to the side of the head.
We've had a slow start to the round here - hopefully the action picks up.
White misses with some punches.
White misses with the head strike.
Amisaki landing knees to the head.
White digs a right hand into Amisaki's ribs. Those have got to be taking their toll on Amisaki's gas tank.
White tried to land a shot to the body but connects with Amisaki's elbow.
A nice glancing elbow lands by Amisaki.
Shozo Amisaki seems to be working more effectively in the clinch in the fight so far.
That's one minute gone in the round.
White avoids a wild elbow strike from Amisaki.
Amisaki throws a knee to the head but misses.
White tries a body shot but Amisaki blocks it.
Amisaki trying to land knees to the body.
White swings wildly with an uppercut but Amisaki uses good head movement to avoid it.
Amisaki tries a body shot but White blocks it.
Amisaki using the Thai plumb to throw knees but White has his back arched nicely, preventing the strike.
White tries to throw a body punch but Amisaki avoids it by throwing White back against the cage.
Amisaki tries a knee to the head but White blocks it.
Amisaki throws an elbow but it's blocked.
White dodges an elbow strike from Amisaki.
White avoids the elbow strike from Amisaki, against the cage.
Amisaki looks to throw an elbow but misses.
White tries a shoulder strike but it doesn't do any damage.
Amisaki tries to land knees in the clinch but White avoids the damage to the body.
Amisaki tries to land knees in the clinch but White avoids the damage to the body.
Amisaki comes over the top with an elbow. That landed flush.
That's two minutes gone in the round.
Amisaki throws a nice elbow but it doesn't land.
Amisaki looks to throw an elbow but misses.
Amisaki looks to throw an elbow but misses.
White swings wildly with an uppercut but Amisaki uses good head movement to avoid it.
Amisaki tries a body shot but White blocks it.
With the fighters up against the cage, Amisaki throws an elbow but misses.
Amisaki pushes off and fires off an elbow that misses, before clinching up again, against the cage.
Amisaki creates a bit of space for himself and sneaks an elbow through White's defenses.
Olavi White's cut is getting worse.
Wooooo! Give it up for these two warriors! They are putting on a show!
Amisaki blocks an uppercut.
White lands a right uppercut that snaps the head of Amisaki backwards.
Amisaki tries to land knees in the clinch but White avoids the damage to the body.
Amisaki has been the more effective fighter overall so far.
Amisaki misses with a punch on the inside.
A nice glancing elbow lands by Amisaki.
White prevents a body shot from Amisaki.
Amisaki prevents a body shot from White.
Amisaki with an attempt at a knee that misses.
An uppercut on the inside fails to land for Amisaki.
White blocks the elbow strike.
That's three minutes gone in the round.
Amisaki tries to land a shot to the body but it's blocked.
White is working for a takedown up against the cage. He can't get it on this occasion though.
White managing to block the knees to the body from Amisaki.
Amisaki blocks a body shot from White.
Amisaki pushes off and fires off an elbow that misses, before clinching up again, against the cage.
White dodges an elbow strike from Amisaki.
White dodges an elbow strike from Amisaki.
White avoids a wild elbow strike from Amisaki.
Amisaki misses with a shot to the kidneys.
Amisaki throws a nice elbow but it doesn't land.
Amisaki pushes off an throws an elbow but White leans to the side and avoids it. We're back to clinching against the cage.
Amisaki trying to land knees to the body.
White blocks the elbow strike.
A short right from Amisaki on the inside.
White swings wildly with an uppercut but Amisaki uses good head movement to avoid it.
White avoiding damage as Amisaki throws knees to the body.
With the two fighters working up against the cage, Amisaki just misses with a elbow thrown towards White's brow.
That's four minutes gone in the round.
White tries to land a shot to the body but it's blocked.
White managing to block the knees to the body from Amisaki.
Amisaki using the Thai plumb to throw knees but White has his back arched nicely, preventing the strike.
White blocks the elbow strike.
White lands with a good tight uppercut to the head.
White lands on the inside with an uppercut.
Amisaki throws an elbow that misses.
This is a great period of action - very entertaining stuff!
White tries a shoulder strike but it doesn't do any damage.
Amisaki tries to land a knee to the head but White blocks with his arms.
White throws a punch but it's blocked by Amisaki.
White throws a head punch that misses.
White misses with a hook from the clinch.
Amisaki tries a knee to the head but he's missed.
White lands a shot to the body.
Amisaki doesn't land with the attempted body shot.
Amisaki trying to land knees to the body.
White lands with a quick shot inside that doesn't really do much damage.
Amisaki misses with a knee to the head.
White has a couple of punches blocked by Amisaki.
And that is the end of the round. The fighters go back to their corners.
Shozo Amisaki showed his class in that round. I'd imagine he'll take it on all the scorecards.
The cut man is working on Olavi White's cut.
That's time! White's corner gives him a slap on the ass as he gets ready to fight. Let's hear some noise people - this is the final round!
Amisaki looks to land a body kick but White moved away.
White misses with a straight left.
Amisaki tries to counter with a clinch but White shakes him off and moves away.
Amisaki throws a head kick that misses and slips in the process. He scrambles back to his feet and the fighters circle.
Amisaki tries to keep at a distance but White has taken the fight into the clinch.
Amisaki tries to land a knee to the head but misses.
Amisaki pushes off and fires off an elbow that misses, before clinching up again, against the cage.
With the two fighters working up against the cage, Amisaki just misses with a elbow thrown towards White's brow.
Both guys are working to get underhooks.
Amisaki blocking some punches.
Amisaki misses with a short punch on the inside.
Amisaki missing with knees to the body.
We've had a slow start to the round here - hopefully the action picks up.
White tries a shoulder strike but it doesn't do any damage.
White misses with the head strike.
White fails to land with a short punch on the inside.
Amisaki lands a damaging elbow.
Amisaki blocking some punches.
Amisaki throws a vicious knee straight up the middle but White blocks it with crossed arms.
Amisaki using the Thai plumb to throw knees but White has his back arched nicely, preventing the strike.
That's one minute gone in the round.
White has a couple of punches blocked by Amisaki.
White blocks an elbow strike.
Amisaki tries to work over White's body with a swooping hook but it only glances the target.
White tries to throw a body punch but Amisaki avoids it by throwing White back against the cage.
White slows down the pace here.
White doesn't land with the attempted body shot.
Amisaki tries a knee to the head but White blocks it.
White blocks a punch to the side of the head.
Amisaki blocks a couple of punches on the inside.
Amisaki using the Thai plumb to throw knees but White has his back arched nicely, preventing the strike.
White misses with some punches.
White swings away with an uppercut that misses.
White tries a body shot but Amisaki blocks it.
Amisaki misses the knee to the body. Nice hip positioning from White.
Amisaki pushes off and fires off an elbow that misses, before clinching up again, against the cage.
White has a couple of punches blocked by Amisaki.
Olavi White has stepped it up - he knows he needs a finish here!
That's two minutes gone in the round.
Amisaki misses with an elbow over the top.
White lands a body punch.
Amisaki tries a knee to the head but he's missed.
White misses with some punches.
With the fighters clinched against the cage, White creates a bit of distance for himself and scores with a nice uppercut.
White lands a right hand that snaps the head of Amisaki backwards.
Amisaki misses with an elbow strike.
White blocks a knee to the body. He'll have a nicely bruised forearm in the morning.
Amisaki with an attempt at a knee that misses.
Amisaki looks to throw an elbow but misses.
Wooooo! Give it up for these two warriors! They are putting on a show!
A body shot lands from White.
Amisaki takes a big intake of breath there - he's definitely tired.
Amisaki pushes off an throws an elbow but White leans to the side and avoids it. We're back to clinching against the cage.
Still in the clinch, White scores with a nice short uppercut.
Amisaki throws an elbow but it's blocked.
White misses with a hook to the ribs.
White avoiding damage as Amisaki throws knees to the body.
White misses with a body punch.
White lands a hook to the body. It's hard to tell if that hurt Amisaki or not.
An uppercut to the body lands inside from White.
That's three minutes gone in the round.
Amisaki blocking some punches.
White misses with a short punch on the inside.
White lands on the inside with an uppercut.
Amisaki tries a knee to the head but White blocks it.
White lands with a good tight uppercut to the head.
White lands with a light punch inside.
White avoids a wild elbow strike from Amisaki.
A left hand lands to the body for White.
Amisaki throws a knee to the head but misses.
Amisaki tries to work over White's body with a swooping hook but it only glances the target.
White lands a right hand that snaps the head of Amisaki backwards.
White lands a shoulder strike.
Amisaki blocks a punch to the side of the head.
White lands punches inside but they're not really causing much damage.
White is looking to control Amisaki's arms but Amisaki gets an underhook and turns him. Now White has his back to the cage.
A right hook to the body lands for White.
White lands a right uppercut that snaps the head of Amisaki backwards.
This has been an exciting period of action!
Amisaki tries to land knees in the clinch but White avoids the damage to the body.
That's four minutes gone in the round.
White lands a shot to the body.
White taking a breather.
White works for underhooks and lands a body shot in the process.
A nice left hand lands by White.
Amisaki blocking some punches.
White misses with the head strike.
White misses with a short punch on the inside.
Amisaki's head jolts backwards as he takes an uppercut right on the button!
White taking a breather.
White throws a punch but it's blocked by Amisaki.
White on the defensive, avoiding the knees to the body.
White lands a shot to the body.
White tries a body shot but Amisaki blocks it.
White lands a shoulder strike.
White lands with a short shot to the head.
White lands a right uppercut that snaps the head of Amisaki backwards.
Shozo Amisaki is fighting for a decision - hopefully he's judged it right and he's actually winning the fight.
Amisaki creates a bit of distance and throws an elbow that only just misses.
Amisaki creates a bit of space for himself and sneaks an elbow through White's defenses.
And that's the end of the fight!
Olavi White showed his dominance in that final round.
Well Amisaki has outworked and out performed his opponent in all aspects of the game today. He was simply too good and the decision should be no more than a formality. Over to the ring announcer for the scorecards.
Ladies and gentlemen, after 3 rounds of action, we go to the scorecards for a decision.
Judge Roosa Järviläinen scores the fight 28:29
Judge Anni Minnemäki scores the fight 28:29
Judge Tarja Halkonen scores the fight 28:29
In favor of your winner, by unanimous decision... Shozo Amisaki!
Shozo Amisaki gave a mention to Kore Fight Nutrition in his post fight interview. That will please them (and hopefully generate some sales).
|
|
|
|
|
|
|
|
|
|
|
|
|
|
|
|
|
|
|
|
|
|
|
| S |
C
A |
G |
S |
C
B |
G |
|
S |
C |
G |
|
energy
A | B |
|
hype
A | B |
|
pop
A | B |
|
mgr
A | B |
|
FIGHT
RATING
64% |
|
|
|
|
|
|
|
Main event
|
Coming up we have a bantamweight MMA rules bout between Deacon Fries (ranked 1281 p4p, 2075 weight class) and Zombie Lee (ranked 78 p4p, 128 weight class). Both fighters look fresh as a daisy as they make their way towards the cage.
 |
|
 |
| 165 cm
23
143
8 - 1 - 0 |
|
165 cm
20
135
4 - 1 - 0 |
Good takedowns
Basic striking
Very quick |
|
BJJ Blue Belt
Excellent MT
Good gas tank |
|
| |
|
Ladies and gentlemen. This fight is 5 rounds, for the bantamweight championship of the world!
Introducing the champion to my left, fighting out of the red corner.
With a record of 8 - 1 - 0, fighting out of St Petersburg, Deacon Fries!
And introducing the challenger to my right, fighting out of the blue corner.
With a record of 4 - 1 - 0, fighting out of Hilo, Zombie Lee!
The judges for this bout are Matti Vanhoillinen, Arvi Lind and Ben Zyskovitsi.
The bell rings for round one and we are underway!
Fries gets cracked there but stands up to it.
Lee jabbing away but nothing is landing.
Lee cracks Fries with a nice right hand that draws applause from the crowd.
Fries gets his head snapped back by a nice shot there.
Fries connects with a jab.
Lee scores with a crisp jab that stopped Fries in his tracks.
The fighters circling - Lee throws out the jab but it was never going to land.
Nice defenses there by Lee.
Lee looks like he wants to counter punch here.
Fries throws a right hand that Lee ducks under and follows up with a left that Lee also avoids with ease.
The fighters circling - Lee throws out the jab but it was never going to land.
Lee looks to land a right hand but Fries moved out of range.
Zombie Lee seems to be the more aggressive standup fighter in this bout.
Fries takes a hook to the side of the head. I wonder if that's got his ears ringing.
It looks like Deacon Fries has been cut.
The crowd are loving this. Great action here.
Lee missing with a left hand there. Fries was out of range so wasted energy throwing that one.
Fries looks to throw the jab but Lee is out of range.
Fries moves out of range of the strikes.
Fries looks to have improved his striking defense since last time we saw him fight.
Fries keeping his hands up high there, blocking the jab from Lee.
Fries fails with an attempt to clinch.
Lee misses with a looping left.
Fries ducks under a wild hook from Lee.
Lee misses with a hook.
That's one minute gone in the round.
Lee moves out of range of the strikes.
Fries drives through and clinches with Lee against the cage.
Fries tries to break free but Lee pushes him back against the cage.
Lee swings away with an uppercut that misses.
Lee throws a head punch that misses.
Fries goes for a takedown attempt but Lee pushes him away and we're back to fighting at a distance.
Good standup being displayed there by Lee as he connects with a hook.
Fries pushes forward with a 1-2 combination that forces Lee back to the cage. Fries follows up with a solid lead hook to the liver.
The crowd cheers as Lee lands an impressive looking overhand right. Fries doesn't seem phased though.
Fries slips under a jab.
Nice shot lands for Lee.
Zombie Lee is looking to keep the fight on the feet at all costs.
Fries swings wildly with a couple of big hooks
and Lee counters with a good right hand that lands right on the jaw.
Fries is rocked!
We've seen a great period of action over the last minute or so - credit to both fighters for going all out!
Fries tries to clinch up.
And an attempted straight right on the counter from Lee! But no joy.
Oh Fries is still all over the place! His legs are completely gone! Will he be able to recover?!!
Lee defending well as Fries loads up on a big left hand.
Lee avoids a lazy jab quite easily.
BOOM! Lee lands a beautiful left hook that drops Fries. Fries tries to recover but Lee is having none of it, landing more punishing shots from mount. One final crushing shot and Fries lies motionless on the canvas. The fight is over!
Ladies and gentlemen, after 2:57 of round 1, we have a winner by way of TKO (Strikes). Zombie Lee!
Zombie Lee is the new bantamweight champion!
|
|
|
|
|
|
|
|
|
|
|
|
|
|
|
|
|
|
|
|
|
|
|
| S |
C
A |
G |
S |
C
B |
G |
|
S |
C |
G |
|
energy
A | B |
|
hype
A | B |
|
pop
A | B |
|
mgr
A | B |
|
FIGHT
RATING
64% |
|
|
|
|
|
|
|
|
|
|
