 |
Highland 149 PBP Commentary |
Undercard bout
|
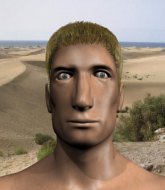
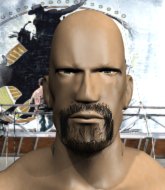
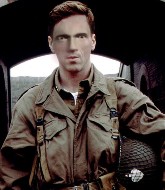
Coming up we have a light heavyweight MMA rules bout between Ray Lawris (ranked 24549 p4p, 1423 weight class) and Diamond Hand (ranked 735 p4p, 182 weight class). Ray Lawris could well score a knockout today. He has the power to get to Diamond Hand's chin.
 |
|
 |
| 167 cm
28
205
3 - 7 - 0 |
|
190 cm
29
210
11 - 7 - 0 |
BJJ White Belt
Excellent boxer
Very strong |
|
Good wrestler
Excellent boxer
Good gas tank |
|
| |
|
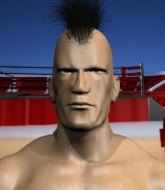
Ladies and gentlemen. This fight is 3 rounds, in the light heavyweight division.
Introducing the fighter to my left, fighting out of the red corner.
With a record of 3 - 7 - 0, fighting out of London, Ray Lawris!
And introducing the fighter to my right, fighting out of the blue corner.
With a record of 11 - 7 - 0, fighting out of London, Diamond Hand!
The judges for this bout are Shirou Masuda, Ren Mimura and Shigeki Fujiwara.

The bell rings for round one and we are underway!
Hand scores with a shot to the body.
Lawris throws a combination that misses
enabling Hand to counter with a crisp jab.
Lawris throws a combination that misses
and Hand counters with a straight right hand.
Lawris's corner calls for a 1, 2 combination and Lawris duly obliges.
Lawris tries to move into range but Hand moves to the side and lands with a nice right hand.
Lawris misses with a double jab
enabling Hand to counter with a crisp jab.
Lawris misses with a double jab
and Hand counters with a straight right hand.
This has been an exciting period of action!
Lawris throws a jab, cross combination which is slipped

and Hand counters with a nice right hand that sends Lawris toppling to the canvas! Lawris scrambles and gets back to his feet - can Hand finish him?!
 It looks like Ray Lawris has been cut. It looks like Ray Lawris has been cut.
Lawris throws a right and a left that both miss.
Lawris throws a combination but comes up with nothing but fresh air.
Lawris misses with a combination
and Hand counters with a crisp right hand that drops Lawris! Hand lets Lawris back up to his feet, looking for a finish!
 Lawris is rocked! Lawris is rocked!
Lawris steps to the side to avoid the strikes from Hand.
Lawris misses with the combination.

That's one minute gone in the round.
Hand connects with a looping left hand that seems like it dazed Lawris momentarily.
Lawris swings wildly with a couple of big hooks
and Hand counters with a straight punch to the midsection.
Lawris is breathing heavily.
Hand lands a big uppercut and Lawris crumbles to the floor! The ref thinks about stopping the fight but Lawris looks OK. Hand waves Lawris back to his feet!
Oh Lawris is still all over the place! His legs are completely gone! Will he be able to recover?!!
Lawris shoots in but doesn't get the takedown
and Hand counters with a nice right hand that sends Lawris toppling to the canvas! Lawris scrambles and gets back to his feet - can Hand finish him?!
Hand is landing a lot of head punches in this opening round! Lawris had better start moving his head a bit unless he wants his face to turn into mush.
We've seen a great period of action over the last minute or so - credit to both fighters for going all out!
Lawris tries to get into range but Hand steps to the side and lands a beautiful hook that drops Lawris! He's faceplanted into the mat, ass in the air... he's out cold! That's an image he won't want to show his grandkids when he gets older! Hand scores the big KO victory!
Ladies and gentlemen, after 1:34 of round 1, we have a winner by way of KO (Punch). Diamond Hand!
A very excited looking Diamond Hand made sure he remembered to thank all the fans both in the arena and on the internet. He said all the coolest people spend all day on MMA websites, which got a big reaction.
|
|
|
|
|
|
|
|
|
|
|
|
|
|
|
|
|
|
|
|
|
|
|
| S |
C
A |
G |
S |
C
B |
G |
|
S |
C |
G |
|
energy
A | B |
|
hype
A | B |
|
pop
A | B |
|
mgr
A | B |
|
FIGHT
RATING
100% |
|
|
|
|
|
|
|
Undercard bout
|
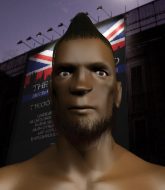
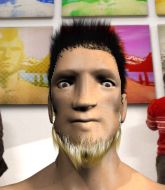
Coming up we have a light heavyweight MMA rules bout between Robert Lee (ranked 1561 p4p, 6223 weight class) and Jayden James (ranked 205 p4p, 612 weight class). Buckle up people - heeeeeeeeeere we go!
 |
|
 |
| 193 cm
29
217
7 - 5 - 0 |
|
168 cm
28
209
5 - 6 - 0 |
Good wrestling
Brawler
Very quick |
|
Good wrestler
Counter fighter
Powerful |
|
| |
|
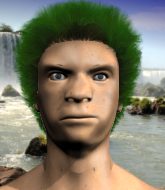
Ladies and gentlemen. This fight is 3 rounds, in the light heavyweight division.
Introducing the fighter to my left, fighting out of the red corner.
With a record of 7 - 5 - 0, fighting out of Las Vegas, Robert Lee!
And introducing the fighter to my right, fighting out of the blue corner.
With a record of 5 - 6 - 0, fighting out of Montreal, Jayden James!
The judges for this bout are Yuuki Gou, Shigeki Fujiwara and Taro Takaoka.
The bell rings for round one and we are underway!
Nice sprawl there from James as Lee shoots in.
James looked like he wanted to counter with a punch but didn't throw it.

Lee shoots in from a long way out. He's driving through with the takedown attempt and he eventually gets it, landing in James's guard.

James is looking for a guillotine. You can't force these things though and Lee defends well.
James working away from the bottom but not quite defensive enough there because Lee has passed into half guard!
Lee throwing punches and elbows but they're not doing any damage.
We've been hearing good reports from Lee's training camp. Apparently he has been rolling around with some good quality BJJ practitioners and has been sharpening his skills. Let's see if that has an impact on the fight today.
Lee is looking to take a break and control but James is keeping him honest, looking to work from the bottom.

Lee is looking for a kimura. It's going to be difficult to finish that from half guard though and James defends it well.
We've had a slow start to the round here - hopefully the action picks up.
Lee slows the pace down in half guard.
James is refusing to be controlled, as Lee sits in half guard.
That's one minute gone in the round.
James is trying to get back to full guard.
Lee is pressing down on James's thigh, looking to free his foot. James is holding on for now.
James looking for submissions from an awkward position here.
James looking for submissions off his back.
James is not content to let Lee control the position.
James looking to work for a kimura from the bottom.
James looks winded!
Lee is looking for a kimura but he's never going to get it from there.
Lee perhaps working for something from half guard, or maybe not. It looks like he's just sitting there.

That's two minutes gone in the round.
Lee is looking for an arm triangle, whilst trying to pass to side control. James doesn't seem that keen to cooperate though. No luck this time Lee.
Lee is looking for a kimura but James is holding onto that half guard position, so it's hard for Lee to get the leverage.
James looking to work for a kimura from the bottom.
James with the active half guard here but Lee passes nicely into side control.
Lee is looking to finish here, going for an Americana. James knows the correct defense though, so he's OK.
Lee is trying to land an Americana. He has the arm isolated but James is keeping cool and he's avoided the danger for now.
The ref warns both fighters not to hold the cage as they work up against the meshing.
The crowd cheering loudly, showing their appreciation for the quality fight we're seeing here.
Lee is in a dominant position here, looking for a kimura. James looks calm but he's in trouble here. Lee gets his leg over his opponent's head and yanks on the arm. James is tapping like a morse code operator on the titanic! SOS! SOS! Lee lets go of the hold and James can pop his arm back in it's socket.
Ladies and gentlemen, after 3:18 of round 1, we have a winner by way of Submission (Kimura). Robert Lee!
A victorious Robert Lee thanked his army of followers in his post fight interview, telling people to make sure they follow him on Twitter.
|
|
|
|
|
|
|
|
|
|
|
|
|
|
|
|
|
|
|
|
|
|
|
| S |
C
A |
G |
S |
C
B |
G |
|
S |
C |
G |
|
energy
A | B |
|
hype
A | B |
|
pop
A | B |
|
mgr
A | B |
|
FIGHT
RATING
37% |
|
|
|
|
|
|
|
Undercard bout
|
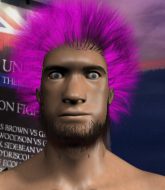
Coming up we have a middleweight MMA rules bout between Mapple Syrup (ranked 2925 p4p, 1117 weight class) and Nikolay Leonov (ranked 391 p4p, 166 weight class). Mapple Syrup is staring across the cage at his opponent, tweaking his nipples... Tweaking his own nipples that is.
 |
|
 |
| 198 cm
28
190
7 - 11 - 0 |
|
180 cm
29
195
12 - 10 - 0 |
Decent wrestler
Brawler
Experienced |
|
Good wrestler
World class boxer
Good gas tank |
|
| |
|
Ladies and gentlemen. This fight is 3 rounds, in the middleweight division.
Introducing the fighter to my left, fighting out of the red corner.
With a record of 7 - 11 - 0, fighting out of Montreal, Mapple Syrup!
And introducing the fighter to my right, fighting out of the blue corner.
With a record of 12 - 10 - 0, fighting out of St Petersburg, Nikolay Leonov!
The judges for this bout are Ren Mimura, Yukihiro Yamamoto and Shigeki Sano.
The bell rings for round one and we are underway!
Leonov lands with a kick to the temple. Syrup shrugs as if to say "is that all you've got?"
It looks like Mapple Syrup has been cut.
Syrup shoots and misses
and Leonov counters with a one-two to the body.
Syrup is rocked!
Syrup drops his hands momentarily. Leonov doesn't need a second invitation, landing a shot to the temple. Syrup staggers and falls to the mat and the ref dives in to save him from any more punishment. Syrup doesn't seem happy with the stoppage but he was done.
Ladies and gentlemen, after 0:09 of round 1, we have a winner by way of KO (Punch). Nikolay Leonov!
During a confident post fight interview, Nikolay Leonov thanked all his fans. He seemed very genuine when describing how motivated his fans keep him.
|
|
|
|
|
|
|
|
|
|
|
|
|
|
|
|
|
|
|
|
|
|
|
| S |
C
A |
G |
S |
C
B |
G |
|
S |
C |
G |
|
energy
A | B |
|
hype
A | B |
|
pop
A | B |
|
mgr
A | B |
|
FIGHT
RATING
100% |
|
|
|
|
|
|
|
Undercard bout
|
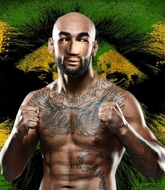
Coming up we have a light heavyweight MMA rules bout between Abdullah Zaire (ranked 745 p4p, 3405 weight class) and Ben Askrew (ranked 103 p4p, 409 weight class). Ben Askrew has the eye of the tiger tonight.
 |
|
 |
| 180 cm
27
215
11 - 5 - 0 |
|
185 cm
28
217
11 - 10 - 0 |
Good takedowns
Counter fighter
KO power |
|
BJJ Purple Belt
Counter fighter
Solid chin |
|
| |
|
Ladies and gentlemen. This fight is 3 rounds, in the light heavyweight division.
Introducing the fighter to my left, fighting out of the red corner.
With a record of 11 - 5 - 0, fighting out of Los Angeles, Abdullah Zaire!
And introducing the fighter to my right, fighting out of the blue corner.
With a record of 11 - 10 - 0, fighting out of Sydney, Ben Askrew!
The judges for this bout are Kenichi Hosakawa, Tatsuya Matsuyama and Shirou Masuda.
The bell rings for round one and we are underway!

Zaire pushes Askrew up against the cage in a clinch.
Zaire pushes Askrew back against the cage and lands a hook to the side of the head.

Askrew lands a nice trip takedown into half guard.
Zaire punching from the bottom.
Askrew is sneakily working for an arm triangle but Zaire sees it coming and defends easily.
Askrew is trying for a guillotine from the top but the pressure isn't in the right place so Zaire is just riding it out for now. Askrew eventually gives up the hold.
Askrew is trying to work for a kimura. This could be trouble! No, Zaire has managed to free his arm - good work.
Zaire looking for submissions from an awkward position here.
Zaire punching from the bottom.
We've had a slow start to the round here - hopefully the action picks up.
Askrew is looking for a kimura here.
Askrew is working for submissions here but there's nothing on.
Askrew is trying to work for a kimura. This could be trouble! No, Zaire has managed to free his arm - good work.
That's one minute gone in the round.
Zaire looking for submissions off his back.
Zaire wants to control but Askrew is keeping busy and won't allow it.
Zaire is in a bad position, trying to hold on for dear life but he is really struggling to maintain any sort of control.
Zaire looking to work for a kimura from the bottom.
Askrew is looking for an arm triangle, whilst trying to pass to side control. Zaire doesn't seem that keen to cooperate though. No luck this time Askrew.
Zaire looking to work for a kimura from the bottom.
Zaire looking for submissions off his back.
That's two minutes gone in the round.
The crowd are getting on the fighters' backs, as the pace has dropped off in the last minute or so.
Askrew is working for submissions here but there's nothing on.
Zaire looking to work for a kimura from the bottom.
Zaire is controlling Askrew's position as best he can from this difficult position.
Zaire looking for submissions off his back.
Zaire moves into full guard.
Askrew got a little sloppy there for a moment and Zaire has worked his way into a loose triangle - can he finish it?! No, Askrew has managed to get both his arms back between Zaire's legs - danger averted.
Zaire trying to keep a closed guard but Askrew is proving a slippery customer.
Askrew drops back for a leg! It's a sloppy attempt though and Askrew jumps back into guard quickly, to retain the dominant position.
Askrew postures up.

That's three minutes gone in the round.
Zaire controlling Askrew's posture.
Zaire looking for a guillotine here but Askrew defends easily.
Askrew is trying to work a guillotine from the top, or something like that? Don't know how he thinks he's going to get a finish from there.
Zaire scores with a couple of body punches from the bottom.
Zaire has managed to work for a loose triangle. I think Askrew should be able to defend this one pretty easily though. Oh, Zaire has tightened it up now! Askrew should have reacted faster there - he's in big trouble and yes, he's tapped out! This one is all over!
Ladies and gentlemen, after 3:58 of round 1, we have a winner by way of Submission (Triangle). Abdullah Zaire!
Our winner, Abdullah Zaire, made sure he spent some time buttering up the crowd during his post fight interview, which will no doubt bring him a few more fans.
|
|
|
|
|
|
|
|
|
|
|
|
|
|
|
|
|
|
|
|
|
|
|
| S |
C
A |
G |
S |
C
B |
G |
|
S |
C |
G |
|
energy
A | B |
|
hype
A | B |
|
pop
A | B |
|
mgr
A | B |
|
FIGHT
RATING
30% |
|
|
|
|
|
|
|
Undercard bout
|
Coming up we have a welterweight MMA rules bout between Mike Ziskie (ranked 910 p4p, 1250 weight class) and Odd Job (ranked 130 p4p, 174 weight class). Both fighters will be looking to make this an exciting fight for the fans, I'm sure!
 |
|
 |
| 187 cm
29
186
19 - 10 - 1 |
|
179 cm
29
174
14 - 10 - 0 |
Good wrestling
Basic striking
Granite chin |
|
Good wrestler
Basic striking
Good gas tank |
|
| |
|
Ladies and gentlemen. This fight is 3 rounds, in the welterweight division.
Introducing the fighter to my left, fighting out of the red corner.
With a record of 19 - 10 - 1, fighting out of London, Mike Ziskie!
And introducing the fighter to my right, fighting out of the blue corner.
With a record of 14 - 10 - 0, fighting out of New York, Odd Job!
The judges for this bout are Shigeki Fujiwara, Yasuomi Hirokawa and Yuuki Gou.
The bell rings for round one and we are underway!
Job jabbing away but nothing is landing.
Job lands a jab.
Mike Ziskie seems to be the more aggressive standup fighter in this bout.
Ziskie lunges in with swinging rights and lefts but Job circles away quickly and effectively.
Ziskie looks to land a left hand but Job moved out of range nicely.
Job uses good head movement to avoid the hook from Ziskie.
Ziskie loads up on a big right hand but Job slips the punch.
Good shot there by Job.
Job dives in and grabs Ziskie's left leg, looking for a takedown. Ziskie pushes down on Job's head and hops out.
It looked like Ziskie wanted to counter with a hook but didn't fully commit.
Ziskie throws a big shot that misses.
Nice takedown defense from Ziskie. No joy for Job on that attempt.
Ziskie slaps away a takedown attempt from Job, before circling back to the center of the mat.
Mike Ziskie has stuffed three takedown attempts in the round now. That's going to take a lot out of Odd Job.
The fighters circling - Ziskie throws out the jab but it was never going to land.
Job shoots in but Ziskie avoids the takedown attempt easily.
Job moves out of range of the strikes.
Job shoots in looking for a takedown but Ziskie manages to keep the fight standing, pushing Job's face into the canvas for good measure before circling away.
Job ducks under a wild hook from Ziskie.
Ziskie tries to move into range but Job moves to the side and lands with a nice right hand.
Ziskie throws a hook to the side of Job's head but Job sees it coming and ducks under it beautifully.
Wooooo! Give it up for these two warriors! They are putting on a show!
Ziskie staying out of range there.
Job decides to change it up a bit and drives through with a nice takedown into half guard.
That's one minute gone in the round.
Ziskie is looking for a sweep. Job is wise to his cunning plan and keeps the top position.
Neither fighter is being very active at the moment, with Job in particular looking to stall.
Ziskie wants to control but Job is keeping busy and won't allow it.
Job missing with the ground and pound from half guard.
Job is stalling here. Ziskie is in no mood to hang around though. He's locked up a kimura from the bottom! Job seems to be keeping calm but he's forced to roll out of the hold and Ziskie has ended up in side control on the top. Nice work.
Job is trying to control Ziskie's posture but Ziskie avoids it.
Ziskie trying to control the action but Job is working from the bottom.
Job is looking to reverse the position.
That's two minutes gone in the round.
Ziskie tries for an arm triangle. That looks pretty tight to me. Is this one over!?! Possibly, maybe, no Ziskie has let go of the choke. Obviously it wasn't as tight as we thought!
Job tries to work a leg under to get back to half guard but Ziskie wriggles his own leg back out and remains in side control.
Ziskie trying to control the position but Job is working away.
Ziskie is moving around in side control but his primary objective seems to be to maintain the position.
Ziskie working hard here to secure a kimura but he's not really in the right position for it.
That's three minutes gone in the round.
Job is looking to reverse the position.
Ziskie slows the pace down.
Ziskie tries for an arm triangle. That looks pretty tight to me. Is this one over!?! Possibly, maybe, no Ziskie has let go of the choke. Obviously it wasn't as tight as we thought!

That's four minutes gone in the round.
My god... these two guys really need to pick up the pace or everyone will leave to go get a beer.
Job is looking for a sweep.
Ziskie is looking to take a break and control but Job is keeping him honest, looking to work from the bottom.
Job regains half guard there - taking advantage of Ziskie's attempt to lay and pray for a moment.
Job looking for submissions from an awkward position here.
The crowd thankful this round is nearly over.
Job is looking to improve his position.
Ziskie trying to mount his opponent but Job defends it.
And that is the end of the round. The fighters go back to their corners.
That was a close round but I would say that Mike Ziskie will probably get the nod.
That's time! Ziskie's corner gives him a slap on the ass as he gets ready to fight.

Job decides to change it up a bit and drives through with a nice takedown into half guard.
Ziskie gets full guard.
Job trying to control the position from guard on top but Ziskie is wriggling around, looking for whatever he can.
Ziskie working the defensive guard well to avoid strikes from Job.
Job trying to pass the guard but can't manage it just yet.
Job trying to control but Ziskie is working from the bottom.
We've had a slow start to the round here - hopefully the action picks up.
A big thud reverberates around the arena there as Job accidentally thumps the mat. Hopefully he's not broken his hand.
Ziskie being controlled here, momentarily.
That's one minute gone in the round.
Job loading up with the ground and pound but he's missing more than he's landing in this flurry.
Job scoring with some ground and pound.
Job looking to pass the guard.
Job sitting in guard, not really doing much.
Job wants to control from the top but Ziskie keeps moving.

The referee has decided to stand the fighters back up, so we'll restart on the feet.
Job uses good footwork to avoid the strikes from Ziskie.
Job swings away with a counter right hand but no contact made.
Job feints and then dives in with a takedown. That was a long way out but the feint bought him enough time to close the distance and complete the takedown. Now we'll play guard for a bit and see who can get the better of that position.
That's two minutes gone in the round.
Job pressing down on his opponent's thigh, looking to pass guard. Ziskie is keeping the position for now.
Ziskie looking for subs off his back but Job has passed one foot through into half guard.
Ziskie looking to work for a kimura from the bottom.
Job slips a nice elbow through Ziskie's hands, connecting with Ziskie's forehead.
Ziskie is pressing down on Job's left leg trying to get back to full guard. He's managed it.
That's three minutes gone in the round.
Job throwing elbows and punches but not connecting, as Ziskie works some decent striking defense from the bottom.
Job scoring with punches to the head and body.
Job stays in close to Ziskie's body and controls the position.
Ziskie tries to land a sweep but no joy.
Job throwing strikes but missing.
Job wants to control from the top but Ziskie keeps moving.
The fighters are pressed up against the cage, both looking to find a bit of space to work.
Job looking to sit in guard and control but Ziskie gets the butterfly guard and sweeps. He's now in the guard on the top.

Job is working an open guard here, looking to improve his position. No doubt that will leave him open to counters but at least he's being more offensive.
That's four minutes gone in the round.
Ziskie drops back, looking for a kneebar! Job looks panicked! The fighters roll across the mat, one looking to finish, one looking to escape. Job looks to have wriggled free... Yes, he's got his leg free and he's dived into side control! Good work there from Job!

Job trying to control the position but Ziskie is working away.
Ziskie tries to work a leg under to get back to half guard but Job wriggles his own leg back out and remains in side control.
Ziskie is working hard here to advance position.
Job has been the more effective fighter overall so far.
Boooooooooooooooooooo!!! God, this has been a terrible round. Come on you two, sort yourselves out!
Ziskie is letting Job control him for a moment.
Ziskie is not content to let Job control the position.
And that is the end of the round. The fighters go back to their corners.
Odd Job showed his class in that round. I'd imagine he'll take it on all the scorecards.
The corners get their ten second warning. Both fighters stand from their stools and stare each other down, ready to get back to the action. This is the final round!

Job closes the distance and gets a double leg, slamming Ziskie to the mat! Ziskie manages to get full guard.
Ziskie keeping moving, preventing Job from controlling successfully.
Job throwing strikes from guard but Ziskie blocks nicely.
Ziskie is looking for a triangle but Job pushes his legs off easily.
Job works over Ziskie with some ground and pound from guard.
We've had a slow start to the round here - hopefully the action picks up.
Job wants to control from the top but Ziskie keeps moving.
Job stands and throws Ziskie's legs to the side, diving into side control.
That's one minute gone in the round.
Job creates a bit of distance and throws down some hard shots.
Job working the head and body with strikes.
Job looking for an arm triangle but it's way too loose to do anything.
Ziskie manages to work his way to half guard, despite Job's best efforts.
Ziskie regains full guard. Nicely done.
Job trying to control the position from guard on top but Ziskie is wriggling around, looking for whatever he can.
Job is just sitting in guard, looking to avoid any submissions.
That's two minutes gone in the round.
Job stands up and looks to throw the legs aside to pass to side control. Ziskie swivels though and keeps the full guard.
Ziskie is throwing his legs up, looking for submissions. Job is aware though and is defending well.
Ziskie has a loose triangle. He'll be looking to tighten that up but Job can see exactly what he's planning and manages to posture up and free himself.
Job with a nice head shot there.
Job controls from within his opponent's guard.
Ziskie is looking for a guillotine. You can't force these things though and Job defends well.
Odd Job has got the better of the ground game so far.
That's three minutes gone in the round.
Ziskie escapes his hips to the side and looks to be working for an armbar. Job gives him a little smile and shakes his head. No chance.
Job showing good wrestling skills to control the position.
Job trying to move into half guard but instead Ziskie has managed to sweep!
That's four minutes gone in the round.
The crowd are starting to boo a lack of action.
Job is active off his back here, looking for submissions.
Job looking for a guillotine here but Ziskie defends easily.
Job looking to control.
Ziskie advances to half guard.
Job looking to work for a kimura from the bottom.
Boooooooooooooooooooo!!! God, this has been a terrible round. Come on you two, sort yourselves out!
Ziskie is looking for a kimura. It's going to be difficult to finish that from half guard though and Job defends it well.
And that's the end of the fight!
Odd Job comfortably won the final round on my scorecard.
I think Job has won this one but let's see whether the judges agree with me. Over to the ring announcer for the scorecards.
Ladies and gentlemen, after 3 rounds of action, we go to the scorecards for a decision.
Judge Shigeki Fujiwara scores the fight 28:29
Judge Yasuomi Hirokawa scores the fight 28:29
Judge Yuuki Gou scores the fight 28:29
In favor of your winner, by unanimous decision... Odd Job!
|
|
|
|
|
|
|
|
|
|
|
|
|
|
|
|
|
|
|
|
|
|
|
| S |
C
A |
G |
S |
C
B |
G |
|
S |
C |
G |
|
energy
A | B |
|
hype
A | B |
|
pop
A | B |
|
mgr
A | B |
|
FIGHT
RATING
27% |
|
|
|
|
|
|
|
Undercard bout
|
Coming up we have a heavyweight MMA rules bout between Everest Frank (ranked 684 p4p, 1337 weight class) and Ramesses Rei (ranked 105 p4p, 200 weight class). Frank comes to the cage accompanied by Knife Talk x Drake ft. 21 Savage x Project Pat. Over to our ring announcer for the fighter introductions!
 |
|
 |
| 212 cm
27
283
14 - 7 - 0 |
|
189 cm
27
260
11 - 8 - 0 |
Good wrestling
Basic striking
Granite chin |
|
BJJ White Belt
Excellent boxer
Heavy handed |
|
| |
|
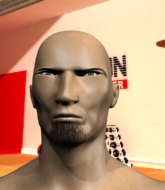
Ladies and gentlemen. This fight is 3 rounds, in the heavyweight division.
Introducing the fighter to my left, fighting out of the red corner.
With a record of 14 - 7 - 0, fighting out of Las Vegas, Everest Frank!
And introducing the fighter to my right, fighting out of the blue corner.
With a record of 11 - 8 - 0, fighting out of Los Angeles, Ramesses Rei!
The judges for this bout are Hirohito Nitta, Yukihiro Shimada and Yasuomi Hirokawa.
The bell rings for round one and we are underway!
Frank looks for a takedown here. Will he get it? Rei is fending him off so far but Frank persists. Nope, Rei circles away and we're back to standing.
Frank shoots in looking for a takedown but Rei manages to keep the fight standing, pushing Frank's face into the canvas for good measure before circling away.
Frank has been talking about how he's improved his wrestling in the run up to the fight so let's see if that's enough to sway the balance.
Frank drops down and drives through with a powerful takedown into guard.
Frank seems content to control from guard here. He's going to have to remain active though if he doesn't want to get stood back up.
Frank will need to keep those long limbs tucked in whilst he's on the ground, to prevent any submissions.
Frank slips nicely into half guard.
Rei moves into full guard.
We get told so often about how wrestlers don't like to be on their backs. Let's see if Rei can do anything to dispel that myth.
We've had a slow start to the round here - hopefully the action picks up.
Frank is intent on slowing down the pace of the fight, simply looking to control.
That's one minute gone in the round.
Frank throwing strikes from guard but Rei blocks nicely.
Frank tries to free his leg and advance position but Rei is retaining full guard.
Frank controls from within his opponent's guard.
Rei keeping full guard, as Frank tries to pass.
Frank's corner is telling him to maintain position.
The referee wants the fighters to be more active or he's going to reset them on the feet.
That's two minutes gone in the round.
The crowd are getting on the fighters' backs, as the pace has dropped off in the last minute or so.
Frank in full guard, throwing the ground and pound. No damage this time.
The referee decides to stand the fighters back up.
Frank closes the distance and clinches up, looking for a takedown. He shifts his weight and gets a nice trip into half guard.
Frank sitting and controlling from the half guard.
Frank has controlled the position for a good 20 seconds, which will no doubt be starting to frustrate his opponent.
The fighters are pressed up against the cage, both looking to find a bit of space to work.
Rei wants to control but Frank is keeping busy.
Frank content to sit in half guard and control for a moment.
That's three minutes gone in the round.
Frank stops Rei from getting back to his feet.
Frank is controlling the pace.
Rei trying to control here.
The ref stands the fighters back up due to a lack of activity.
Frank shoots in for a takedown - he's clinched up with Rei but Rei pushes him off and we're back to square one.
That's three failed takedown attempts in the round for Everest Frank. That's going to take a lot out of him.
That's four minutes gone in the round.
Neither fighter has done anything of merit for a good minute or two here and the crowd are not happy about it.
Rei displays good takedown defense there as he swats away a double leg from Frank.
Rei tries to land with a swinging hook to the body but Frank was well out of range. Poor timing from Rei.
Frank has a takedown stuffed.
Frank fails miserably with a takedown attempt.
It seemed like Rei was going to counter with the hook but didn't fully commit to it.
Nice uppercut lands for Rei. That snapped Frank's head back.
The fighters are starting to get sweaty, which will make takedowns a bit more tricky.
Rei scores with a jab to the body.
Frank uses some good footwork to avoid the body shot by Rei.
Rei cracks Frank with a good jab.
It looks like Everest Frank has been cut.
Boooooooooooooooooooo!!! God, this has been a terrible round. Come on you two, sort yourselves out!
Rei lands a vicious shot with the stealth of a sniper and the strength of a viper. Are vipers that strong? I can think of lots of things that are stronger than a viper - not many rhyme with sniper though.
Rei connects with a nice looking jab.
Frank misses with a takedown attempt. He shot from a bit too far out.
Rei thuds a left hand into Frank's body.
And that is the end of the round. The fighters go back to their corners.
Ramesses Rei dominated that round.
The cut man is working on Everest Frank's cut.
The fighters get back to their feet, the hooter sounds and we're back to the action!
Rei jabs Frank right on the nose. Frank blinks but takes it well.
Rei tries to sprawl but Frank drives through with a takedown into half guard.
Frank takes a deep breath and rests his weight momentarily on top of his opponent, to control the position.
Rei wants to sweep but Frank has passed to side control!
Rei can't do much from the bottom here.
We've had a slow start to the round here - hopefully the action picks up.
Rei tries to get back to half guard but can't.
Rei taking punishment in the form of punches.
That's one minute gone in the round.
Rei tries to improve position but can't.
Rei is letting Frank control him for a moment.
Frank creates a bit of distance and throws down some hard shots.
Rei tries to improve position but can't.
The referee tells the fighters to keep busy.
Frank in side control lands a decent elbow.
Rei is positioning himself to get back to half guard.
Rei seems a little lost for a moment, as Frank dominates the positioning.
That's two minutes gone in the round.
Frank scores with punches from side control.
Frank staying calm.
Frank scoring with punches from side control.
Rei really doesn't want to stay on the ground with Frank. If he can't get it back to his feet, it's only a matter of time before he'll be tapping out.
That's three minutes gone in the round.
Frank in side control lands a decent elbow.
Frank scoring with punches and elbows.
Frank in side control, just content to control the action for now.
Everest Frank overall seems to be getting the better of the ground position in the fight so far.
Frank scores with a couple of short elbows.
A lull in the action here as Frank stalls from top position.
That's four minutes gone in the round.
Frank's ground tactics aren't going to win him many fans. Let's hope he's got fireworks for us if he gets back to his feet because he's not doing much on the ground.
Rei is trying to control Frank's posture but Frank avoids it.
The ref warns both fighters not to hold the cage as they work up against the meshing.
Rei being controlled for a moment.
Frank scores with a couple of short elbows.
And that is the end of the round. The fighters go back to their corners.
Everest Frank dominated that second round.
The cut man is working on Everest Frank's cut.
That's time! Back to the action! This is the final round!
Frank darts in and lands a nice takedown into half guard.
Frank is controlling the pace.
We've had a slow start to the round here - hopefully the action picks up.
Rei wants to improve his position but Frank is controlling well.
That's one minute gone in the round.
Rei tries to regain full guard. Instead though, Frank has advanced to mount. Uh oh.
Frank takes a little breather and maintains the position. The referee will be looking for him to stay active from such a dominant position though.
Rei is desperately trying to improve his position but Frank has a good base and remains in mount.
Frank with a couple of short strikes.
Frank lands a couple of nice shots there from mount.
Frank lands a heavy elbow.
That's two minutes gone in the round.
Rei tries to hold on but Frank postures up.
Frank content just to control the position here.
Frank is in the full mount, landing strikes.
Frank fakes a shot to the body and cracks his opponent in the head. Nice ground and pound there!
Frank postures up and cracks his opponent a couple of times before moving back into close ground control. Rei looks a forlorn figure.
Frank takes a little breather and maintains the position. The referee will be looking for him to stay active from such a dominant position though.
Wooooo! Give it up for these two warriors! They are putting on a show!
That's three minutes gone in the round.
Frank working Rei over with strikes here.
Frank takes a little breather and maintains the position. The referee will be looking for him to stay active from such a dominant position though.
Frank raining down shots from the mount!
Frank controlling from mount.
That's four minutes gone in the round.
Rei is in a horrible position here. Frank smacks him with another shot as he tries to escape the position.
Frank scoring with strikes but Rei is staying in there.
Frank controlling from mount.
Frank with shots to the head and body - Rei looks very uncomfortable down there.
The crowd thankful this round is nearly over.
Frank tucks in and makes sure he doesn't lose the dominant position.
And that's the end of the fight!
Everest Frank showed his dominance in that final round.
I think Frank has won this one but let's see what the judges have to say. Over to the ring announcer for the scorecards.
Ladies and gentlemen, after 3 rounds of action, we go to the scorecards for a decision.
Judge Hirohito Nitta scores the fight 29:27
Judge Yukihiro Shimada scores the fight 29:27
Judge Yasuomi Hirokawa scores the fight 29:27
In favor of your winner, by unanimous decision... Everest Frank!
A very excited looking Everest Frank made sure he remembered to thank all the fans both in the arena and on the internet. He said all the coolest people spend all day on MMA websites, which got a big reaction.
|
|
|
|
|
|
|
|
|
|
|
|
|
|
|
|
|
|
|
|
|
|
|
| S |
C
A |
G |
S |
C
B |
G |
|
S |
C |
G |
|
energy
A | B |
|
hype
A | B |
|
pop
A | B |
|
mgr
A | B |
|
FIGHT
RATING
29% |
|
|
|
|
|
|
|
Undercard bout
|
Coming up we have a welterweight MMA rules bout between Ottaa Koppia (ranked 106 p4p, 2733 weight class) and Jake Damien (ranked 20 p4p, 344 weight class). On his way into the cage it seems that Ottaa Koppia has been attacked by a crazed fan! It looks like it might have been the just bleed guy! Luckily Ottaa Koppia seems to be OK! I thought that lunatic was in prison!?
 |
|
 |
| 183 cm
29
182
17 - 8 - 0 |
|
180 cm
29
176
13 - 7 - 0 |
Good wrestling
Solid boxing
Cardio machine |
|
Powerful takedowns
Basic striking
Good gas tank |
|
| |
|
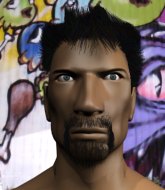
Ladies and gentlemen. This fight is 3 rounds, in the welterweight division.
Introducing the fighter to my left, fighting out of the red corner.
With a record of 17 - 8 - 0, fighting out of London, Ottaa Koppia!
And introducing the fighter to my right, fighting out of the blue corner.
With a record of 13 - 7 - 0, fighting out of Rio de Janeiro, Jake Damien!
The judges for this bout are Taro Takaoka, Tatsuya Matsuyama and Yukihiro Yamamoto.
The bell rings for round one and we are underway!
Damien shoots in and scores a nice double leg takedown into half guard.
Well, if Damien is going to just lie there, perhaps we should talk about what we're having for dinner tonight
I'm having a ham and pineapple pizza
Yum. Can't wait.
Koppia trying to control but Damien postures up.
The ref warns both fighters not to hold the cage as they work up against the meshing.
Damien is sneakily working for an arm triangle but Koppia sees it coming and defends easily.
Damien has hold of the far side arm. He's working for the Kimura, can Koppia defend it? Damien steps over the head and cranks it - Koppia is tapping out! That was textbook stuff right there - nice submission victory for Damien!
Ladies and gentlemen, after 0:40 of round 1, we have a winner by way of Submission (Kimura). Jake Damien!
|
|
|
|
|
|
|
|
|
|
|
|
|
|
|
|
|
|
|
|
|
|
|
| S |
C
A |
G |
S |
C
B |
G |
|
S |
C |
G |
|
energy
A | B |
|
hype
A | B |
|
pop
A | B |
|
mgr
A | B |
|
FIGHT
RATING
81% |
|
|
|
|
|
|
|
Undercard bout
|
Coming up we have a featherweight MMA rules bout between Kazuo Takashi (ranked 45 p4p, 983 weight class) and Smashy Cartwright (ranked 7 p4p, 122 weight class). Chooooooooon! I think Takashi might be my favorite fighter, now he's come out to åç°å
å¼ Rising. Cartwright has chosen The Hammer as his entrance music. Kazuo Takashi had a look across the cage there at his opponent. He definitely means business
 |
|
 |
| 170 cm
29
145
25 - 3 - 0 |
|
174 cm
29
157
7 - 3 - 1 |
Abu Dhabi Champ
Counter fighter
Insanely flexible |
|
Good wrestler
Decent boxing
Powerful |
|
| |
|
Ladies and gentlemen. This fight is 5 rounds, for the featherweight championship of the world!
Introducing the champion to my left, fighting out of the red corner.
With a record of 25 - 3 - 0, fighting out of London, Kazuo Takashi!
And introducing the challenger to my right, fighting out of the blue corner.
With a record of 7 - 3 - 1, fighting out of Hilo, Smashy Cartwright!
The judges for this bout are Yuuki Gou, Sosuke Kotani and Taro Takaoka.
The bell rings for round one and we are underway!
Cartwright throws out a powerful jab.
Takashi takes a body punch but keeps moving.
A looping hook to the body misses from Cartwright. Takashi does a little dance to reset his feet.
Nice defenses there by Cartwright.
Cartwright misses with a straight right.
Cartwright has been working on his striking defense in training and it's paying off as Takashi is landing a low percentage of strikes.
Cartwright misses with a right hand
and Takashi decides to take the opportunity to score a takedown. He's landed in Cartwright's guard.
Cartwright is looking to stand back up but Takashi counters by passing into half guard. Oops... bit sloppy there by Cartwright.
Takashi is working for a kimura but Cartwright is defending it quite comfortably.
Takashi looking to pass the half guard. Not this time.
That's one minute gone in the round.
Cartwright is defending against the submission attempts here by Takashi.
Cartwright trying to hold on to Takashi's head to control him but Takashi postures up.
The fighters are pressed up against the cage, both looking to find a bit of space to work.
Cartwright wants to get back to his feet.
That's two minutes gone in the round.
My god... these two guys really need to pick up the pace or everyone will leave to go get a beer.
Takashi moves into full mount! Cartwright won't be happy about that!
Takashi controlling from the full mount.
We could do with one of the fighters taking the initiative a bit more on the ground - they're both waiting to capitalize on a mistake.
Takashi trying to control but he's not successful this time.
Cartwright is in all sorts of trouble here.
Takashi fails to take his opponent's back.
That's three minutes gone in the round.
Takashi looking to control but Cartwright is working nicely, looking to advance position himself.
Takashi wants to take his opponent's back but Cartwright doesn't allow it.
Takashi looking to control and managing it successfully.
Takashi wants to take Cartwright's back here but Cartwright is holding on to an arm, himself looking to escape.
That's four minutes gone in the round.
Neither fighter has done anything of merit for a good minute or two here and the crowd are not happy about it.
Cartwright is looking to improve his position but Takashi isn't that keen on the idea.
Takashi content just to control the position here.
Takashi has controlled the position for a good 20 seconds, which will no doubt be starting to frustrate his opponent.
Boooooooooooooooooooo!!! God, this has been a terrible round. Come on you two, sort yourselves out!
Takashi goes for an armbar but he's not got it
Cartwright turns into him and now he's in Takashi's guard.
Cartwright throwing strikes from guard but Takashi blocks nicely.
And that is the end of the round. The fighters go back to their corners.
Kazuo Takashi dominated that round.
Well, the break between rounds is over. Let's get back to the scrappin!
Cartwright defending well as Takashi loads up on a big left hand.
Cartwright pushing out the jab but it's not landing.
Cartwright throws a hook but Takashi avoids it easily.
Takashi changes levels and drives through with a really nice takedown into side control. Cartwright looks really pissed at himself for not defending that better.
Cartwright prevents Takashi from moving into mount.
Cartwright tries to get back to half guard but can't.
Takashi tries for an arm triangle. That looks pretty tight to me. Is this one over!?! Possibly, maybe, no Takashi has let go of the choke. Obviously it wasn't as tight as we thought!
We've had a slow start to the round here - hopefully the action picks up.
Takashi tries to advance to mount but can't.
That's one minute gone in the round.
Takashi taking a break here but Cartwright is having none of it and regains half guard.
Takashi wants to control but Cartwright is keeping him busy.
Cartwright is looking to regain full guard. Not this time though.
That's two minutes gone in the round.
Neither fighter has done anything of merit for a good minute or two here and the crowd are not happy about it.
Takashi tries to pass to full mount but Cartwright defends it.
Cartwright wants to get back to his feet.
The referee has stepped in and called for a break in the action. We'll restart on the feet.
Takashi closes the distance and clinches up with Cartwright, looking for a takedown. Takashi pushes Cartwright against the cage but Cartwright circles to the side and manages to break the clinch.
Cartwright is looking to chop away at Takashi's legs.
Takashi wants to take advantage of his opponent's missed offense by moving into the clinch.
Takashi tries to close the distance and clinch up against the cage but Cartwright paws at him with a jab and circles away.
Takashi staying out of range there.
Cartwright scores with a punch to the head.
That's three minutes gone in the round.
Cartwright misses with a straight left.
A low kick from Cartwright misses
and Takashi counters with a nice shoot takedown that brings the fighters to the ground.
Cartwright keeping moving, preventing Takashi from controlling successfully.
Takashi controls the pace of the fight for a moment.
Cartwright is looking to stand up but Takashi isn't so interested in that idea.
Takashi slips effortlessly into side control - very nice.
That's four minutes gone in the round.
Takashi taking a breather here.
This fight is sponsored by Chainsaw 7. More blood and guts and stuff like that, in cinemas everywhere now!
Boooooooooooooooooooo!!! God, this has been a terrible round. Come on you two, sort yourselves out!
Cartwright is pushing Takashi's head away, looking to escape. Takashi manages to hold on to the position though.
The referee looks like he's ready to step in and stand the fighters back up.
And that is the end of the round. The fighters go back to their corners.
That was a close second round but I would say that Kazuo Takashi will probably get the nod.
The fighters get back to their feet, the hooter sounds and we're back to the action!
Cartwright missing with a left hand there. Takashi was out of range so wasted energy throwing that one.
Cartwright staying out of range there.
Takashi throws a shot from downtown. Cartwright moves away and avoids it.
Cartwright is the aggressor but that punch slipped nicely by Takashi.
Takashi appears to be looking for a counter takedown.
Takashi misses with a series of wild punches.
Cartwright misses with a left hand
and Takashi counters with a takedown into side control! That could mean trouble for Cartwright!
Takashi taking a break here but Cartwright is having none of it and regains half guard.
Cartwright trying to control here.
That's one minute gone in the round.
We've had a slow start to the round here - hopefully the action picks up.
Takashi trying to control from half guard but Cartwright is working away.
Kazuo Takashi overall seems to be getting the better of the ground position in the fight so far.
Takashi prevents Cartwright from improving his position.
Takashi moves into full mount! Cartwright won't be happy about that!
Takashi controlling from mount.
Cartwright tries to hold on but Takashi postures up.
That's two minutes gone in the round.
My god... these two guys really need to pick up the pace or everyone will leave to go get a beer.
Takashi trying to control but Cartwright is having none of it.
Takashi controlling his opponent.
Takashi wants to control the pace but Cartwright is squirming around nicely.
That's three minutes gone in the round.
Takashi is really struggling to control Cartwright but he's trying to hold on to the position.
Takashi working for a guillotine from mount but Cartwright is in no mood to give up.
Takashi can't quite control the action as he would like just now, as Cartwright is looking to escape.
Cartwright tries to hold on but Takashi pushes him away.
That's four minutes gone in the round.
The crowd are starting to boo a lack of action.
Takashi trying to control but he's not successful this time.
Cartwright is desperately trying to improve his position but Takashi has a good base and remains in mount.
Cartwright tries to buck Takashi off but he can't manage it.
Boooooooooooooooooooo!!! God, this has been a terrible round. Come on you two, sort yourselves out!
Cartwright is wriggling around trying to escape.
Takashi can't quite control the action as he would like just now, as Cartwright is looking to escape.
And that is the end of the round. The fighters go back to their corners.
Kazuo Takashi clearly takes that round.
The fighters get back to their feet, the hooter sounds and we're back to the action!

Takashi lands a jab, followed by a cross and another cross, as Cartwright backs up against the cage.
Takashi rushes Cartwright and pushes him back against the cage in a clinch.
Come on Takashi - let's have some action - none of this stalling nonsense.
Takashi goes for a takedown attempt but Cartwright pushes him away and we're back to fighting at a distance.
Takashi is really dominating this fight. Is there anything that Cartwright can do to turn this around?
Takashi swings away with a body shot that misses
and Cartwright counters with a straight right hand.
Cartwright slips in close and lands a nice hook before moving back out of range.
We've had a slow start to the round here - hopefully the action picks up.
Takashi keeping a good distance there, avoiding the body shot.
Takashi with poor footwork there. He got himself in a bit of a tangle, enabling Cartwright to score with a decent uppercut.
Cartwright lands with a good body shot.
Takashi with poor footwork there. He got himself in a bit of a tangle, enabling Cartwright to score with a decent uppercut.
That's one minute gone in the round.
The fight moves into the clinch position.
A right hand to the body from Takashi.
Takashi drops down for a takedown but doesn't get it.

Cartwright escapes the clinch and we're back to striking.
Cartwright tries to score with a leg kick but it misses it's target.
Takashi feints and as Cartwright raises his hands in defense, Takashi changes levels and drives through with a takedown into guard.
Takashi is standing up over Cartwright. Cartwright looks to escape but Takashi dives into side control.
Takashi tries to move into full mount but can't pass Cartwright's legs.
That's two minutes gone in the round.
Cartwright is putting a lot of effort into getting back to his feet here.
Cartwright struggling a bit here.
Takashi takes a little break here. Cartwright wants to take advantage but he is being controlled well.
Takashi trying to control the position but Cartwright is working away.
That's three minutes gone in the round.
Takashi tries to cartwheel into mount but he doesn't manage it.
Takashi is moving around in side control but his primary objective seems to be to maintain the position.
Cartwright tries to improve position but can't.
That's four minutes gone in the round.
The crowd are hurling abuse towards the fighters... You can hardly blame them though because there isn't a lot going on in the fight.
Takashi advances to mount.
You get the feeling that Cartwright really doesn't like being in this position too much.
Takashi fails to advance to Cartwright's back.
The crowd thankful this round is nearly over.
Takashi wants to control the pace but Cartwright is squirming around nicely.
And that is the end of the round. The fighters go back to their corners.
That was a close fourth round but I would say that Kazuo Takashi will probably get the nod.
The corners get their ten second warning. Both fighters stand from their stools and stare each other down, ready to get back to the action. This is the final round!

Takashi has closed the distance and engaged Cartwright in a clinch.
Takashi displaying some good clinch control by pressing Cartwright up against the cage.
Cartwright breaks the clinch and we're back to striking at distance.
Cartwright throws a hook to the body but it doesn't connect.
Cartwright throws a lazy uppercut
and Takashi counters with a single leg into guard. Cartwright didn't expect that.
Cartwright is looking to stand back up but Takashi counters by passing into half guard. Oops... bit sloppy there by Cartwright.
We've had a slow start to the round here - hopefully the action picks up.
Cartwright is looking to improve his position.
Cartwright wants to get back to his feet.
That's one minute gone in the round.
Takashi is looking to advance position but Cartwright won't allow it.
Takashi is looking to pass the guard... He's managed it - he's now in full mount!
Cartwright is writhing around trying to get back to his feet.
Takashi looking to control but Cartwright is working nicely, looking to advance position himself.
Takashi wants to take his opponent's back but Cartwright doesn't allow it.
That's two minutes gone in the round.
Cartwright has given up his back. Will we see Takashi going for some submissions?
Takashi is remaining active here, looking for the choke. The more discerning members of the crowd will appreciate his efforts.
So, who will make the next big move? In this position it could be crucial.
That's three minutes gone in the round.
Takashi is working hard for the rear naked choke here.
Takashi is controlling the position but Cartwright somehow manages to roll and ends up with half guard.
Takashi uses his free foot to push down on Cartwright's thigh. Eventually he works his other foot free and he's advanced to mount - this is trouble for Cartwright.
Smashy Cartwright has stepped it up - he knows he needs a finish here!
That's four minutes gone in the round.
Cartwright is trying desperately to improve position.
Cartwright is trying to stand.
Takashi can't quite control the action as he would like just now, as Cartwright is looking to escape.
Cartwright is trying to get to the cage to help him get back to his feet.
And that's the end of the fight!
Kazuo Takashi showed his dominance in that final round.
Well I reckon that's a shut out for Takashi, winning every round. Will the judges agree? They are the ones who matter, even if they are often depressingly incompetent. Over to the ring announcer for the scorecards.
Ladies and gentlemen, after 5 rounds of action, we go to the scorecards for a decision.
Judge Yuuki Gou scores the fight 49:46
Judge Sosuke Kotani scores the fight 50:45
Judge Taro Takaoka scores the fight 50:45
In favor of your winner, by unanimous decision... Kazuo Takashi!
Kazuo Takashi retains his featherweight title!
During a confident post fight interview, Kazuo Takashi thanked all his fans. He seemed very genuine when describing how motivated his fans keep him.
|
|
|
|
|
|
|
|
|
|
|
|
|
|
|
|
|
|
|
|
|
|
|
| S |
C
A |
G |
S |
C
B |
G |
|
S |
C |
G |
|
energy
A | B |
|
hype
A | B |
|
pop
A | B |
|
mgr
A | B |
|
FIGHT
RATING
27% |
|
|
|
|
|
|
|
Co-main event
|
Coming up we have a lightweight MMA rules bout between Ed Green (ranked 98 p4p, 346 weight class) and Dick Winters (ranked 12 p4p, 47 weight class). Winters is bobbing his head along to his entrance song: All Along the Watchtower. Over to our ring announcer for the fighter introductions!
 |
|
 |
| 175 cm
29
162
19 - 6 - 0 |
|
183 cm
29
161
21 - 8 - 0 |
Powerful takedowns
Solid Muay Thai
Cardio machine |
|
Good wrestler
Basic striking
Granite chin |
|
| |
|
Ladies and gentlemen. This fight is 5 rounds, for the lightweight championship of the world!
Introducing the champion to my left, fighting out of the red corner.
With a record of 19 - 6 - 0, fighting out of Rio de Janeiro, Ed Green!
And introducing the challenger to my right, fighting out of the blue corner.
With a record of 21 - 8 - 0, fighting out of Montreal, Dick Winters!
The judges for this bout are Taro Takaoka, Yukihiro Shimada and Shigeki Fujiwara.
The bell rings for round one and we are underway!
Winters shoots in for a takedown - he's clinched up with Green but Green pushes him off and we're back to square one.
Winters dodges the punch combination from Green.
Green closes the distance and gets a trip takedown into side control. Winters quickly recovers to half guard.
Winters tries to get to full guard but Green has control of the leg.
Winters is trying to control but can't.
Winters is refusing to be controlled, as Green sits in half guard.
Winters wants to get back to full guard.
We've had a slow start to the round here - hopefully the action picks up.
Winters looking to force a kimura from the bottom here. He's concentrating on that move too much though and Green pushes past his half guard into mount!
Winters has given up his back.
Green is not going to allow Winters to sit and survive in this position.
Winters is in a world of trouble here. He's outmatched on the ground here and he'd better get Green off his back sharpish unless he wants to be submitted.
Winters can't escape the position.
That's one minute gone in the round.
Green trying to control momentarily.
Winters is in bad spot here.
Green is not going to allow Winters to sit and survive in this position.
Winters is really stuck here.
Green trying to control.
Green tightening his grip on Winters, looking for the choke.
Winters looks to control his opponent's hands but he's not mananging it at the moment.
That's two minutes gone in the round.
Winters showing good submission defense here.
Winters tries to escape the position.
The ref warns both fighters not to hold the cage as they work up against the meshing.
Winters trying to control the hands but Green won't let him.
Green is working really hard to secure the rear naked choke. Winters defends successfully for a significant amount of time. Both fighters are looking very determined.
That's three minutes gone in the round.
Green tries to get the hooks in deep but Winters pushed the leg off.
Green is trying to stick to Winters's back but Winters is turning into Green. He's managed to reverse the position - now he's in Green's guard. Polite applause from the crowd in appreciation of some nice Jiu Jitsu by Winters.
Winters slows down the pace of the fight for a moment. He'll need to remain active if he doesn't want to see the fight stood back up.
Winters trying to control but Green is working from the bottom.
Green working for a triangle but Winters defends it easily.
Green keeping moving, preventing Winters from controlling successfully.
Green keeping full guard, as Winters tries to pass.
The fighters are pressed up against the cage, both looking to find a bit of space to work.
That's four minutes gone in the round.
Green not looking particularly offensive just at the moment.
Winters trying to control but Green is working from the bottom.
Green is looking for a guillotine. You can't force these things though and Winters defends well.
Winters got a little sloppy there for a moment and Green has worked his way into a loose triangle - can he finish it?! No, Winters has managed to get both his arms back between Green's legs - danger averted.
Winters engaging in some classic timewasting tactics.
Green tries to land a sweep but no joy.
The crowd thankful this round is nearly over.
Winters looking to control the position here, rather than advance.
Winters tries to free his leg and advance position but Green is retaining full guard.
And that is the end of the round. The fighters go back to their corners.
Ed Green dominated that round.
OK. That's time! The bell goes and we're back to the action.
Green throws a body kick but he wasn't in range.
Winters drops down looking to force a counter takedown but Green defends it well.
Green tries to work over Winters's front leg with a kick but Winters checks it.
Green drives through with a really nice takedown into side control.
Winters is looking for a sweep.
Green trying to control the position but Winters is working away.
Green tries to move to mount but Winters blocks the move with his legs.
Winters regains half guard.
Green seems to be looking for submissions.
We've had a slow start to the round here - hopefully the action picks up.
Winters is trying to get back to full guard.
Winters preventing any damage for now, controlling his opponent's head.
Winters trying to control here.
That's one minute gone in the round.
Green is looking to advance position but Winters won't allow it.
Green wants to lay and pray for a moment but Winters keeps working.
Green is looking to pass the guard... He's managed it - he's now in full mount!
Winters tries to lock up and control but Green gives him a forearm to the face and pushes him away.
Green wants to take Winters's back but he can't do it this time.
Winters tries to hold on but Green postures up.
Green controlling the position easily from mount.
That's two minutes gone in the round.
Winters keeping his composure momentarily, calmly looking to get back to half guard.
Green jumps to the side looking to secure the arm triangle
. Ooooh, that looks tight
Winters is gargling but he's managed to escape! Nice work there by Winters and Green has given up the dominant position trying to land that submission.
Winters struggling a bit here.
Winters is being controlled here.
Green gets to mount! Winters was on the offensive and wasn't defending properly.
Winters has given up his back here.
That's three minutes gone in the round.
Winters just trying to survive but Green is wriggling into a better position, looking to finish.
Green is really dominating this fight. Is there anything that Winters can do to turn this around?
Green has the hooks in. Winters is trying to push off one leg but he has to do so cautiously to avoid being submitted.
Green is persistently looking for the submission but Winters is defending it well.
Winters rolls, trying to escape but Green keeps control of the position.
Green working for the choke.
A lull in the action here.
Green is working for the rear naked choke. He has one arm under the chin but Winters has hold of the other arm. A bit of a stalemate here.
Green is hanging on to Winters's back as he tries to escape.
That's four minutes gone in the round.
Green has his opponent's back and is working for the choke.
Winters is displaying good submission defense - not really looking in danger of submitting to the rear naked choke at the moment. That could change in an instant of course if Green gets his way!
Green gets his hands free as Winters looks to control.
Green controlling the position well here. Winters rolled but Green kept the hooks locked in and stayed in the dominant position.
Winters trying to control the hands but Green breaks the grip.
Boooooooooooooooooooo!!! God, this has been a terrible round. Come on you two, sort yourselves out!
Green controlling well, preventing Winters from escaping the position.
Winters looks to control his opponent's hands but he's not mananging it at the moment.
And that is the end of the round. The fighters go back to their corners.
Ed Green dominated that second round.
That's time! Green's corner gives him a slap on the ass as he gets ready to fight.
Winters closes the distance and clinches up with Green, looking for a takedown. Winters pushes Green against the cage but Green circles to the side and manages to break the clinch.
Green stuffs the takedown.
Horrible takedown attempt by Green or perhaps it was just good defense by Winters, which made it look bad.
Dick Winters seems to be the more aggressive standup fighter in this bout.
Winters gets the takedown into side control.
Winters goes for an armbar here - this could be all over! But no, Green has escaped beautifully and is now on top in side control! Oh, that's unlucky for Winters but great work by Green.
Green wants to work for a kimura but he's foiled early by Winters, who protects the arm well.
Winters is not content to let Green control the position.
You can see the frustration on Winters's face, being in this tough position on the bottom.
That's one minute gone in the round.
Green trying to control the position but Winters is working away.
Winters wants to control but Green postures up.
Green wants to lay and pray for a moment but Winters keeps working.
Winters tries to bench press Green off him but Green keeps the position.
Green tries to move to mount but Winters blocks the move with his legs.
Winters can't do much from the bottom here.
That's two minutes gone in the round.
The crowd are showing their displeasure at the lack of action as loud boos ring out around the arena.
Winters stops Green from passing to mount.
Green advances nicely into full mount.
Green is looking to work his way around to Winters's back. He needs to be careful though, as he's in danger of losing this dominant position.
Winters swinging wildly from the bottom but he's not landing.
Winters wants to control but Green is having none of it.
Green controlling the pace for now.
Winters gets back to half guard.
That's three minutes gone in the round.
Green looking to pass the half guard. Not this time.
Ed Green overall seems to be getting the better of the ground position in the fight so far.
Winters trying to control but Green postures up.
Winters manages to get to full guard.
Winters keeping full guard, as Green tries to pass.
That's four minutes gone in the round.
Well. There's a bit of a lull in the action here and the crowd are starting to get restless.
Green is pushing down on Winters's leg trying to pass to half guard. Winters is fighting to maintain full guard but Green has managed to sneak the leg through.
Winters wants to get back to full guard.
Green trying to control from half guard but Winters is working away.
Winters wants to sweep but Green has passed to side control!
Winters trying to control but Green flips him over like a cheap hooker and has his back!
Green is not going to allow Winters to sit and survive in this position.
Boooooooooooooooooooo!!! God, this has been a terrible round. Come on you two, sort yourselves out!
Winters might have to switch it up a bit here because his efforts to control Green haven't been going to plan, at least at the current moment in time.
And that is the end of the round. The fighters go back to their corners.
Ed Green clearly takes that round.
That's time! Green's corner gives him a slap on the ass as he gets ready to fight.
Winters dives in for a single leg takedown but Green sprawls and the fighters end up clinched against the cage.
Winters tries to close the distance and clinch but Green swats him to one side with an open hand palm strike and circles away.
Green half commits to a counter takedown before pushing away, out of range.
Winters shoots in for a takedown but Green shows good takedown defense.
Green feinted with a counter takedown.

Green gets tackled into the cage by Winters. Winters maintains the clinch.
Winters has clasped his hands together around Green's back... aaand, he's got a takedown into side control. Nicely done.
Green is looking for a sweep.
Green is in a tricky position but he's been working on his transitions down at Soul Supremacy Rio, so we'll see if he gets out of it.
Green is trying to get back to half guard. He's pushing on Winters's leg. He's managed it. Nice work.
Winters trying to control from half guard but Green is working away.
Winters works his way into side control.
We've had a slow start to the round here - hopefully the action picks up.
Winters laying and praying for a moment but Green takes advantage and regains half guard.
Green is looking to improve his position.
That's one minute gone in the round.
Winters passes to side control.
Winters trying to control the action but Green is working from the bottom.
Winters moving around in side mount but really he's just happy to control for now.
Green sneaks a leg under to get back to half guard.
Green is looking to sinch up a guillotine here but Winters pulls his head out easily.
Green is looking to regain full guard. Not this time though.
That's two minutes gone in the round.
The crowd are starting to boo a lack of action.
Winters controlling the pace.
Green tries to get to full guard but Winters has control of the leg.
Winters controlling the pace.
Winters wants to pass the guard but Green is defending well.
Winters is looking for a kimura here.
Green is looking to sinch up a guillotine here but Winters pulls his head out easily.
That's three minutes gone in the round.
Winters wants to pass to mount but Green is defending the position.
Green is looking for a sweep. Winters is wise to his cunning plan and keeps the top position.
Green keeps control of the position for the meantime.
Winters looks over to his corner - he wants some instructions but his corner are not responding.
The referee decides to stand the fighters back up.
Winters drops down and drives through with a powerful takedown into guard.
Winters is intent on slowing down the pace of the fight, simply looking to control.
Winters pressing down on his opponent's thigh, looking to pass guard. Green is keeping the position for now.
That's four minutes gone in the round.
Green tries to land a sweep but no joy.
Winters passes easily into side control. Nice work.
Winters wants to lay and pray for a moment but Green keeps working.
Green is positioning himself to get back to half guard.
Green can't do much from the bottom here.
Boooooooooooooooooooo!!! God, this has been a terrible round. Come on you two, sort yourselves out!
Winters looking for an arm triangle but it's way too loose to do anything.
Winters wants to control but Green is keeping him busy.
And that is the end of the round. The fighters go back to their corners.
Dick Winters dominated that fourth round.
OK. That's time! The bell goes and we're back to the action. This is the final round!
Winters tries to clinch but Green moves away
so Green counters with a double leg into guard. Good agility.
Green trying to control the position from guard on top but Winters is wriggling around, looking for whatever he can.
Green wants to pass the guard but Winters is keeping the position.
Winters has an active guard here but Green has managed to pass into half guard.
Green is pressing down on Winters's thigh, looking to free his foot. Winters is holding on for now.
We've had a slow start to the round here - hopefully the action picks up.
Green stalling away here and it's allowed Winters to slip out his trapped foot and regain full guard.
Winters keeping moving, preventing Green from controlling successfully.
That's one minute gone in the round.
Winters working a defensive guard here.
Winters looking for submissions off his back, moving his hips, looking for an opening.
Green slips nicely into half guard.
Winters is looking to regain full guard. Not this time though.
Green trying to pass the guard but Winters defending well.
That's two minutes gone in the round.
My god... these two guys really need to pick up the pace or everyone will leave to go get a beer.
Winters is concentrating on defense, preventing Green from advancing position.
Winters wants to get back to full guard.
Green trying to control the action but Winters is working from the bottom.
Green trying to pass the guard but Winters defending well.
We must be close to a standup if these guys don't pick up the pace.
That's three minutes gone in the round.
Green is looking for a kimura. It's going to be difficult to finish that from half guard though and Winters defends it well.
Green passes to full mount!
Green avoids the attempt from Winters to control.
Green is going oldschool here, as he tries to force Winters to tap using a forearm choke. This isn't 1993 though, so Winters shrugs it off.
Winters is working to get back to half guard.
Green wants to take his opponent's back but Winters doesn't allow it.
Winters tries to lock up and control but Green gives him a forearm to the face and pushes him away.
That's four minutes gone in the round.
Winters is trying to escape the mount but Green keeps good control and instead manages to take Winters's back.
Winters trying to control but not successfully.
Green is remaining active here, looking for the choke. The more discerning members of the crowd will appreciate his efforts.
Green is working really hard to secure the rear naked choke. Winters defends successfully for a significant amount of time. Both fighters are looking very determined.
Winters trying to control the action but Green just sinks the hooks in.
Dick Winters has stepped it up - he knows he needs a finish here!
Ed Green is fighting for a decision here - he's started to take the cautious approach.
Boooooooooooooooooooo!!! God, this has been a terrible round. Come on you two, sort yourselves out!
Green trying to secure his dominant position for a moment - making sure Winters doesn't escape.
And that's the end of the fight!
Ed Green showed his dominance in that final round.
I think Green has won this one but let's see what the judges have to say. Over to the ring announcer for the scorecards.
Ladies and gentlemen, after 5 rounds of action, we go to the scorecards for a decision.
Judge Taro Takaoka scores the fight 49:46
Judge Yukihiro Shimada scores the fight 49:46
Judge Shigeki Fujiwara scores the fight 49:46
In favor of your winner, by unanimous decision... Ed Green!
Ed Green retains his lightweight title!
Ed Green took to the microphone after his victory and thanked his sponsors, Groove Gear for their support in the buildup to the fight.
|
|
|
|
|
|
|
|
|
|
|
|
|
|
|
|
|
|
|
|
|
|
|
| S |
C
A |
G |
S |
C
B |
G |
|
S |
C |
G |
|
energy
A | B |
|
hype
A | B |
|
pop
A | B |
|
mgr
A | B |
|
FIGHT
RATING
29% |
|
|
|
|
|
|
|
Main event
|
Coming up we have a light heavyweight MMA rules bout between Torhte Finlayson (ranked 13 p4p, 325 weight class) and Matthew Quigley (ranked 2 p4p, 41 weight class). Finlayson comes into the arena with Scotland the Brave, Black Bear blaring out of the sound system. Both fighters look fresh as a daisy as they make their way towards the cage.
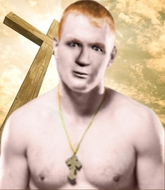 |
|
 |
| 190 cm
29
210
27 - 2 - 0 |
|
194 cm
29
215
13 - 11 - 0 |
Good wrestling
World class boxer
Cardio machine |
|
Decent wrestler
Excellent boxer
Heavy handed |
|
| |
|
Ladies and gentlemen. This fight is 5 rounds, for the light heavyweight championship of the world!
Introducing the champion to my left, fighting out of the red corner.
With a record of 27 - 2 - 0, fighting out of Los Angeles, Torhte Finlayson!
And introducing the challenger to my right, fighting out of the blue corner.
With a record of 13 - 11 - 0, fighting out of London, Matthew Quigley!
The judges for this bout are Shirou Masuda, Sosuke Kotani and Yukihiro Shimada.
The bell rings for round one and we are underway!
Finlayson listening to his corner there, landing a nice uppercut.
Quigley throws a shot from downtown. Finlayson moves away and avoids it.
Finlayson misses with an uppercut. Quigley saw that one coming.
Finlayson scores with a straight right hand, right through his opponent's guard.
Quigley throws a monster uppercut resembling something out of street fighter but it doesn't land.
It looked like Finlayson was trying to counter with a body shot coming off that last attack from Quigley.
Quigley misses with a left hand
and Quigley takes a counter punch right on the button for his troubles.
Quigley catches Finlayson with a nice straight right. He seems pissed - ooooh, it's on now! On like donkey kong!
We've been told by Finlayson's head coaches at FIST OF FURY that he's been working on his takedown defense in preparation for this fight.
Finlayson misses with a body shot. Nice footwork from Quigley.
Quigley throws a right hand that misses
enabling Finlayson to counter with a crisp jab.
Quigley throws an ugly left hook that misses
and Finlayson counters with a nice body shot.
Finlayson defending well as Quigley loads up on a big left hand.
A quick step to the side and Finlayson tries to counter with a shot to the body but it doesn't connect.
Wooooo! Give it up for these two warriors! They are putting on a show!
Finlayson slips under a jab.
Quigley lunges in with an uppercut that skims his opponent's chin.
That's one minute gone in the round.
Finlayson lands with an overhand left.
Quigley just misses with a punch to the body.
Finlayson misses the jab.
Finlayson loads up on a big right hand but Quigley slips the punch.
Quigley misses with a wild body shot.
Finlayson avoids a lazy jab quite easily.
No joy there for Quigley, who threw a few shots but didn't land.
Quigley loads up on a big right hand but Finlayson slips the punch.
Quigley's corner calls for a 1, 2 combination and Quigley duly obliges.
Finlayson lands an overhand left. A wild punch that just about connected.
Quigley throws a poor cross that misses
and Finlayson makes him pay by landing a nice hook to the body before moving out of range.
Nice body punch from Finlayson.
That's two minutes gone in the round.
We've seen a great period of action over the last minute or so - credit to both fighters for going all out!
Finlayson throws a monster uppercut resembling something out of street fighter but it doesn't land.
Finlayson throws a body shot but no joy.
Finlayson moves out of range of the strikes.
Quigley will need to tighten up his combinations if he doesn't want to gas himself out, swinging at thin air.
Quigley throws an off balance right hand
and Finlayson counters with a straight punch to the midsection.
Finlayson throws a nice hook to the body that draws an oooh from the crowd.

Finlayson sends Quigley crashing to the mat with a devastating uppercut! Finlayson is motioning to the referee to let Quigley up. He wants to try and finish this one on the feet!
 It looks like Matthew Quigley has been cut. It looks like Matthew Quigley has been cut.
Quigley throws out a token jab with nothing on it.
Finlayson swung with a counter punch to the body but it didn't connect.
Finlayson connects with a body shot.
Quigley has tried to improve his agility in the runup to this fight.
Quigley looks winded!
A shot to the body from Quigley misses
letting Finlayson counter with a right hand.
That's three minutes gone in the round.
Finlayson lands a jab to Quigley's midsection.
Finlayson is really peppering his opponent's head with punches.
Finlayson fakes a jab and then connects with a hook.
Finlayson ducks under an overhand right and circles away with a smile on his face.
Finlayson works Quigley's body with a nice hook.
Quigley misses with a lunging right hand
and Finlayson counters with a good right hand that lands right on the jaw.
 Quigley is rocked! Quigley is rocked!
Matthew Quigley seems to be the more aggressive standup fighter in this bout.
Finlayson sends Quigley crashing to the mat with a devastating uppercut! Finlayson is motioning to the referee to let Quigley up. He wants to try and finish this one on the feet!
Quigley is still on wobbly legs! Can Finlayson finish him?
Wooooo! Give it up for these two warriors! They are putting on a show!
Finlayson measures up his opponent and throws a superman punch that connects to the jaw! Down goes Quigley! The ref steps in, and that's the ball game folks!
Ladies and gentlemen, after 3:45 of round 1, we have a winner by way of KO (Superman Punch). Torhte Finlayson!
Torhte Finlayson retains his light heavyweight title!
Torhte Finlayson thanked the fans post fight for their support.
|
|
|
|
|
|
|
|
|
|
|
|
|
|
|
|
|
|
|
|
|
|
|
| S |
C
A |
G |
S |
C
B |
G |
|
S |
C |
G |
|
energy
A | B |
|
hype
A | B |
|
pop
A | B |
|
mgr
A | B |
|
FIGHT
RATING
60% |
|
|
|
|
|
|
|
|
|
|
