 |
NYCL 10 - Wellstone vs Rider PBP Commentary |
Undercard bout
|
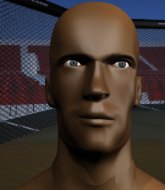
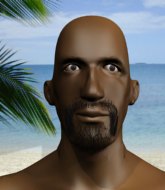
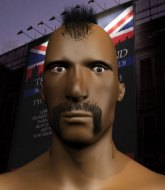
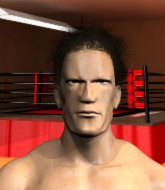
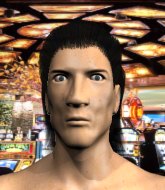
Coming up we have a middleweight MMA rules bout between Cameron Doyle (ranked 4336 p4p, 4818 weight class) and RaeRae Usman (ranked 547 p4p, 578 weight class). Doyle comes to the cage accompanied by Pull Up. Usman is bobbing his head along to his entrance song: Somewhere I belong. RaeRae Usman has the better chin. Will he look to stand and bang today?
 |
|
 |
| 178 cm
22
180
2 - 1 - 0 |
|
193 cm
25
185
0 - 0 - 0 |
BJJ Blue Belt
Brawler
Cuts easily |
|
BJJ Blue Belt
Solid Muay Thai
Solid chin |
|
| |
|
Ladies and gentlemen. This fight is 3 rounds, in the middleweight division.
Introducing the fighter to my left, fighting out of the red corner.
With a record of 2 - 1 - 0, fighting out of Amsterdam, Cameron Doyle!
And introducing the fighter to my right, fighting out of the blue corner.
With a record of 0 - 0 - 0, fighting out of Los Angeles, RaeRae Usman!
The judges for this bout are Russell Pearce, John Kavanagh and Anthony Taglia.

The bell rings for round one and we are underway!
Doyle tries to clinch up.

Usman gets to the clinch - let's see what his plan is here.
Usman lands a damaging elbow.
 It looks like Cameron Doyle has been cut. It looks like Cameron Doyle has been cut.
Usman blocks an uppercut.
A short right from Doyle on the inside.

Usman pushes off and circles away, back to the middle of the mat.
Usman circles away from the clinch attempt
and Usman counters with a lovely straight right hand!

Doyle moves into the clinch successfully.
Usman breaks the clinch and we're back to striking at distance.
Doyle tries to clinch but fails miserably
and Usman counters with a nice body shot.
Doyle moves in looking to clinch but Usman pushes him off.
Doyle tries to clinch but is not successful on this occasion.
Usman fails to land with the punch combination there - jab, cross, hook, miss, miss, miss.
A slapping leg kick lands for Usman.
This is a great period of action - very entertaining stuff!
Usman throws a jab to the body, straight down the pipe. Boom. That sent Doyle stumbling backwards but he manages to regain his composure quickly.
Usman scores with a jab. Doyle acknowledges it with a nod of the head.
Doyle walks forward, straight into a front kick from Usman.
Doyle is breathing heavily.
Usman moves into range and lands a nice body kick.

That's one minute gone in the round.
Usman wings a very wild body shot but it does the job and lands to the midsection.
Usman connects with a body shot.
Usman goes for a high kick. It partially lands.
 Doyle is rocked! Doyle is rocked!
Doyle tries to check a leg kick but that clearly hurt him.
Usman lands a big head kick that sends Doyle to the canvas! Usman follows up with strikes from the mount that forces the ref to step in and stop the fight!
Ladies and gentlemen, after 1:20 of round 1, we have a winner by way of TKO (Strikes). RaeRae Usman!
Our winner, RaeRae Usman, made sure he spent some time buttering up the crowd during his post fight interview, which will no doubt bring him a few more fans.
Cameron Doyle was interviewed post fight and said 'The ref was wrong. I should have won. Next time ill get em.'.
|
|
|
|
|
|
|
|
|
|
|
|
|
|
|
|
|
|
|
|
|
|
|
| S |
C
A |
G |
S |
C
B |
G |
|
S |
C |
G |
|
energy
A | B |
|
hype
A | B |
|
pop
A | B |
|
mgr
A | B |
|
FIGHT
RATING
78% |
|
|
|
|
|
|
|
Undercard bout
|
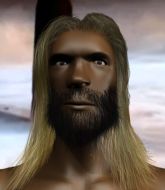
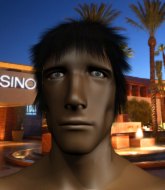
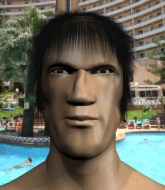
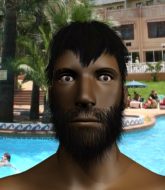
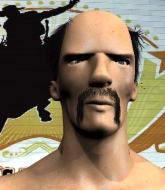
Coming up we have a light heavyweight MMA rules bout between Arminious Kaja (ranked 5804 p4p, 4309 weight class) and Magnus Magnussen (ranked 601 p4p, 527 weight class). Both fighters look fresh as a daisy as they make their way towards the cage.
 |
|
 |
| 175 cm
25
205
0 - 2 - 0 |
|
194 cm
23
206
1 - 0 - 0 |
BJJ Blue Belt
Good knees
Granite chin |
|
BJJ Blue Belt
Good kicks
Determined |
|
| |
|
Ladies and gentlemen. This fight is 3 rounds, in the light heavyweight division.
Introducing the fighter to my left, fighting out of the red corner.
With a record of 0 - 2 - 0, fighting out of New York, Arminious Kaja!
And introducing the fighter to my right, fighting out of the blue corner.
With a record of 1 - 0 - 0, fighting out of Los Angeles, Magnus Magnussen!
The judges for this bout are Steve Montenegro, David Schapiro and Eddie Farnsworth.
The bell rings for round one and we are underway!
Kaja misses with a series of wild punches.
No luck for Kaja with that takedown attempt.
Magnussen shapes to counter with a head kick.
Kaja scores with a nice right hand.
 It looks like Magnus Magnussen has been cut. It looks like Magnus Magnussen has been cut.
Kaja misses with the combination.
Magnussen with the counter takedown but Kaja avoids it easily.
Kaja moves into range and connects with a jab.
Magnussen throws a head kick that misses.
We've had a slow start to the round here - hopefully the action picks up.
Kaja closes this distance looking for a takedown but Magnussen circles away.
Magnussen slips a jab and a cross from Kaja.
Kaja swinging wildly here.
Magnussen clinches up with Kaja and pushes him back against the cage.
That's one minute gone in the round.
Kaja wants to strike at distance but he can't break free of the clinch.
Kaja wants to break free but Magnussen has control.
Kaja wants to strike at distance but he can't break free of the clinch.
Kaja jumps guard but Magnussen turns him against the cage and keeps the fight standing.
That's three failed takedown attempts in the round for Arminious Kaja. That's going to take a lot out of him.
Some stalling of biblical proportions here from Magnussen.
Magnussen breaks the clinch and we're back to striking at distance.
Magnussen throws a nice inside leg kick.
Magnussen fails in his attempt to clinch.
Magnussen slaps away a takedown attempt from Kaja, before circling back to the center of the mat.
Magnussen fails with a takedown attempt.
Magnussen drives through and clinches with Kaja against the cage.

That's two minutes gone in the round.
Magnussen stalling the fight.

Kaja breaks the clinch.
Kaja lands with a two punch combination before moving back out of range.
Kaja shoots in for a takedown but doesn't get it.
A nice leg kick from Magnussen, right into the meat of the thigh.
Magnussen will have to do better than that with his takedown attempts.
Kaja misses with a hook
and Magnussen counters with a big head kick but Kaja shrugs it off.
Kaja could do with losing a few pounds - he looks very soft around the mid section, to put it politely.
Fantastic stuff here - a very entertaining period of action, which has drawn cheers from the crowd.
Kaja swings away but doesn't land with a series of punches.
Magnussen closes this distance looking for a takedown but Kaja circles away.
Kaja misses with an uppercut.
Magnussen tries to clinch but fails miserably
and Kaja counters with a good right hand that lands right on the jaw.
Good exchange - Magnussen coming out on top.
Magnussen drives through and clinches with Kaja against the cage.

That's three minutes gone in the round.

Kaja jumps into guard, dragging Magnussen to the mat.
Kaja wants to sweep but no luck.
Magnussen slips effortlessly into side control - very nice.

Magnussen goes for an armbar here - this could be all over! But no, Kaja has escaped beautifully and is now on top in side control! Oh, that's unlucky for Magnussen but great work by Kaja.
The fighters are pressed up against the cage, both looking to find a bit of space to work.

Kaja decides to stand back up. Kaja steps back and let's Magnussen get back to his feet.
Magnussen moves into the clinch.

Magnussen manages to pull guard.
Magnussen wants to sweep here but Kaja controlling him for the moment.
Kaja stands up and looks to throw the legs aside to pass to side control. Magnussen swivels though and keeps the full guard.

That's four minutes gone in the round.

Magnussen is scooting his butt against the cage and has managed to get back to his feet. Kaja presses him back against the cage, presumably looking to take the fight back to the mat.
The fans in attendance giving it up for the two fighters, who have really let it all hang out in the last minute or so!
Kaja wants to get back to striking at distance but Magnussen won't allow it.
Magnussen pulls guard successfully.
Magnussen keeping full guard, as Kaja tries to pass.
Magnussen has a closed guard, preventing Kaja from standing up.
Kaja stays in close to Magnussen's body and controls the position.
Kaja trying to control the position from guard on top but Magnussen is wriggling around, looking for whatever he can.
The fighters are starting to get a bit slippery now, which will make submissions a bit more difficult.
Magnussen is working an open guard here, looking to improve his position. No doubt that will leave him open to counters but at least he's being more offensive.
And that is the end of the round. The fighters go back to their corners.
A close round but Magnus Magnussen will probably get the nod.
The cut man is working on Magnus Magnussen's cut.
The minute break is over - no more time for sponges and pep talks - back to the action!

Magnussen takes one to the side of the head.
Magnussen tries to close the distance and clinch up but Kaja swats him away and circles back towards the center.
Magnussen has his head slapped from side to side by a 3 punch combination. That must have hurt him.
Kaja misses with a jab, cross combination.
Magnussen tests Kaja's chin there with a solid looking shot.
Kaja throws a wild combination but nothing lands.
Magnussen is looking for the big counter here.
Magnussen drives through and clinches with Kaja against the cage.
Kaja wants to strike at distance but he can't break free of the clinch.
Magnussen manages to get underhooks and slows down the pace for a moment.
Magnussen is struggling to control the position.
Magnussen wants a takedown but no success here.
That's one minute gone in the round.
Magnussen stalling in the clinch but Kaja improves position.
Kaja pulls guard effortlessly.
Kaja keeping moving, preventing Magnussen from controlling successfully.
Kaja is working from a closed guard but he's struggling to control his opponent.
Magnussen tries to free his leg and advance position but Kaja is retaining full guard.
Magnussen sneaks a leg through and gets to half guard. That was like a knife through butter how easily he passed Kaja's guard.
Kaja is looking to regain full guard. Not this time though.
Magnussen throwing shots but they're hitting the canvas more than the man.
That's two minutes gone in the round.
Kaja is trying to control but can't.
Magnussen is stalling here. Kaja is in no mood to hang around though. He's locked up a kimura from the bottom! Magnussen seems to be keeping calm but he's forced to roll out of the hold and Kaja has ended up in side control on the top. Nice work.
Magnussen is looking to reverse the position.
Kaja stands up and we're back to a striking position.
Magnussen tries to clinch
and Kaja counters with a one-two to the body.
Magnussen has worked on his takedown defense in the runup to this fight and it is paying off so far.
Kaja misses with the combination.
Magnussen scoring well with a low kick there.
That's three minutes gone in the round.
Kaja fakes high and shoots in for a takedown but Magnussen avoids it really well and circles away.
Magnussen is looking to clinch but Kaja is avoiding it.
Kaja shoots in looking for a takedown but Magnussen manages to keep the fight standing, pushing Kaja's face into the canvas for good measure before circling away.
Kaja throws a hook to the body but it doesn't connect.
Kaja fakes high and shoots in for a takedown but Magnussen avoids it really well and circles away.
That's three failed takedown attempts in the round for Arminious Kaja. That's going to take a lot out of him.
Kaja throws a wild combination but nothing lands.
Magnussen is looking to clinch.
Kaja misses with a hook
and Magnussen counters with a straight right hand.
Kaja throws a body punch but Magnussen moves out of range.
Despite the aggression on Magnussen's face he doesn't fully commit to the counter.
Arminious Kaja is looking to throw some combinations by the looks of things.
Magnussen drives through and clinches with Kaja against the cage.
That's four minutes gone in the round.
Magnussen slows down the pace here.
Come on Magnussen - let's have some action - none of this stalling nonsense.
The crowd are getting on Magnussen's back here. They're not happy about his lack of aggression in the clinch.
Magnussen prevents Kaja from breaking the clinch.
Kaja is trying to break the clinch but Magnussen is controlling him.
Kaja tries to break free but Magnussen pushes him back against the cage.
Magnussen breaks the clinch and we're back to striking at distance.
Magnussen shoots in and drives through. Kaja sprawls well.
Kaja tries to counter by clinching up but Magnussen breaks away and moves out of range.
Magnussen keeping his hands up high there, blocking the jab from Kaja.
Despite the aggression on Magnussen's face he doesn't fully commit to the counter.
Kaja throws a combination but it was largely blocked by Magnussen.
Kaja shoots in but no luck this time.
Kaja circles away from the clinch attempt.
And that is the end of the round. The fighters go back to their corners.
Arminious Kaja dominated that second round.
The cut man is working on Magnus Magnussen's cut.
The fighters get back to their feet, the hooter sounds and we're back to the action! This is the final round!

Magnussen moves into the clinch successfully.
Kaja prevents the takedown attempt.
Good anti-grappling being displayed by Kaja as Magnussen tries to tie him up.
Kaja jumps guard but his hands slip and he falls flat on his back. Well, he's made himself look a right mug there, as Magnussen walks away with a smile on his face. Kaja gets slowly back to his feet and shakes his head.
Kaja darts in looking for a takedown but Magnussen gets double underhooks and turns Kaja into the cage.
As Kaja backs off Magnussen throws a huge counter combo but Kaja manages to avoid it all.
Magnussen has Kaja pressed against the cage, preventing Kaja from circling away and getting back to striking at range.
Magnussen jumps guard but Kaja stands there with Magnussen around his waist. Magnussen gives up and drops back to his feet. We remain in the clinch.
Kaja looks like he'd prefer to be striking at range right now.
We've had a slow start to the round here - hopefully the action picks up.
Kaja is trying to break the clinch but Magnussen has him pressed against the cage.
Magnussen breaks the clinch and we return to the middle of the mat.
Magnussen fails to land the takedown.
Arminious Kaja has stuffed three takedown attempts in the round now. That's going to take a lot out of Magnus Magnussen.
The fight stays on the outside here - Magnussen looks like he's thinking about clinching though.
That's one minute gone in the round.
Magnussen gets a clinch.
Magnussen breaks the clinch and we're back to striking at distance.
Kaja scores with a jab to the head.
Magnussen tries to clinch but Kaja moves out of range.
Kaja looks frustrated there after his takedown attempt is stuffed easily.
Kaja fails to land the takedown.
Kaja looks to score with a jab to the body but Magnussen is just out of range.
Magnussen clinches up against the cage.
Kaja manages to break the clinch.
That's two minutes gone in the round.
Magnussen tries to clinch but Kaja is having none of it.
It looked like Kaja was looking amped, ready to throw a big counter but didn't commit.
Magnussen lands with a head kick! That's gotta hurt.
Kaja lands a jab to Magnussen's midsection.
Magnussen tries to close the distance and clinch up but Kaja swats him away and circles back towards the center.
Magnussen fakes with an overhand right and moves in to clinch with Kaja, pushing him back against the cage.
Kaja tries to circle away but Magnussen has him pinned against the cage.
Magnussen stays in close to his opponent and throws a right hand to the body.
Wooooo! Give it up for these two warriors! They are putting on a show!
Kaja wants to get back to striking at distance but Magnussen won't allow it.
Magnussen has Kaja pressed against the cage, preventing Kaja from circling away and getting back to striking at range.
Kaja looks like he'd prefer to be striking at range right now.
Kaja is defending well against a takedown attempt.
Magnussen content to slow the pace in the clinch.
An uppercut to the body lands inside from Magnussen.
Kaja gets underhooks to prevent Magnussen's takedown attempt.
That's three minutes gone in the round.
Magnussen trying to control the position but instead, Kaja has worked for underhooks and has pushed Magnussen into the cage.
Kaja tries to break the clinch but Magnussen is controlling the position.
Magnussen is looking to take this one to the mat.
Magnussen takes a big intake of breath there - he's definitely tired.
Kaja tries to break free but Magnussen pushes him back against the cage.
Kaja breaks the clinch.
Magnussen uses some good footwork to avoid the body shot by Kaja.
Kaja throws a series of punches but Magnussen moves out of range.
Kaja misses with a takedown attempt
and Magnussen counters with a nice uppercut.
Arminious Kaja seems to be the more aggressive standup fighter in this bout.
Kaja has a takedown stuffed.
Nice jab there from Kaja.
That's four minutes gone in the round.
Magnussen tries to clinch up.
Magnussen rushes Kaja and pushes him back against the cage in a clinch.
Magnussen is looking for a takedown up against the cage. Kaja gets underhooks though and prevents the takedown attempt.
Kaja's corner calls for him to break the clinch, which he does.
Kaja lands a nice hook to Magnussen's body. Magnussen takes it in his stride and looks to land his own strikes.
Kaja misses with a takedown attempt
and Magnussen counters with a straight right hand.
Magnussen throws a head kick that half lands.
Kaja closes the distance and clinches up with Magnussen, looking for a takedown. Kaja pushes Magnussen against the cage but Magnussen circles to the side and manages to break the clinch.
Magnussen is definitely looking for the counter takedowns here.
The crowd are loving this. Great action here.
Kaja shoots in with a takedown attempt and he has Magnussen pinned against the cage. Magnussen gets the underhooks and manages to circle away.
Magnussen drives through and clinches with Kaja against the cage.
And that's the end of the fight!
Magnus Magnussen comfortably won the final round on my scorecard.
I think Magnussen has won this one but let's see whether the judges agree with me. Over to the ring announcer for the scorecards.
Ladies and gentlemen, after 3 rounds of action, we go to the scorecards for a decision.
Judge Steve Montenegro scores the fight 29:28
Judge David Schapiro scores the fight 28:29
Judge Eddie Farnsworth scores the fight 29:29
The fight is ruled a draw!
|
|
|
|
|
|
|
|
|
|
|
|
|
|
|
|
|
|
|
|
|
|
|
| S |
C
A |
G |
S |
C
B |
G |
|
S |
C |
G |
|
energy
A | B |
|
hype
A | B |
|
pop
A | B |
|
mgr
A | B |
|
FIGHT
RATING
45% |
|
|
|
|
|
|
|
Undercard bout
|
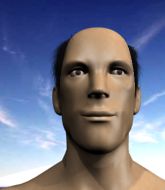
Coming up we have a bantamweight MMA rules bout between Micah Spinks (ranked 4043 p4p, 5407 weight class) and Sean Dash (ranked 218 p4p, 258 weight class). Both fighters really staring each other down here, as Sean Dash enters the cage!
 |
|
 |
| 159 cm
25
135
1 - 1 - 0 |
|
160 cm
25
142
2 - 1 - 0 |
BJJ Blue Belt
Solid Muay Thai
Cuts easily |
|
BJJ Blue Belt
Solid Muay Thai
Heavy handed |
|
| |
|
Ladies and gentlemen. This fight is 3 rounds, in the bantamweight division.
Introducing the fighter to my left, fighting out of the red corner.
With a record of 1 - 1 - 0, fighting out of Hilo, Micah Spinks!
And introducing the fighter to my right, fighting out of the blue corner.
With a record of 2 - 1 - 0, fighting out of Amsterdam, Sean Dash!
The judges for this bout are Reed Andrews, Chad Campbell and Anthony Taglia.
The bell rings for round one and we are underway!
A head kick by Spinks misses
and Dash counters with a crisp hook to the side of the head.
It looks like Micah Spinks has been cut.
Dash lands a beauty of a right hand that gets the crowd cheering.
Dash misses with a wild combination.
It looked like Spinks was looking amped, ready to throw a big counter but didn't commit.
Spinks throws the kick towards the body but Dash avoids it.
Spinks gets in close and instigates a clinch.
Spinks throws a vicious knee straight up the middle but Dash blocks it with crossed arms.
Dash lands a short shot on the inside that snaps the head of Spinks backwards.
Dash takes a knee to the side of the body.
Dash misses with a shot to the kidneys.
The referee calls for Dash to work.
Spinks misses with an elbow over the top.
Spinks tries to land a knee to the body but he is off balance and Dash avoids it.
Dash misses with a body punch.
Dash avoids the elbow strike from Spinks, against the cage.
Spinks misses with an elbow strike.
Dash dodges an elbow strike from Spinks.
That's one minute gone in the round.
Spinks is trying to stall.
Spinks looking to slow down the pace here.
Dash lands with a short shot to the head.
Spinks is trying to break the clinch but Dash is controlling him.
Spinks trying to stall but Dash improves his position.
Dash throws a punch but it's blocked by Spinks.
Spinks throws an elbow but it misses.
Dash throws a blind hook that connects with the side of Spinkss head.
Spinks is trying to slow down the pace of the fight but Dash is keeping busy.
Spinks blocks an uppercut.
Dash lands a hook to the side of the head.
Spinks tries to land a knee to the body but he is off balance and Dash avoids it.
Spinks is looking to break free of the clinch but Dash has double underhooks.
Dash lands a nice shot to the body.
That's two minutes gone in the round.
Dash misses with a body punch.
Dash lands with a quick shot inside that doesn't really do much damage.
Dash blocks an elbow strike from Spinks.
Dash's coach down at 88Fight Club Gym88.. 800pw (15 COACHES) was telling us pre-fight that they have been working on Dash's balance. Obviously they view that as a key factor in the outcome of this fight.
The pace slowing considerably in the clinch, as Dash takes a break from that fighting nonsense to think about the finer things in life.
A nice left hand lands by Dash.
Spinks throws an elbow but it's blocked.
Dash being controlled against the cage.
Dash blocks the elbow strike.
Spinks misses with a knee strike.
Spinks is trying to slow down the pace of the fight but Dash is keeping busy.
Spinks throws a vicious knee straight up the middle but Dash blocks it with crossed arms.
The crowd cheering loudly, showing their appreciation for the quality fight we're seeing here.
Dash lands an uppercut.
Spinks lands a damaging elbow.
That's three minutes gone in the round.
Spinks has had enough of the clinch but Dash keeps him there for the moment.
Spinks tries to land a knee to the head but misses.
Dash on the defensive, avoiding the knees to the body.
Spinks throws an elbow that misses.
Dash lands a hook that snaps the head of Spinks backwards.
Dash holding his opponent close, against the cage.
Dash lands a hook that snaps the head of Spinks backwards.
Dash stalling against the cage.
Spinks misses with an elbow strike.
Dash lands a shoulder strike.
Dash fails to land with a short punch on the inside.
A quick uppercut on the inside from Dash.
Spinks looking to stall.
A short right hand to the side of the head by Dash.
That's four minutes gone in the round.
Spinks is looking to score with knees to the body. Maybe he'll change it up and go body then head. Dash is defending well for now.
Spinks is working hard here but doesn't seem to be able to control effectively, up against the cage.
Dash holding his opponent close, against the cage.
Dash working aggressively here.
Dash will no doubt start fighting again in a minute but for now he's just having a little rest, leaning Spinks up against the cage.
Dash tries to throw a body punch but Spinks avoids it by throwing Dash back against the cage.
Dash blocks an elbow strike from Spinks.
Dash lands with a short punch from the clinch.
Wooooo! Give it up for these two warriors! They are putting on a show!
Spinks trying to stall but Dash improves his position.
Dash stalling in the clinch.
Spinks takes a shot to the head.
A short body shot lands from Dash as the two fighters clinch.
Dash avoids a wild elbow strike from Spinks.
And that is the end of the round. The fighters go back to their corners.
Sean Dash dominated that round.
The cut man is working on Micah Spinks's cut.
That's the end of the round. The referee orders the cornermen out of the cage so we can get back down to business.
Spinks pulls out of a head kick attempt.
Dash tries to bum rush Spinks with a series of wild strikes but Spinks uses good footwork to avoid the assault.
Dash checks a low kick from Spinks.
Dash looks to land a combination. Spinks sees it coming but can only parry a couple of the shots.
Dash thows a left - swing and a miss!
Spinks lands a leg kick and bounces back out of range.
Spinks tries to land a front kick but Dash steps back. That was a bit too telegraphed.
Spinks slips a straight right by Dash.
Spinks shakes his hands off, looking to compose himself, but takes a jab to the jaw whilst he does it.
Spinks is rocked!
Spinks moves away from the strike by Dash.
Spinks scores with a head kick.
Dash throws a shot to the body.
The fans in attendance giving it up for the two fighters, who have really let it all hang out in the last minute or so!
Spinks doesn't react quick enough there as he takes a shot to the body.
A chopping leg kick lands by Spinks.
Spinks walks forward and throws out a flicking leg kick. Dash checks it nicely though, as he moves to the side.
Dash shuffles to his left behind two crisp jabs. Spinks eats them both and turns towards Dash to reposition himself and eats a stinging right hand-left hook combo.
Oh Spinks is still all over the place! His legs are completely gone! Will he be able to recover?!!
Spinks avoids a punch combination nicely.
That's one minute gone in the round.
Spinks throws a head kick but Dash moves out of range.
Spinks misses with a head kick.
Spinks seems to have got his legs back now.
Dash has been the more effective fighter overall so far.
Dash looks to land a combination but Spinks avoids it well.
Spinks is looking light on his feet compared to last time was saw him fight.
Spinks misses with a low kick.
Dash throws a right hand that Spinks ducks under and follows up with a left that Spinks also avoids with ease.
Spinks seems to be squinting his left eye. Perhaps he got a poke in that previous exchange. Dash shows no mercy and swarms him with a barage of strikes! Spinks is backing up but Dash catches him with a final right hook that drops him! Spinks covers up and the referee steps in to end the fight! Dash Jumps to his feet and flashes his guns to the crowd. Oh yeah, baby! How'd you like them apples?!
Ladies and gentlemen, after 1:24 of round 2, we have a winner by way of TKO (Strikes). Sean Dash!
After the fight, Sean Dash was humble in paying tribute to his opponent but made it clear he wants to go on to bigger and better things. It seemed to go down well with the crowd who cheered him loudly.
|
|
|
|
|
|
|
|
|
|
|
|
|
|
|
|
|
|
|
|
|
|
|
| S |
C
A |
G |
S |
C
B |
G |
|
S |
C |
G |
|
energy
A | B |
|
hype
A | B |
|
pop
A | B |
|
mgr
A | B |
|
FIGHT
RATING
53% |
|
|
|
|
|
|
|
Undercard bout
|
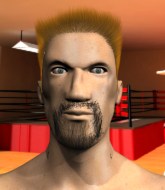
Coming up we have a light heavyweight MMA rules bout between Shendo Hirasho (ranked 4139 p4p, 3948 weight class) and Kendric Bazemore (ranked 511 p4p, 490 weight class). Kendric Bazemore is the more experienced fighter, so let's see if that makes a difference tonight.
 |
|
 |
| 199 cm
25
205
1 - 1 - 0 |
|
195 cm
25
212
1 - 1 - 0 |
BJJ White Belt
Excellent MT
Good chin |
|
BJJ Blue Belt
Brawler
Determined |
|
| |
|
Ladies and gentlemen. This fight is 3 rounds, in the light heavyweight division.
Introducing the fighter to my left, fighting out of the red corner.
With a record of 1 - 1 - 0, fighting out of Tokyo, Shendo Hirasho!
And introducing the fighter to my right, fighting out of the blue corner.
With a record of 1 - 1 - 0, fighting out of New York, Kendric Bazemore!
The judges for this bout are Steve Montenegro, Chad Campbell and Joseph Jones.
The bell rings for round one and we are underway!
Bazemore manages to get an easy takedown there - catching Hirasho on his heels. He'll look to pass Hirasho's guard now, I'm sure.
Bazemore prevents Hirasho from getting back to his feet.
Hirasho is working an open guard here, looking to improve his position. No doubt that will leave him open to counters but at least he's being more offensive.
Hirasho looking to control.
Bazemore pushing down on Hirasho's thigh, trying to pass to half guard. He's managed it... Nice work.
Bazemore tries to pass to full mount but Hirasho defends it.
Hirasho avoiding damage under a succession of punches from Bazemore.
Bazemore looks more muscular than last time we saw him. He must have been on the weights.
Bazemore throwing punches and elbows but they're not doing any damage.
We've had a slow start to the round here - hopefully the action picks up.
Hirasho is looking to escape.
Bazemore prevents Hirasho from improving his position.
The two fighters exchange a few words. I couldn't hear what they were saying but maybe it's more fun if you make it up yourself. Bazemore connects with a nice short shot to Hirasho's temple.
That's one minute gone in the round.
Bazemore landing with strikes to the body and head, softening up his opponent.
Bazemore has the superior BJJ but he's also working some ground strikes into his gameplan.
Hirasho is looking to regain full guard. Not this time though.
Bazemore throwing shots but Hirasho is blocking nicely.
Hirasho wants to get back to his feet.
Ground and pound from Bazemore.
Bazemore not throwing his punches with enough precision this time.
Bazemore wants to pass to mount but Hirasho is defending the position.
Hirasho is trying to stand up here but Bazemore is controlling him well.
Hirasho is trying to maintain the position but Bazemore is very close to passing his half guard.
Hirasho is looking to improve his position.
That's two minutes gone in the round.
Bazemore is working for a submission of some sort.
Bazemore working over Hirasho with some ground and pound. Hirasho looks like he wants out of this position, which is understandable.
Bazemore thumps the canvas. Not on purpose obviously - he just missed Hirasho's head.
Hirasho taking some punishment here, with Bazemore in his half guard.
Hirasho taking some punishment here, with Bazemore in his half guard.
Bazemore is working for a kimura but Hirasho is defending it quite comfortably.
Bazemore is scoring with some nice ground and pound from the dominant position.
That's three minutes gone in the round.
Bazemore seems to be taking a bit of a break to think of his next move. He lands a short punch in the meantime.

Hirasho makes some distance and scrambles quickly back to his feet. Nice work!
Bazemore blocks a head kick by Hirasho.
Bazemore changes levels and looks for a double leg takedown. Hirasho tries to avoid it but Bazemore manages to keep hold of a leg and drag Hirasho to the ground. Hirasho escapes though and pops straight back up to his feet.
Hirasho seems to be moving with more speed, compared to his last bout. He must have been working on that in the gym.
Bazemore shoots in and bounces Hirasho off the cage to secure the takedown into guard.
The ref warns both fighters not to hold the cage as they work up against the meshing.
Bazemore postures up and lands some nice ground and pound.
The fighters are working up against the cage. Hirasho manages to wriggle his way back to his feet, so the fighters are now clinched against the cage.
This is a great period of action - very entertaining stuff!
Hirasho slowing the pace effectively.
That's four minutes gone in the round.
Bazemore has Hirasho pressed up against the cage and is working for takedown. Hirasho manages to improve position though and keeps the fight standing.
Bazemore is working on a leg, looking for a takedown but Hirasho is defending well.
Shendo Hirasho has stuffed three takedown attempts in the round now. That's going to take a lot out of Kendric Bazemore.
Bazemore gets a trip takedown into half guard.

Hirasho manages to create a bit of space in order to work his way back to his feet. Bazemore keeps hold of his opponent and drives him back against the cage.
A battle for position here, against the cage.
Bazemore works for the underhooks and manages to get a trip takedown into guard.
Bazemore stops Hirasho from standing up.
Bazemore slips nicely into half guard.
Hirasho wants to control but Bazemore is keeping busy.
Bazemore wants to work for an arm triangle but Hirasho is really keeping half guard well and defending the submission attempt.
Hirasho tries to kick Bazemore off but Bazemore keeps his base steady and stays in half guard.
And that is the end of the round. The fighters go back to their corners.
Kendric Bazemore dominated that round.
That's time! Back to the action!
Hirasho tries to sprawl but Bazemore drives through with a takedown into half guard.
Hirasho manages to escape and get back to his feet!
Bazemore shoots in and gets a takedown into Hirasho's guard.
Bazemore prevents Hirasho from getting back to his feet.
Bazemore is in close to Hirasho's body, working some short punches and elbows.
This has been an exciting period of action!
Hirasho wants to get back to his feet but Bazemore is in a dominant position and won't allow it.
Hirasho manages to escape and get back to his feet.
Bazemore fails with a takedown attempt from distance.
A really sloppy takedown attempt there from Bazemore.
That's one minute gone in the round.
Hirasho scores with a head kick. Bazemore tried to block it but didn't get his arm up in time.
A head kick misses from Hirasho.
Bazemore looks for a takedown. He's got it. We're now in half guard.
Hirasho is looking to improve his position.
Hirasho is defending against the submission attempts here by Bazemore.
Bazemore is thinking about going for an arm triangle but he can't free his leg.
The fighters are pressed up against the cage, both looking to find a bit of space to work.
That's two minutes gone in the round.
Bazemore trying to mount his opponent but Hirasho defends it.
Bazemore moves nicely into side control.
Bazemore is trying to land an Americana. He has the arm isolated but Hirasho is keeping cool and he's avoided the danger for now.
Check out the look on Bazemore's face as he threw that strike - that's one determined fighter!
That's three minutes gone in the round.
Hirasho tries to buck Bazemore off but Bazemore is having none of it.
Bazemore working the head and body with strikes.
Hirasho prevents Bazemore from moving into mount.
Hirasho pushes Bazemore away and creates a bit of space to escape. He's almost out here... but no, Bazemore gets a good hold of his legs and remains firmly in side control.
Bazemore is trying to land an Americana. He has the arm isolated but Hirasho is keeping cool and he's avoided the danger for now.
Bazemore in side control lands a nice looking series of punches and elbows.
Hirasho is looking for a sweep.
Bazemore working the ground and pound.
Bazemore wants to lay and pray for a moment but Hirasho keeps working.
Bazemore wants to work for a kimura but he's foiled early by Hirasho, who protects the arm well.
That's four minutes gone in the round.
Bazemore working the ground and pound from side control.
Hirasho is trying to get back to half guard.
Hirasho wants to control but Bazemore postures up.
Hirasho is positioning himself to get back to half guard.
Hirasho tries to wriggle free to get back to his feet but he's given up his back! Oops.
And that is the end of the round. The fighters go back to their corners.
Kendric Bazemore showed his class in that round. I'd imagine he'll take it on all the scorecards.
The corners get their ten second warning. Both fighters stand from their stools and stare each other down, ready to get back to the action. This is the final round!
Hirasho lands a nice looking body kick.
Hirasho misses with a head kick.
And Bazemore tries to counter it with a takedown but Hirasho pushes his down on his head and steps out.
Bazemore scores a trip takedown into side control. Nice.
Hirasho is working hard to escape and get back to his feet. After a battle for position, Bazemore asserts his dominance and retains side control.
Bazemore is looking to take a break and control but Hirasho is keeping him honest, looking to work from the bottom.
Bazemore working hard here to secure a kimura but he's not really in the right position for it.
We've had a slow start to the round here - hopefully the action picks up.
Bazemore scores with punches from side control.
It looks like Shendo Hirasho has been cut.
That's one minute gone in the round.
Bazemore lands a knee to the body and a forearm to the face.
Shendo Hirasho's cut is getting worse.
Bazemore scoring with punches and elbows.
Bazemore landing a few strikes.
Bazemore scores with a couple of short elbows.
Bazemore landing strikes.
A control attempt from Hirasho but he's now mounted!
Bazemore with good strikes from the mount here!
Bazemore looking to finish Hirasho with some ground and pound. This is bad for Hirasho!
That's two minutes gone in the round.
Bazemore raining down hammerfists from mount.
Hirasho wants to hold on but Bazemore pushes him away.
Hirasho is looking to get back to his feet - it's going to be hard from this position.
The fans in attendance giving it up for the two fighters, who have really let it all hang out in the last minute or so!
Bazemore raining down hammerfists from mount.
Hirasho is rocked!
Hirasho is bucking up trying to escape but Bazemore cracks him with another couple of good strikes.
Oh Hirasho is still in real trouble! Will he be able to recover?!!
Bazemore working away from the top, dropping strikes.
Oooh a big shot lands for Bazemore! Hirasho is out! The ref dives in to save him from more punishment!
Ladies and gentlemen, after 2:51 of round 3, we have a winner by way of KO (Strikes). Kendric Bazemore!
A less than humble Kendric Bazemore misjudged his post fight interview somewhat and came across a little too arrogant whilst trying to hype up his own abilities.
|
|
|
|
|
|
|
|
|
|
|
|
|
|
|
|
|
|
|
|
|
|
|
| S |
C
A |
G |
S |
C
B |
G |
|
S |
C |
G |
|
energy
A | B |
|
hype
A | B |
|
pop
A | B |
|
mgr
A | B |
|
FIGHT
RATING
61% |
|
|
|
|
|
|
|
Undercard bout
|
Coming up we have a welterweight MMA rules bout between Chris Holland (ranked 4200 p4p, 4001 weight class) and Roberto Zezinho (ranked 487 p4p, 472 weight class). Roberto Zezinho has the better chin. Will he look to stand and bang today?
 |
|
 |
| 192 cm
25
175
1 - 1 - 0 |
|
185 cm
25
177
1 - 0 - 0 |
BJJ Purple Belt
Solid boxing
KO power |
|
BJJ White Belt
Excellent MT
Heavy handed |
|
| |
|
Ladies and gentlemen. This fight is 3 rounds, in the welterweight division.
Introducing the fighter to my left, fighting out of the red corner.
With a record of 1 - 1 - 0, fighting out of New York, Chris Holland!
And introducing the fighter to my right, fighting out of the blue corner.
With a record of 1 - 0 - 0, fighting out of Las Vegas, Roberto Zezinho!
The judges for this bout are David Schapiro, Bruno Lombardi and Jorge Garcia.
The bell rings for round one and we are underway!
Holland tries to clinch but is not successful on this occasion.
Zezinho looks shocked there as he takes a right hand to the temple.
Holland slips in close and lands a nice hook before moving back out of range.
We've been told by Holland's head coaches at New York Public Gym that he's been working on his takedown defense in preparation for this fight.
Holland lands an overhand left. A wild punch that just about connected.
Zezinho cracks Holland with a right hand to the side of the head.
Zezinho avoids a punch combination nicely.
Zezinho swings away but doesn't land with a series of punches.
Holland was looking to counter that move with a punch but didn't quite pull the trigger.
Holland closes the distance and gets a trip takedown into side control. Zezinho quickly recovers to half guard.
This is a great period of action - very entertaining stuff!
Holland thows a huge punch but Zezinho dodges it nicely.
Holland stands up out of the half guard.
Holland swinging wildly here.
Nice shot by Zezinho.
Zezinho throws out a powerful jab.
Holland is rocked!
Zezinho moves in close and cracks Holland with a massive right hand! Holland, frozen momentarily in time, tumbles to the canvas, already out cold! A brutal knockout by Zezinho!
Ladies and gentlemen, after 0:53 of round 1, we have a winner by way of KO (Punch). Roberto Zezinho!
Roberto Zezinho took to the microphone after his victory and thanked his sponsors, REAPERS Clothing for their support in the buildup to the fight.
|
|
|
|
|
|
|
|
|
|
|
|
|
|
|
|
|
|
|
|
|
|
|
| S |
C
A |
G |
S |
C
B |
G |
|
S |
C |
G |
|
energy
A | B |
|
hype
A | B |
|
pop
A | B |
|
mgr
A | B |
|
FIGHT
RATING
99% |
|
|
|
|
|
|
|
Undercard bout
|
Coming up we have a featherweight MMA rules bout between Patrick Bateman (ranked 3545 p4p, 4349 weight class) and Wallace Everett (ranked 330 p4p, 391 weight class). Bateman comes to the cage accompanied by Hip to be Square. Patrick Bateman had real problems making weight for this fight. After initially coming in at 147.0lbs, he had two hours to make the official fight weight. He made it but it will have taken a lot out of him to cut those extra few pounds. Both fighters really staring each other down here, as Wallace Everett enters the cage!
 |
|
 |
| 175 cm
25
159
3 - 1 - 0 |
|
170 cm
27
153
3 - 0 - 0 |
Good wrestling
Brawler
Very quick |
|
BJJ Blue Belt
Counter fighter
Determined |
|
| |
|
Ladies and gentlemen. This fight is 3 rounds, in the featherweight division.
Introducing the fighter to my left, fighting out of the red corner.
With a record of 3 - 1 - 0, fighting out of Las Vegas, Patrick Bateman!
And introducing the fighter to my right, fighting out of the blue corner.
With a record of 3 - 0 - 0, fighting out of Tokyo, Wallace Everett!
The judges for this bout are Eddie Farnsworth, Alyssa Summers and Chad Campbell.
The bell rings for round one and we are underway!
Bateman closes the distance and looks for a trip takedown... aaaand he's got it - Bateman lands in his opponent's guard.
Bateman with a nice head shot there.
Bateman stands up and looks to throw the legs aside to pass to side control. Everett swivels though and keeps the full guard.
Bateman pushing down on Everett's thigh, trying to pass to half guard. He's managed it... Nice work.
Bateman passes to side control.
Bateman working the ground and pound from side control.
Bateman in side control lands a nice looking series of punches and elbows.
Bateman working the head and body with strikes.
Bateman scoring with punches and elbows.
Everett tries to get back to half guard but can't.
You can see the frustration on Everett's face, being in this tough position on the bottom.
Everett is not in a great position here, taking some shots.
That's one minute gone in the round.
Everett on the wrong end of some ground and pound.
Bateman in side control lands a nice looking series of punches and elbows.
Bateman lands an elbow.
Everett tries to bench press Bateman off him but Bateman keeps the position.
Everett wants to control but Bateman postures up.
Everett taking a bit of punishment here - Bateman scoring with strikes.
Everett takes an elbow right on the bridge of the nose and winces in pain.
 Everett is rocked! Everett is rocked!
Bateman wants to control but Everett is keeping him busy.
Everett is still in real trouble! Can Bateman finish him?
Everett really doesn't want to stay on the ground with Bateman. If he can't get it back to his feet, it's only a matter of time before he'll be tapping out.
Everett seems to have recovered his senses.
Bateman cracks Everett with a big elbow.
That's two minutes gone in the round.
You can see the frustration on Everett's face, being in this tough position on the bottom.
Everett throws a couple of strikes even though he's not really in a good position to do so.
Bateman trying to control the position but Everett is working away.
Bateman working the body and head with strikes.
Both fighters have adopted an aggressive gameplan on the ground!
You can see the frustration on Everett's face as Bateman controls the position.
Everett tries to buck Bateman off but Bateman is having none of it.
Bateman scores with a couple of short elbows.
That's three minutes gone in the round.
Bateman remains in side control and seems content to stay there. It's a versatile position from which he can work both strikes and submissions, whilst maintaining that control, so maybe he'll sit here for a while.
Bateman creates a bit of distance and throws down some hard shots.
The ref warns both fighters not to hold the cage as they work up against the meshing.
Everett tries to improve position but can't.
Bateman trying to control the action but Everett is working from the bottom.
Bateman lands a knee to the body and a forearm to the face.
Everett is looking to reverse the position.
Bateman grinds an elbow into Everett's temple.
That's four minutes gone in the round.
Bateman connects with a decent looking elbow from side control that caused Everett some visible discomfort.
Everett takes a big shot right to the temple there but he's taken it well.
Everett seems a little lost for a moment, as Bateman dominates the positioning.
Everett is trying to get back to half guard.
We get told so often about how wrestlers don't like to be on their backs. Let's see if Everett can do anything to dispel that myth.
You can see the frustration on Everett's face, being in this tough position on the bottom.
Bateman is looking to take a break and control but Everett is keeping him honest, looking to work from the bottom.
Bateman connects with a decent looking elbow from side control that caused Everett some visible discomfort.
Everett tries to get back to half guard but can't.
Bateman wants to lay and pray for a moment but Everett keeps working.
Everett is positioning himself to get back to half guard.
And that is the end of the round. The fighters go back to their corners.
Patrick Bateman dominated that round.
That's the end of the interval. I'm sure that seemed a lot quicker than a minute for our two fighters! Back to the action.
Bateman shoots in for a takedown and gets it. Let's see what he's got on the mat.

Everett uses the cage to get back to his feet.
Bateman is really dominating this fight. Is there anything that Everett can do to turn this around?
Bateman tries to shoot in for a takedown. He's got hold of a leg but Everett swivels and escapes.
Everett is trying hard to land a takedown here. Bateman sprawls well and keeps this one on the feet.
Bateman shoots in with a takedown attempt and he has Everett pinned against the cage. Everett gets the underhooks and manages to circle away.
Bateman stuffs a takedown. It's all about dictating where the fight takes place and Bateman wants it to stay on the feet.
Bateman looking to shoot here. He's gone for it and he's landed a takedown into side control! Oh, that's bad for Everett!
Everett explodes and escapes back to his feet! Nice escape there!
Patrick Bateman seems to be the more aggressive standup fighter in this bout.
We've seen a great period of action over the last minute or so - credit to both fighters for going all out!
No luck for Bateman with that takedown attempt.
Everett changes levels for a counter takedown but doesn't follow through with his attempt.
That's three failed takedown attempts in the round for Patrick Bateman. That's going to take a lot out of him.
Nice takedown defense from Everett. No joy for Bateman on that attempt.
That's one minute gone in the round.
Bateman fakes an overhand right and shoots for a takedown. Everett sprawls well initially but Bateman persists and gets the takedown into half guard.
Bateman landing with strikes to the body and head, softening up his opponent.
Bateman winds up and cracks Everett with a swinging punch to the side of the head.
Everett gets full guard.
There's a bit of a scramble here and now Everett is on top in guard.

Bateman wants to sweep here but Everett controlling him for the moment.
Everett throwing elbows and punches but not connecting, as Bateman works some decent striking defense from the bottom.
Everett pressing down on his opponent's thigh, looking to pass guard. Bateman is keeping the position for now.
Everett preventing the sweep.
That's two minutes gone in the round.
Bateman keeping full guard, as Everett tries to pass.
Everett loading up with the ground and pound but he's missing more than he's landing in this flurry.
Everett has decided he wants to stand but the closed guard of Bateman is proving hard to escape from.
The fighters are pressed up against the cage, both looking to find a bit of space to work.
Bateman pulls Everett in to control the position.
Everett is looking to pass into half guard but Bateman pushes him away with his feet and jumps on top - now Bateman is in guard.

Bateman has been looking to land a fair amount of strikes on the ground. He might be looking to soften his opponent up in order to work for a submission.
That's three minutes gone in the round.
Everett has momentary wrist control but Bateman slips an elbow through the middle.
Bateman trying to control but Everett is working from the bottom.
Bateman pressing down on his opponent's thigh, looking to pass guard. Everett is keeping the position for now.
Everett looking to sweep here. No luck so far.
Bateman wants to pass the guard but Everett is keeping the position.
Everett is looking for a guillotine. You can't force these things though and Bateman defends well.
Bateman trying to pass the guard but can't manage it just yet.
It looks like the ref is thinking about a standup.
Patrick Bateman overall seems to be getting the better of the ground position in the fight so far.
That's four minutes gone in the round.
Neither fighter has done anything of merit for a good minute or two here and the crowd are not happy about it.
Bateman advances position into side control!
Everett takes a big shot right to the temple there but he's taken it well.
Bateman scoring with punches from side control.
Bateman is looking to take a break and control but Everett is keeping him honest, looking to work from the bottom.
Everett takes an elbow right on the bridge of the nose and winces in pain.
Everett wants to control but Bateman postures up.
Bateman is staying tight to Everett's torso, preventing him from escaping.
Everett is working to avoid the ground and pound but Bateman connects with a decent elbow.
You can see the frustration on Everett's face, being in this tough position on the bottom.
And that is the end of the round. The fighters go back to their corners.
That was a close second round but I would say that Patrick Bateman will probably get the nod.
The fighters' corners scream their final instructions, as the referee calls time. Here we go, back to the action! Let's get this one finished - here comes the final round!
Bateman closes the distance, clinches up and gets a nice trip takedown into side control. Very smooth.
Everett bucks up and manages to escape back to his feet!
Bateman misses with a takedown attempt
and Everett counters with a three punch combo that has Bateman backing up. Bateman nods at Everett to acknowledge the strikes.
Bateman gets his takedown attempt stuffed easily
and Everett counters with a quick right hand to the jaw.
Fantastic stuff here - a very entertaining period of action, which has drawn cheers from the crowd.
Bateman shoots in for a takedown and gets it.
Everett manages to create a bit of space in order to work his way back to his feet. Bateman keeps hold of his opponent and drives him back against the cage.
I was talking to Bateman's coach per-fight and he was telling me that they'd been working on the clinch in the runup to this fight.
Bateman looking for a takedown.
That's three failed takedown attempts in the round for Patrick Bateman. That's going to take a lot out of him.
Everett pulls guard.
Bateman sitting in guard, not really doing much.
Bateman scores with a decent looking elbow strike.
That's one minute gone in the round.
Bateman is sitting in guard, working some ground and pound.
Bateman makes a bit of distance and scores with some ground and pound, still in guard.
Everett working for a triangle but Bateman defends it easily.
Everett has momentary wrist control but Bateman slips an elbow through the middle.
Everett throwing his legs up looking for a triangle.
Bateman keeps in close for a moment and lands a decent shot to the side of Everett's head.
Bateman sneaks a leg through and gets to half guard. That was like a knife through butter how easily he passed Everett's guard.
That's two minutes gone in the round.
Bateman drops an elbow to the side of Everett's head.
Everett is looking to regain full guard. Not this time though.
Bateman frees up his trapped foot and advances to mount.
Bateman punishing his opponent with strikes.
Everett bucks up and manages to get a nice reversal! He's in guard on the top - nicely done!
Bateman wants to control here, rather than go for any submissions from the bottom. At least for now.
Everett postures up in Bateman's guard and throws a big left but Bateman blocks it.
Wallace Everett has stepped it up - he knows he needs a finish here!
Patrick Bateman is fighting for a decision here - he's started to take the cautious approach.
That's three minutes gone in the round.
Bateman trying to control the position here.
Everett trying to move into half guard but instead Bateman has managed to sweep!
Bateman seems content to control from guard here. He's going to have to remain active though if he doesn't want to get stood back up.
Bateman's ground tactics aren't going to win him many fans. Let's hope he's got fireworks for us if he gets back to his feet because he's not doing much on the ground.
That's four minutes gone in the round.
My god... these two guys really need to pick up the pace or everyone will leave to go get a beer.
Further stalling from Bateman.
And that's the end of the fight!
I would just about give that final round to Wallace Everett.
I think Bateman has won this one but let's see what the judges have to say. Over to the ring announcer for the scorecards.
Ladies and gentlemen, after 3 rounds of action, we go to the scorecards for a decision.
Judge Eddie Farnsworth scores the fight 29:28
Judge Alyssa Summers scores the fight 29:28
Judge Chad Campbell scores the fight 29:28
In favor of your winner, by unanimous decision... Patrick Bateman!
A loyal slave to those sponsorship dollars, Patrick Bateman made sure he mentioned Strikers Supplements, along with how happy he was to win his fight.
|
|
|
|
|
|
|
|
|
|
|
|
|
|
|
|
|
|
|
|
|
|
|
| S |
C
A |
G |
S |
C
B |
G |
|
S |
C |
G |
|
energy
A | B |
|
hype
A | B |
|
pop
A | B |
|
mgr
A | B |
|
FIGHT
RATING
46% |
|
|
|
|
|
|
|
Undercard bout
|
Coming up we have a featherweight MMA rules bout between Jerry Goon (ranked 3157 p4p, 4030 weight class) and Morgan Masvidal (ranked 301 p4p, 373 weight class). On his way into the cage it seems that Jerry Goon has been attacked by a crazed fan! It looks like it might have been the just bleed guy! Luckily Jerry Goon seems to be OK! I thought that lunatic was in prison!?
 |
|
 |
| 178 cm
25
145
2 - 0 - 0 |
|
179 cm
25
150
4 - 1 - 0 |
BJJ White Belt
Excellent boxer
Big right hand |
|
Decent wrestler
Basic striking
Solid chin |
|
| |
|
Ladies and gentlemen. This fight is 5 rounds, for the featherweight championship of the world!
Introducing the champion to my left, fighting out of the red corner.
With a record of 2 - 0 - 0, fighting out of London, Jerry Goon!
And introducing the challenger to my right, fighting out of the blue corner.
With a record of 4 - 1 - 0, fighting out of Las Vegas, Morgan Masvidal!
The judges for this bout are David Schapiro, John Roberts and Alyssa Summers.
The bell rings for round one and we are underway!
Masvidal throws a poor cross that misses
enabling Goon to counter with a crisp jab.
It looks like Morgan Masvidal has been cut.
Masvidal misses with a right hand
and Goon counters with a quick right hand to the jaw.
Goon seems to be moving with more speed, compared to his last bout. He must have been working on that in the gym.
Masvidal throws a sloppy body shot
and Goon counters with a nice uppercut.
Masvidal misses the body punch
and Goon counters with a good right hand that lands right on the jaw.
Masvidal is rocked!
Masvidal throws out a token jab with nothing on it.
Goon seem to be loading up, looking for a big counter.
Masvidal jabs Goon to the body, keeping him at a distance.
Masvidal throws a hook but Goon avoids it easily.
Masvidal throws a hook to the body but it doesn't connect.
Goon throws a combination but it was largely blocked by Masvidal.
Masvidal throws an ugly left hook that misses
and Goon counters with a stiff right hand.
Wooooo! Give it up for these two warriors! They are putting on a show!
Jab, jab by Goon - just one landing.
A telegraphed right hand from Masvidal misses the target.
An attempted straight right counter from Goon misses the target.
Morgan Masvidal seems to be the more aggressive standup fighter in this bout.
The fight stays on the outside here - Masvidal looks like he's thinking about clinching though.
It looked like Goon wanted to counter with a hook but didn't fully commit.
That's one minute gone in the round.
Masvidal misses with a jab to the body
and Goon counters with a nice body shot.
Masvidal swings and misses with a shot to the body
and Goon cracks him with a counter punch right on the button.
That has opened up Morgan Masvidal's cut even more.
Goon ducks under a wild hook from Masvidal.
Masvidal has closed the distance and engaged Goon in a clinch.
Masvidal lands with a short punch from the clinch.
Goon displaying some good clinch control by pressing Masvidal up against the cage.
Masvidal misses with a short punch on the inside.
Goon is trying to work out of this bad position, with his back against the cage.
Goon lands with a right to the head.
Masvidal tried to land a shot to the body but connects with Goon's elbow.
Masvidal tries to land a shot to the body but it's blocked.
Masvidal digs a right hand into Goon's ribs. Those have got to be taking their toll on Goon's gas tank.
We can't be sure of the tactics at this early stage but we have heard that Masvidal has been working on his takedowns a lot in the buildup to the fight and we can only assume he's going to look to take this to the mat.
Goon lands with a short shot to the head.
That's two minutes gone in the round.
Goon blocks a body shot from Masvidal.
Goon wants to strike at distance but he can't break free of the clinch.
Goon lands a hook to the body. It's hard to tell if that hurt Masvidal or not.
The two fighters are working to gain dominance in the clinch.
Masvidal throws a hook to the body. More of an arm punch but it's all scoring with the judges.
The fans in attendance giving it up for the two fighters, who have really let it all hang out in the last minute or so!
Masvidal fails to land with a short punch on the inside.
Goon wants to break the clinch but can't.
Masvidal throws a punch but it's blocked by Goon.
Masvidal misses with a hook to the ribs.
Masvidal tries a body shot but Goon blocks it.
An uppercut on the inside fails to land for Masvidal.
Masvidal tries to land a shot to the body but it's blocked.
A short left from Goon.
Goon tries to land a shot to the body but it's blocked.
Goon lands a body punch - he's looking to wear down Masvidal.
Masvidal misses with a hook to the ribs.
Masvidal is looking to control Goon's arms but Goon gets an underhook and turns him. Now Masvidal has his back to the cage.
That's three minutes gone in the round.
Masvidal lands punches inside but they're not really causing much damage.
Masvidal tries a shoulder strike but it doesn't do any damage.
Masvidal misses with a hook to the ribs.
Masvidal swings wildly with an uppercut but Goon uses good head movement to avoid it.
Masvidal has a couple of punches blocked by Goon.
Goon blocks a body shot from Masvidal.
Masvidal lands a shoulder strike.
Masvidal misses with a body punch.
A right hook to the body lands for Goon.
Masvidal trying to stall but Goon improves his position.
Goon tries to land a shot to the body but it's blocked.
Goon wants to break free. God knows he wants to breaaaak freeee.
Goon softening up his opponent with strikes, against the cage.
Masvidal tries a body shot but Goon blocks it.
Goon breaks from the clinch.
Masvidal rushes in with a sloppy looking punch
and Goon counters with a three punch combo that has Masvidal backing up. Masvidal nods at Goon to acknowledge the strikes.
Masvidal is looking to clinch but Goon is avoiding it.
That's four minutes gone in the round.
Goon takes a swing at Masvidal's ribcage but misses.
Masvidal throws a sloppy body shot
and Goon counters with a crisp hook to the side of the head.
The crowd cheering loudly, showing their appreciation for the quality fight we're seeing here.
Masvidal misses with a left hand
and Goon counters with a crisp hook to the side of the head.
Masvidal is still on wobbly legs! Can Goon finish him?
Goon slips a jab from Masvidal.
Goon is looking to counter punch.
Masvidal seems to have recovered his senses.
Masvidal misses with a body shot.
Goon is looking to counter punch.
Masvidal throws a sloppy body shot
and Goon scores with a counter punch that sends Masvidal to the canvas! Goon smells blood - he's punishing Masvidal with more strikes and the ref has stopped it! Masvidal has no idea where he is - he's tackled the ref... oh dear, poor guy, the crowd is in hysterics!
Ladies and gentlemen, after 4:34 of round 1, we have a winner by way of TKO (Strikes). Jerry Goon!
Jerry Goon is the new featherweight champion!
|
|
|
|
|
|
|
|
|
|
|
|
|
|
|
|
|
|
|
|
|
|
|
| S |
C
A |
G |
S |
C
B |
G |
|
S |
C |
G |
|
energy
A | B |
|
hype
A | B |
|
pop
A | B |
|
mgr
A | B |
|
FIGHT
RATING
43% |
|
|
|
|
|
|
|
Co-main event
|
Coming up we have a welterweight MMA rules bout between Samuel Draven (ranked 2902 p4p, 3875 weight class) and Connor Faber (ranked 381 p4p, 461 weight class). The key to victory for Samuel Draven has got to be keeping the fight on the feet.
 |
|
 |
| 182 cm
25
179
2 - 0 - 0 |
|
185 cm
25
170
3 - 1 - 0 |
BJJ White Belt
Excellent boxer
Very strong |
|
Good wrestler
Brawler
Granite chin |
|
| |
|
Ladies and gentlemen. This fight is 5 rounds, for the welterweight championship of the world!
Introducing the champion to my left, fighting out of the red corner.
With a record of 2 - 0 - 0, fighting out of New York, Samuel Draven!
And introducing the challenger to my right, fighting out of the blue corner.
With a record of 3 - 1 - 0, fighting out of London, Connor Faber!
The judges for this bout are Alyssa Summers, Eddie Farnsworth and Jorge Garcia.
The bell rings for round one and we are underway!
Faber tries for a takedown but Draven circles away easily
and Draven counters with a series of strikes. Faber will be more careful next time no doubt.
Draven lands a beauty of a right hand that gets the crowd cheering.
Draven lands with a nice body punch.
Faber tries to drive through with a takedown attempt but Draven defends well and Faber ends up having to push Draven into the cage where they will battle it out in the clinch.
Faber misses with a takedown attempt. He shot from a bit too far out.
Samuel Draven has stuffed three takedown attempts in the round now. That's going to take a lot out of Connor Faber.
Draven feints a straight left to the body, then turns around with a flashy move and hits Fabers jaw with a dramatic spinning back fist!
Faber has his takedown stuffed
and Draven counters with a lovely straight right hand!
Faber gets his takedown attempt stuffed easily
and Faber takes a counter punch right on the button for his troubles.
Fantastic stuff here - a very entertaining period of action, which has drawn cheers from the crowd.
Faber misses with a takedown
and Draven connects with a straight left hand counter down the middle.
Draven connects with a jab.
Faber avoids a punch combination nicely.
Faber with the counter takedown but Draven avoids it easily.
That's one minute gone in the round.
Faber throws a wild hook but Draven just manages to duck under it and - ooooh! Faber gets nailed by a brutal uppercut which crumples him back against the cage! The referee jumps in - Draven raises his hands in celebration and walks away!
Ladies and gentlemen, after 1:09 of round 1, we have a winner by way of TKO (Strikes). Samuel Draven!
Samuel Draven is the new welterweight champion!
Our winner, Samuel Draven, made sure he spent some time buttering up the crowd during his post fight interview, which will no doubt bring him a few more fans.
|
|
|
|
|
|
|
|
|
|
|
|
|
|
|
|
|
|
|
|
|
|
|
| S |
C
A |
G |
S |
C
B |
G |
|
S |
C |
G |
|
energy
A | B |
|
hype
A | B |
|
pop
A | B |
|
mgr
A | B |
|
FIGHT
RATING
70% |
|
|
|
|
|
|
|
Main event
|
Coming up we have a light heavyweight MMA rules bout between Ike Wellstone (ranked 2561 p4p, 2571 weight class) and LeRoy Rider (ranked 326 p4p, 327 weight class). These two fighters really are very evenly matched on the feet - it will be fascinating to see who can assert themselves in that aspect of the fight.
 |
|
 |
| 189 cm
24
209
2 - 0 - 0 |
|
175 cm
25
210
1 - 1 - 0 |
BJJ Blue Belt
Excellent MT
Self confident |
|
BJJ White Belt
Excellent boxer
Tends to cut |
|
| |
|
Ladies and gentlemen. This fight is 3 rounds, in the light heavyweight division.
Introducing the fighter to my left, fighting out of the red corner.
With a record of 2 - 0 - 0, fighting out of Tokyo, Ike Wellstone!
And introducing the fighter to my right, fighting out of the blue corner.
With a record of 1 - 1 - 0, fighting out of Helsinki, LeRoy Rider!
The judges for this bout are Eddie Farnsworth, Joseph Jones and Anthony Taglia.
The bell rings for round one and we are underway!
A head kick misses from Wellstone.
Rider tries to keep at a distance but Wellstone has taken the fight into the clinch.
Wellstone using the Thai clinch to land knees to the body.
Wellstone landing knees to the head.
It looks like LeRoy Rider has been cut.
Wellstone has been talking about how he's improved his wrestling in the run up to the fight so let's see if that's enough to sway the balance.
Wellstone lands with a quick shot inside that doesn't really do much damage.
Rider fails to land with a short punch on the inside.
Wellstone connects with a knee to the head.
Wellstone with a knee to the head.
Rider throws a head punch that misses.
Rider wants to push off and get back to the center of the mat but Wellstone has him pressed against the cage.
Wellstone lands with a light punch inside.
Wellstone misses with a knee to the head.
The fans in attendance giving it up for the two fighters, who have really let it all hang out in the last minute or so!
Rider wants to get back to striking at distance but Wellstone won't allow it.
Rider avoids a wild elbow strike from Wellstone.
Rider wants to break free but Wellstone has control.
Rider is trying to push Wellstone away but Wellstone has him pressed against the cage, so he's going nowhere.
Rider wants to strike at distance but he can't break free of the clinch.
Rider managing to block the knees to the body from Wellstone.
Wellstone lands with a short head shot on the inside.
Wellstone connects with a knee to the head.
That's one minute gone in the round.
Wellstone scores with a knee to the head.
Wellstone lands a right hand that snaps the head of Rider backwards.
Rider is rocked!
A knee to the head by Wellstone.
Rider is still on wobbly legs! Can Wellstone finish him?
Wellstone lands a big right hand that drops Rider! The killer instinct kicks in and Wellstone finishes his opponent with a series of strikes from mount. A dominating finish by Wellstone!
Ladies and gentlemen, after 1:17 of round 1, we have a winner by way of TKO (Strikes). Ike Wellstone!
Ike Wellstone made sure to mention his sponsor, Barry Bonds Performance Enhancers $110 160q Rec&St in his post fight interview.
|
|
|
|
|
|
|
|
|
|
|
|
|
|
|
|
|
|
|
|
|
|
|
| S |
C
A |
G |
S |
C
B |
G |
|
S |
C |
G |
|
energy
A | B |
|
hype
A | B |
|
pop
A | B |
|
mgr
A | B |
|
FIGHT
RATING
73% |
|
|
|
|
|
|
|
|
|
|
