 |
UnderGround FC 81 PBP Commentary |
Undercard bout
|
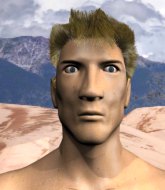
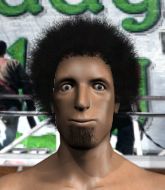
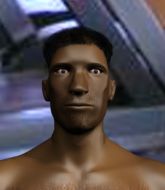
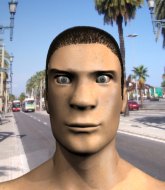
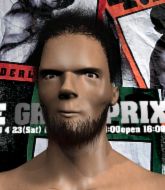
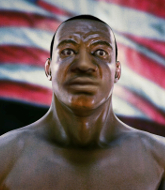
Coming up we have a heavyweight MMA rules bout between Sauli Kekkonen (ranked 3236 p4p, 302 weight class) and Yardbird Knox (ranked 1615 p4p, 178 weight class). The crowd seem to be enjoying Knox's choice of entrance music: Tear da Club Up | Three 6 Mafia. Both these guys have solid standup skills and neither is particularly fantastic on the ground, so let's hope for a nice standup war!
 |
|
 |
| 206 cm
18
265 lbs
2 - 2 - 0 |
|
207 cm
22
285 lbs
5 - 1 - 0 |
Good wrestling
Solid boxing
Insanely flexible |
|
Decent wrestler
Excellent MT
Granite chin |
|
| |
|
Ladies and gentlemen. This fight is 3 rounds, in the heavyweight division.
Introducing the fighter to my left, fighting out of the red corner.
With a record of
2 - 2 - 0, fighting out of Las Vegas, Sauli Kekkonen!
And introducing the fighter to my right, fighting out of the blue corner.
With a record of
5 - 1 - 0, fighting out of London, Yardbird Knox!
The judges for this bout are Anni Minnemäki, Matti Vanhoillinen and Ben Zyskovitsi.

The bell rings for round one and we are underway!
Kekkonen keeps his opponent at a distance with a nice jab.
Knox keeping a good distance there, avoiding the body shot.
A nice side step and Knox releases a counter shot to the body, but it doesn't find it's home.
Kekkonen throws a lazy uppercut
enabling Knox to counter with a crisp jab.
Kekkonen rushes in with a sloppy looking punch
and Knox counters with a good right hand that lands right on the jaw.
Kekkonen misses with a series of wild punches.
Knox misses the shot to the body.
Kekkonen seem to be loading up, looking for a big counter.
Kekkonen shoots in looking for a takedown. Knox tries to sprawl out of it but Kekkonen keeps driving through. The fighters are pinned against the cage. Knox manages to get underhooks and after a bit of a struggle, circles away and we're back to standing.
We've had a slow start to the round here - hopefully the action picks up.
Kekkonen misses with a right hand
and Knox counters with a quick right hand to the jaw.
Knox takes a punch right to his stomach. That took the wind out of him momentarily.
Kekkonen fails with the takedown

and Knox counters with a nice right hand that sends Kekkonen toppling to the canvas! Kekkonen scrambles and gets back to his feet - can Knox finish him?!

Kekkonen is rocked!
Fantastic stuff here - a very entertaining period of action, which has drawn cheers from the crowd.
Kekkonen has his takedown stuffed
and Knox counters with a powerful cross that connects right on the chin and the lights go out! A massive one punch knock out!
Ladies and gentlemen, after 1:05 of round 1, we have a winner by way of KO (Punch). Yardbird Knox!
During a confident post fight interview, Yardbird Knox thanked all his fans. He seemed very genuine when describing how motivated his fans keep him.
|
|
|
|
|
|
|
|
|
|
|
|
|
|
|
|
|
|
|
|
|
|
|
| S |
C
A |
G |
S |
C
B |
G |
|
S |
C |
G |
|
energy
A | B |
|
hype
A | B |
|
pop
A | B |
|
mgr
A | B |
|
FIGHT
RATING
80% |
|
|
|
|
|
|
|
Undercard bout
|
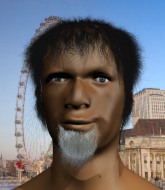
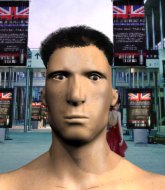
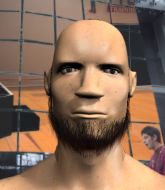
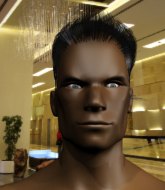
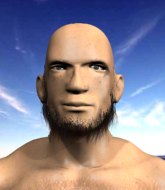
Coming up we have a light heavyweight MMA rules bout between Jimbo Cricky (ranked 1807 p4p, 241 weight class) and Vincenzo Lambrucci (ranked 1906 p4p, 248 weight class). Over to our ring announcer for the fighter introductions!
 |
|
 |
| 190 cm
22
217 lbs
9 - 7 - 0 |
|
185 cm
21
211 lbs
5 - 5 - 0 |
Good wrestling
Excellent boxer
Granite chin |
|
Good wrestler
Excellent MT
Good gas tank |
|
| |
|
Ladies and gentlemen. This fight is 3 rounds, in the light heavyweight division.
Introducing the fighter to my left, fighting out of the red corner.
With a record of
9 - 7 - 0, fighting out of Amsterdam, Jimbo Cricky!
And introducing the fighter to my right, fighting out of the blue corner.
With a record of
5 - 5 - 0, fighting out of Los Angeles, Vincenzo Lambrucci!
The judges for this bout are Johanna Lukiainen, Arvi Lind and Roosa Järviläinen.
The bell rings for round one and we are underway!
Lambrucci blocks a jab.
And an attempted straight right on the counter from Lambrucci! But no joy.
Lambrucci misses with a right hand
and Lambrucci takes a counter punch right on the button for his troubles.
Lambrucci tries to land with a swinging hook to the body but Cricky was well out of range. Poor timing from Lambrucci.
Lambrucci missing with a left hand there. Cricky was out of range so wasted energy throwing that one.
Cricky appears to be looking for a big counter.
Lambrucci misses with a wild combination.
Lambrucci takes one on the chin but seems OK.
Lambrucci misses with a right hand
and Cricky cracks him with a counter punch right on the button.
We've had a slow start to the round here - hopefully the action picks up.
Cricky uses good footwork to get in and out and land a nice right hand before Lambrucci has time to react.
We can't be sure of the tactics at this early stage but we have heard that Lambrucci has been working on his takedowns a lot in the buildup to the fight and we can only assume he's going to look to take this to the mat.
Lambrucci throws a combination but it was largely blocked by Cricky.
It looked like Cricky was trying to counter with a body shot coming off that last attack from Lambrucci.
Lambrucci moves out of range of the strikes.
Nice defenses there by Cricky.
Cricky slips under a jab.

That's one minute gone in the round.
Nice defenses there by Cricky.
Cricky looks to land a left hand but Lambrucci moved out of range nicely.
Lambrucci throws a hard body shot but it just misses.
Lambrucci misses with the combination.
Cricky is looking to counter punch.
Cricky pushing out the jab but it's not landing.
A telegraphed right hand from Lambrucci misses the target.
Lambrucci moves out of range of the strikes.
Lambrucci looks like he wants to counter punch here.
Vincenzo Lambrucci seems to be the more aggressive standup fighter in this bout.
Cricky lands a right hook to the body.
Cricky scores with a punch to the head.
Cricky scores with the left hand. Lambrucci knows he should have avoided that one.
Lambrucci tries to clinch but Cricky is having none of it.

That's two minutes gone in the round.
Lambrucci looks to score with a combo but nothing lands.
A quick step to the side and Cricky tries to counter with a shot to the body but it doesn't connect.
A punch combination from Lambrucci misses.
Cricky swings widly with a right hand
and Lambrucci counters with a one-two to the body.
Wooooo! Give it up for these two warriors! They are putting on a show!
Lambrucci misses with a shot to the body
and Cricky counters with a lovely shot to the body.
Lambrucci walks into a left hand.
Lambrucci takes a body punch but keeps moving.
Lambrucci tries to clinch up but Cricky circles away and keeps his distance.
Cricky looks to land a right hand but Lambrucci moved out of range.
Lambrucci uses good footwork to avoid the strikes from Cricky.
Good exchange - Cricky coming out on top.
Lambrucci misses with an uppercut.
Lambrucci misses with a body shot. Nice footwork from Cricky.
Cricky lands a nice shot to the body.

That's three minutes gone in the round.
Cricky shakes his hands off, looking to compose himself, but takes a jab to the jaw whilst he does it.
Cricky lands a vicious shot with the stealth of a sniper and the strength of a viper. Are vipers that strong? I can think of lots of things that are stronger than a viper - not many rhyme with sniper though.
Lambrucci misses with a double jab
and Cricky counters with a good right hand that lands right on the jaw.
Cricky ducks low and lands a nice hook to the body of his opponent.
Lambrucci on the wrong end of a nice hook.
Lambrucci swings away but doesn't land with a series of punches.
Lambrucci misses with a wild body shot.
Cricky lands with a cross.
Lambrucci takes a jab on the nose. He smiles like he loves it and keeps coming.
Nice straight punches there by Cricky. You know Roy Jones Jr respects the hands of Cricky.
The crowd cheering loudly, showing their appreciation for the quality fight we're seeing here.
Lambrucci looks to score with a combo but nothing lands.

That's four minutes gone in the round.
Cricky keeps the fight on the outside.
Lambrucci throws a right and a left that both miss.
Cricky misses with an uppercut. Lambrucci saw that one coming.
Lambrucci steps in looking to clinch after the strikes miss from Cricky.
Lambrucci has his head snapped back a nice jab. A little nod from Lambrucci there as he acknowledges the shot.
Cricky swings for the body but Lambrucci moves out of range.
Cricky is really peppering his opponent's head with punches.
Lambrucci throws an off balance right hand
and Cricky counters with a series of strikes. Lambrucci will be more careful next time no doubt.
Lambrucci jabbing away but nothing is landing.
Lambrucci throws a wild combination but nothing lands.
Lambrucci throws a lazy uppercut
and Cricky counters with a two punch combo.
Jab by Cricky.
Lambrucci misses with a few strikes there.
Lambrucci tries to grapple but his opponent circles
and Cricky counters with a crisp hook to the side of the head.
And thats the end of the round the fighters go back to their corners.
Jimbo Cricky dominated that round.
That's time! Back to the action!

Lambrucci tries to clinch there but Cricky circles away.
Cricky swung with a counter right hand that didn't connect.
Lambrucci swings wildly with a couple of big hooks
and Cricky counters with a good right hand that lands right on the jaw.
Lambrucci throws the left hand but Cricky avoids the punch easily.
Cricky misses with an uppercut.
Sloppy strikes from Lambrucci. Those never looked like landing.
Cricky was looking to counter that move with a punch but didn't quite pull the trigger.
Cricky is really dominating this fight. Is there anything that Lambrucci can do to turn this around?
Cricky looks to land a left hand but Lambrucci moved out of range nicely.
Lambrucci misses with a combination
and Cricky counters with a one-two to the body.
Cricky throws an ugly left hook that misses

and Lambrucci holds on and brings the fighters into a clinch.
We've had a slow start to the round here - hopefully the action picks up.

Cricky pushes off and circles away, back to the middle of the mat.
Cricky avoids the body shot from Lambrucci.
A quick step to the side and Cricky tries to counter with a shot to the body but it doesn't connect.
Jimbo Cricky is winning the standup battle so far.
Cricky misses with a wild body shot.
Lambrucci uses good footwork to avoid the strikes from Cricky.
That's one minute gone in the round.
A slow jab from Cricky misses its intended target.
Lambrucci just misses with a punch to the body.
Cricky closes the distance and takes a jab right on the nose as he does so.
Lambrucci misses with a straight right.
An attempted straight right counter from Cricky misses the target.
A combination from Lambrucci does no damage.
It looked like Cricky wanted to counter with a hook but didn't fully commit.
Cricky misses with a hook.
Lambrucci scores with a jab to the head.
Lambrucci throws a right hand that misses
and Cricky cracks him with a counter punch right on the button.
Cricky lands with a cross to side of his opponent's head.
Lambrucci looks to clinch
and Cricky counters with a straight right hand.
Lambrucci uses decent footwork to sidestep a right hand from Cricky.
Lambrucci tries to clinch but Cricky moves out of range.
Cricky is really head hunting here, hardly looking to strike to the body at all.
That's two minutes gone in the round.
Lambrucci lands a jab.
The fans in attendance giving it up for the two fighters, who have really let it all hang out in the last minute or so!
Lambrucci throws a right and a left that both miss.
Cricky tries to land with a swinging hook to the body but Lambrucci was well out of range. Poor timing from Cricky.
Lambrucci misses with a straight left.
Cricky misses with a hook
and Lambrucci counters with a nice uppercut.
Lambrucci tries to clinch up
and Cricky counters with a shot to the ribs. That looked like it hurt.
Lambrucci throws a jab when Cricky was well out of range.
Lambrucci falls off balance throwing a combination
and Cricky connects with a straight left hand counter down the middle.
Lambrucci moves to clinch but Cricky breaks away
and Cricky counters with a good right hand that lands right on the jaw.
That's three minutes gone in the round.
Cricky scores with a jab to the body.
Lambrucci is looking to clinch.
Lambrucci fails in his attempt to clinch.
Cricky is looking for a counter combo.
Nice uppercut there from Cricky.
Lambrucci misses with a lunging right hand
letting Cricky counter with a right hand.
Lambrucci paws at his opponent with the jab and then lunges in with a straight, right on the button.
Cricky moves away from the strike by Lambrucci.
Cricky misses with a body shot.
A punch lands to the side of Lambrucci 's head but he takes it in his stride.
Cricky keeping a good distance there, avoiding the body shot.
Cricky throwing a counter right hand but Lambrucci manages to avoid it.
A big left from Cricky misses.
That's four minutes gone in the round.
Lambrucci takes a jab on the nose there. A little bit of blood seems to be coming out. Hopefully that won't affect his breathing.
Cricky defending well as Lambrucci loads up on a big left hand.
Lambrucci throws a left and a right that both miss
and Cricky counters with a stiff right hand.
We've seen a great period of action over the last minute or so - credit to both fighters for going all out!
Cricky connects with a good right hand that stumbles Lambrucci. Lambrucci circles away out of range and recomposes himself.
Lambrucci misses with a double jab
and Cricky counters with a straight right hand.
Cricky slips a jab from Lambrucci.
Cricky scores with a hook.
Lambrucci swings and misses with a hook to the body.
Lambrucci moves in looking to clinch but Cricky pushes him off.
Lambrucci throws a big shot that misses.
Lambrucci throws a left and a right that both miss
and Cricky makes him pay by landing a nice hook to the body before moving out of range.
And thats the end of the round the fighters go back to their corners.
Jimbo Cricky dominated that second round.
Well, the break between rounds is over. Let's get back to the scrappin! The crowd applaud as we get ready to start the final round!

Cricky works his jab well there, keeping his opponent at a distance.
Lambrucci moves into range and clinches up with Cricky.
Lambrucci has a couple of punches blocked by Cricky.
Lambrucci misses with a short punch on the inside.
Lambrucci stalling in the clinch.
Lambrucci is stalling here.
Cricky wants to get back to striking at distance but Lambrucci won't allow it.
Lambrucci struggles to land a body shot inside as Cricky controls his hands.
Lambrucci has a pretty nasty looking mouse under his right eye.
We've had a slow start to the round here - hopefully the action picks up.
Cricky manages to get underhooks and slows down the pace for a moment.
A nice left hand lands by Lambrucci.
That's one minute gone in the round.
Cricky is pushing Lambrucci up against the cage, for a bit of lean and pray action. Action being used the in the loosest possible sense of the word.
Lambrucci working aggressively here.
Cricky tries to circle away but Lambrucci has him pinned against the cage.
Cricky wants to get back to striking at distance but Lambrucci won't allow it.
A right hand to the body from Cricky.
The fighters are starting to perspire pretty heavily.
Lambrucci blocks an uppercut.
Cricky pushes off and circles away, back to the middle of the mat.
Cricky lands a jab. Then a cross. Then finally a nice hook to the body. Good work there by Cricky.
Cricky throws out a token jab with nothing on it.
Lambrucci tries to close the distance and clinch but Cricky swats him to one side with an open hand palm strike and circles away.
That's two minutes gone in the round.
The fight stays on the outside here - Lambrucci looks like he's thinking about clinching though.
A little feinted left hand from Cricky on the counter but he doesn't commit to it.
Lambrucci clinches up with Cricky and pushes him back against the cage.
Lambrucci has Cricky pressed against the cage, preventing Cricky from circling away and getting back to striking at range.
Stalling in the clinch from Cricky.
Come on Lambrucci - let's have some action - none of this stalling nonsense.
Lambrucci blocks a punch to the side of the head.
Lambrucci fails to land with a short punch on the inside.
Cricky is trying to break free.
Lambrucci leaning against his opponent.
That's three minutes gone in the round.
Lambrucci swings wildly with an uppercut but Cricky uses good head movement to avoid it.
Cricky tries a shoulder strike but it doesn't do any damage.
A quick uppercut on the inside from Lambrucci.
Cricky pushes off and circles away, back to the middle of the mat.
Cricky uses good head movement to avoid the hook from Lambrucci.
Vincenzo Lambrucci has stepped it up - he knows he needs a finish here!
Cricky scores with a big left there. The judges will like that one.
Lambrucci misses with a telegraphed body shot
and Cricky counters with a quick right hand to the jaw.
A jab from Cricky misses.
Lambrucci throws a body shot but no joy.
Lambrucci just misses with a punch to the body.
Cricky scores with a body shot.
Vincenzo Lambrucci is looking to throw some combinations by the looks of things.
That's four minutes gone in the round.
Cricky scores with a body shot.
Lambrucci tries to clinch up.
Cricky was looking to counter that move with a punch but didn't quite pull the trigger.
Lambrucci moves into range and clinches up with Cricky.
Cricky pushes Lambrucci back against the cage and lands a hook to the side of the head.
This is a great period of action - very entertaining stuff!
Lambrucci tries to stall but Cricky uses the opportunity to gain a better position.
The pace slowing considerably in the clinch, as Lambrucci takes a break from that fighting nonsense to think about the finer things in life.
Lambrucci lands a nice looking hook to the body, against the cage.
Cricky holding his opponent close, against the cage.
The crowd thankful this round is nearly over.
Cricky swings away with an uppercut that misses.
Lambrucci misses with a hook to the ribs.
Lambrucci fails to land with a short punch on the inside.
And that's the end of the fight!
Jimbo Cricky showed his dominance in that final round.
Well I reckon that's a shut out for Cricky, winning every round. Will the judges agree? They are the ones who matter, even if they are often depressingly incompetent. Over to the ring announcer for the scorecards.
Ladies and gentlemen, after 3 rounds of action, we go to the scorecards for a decision.
Judge Johanna Lukiainen scores the fight 30:27
Judge Arvi Lind scores the fight 30:27
Judge Roosa Järviläinen scores the fight 30:27
In favor of your winner, by unanimous decision... Jimbo Cricky!
|
|
|
|
|
|
|
|
|
|
|
|
|
|
|
|
|
|
|
|
|
|
|
| S |
C
A |
G |
S |
C
B |
G |
|
S |
C |
G |
|
energy
A | B |
|
hype
A | B |
|
pop
A | B |
|
mgr
A | B |
|
FIGHT
RATING
57% |
|
|
|
|
|
|
|
Undercard bout
|
Coming up we have a light heavyweight MMA rules bout between Desperately To Be Positive (ranked 2715 p4p, 336 weight class) and Antonio Almeida (ranked 2568 p4p, 326 weight class). Both fighters look pumped up here. Let's hope this is a good fight!
 |
|
 |
| 190 cm
29
212 lbs
10 - 10 - 0 |
|
188 cm
28
204 lbs
8 - 5 - 0 |
BJJ Blue Belt
Excellent boxer
Very quick |
|
Powerful takedowns
Counter fighter
Granite chin |
|
| |
|
Ladies and gentlemen. This fight is 3 rounds, in the light heavyweight division.
Introducing the fighter to my left, fighting out of the red corner.
With a record of
10 - 10 - 0, fighting out of Tokyo, Desperately To Be Positive!
And introducing the fighter to my right, fighting out of the blue corner.
With a record of
8 - 5 - 0, fighting out of St Petersburg, Antonio Almeida!
The judges for this bout are Roosa Järviläinen, Ben Zyskovitsi and Matti Vanhoillinen.
The bell rings for round one and we are underway!
To Be Positive misses with a looping left.
To Be Positive tries to land with a swinging hook to the body but Almeida was well out of range. Poor timing from To Be Positive.
To Be Positive misses with an uppercut. Almeida saw that one coming.
Almeida is looking for the big counter here.
Almeida shoots for a takedown but To Be Positive saw that one coming a mile off and avoided it easily.
A combination from To Be Positive does no damage.
Almeida has been working on his striking defense in training and it's paying off as To Be Positive is landing a low percentage of strikes.
To Be Positive scores with a nice head shot.
To Be Positive just misses with a punch to the body.
To Be Positive throws an overhand right that lands on Almeida's shoulder, as Almeida tries to avoid the shot.
Almeida tries to counter with a clinch but To Be Positive shakes him off and moves away.
Almeida slips a straight right by To Be Positive.
We've had a slow start to the round here - hopefully the action picks up.
Almeida has a takedown stuffed.
Almeida defending well as To Be Positive loads up on a big left hand.
Almeida avoids the body shot from To Be Positive.
Almeida is loading up here, looking for a big counter of his own.
To Be Positive throws a hard body shot but it just misses.
That's one minute gone in the round.
To Be Positive moves into range and throws a combination. A nice jab followed by a hook to the body.

It looks like Antonio Almeida has been cut.
To Be Positive scores with a nice strike.
To Be Positive scores with a hook.
Almeida displays some good footwork, moving neatly out of range as To Be Positive throws out the jab.
Almeida now looks to counter with a shot at the body.
To Be Positive misses with a body shot. Nice footwork from Almeida.
Almeida is looking for the big counter here.
To Be Positive throws a right and a left that Almeida avoids nicely.
Almeida slips under a jab from To Be Positive.
To Be Positive lands a head shot.
Almeida shoots in looking for a takedown but To Be Positive manages to keep the fight standing, pushing Almeida's face into the canvas for good measure before circling away.
Desperately To Be Positive has stuffed three takedown attempts in the round now. That's going to take a lot out of Antonio Almeida.
Almeida fails with a rather predictable takedown attempt.
To Be Positive appears to be looking for a big counter.
To Be Positive loads up on a big right hand but Almeida slips the punch.
As To Be Positive backs off Almeida throws a huge counter combo but To Be Positive manages to avoid it all.
Desperately To Be Positive seems to be the more aggressive standup fighter in this bout.
To Be Positive throws a shot from downtown. Almeida moves away and avoids it.
We've been told by To Be Positive's head coaches at Mahogany Temple that he's been working on his takedown defense in preparation for this fight.
That's two minutes gone in the round.
To Be Positive fails to land with the punch combination there - jab, cross, hook, miss, miss, miss.
Almeida throws a big counter head kick but To Be Positive avoids it with no problem.
The fans in attendance giving it up for the two fighters, who have really let it all hang out in the last minute or so!
Almeida fails with the takedown
and To Be Positive counters with a nice uppercut.
To Be Positive lunges in with swinging rights and lefts but Almeida circles away quickly and effectively.
To Be Positive throws out a token jab with nothing on it.
To Be Positive throws a hook but Almeida avoids it easily.
Almeida is looking for the big counter here.
To Be Positive defends well against a solid takedown attempt from Almeida.
To Be Positive scores with a three punch combo!
A big right from To Be Positive misses.
Almeida wants to counter the offense by To Be Positive and move into the clinch position.
Almeida takes one to the side of the head.
To Be Positive takes a swing at Almeida's ribcage but misses.
To Be Positive misses with a wild body shot.
That's three minutes gone in the round.
A combination from To Be Positive does no damage.
Almeida slips a straight right by To Be Positive.
Almeida throws a combination but comes up with nothing but fresh air.
To Be Positive pushing out the jab but it's not landing.
Despite the aggression on Almeida's face he doesn't fully commit to the counter.

To Be Positive tries to sprawl but Almeida drives through with a takedown into half guard.

Almeida is working for a kimura but To Be Positive is defending it quite comfortably.
To Be Positive knows he needs to get back to his feet asap. He's simply no match for Almeida on the ground.
To Be Positive wants to get back to his feet.
To Be Positive is not content to let Almeida control the position.
Almeida is trying a forearm choke
I don't think that's going to do much at this level of the game.
Almeida is pressing down on To Be Positive's thigh, looking to free his foot. To Be Positive is holding on for now.
That's four minutes gone in the round.
Almeida is trying for a guillotine from the top but the pressure isn't in the right place so To Be Positive is just riding it out for now. Almeida eventually gives up the hold.
To Be Positive is defending against the submission attempts here by Almeida.
To Be Positive is trying to stand back up but Almeida is controlling him
Almeida is working for a submission of some sort.

Almeida postures up and decides to stand up, from the half guard. The ref calls for To Be Positive to stand up.
Wooooo! Give it up for these two warriors! They are putting on a show!
To Be Positive misses with a series of wild punches.
And thats the end of the round the fighters go back to their corners.
Desperately To Be Positive dominated that round.
The cut man is working on Antonio Almeida's cut.
The minute break is over - no more time for sponges and pep talks - back to the action!
To Be Positive thows a left - swing and a miss!
Desperately To Be Positive is winning the standup battle so far.
Almeida avoids the body shot from To Be Positive.
Almeida is loading up here, looking for a big counter of his own.
Antonio Almeida is looking to throw some combinations by the looks of things.
To Be Positive thuds his right hand into Almeida's forehead from close range. That could be painful for both fighters.
To Be Positive thows a left - swing and a miss!
Almeida lets it all go there with a big combo counter but none of the punches connected.
Almeida bobs and weaves into range and then changes levels and scores with a nice takedown into side control.
Almeida tries for a kimura. Not really close to a finish though.
Almeida is trying to get an arm triangle but To Be Positive is defending well.
Almeida looking for an arm triangle but it's way too loose to do anything.
To Be Positive is working hard to escape and get back to his feet. After a battle for position, Almeida asserts his dominance and retains side control.
Almeida working hard here to secure a kimura but he's not really in the right position for it.
To Be Positive is really dominating this fight. Is there anything that Almeida can do to turn this around?
That's one minute gone in the round.
Almeida fails to land a wild elbow strike.
To Be Positive is trying to stand back up. He's worked his way up against the cage but Almeida has just dragged him back down to the mat.
The ref warns both fighters not to hold the cage as they work up against the meshing.
Almeida is chipping away with strikes.
Almeida tries for an arm triangle. That looks pretty tight to me. Is this one over!?! Possibly, maybe, no Almeida has let go of the choke. Obviously it wasn't as tight as we thought!
Almeida tries for an arm triangle. That looks pretty tight to me. Is this one over!?! Possibly, maybe, no Almeida has let go of the choke. Obviously it wasn't as tight as we thought!
To Be Positive is looking to work his way out of this bad position but Almeida is controlling him well.
Almeida is looking to finish here, going for an Americana. To Be Positive knows the correct defense though, so he's OK.
To Be Positive is pushing Almeida's head away, looking to escape. Almeida manages to hold on to the position though.
That's two minutes gone in the round.
Almeida passes to full mount! That's big trouble for To Be Positive!
To Be Positive is trying to get back to his feet but can't.
Almeida looking for an armbar but decides to keep the dominant position instead.
Almeida working for a submission here. He's tucked his head under his opponent's arm, looking for an arm triangle. He's hopped off into side control, looking to tighten the submission... is it going to work? He's given up a good position looking for it. To Be Positive looks OK. Oh, I spoke too soon, he's out! That must have been tighter than I thought! Excellent work there by Almeida! Submission of the night perhaps?
Ladies and gentlemen, after 2:32 of round 2, we have a winner by way of Submission (Arm Triangle). Antonio Almeida!
Antonio Almeida thanked the fans post fight for their support.
Desperately To Be Positive was interviewed post fight and said 'My opponent is a homosexual pedo... and most importantly... Epstein DID kill himself, twice!'.
|
|
|
|
|
|
|
|
|
|
|
|
|
|
|
|
|
|
|
|
|
|
|
| S |
C
A |
G |
S |
C
B |
G |
|
S |
C |
G |
|
energy
A | B |
|
hype
A | B |
|
pop
A | B |
|
mgr
A | B |
|
FIGHT
RATING
48% |
|
|
|
|
|
|
|
Undercard bout
|
Coming up we have a heavyweight MMA rules bout between Murska Puro (ranked 1816 p4p, 187 weight class) and Fedor Mazepin (ranked 2367 p4p, 232 weight class). Fedor Mazepin is staring across the cage at his opponent, tweaking his nipples.
 |
|
 |
| 192 cm
21
235 lbs
4 - 1 - 0 |
|
190 cm
28
250 lbs
9 - 6 - 0 |
Good wrestling
Solid boxing
Cardio machine |
|
BJJ Brown Belt
Decent boxing
Powerful |
|
| |
|
Ladies and gentlemen. This fight is 3 rounds, in the heavyweight division.
Introducing the fighter to my left, fighting out of the red corner.
With a record of
4 - 1 - 0, fighting out of Los Angeles, Murska Puro!
And introducing the fighter to my right, fighting out of the blue corner.
With a record of
9 - 6 - 0, fighting out of St Petersburg, Fedor Mazepin!
The judges for this bout are Johanna Lukiainen, Roosa Järviläinen and Anni Minnemäki.
The bell rings for round one and we are underway!

Puro moves into the clinch.
Mazepin has dropped down and is looking to force the takedown but it's defended by Puro after a bit of a struggle.
Puro presses Mazepin against the cage and delivers a mid-strength body shot.
Puro misses with a short punch on the inside.
Puro pushes Mazepin back against the cage and lands a hook to the side of the head.
It looks like Fedor Mazepin has been cut.
Puro prevents the takedown attempt.
Puro digs a right hand underneath Mazepin's ribcage. Mazepin let out a lung full of air as it connected.
Mazepin has a body lock and is looking for a takedown. Puro is bouncing around trying to prevent the takedown and somehow he has indeed managed to stay on his feet.
Murska Puro has stuffed three takedown attempts in the round now. That's going to take a lot out of Fedor Mazepin.
Puro misses with some punches.
A quick uppercut on the inside from Puro.
Puro lands with a left to the head.
We've had a slow start to the round here - hopefully the action picks up.
Puro is defending well against a takedown attempt.
Puro lands with a short head shot on the inside.
A short uppercut from Puro.
Puro swings wildly with an uppercut but Mazepin uses good head movement to avoid it.
That's one minute gone in the round.
Mazepin trying to land knees to the body.
Puro working on landing some head shots here - that one got through nicely.
Mazepin wants a takedown but no success here.
Puro tries a shoulder strike but it doesn't do any damage.
Mazepin has been looking to improve his clinch game in recent weeks. Puro seems to have the measure of him in the clinch so far, so let's see if Mazepin can turn it around.
Puro working some nice short punches in the clinch.
We've been hearing reports that Puro has been drilling takedowns in recent sessions so let's see if that has an impact on the result of this fight.
Puro leaning against his opponent.
Puro tries a body shot but Mazepin blocks it.
Mazepin is working for a takedown up against the cage. He can't get it on this occasion though.
A short right from Puro.
Mazepin wants to take the fight to the mat but Puro manages to get underhooks and keep the fight in the clinch.
Puro lands punches inside but they're not really causing much damage.
Puro misses with some punches.
Puro is pressed up against the cage. Mazepin has hold of a leg and is looking to drag Puro down to the mat. Puro avoids the attempt though and has circled away. We're back to striking at a distance.
That's two minutes gone in the round.
Puro drives through and clinches with Mazepin against the cage.
Puro scores with a hook to the body.
Mazepin looks winded!
A short right from Puro.
A short right from Puro.
The crowd are loving this. Great action here.
Puro tries to throw a body punch but Mazepin avoids it by throwing Puro back against the cage.
Puro lands with a good tight uppercut to the head.
Puro struggles to land a body shot inside as Mazepin controls his hands.
Puro lands an uppercut.
With the fighters clinched against the cage, Puro creates a bit of distance for himself and scores with a nice uppercut.
A short body shot lands from Puro as the two fighters clinch.
Mazepin takes a shot to the head.
Puro works on Mazepin's body with a couple of short punches.
Puro lands a right hand.
That's three minutes gone in the round.
Puro lands with a short punch from the clinch.
A left hand lands to the body for Puro.
Puro tried to land a shot to the body but connects with Mazepin's elbow.
Mazepin looking for a takedown.
Mazepin blocking some punches.
Puro makes some space for himself and lands an uppercut.
Puro works on Mazepin's body with a couple of short punches.
Puro softening up his opponent with strikes, against the cage.
Mazepin blocking some punches.
Puro lands a body punch - he's looking to wear down Mazepin.
Puro lands with a quick shot inside that doesn't really do much damage.
Puro lands a hook to the side of the head.
A quick uppercut on the inside from Puro.
That's four minutes gone in the round.
Puro misses with a punch on the inside.
A quick uppercut on the inside from Puro.
That has opened up Fedor Mazepin's cut even more.
This is a great period of action - very entertaining stuff!
Puro fails to land with a short punch on the inside.
Puro working on landing some head shots here - that one got through nicely.

Mazepin is rocked!
Puro misses with some punches.
The referee calls for Puro to work.
Mazepin blocks a body shot from Puro.
Puro misses with a hook to the ribs.
Puro lands with a left to the head.
Puro lands an uppercut in the clinch that drops Mazepin to his knees! Puro keeps firing more shots against his stricken opponent and the referee jumps in to save him!
Ladies and gentlemen, after 4:55 of round 1, we have a winner by way of TKO (Strikes). Murska Puro!
A very excited looking Murska Puro made sure he remembered to thank all the fans both in the arena and on the internet. He said all the coolest people spend all day on MMA websites, which got a big reaction.
|
|
|
|
|
|
|
|
|
|
|
|
|
|
|
|
|
|
|
|
|
|
|
| S |
C
A |
G |
S |
C
B |
G |
|
S |
C |
G |
|
energy
A | B |
|
hype
A | B |
|
pop
A | B |
|
mgr
A | B |
|
FIGHT
RATING
49% |
|
|
|
|
|
|
|
Undercard bout
|
Coming up we have a bantamweight MMA rules bout between Trejean Dugall (ranked 899 p4p, 58 weight class) and Zhang Jun (ranked 2337 p4p, 136 weight class). Over to our ring announcer for the fighter introductions!
 |
|
 |
| 175 cm
23
148 lbs
7 - 0 - 0 |
|
173 cm
20
139 lbs
5 - 3 - 0 |
Good wrestling
Basic striking
Cardio machine |
|
Good wrestler
Excellent MT
Heavy handed |
|
| |
|
Ladies and gentlemen. This fight is 3 rounds, in the bantamweight division.
Introducing the fighter to my left, fighting out of the red corner.
With a record of
7 - 0 - 0, fighting out of Los Angeles, Trejean Dugall!
And introducing the fighter to my right, fighting out of the blue corner.
With a record of
5 - 3 - 0, fighting out of Tokyo, Zhang Jun!
The judges for this bout are Arvi Lind, Tarja Halkonen and Ben Zyskovitsi.
The bell rings for round one and we are underway!
Dugall throws a lazy right hand but Jun sees it coming a mile off and sidesteps it easily.
Dugall pushes forward with a 1-2 combination that forces Jun back to the cage. Dugall follows up with a solid lead hook to the liver.
Dugall scores with a big left there. The judges will like that one.
Dugall displays some good footwork, moving neatly out of range as Jun throws out the jab.
Dugall scores with a punch to the gut of his opponent.
Dugall lands a nice hook to Jun's body. Jun takes it in his stride and looks to land his own strikes.
Dugall uses some good footwork to avoid the body shot by Jun.
Dugall uses some good footwork to avoid the body shot by Jun.
Jun throws a body shot but no joy.
Dugall uses good head movement to avoid the hook from Jun.
Dugall throws a body punch but Jun moves out of range.
Dugall ducks under a wild hook from Jun.

Jun gets caught on his heels momentarily as he allows Dugall to score an easy takedown into full guard.
The crowd are loving this. Great action here.
Jun keeping moving, preventing Dugall from controlling successfully.
Jun throwing his legs up looking for a triangle.
That's one minute gone in the round.
Dugall pushing down on Jun's thigh, trying to pass to half guard. He's managed it... Nice work.

Dugall looking for a kimura but he'll have to free his other leg if he wants to finish that. Perhaps he's just using it as a distraction technique.
Jun is looking for a sweep. Dugall is wise to his cunning plan and keeps the top position.
Dugall is keen to just control but Jun is a slippery customer.
Jun looking to work for a kimura from the bottom.
Dugall is trying to work for a kimura. This could be trouble! No, Jun has managed to free his arm - good work.
That's two minutes gone in the round.
The crowd are starting to boo a lack of action.
Jun looking to work for a kimura from the bottom.
Dugall frees up his trapped foot and advances to mount.
Dugall is working on an americana here. Ooh, that looks pretty nasty! Nope, Jun has managed to escape the submission attempt.
Dugall trying to control but Jun is having none of it.
Dugall avoids the attempt from Jun to control.
That's three minutes gone in the round.
Dugall is working for a guillotine from mount but Jun frees his head quite easily.
Dugall trying to control but Jun is having none of it.
Dugall goes for an armbar but he's not got it
Jun turns into him and now he's in Dugall's guard.
The fighters are pressed up against the cage, both looking to find a bit of space to work.
Jun got a little sloppy there for a moment and Dugall has worked his way into a loose triangle - can he finish it?! No, Jun has managed to get both his arms back between Dugall's legs - danger averted.
Dugall is adopting a defensive guard.
That's four minutes gone in the round.
Jun has gone for a leg lock! Dugall slips out almost immediately though and dives into Jun's guard.

Dugall postures up as if he's going to throw some strikes but drops back for an ankle! Jun is in big trouble! He looks ready to tap! But no, he's escaped and dives on top of Dugall, into his guard.

Jun controls from within his opponent's guard.
Dugall seems to have improved his submission grappling technique since last time we saw him. Let's see if he can pull off a submission.
Jun postures up as if he's going to throw some strikes but drops back for an ankle! Dugall is in big trouble! He looks ready to tap! But no, he's escaped and dives on top of Jun, into his guard.
Jun keeping moving, preventing Dugall from controlling successfully.
And thats the end of the round the fighters go back to their corners.
Trejean Dugall dominated that round.
The fighters get back to their feet, the hooter sounds and we're back to the action!
Dugall misses the shot to the body.
Jun misses with a straight right.
Dugall misses the shot to the body.
Zhang Jun has stepped it up - he knows he needs a finish here!
Dugall closes the distance and after a bit of a stuggle, scores a takedown into Jun's guard.
Dugall is trying to work a guillotine from the top, or something like that? Don't know how he thinks he's going to get a finish from there.
Dugall advances to half guard.
Dugall is looking for a kimura here.
Dugall wants to pass the guard but Jun is defending well.
Jun really doesn't want to stay on the ground with Dugall. If he can't get it back to his feet, it's only a matter of time before he'll be tapping out.
We've had a slow start to the round here - hopefully the action picks up.
Jun wants to control but Dugall is keeping busy and won't allow it.
That's one minute gone in the round.
Dugall is looking for a kimura here.
Jun wants to improve his position but Dugall is controlling well.
Dugall is trying to work for a kimura. This could be trouble! No, Jun has managed to free his arm - good work.
Dugall wants to lay and pray for a moment but Jun keeps working.
Dugall maintaining the dominant position here and is working for a kimura. He's locked it up! Jun could be in real trouble here! He's trying to wriggle out but Dugall has cracked it and Jun is screaming in pain - he's tapped out! Great finish by Dugall!
Ladies and gentlemen, after 2:55 of round 2, we have a winner by way of Submission (Kimura). Trejean Dugall!
|
|
|
|
|
|
|
|
|
|
|
|
|
|
|
|
|
|
|
|
|
|
|
| S |
C
A |
G |
S |
C
B |
G |
|
S |
C |
G |
|
energy
A | B |
|
hype
A | B |
|
pop
A | B |
|
mgr
A | B |
|
FIGHT
RATING
35% |
|
|
|
|
|
|
|
Co-main event
|
Coming up we have a heavyweight MMA rules bout between Henry Akinwande (ranked 156 p4p, 21 weight class) and Anthony McMaster (ranked 708 p4p, 91 weight class). Both fighters look fresh as a daisy as they make their way towards the cage.
 |
|
 |
| 197 cm
21
250 lbs
7 - 1 - 0 |
|
195 cm
21
278 lbs
7 - 0 - 0 |
Good wrestling
Excellent boxer
Cardio machine |
|
BJJ Purple Belt
Excellent MT
Good gas tank |
|
| |
|
Ladies and gentlemen. This fight is 5 rounds, for the heavyweight championship of the world!
Introducing the champion to my left, fighting out of the red corner.
With a record of
7 - 1 - 0, fighting out of New York, Henry Akinwande!
And introducing the challenger to my right, fighting out of the blue corner.
With a record of
7 - 0 - 0, fighting out of London, Anthony McMaster!
The judges for this bout are Anni Minnemäki, Roosa Järviläinen and Ben Zyskovitsi.
The bell rings for round one and we are underway!
A looping hook to the body misses from McMaster. Akinwande does a little dance to reset his feet.
McMaster connects with a lovely jab that went straight through the gap between Akinwande's hands.
McMaster closes the distance and presses his opponent up against the cage.
McMaster blocking some punches.
McMaster swings wildly with an uppercut but Akinwande uses good head movement to avoid it.

McMaster breaks the clinch and we're back to striking at distance.
Akinwande missing with a left hand there. McMaster was out of range so wasted energy throwing that one.
McMaster looked like he wanted to counter with a punch but didn't throw it.
Akinwande scores with a crisp jab that stopped McMaster in his tracks.
McMaster gets a clinch.
We've had a slow start to the round here - hopefully the action picks up.
McMaster misses with a short punch on the inside.
McMaster lands with a short head shot on the inside.
McMaster can't break the clinch.
Both fighters working to control the clinch.
Akinwande blocks an uppercut.
Akinwande throws a punch but it's blocked by McMaster.
That's one minute gone in the round.
McMaster working hard to break the clinch.
McMaster scores with an uppercut up the middle.
A nice left hand lands by Akinwande.
McMaster lands a short shot on the inside that snaps the head of Akinwande backwards.
Akinwande lands with a left to the head.
McMaster fails to land with a short punch on the inside.
McMaster breaks from the clinch.
Akinwande thuds a left hand into McMaster's body.
McMaster blocks a head kick by Akinwande.
McMaster looked like he wanted to counter with a punch but didn't throw it.
Henry Akinwande seems to be the more aggressive standup fighter in this bout.
McMaster misses with the combination.
McMaster bobs and weaves and throws out a fast jab that snaps Akinwande's head backwards.
Akinwande throws a hook but McMaster blocks it.
That's two minutes gone in the round.
Akinwande has taken the fight to the clinch.
We've seen a great period of action over the last minute or so - credit to both fighters for going all out!
An uppercut on the inside fails to land for Akinwande.
Akinwande lands a right hand.
Akinwande blocks a couple of punches on the inside.
Akinwande doesn't land with the attempted body shot.
A head punch blocked on the inside by Akinwande.
Akinwande misses with a short punch on the inside.
McMaster manages to break the clinch.
Akinwande misses with a wild combination.
McMaster now looks to counter with a shot at the body.
Akinwande lets the fists fly and connects with a left straight followed by a right hook.
It looks like Anthony McMaster has been cut.
Akinwande avoids a lazy jab quite easily.
McMaster throws an uppercut from half a mile away. Akinwande sees it coming and avoids it easily.
That's three minutes gone in the round.
Akinwande pulls out of a head kick attempt.
Akinwande pulls out of a head kick attempt.
McMaster on the wrong end of a vicious looking body shot.
McMaster throws a body punch but Akinwande moves out of range.
Akinwande wants to take advantage of his opponent's missed offense by moving into the clinch.
Akinwande feints a straight left to the body, then turns around with a flashy move and hits McMasters jaw with a dramatic spinning back fist!
Akinwande throws a combination but comes up with nothing but fresh air.
McMaster appears to be waiting to throw a counter punch to the body.
Akinwande jabs McMaster right on the nose. McMaster blinks but takes it well.
McMaster on the wrong end of an overhand right that came out of nowhere.
Akinwande misses with a jab, cross combination.
Akinwande ducks down and throws a hook to the body but McMaster moves away.
Akinwande defending well as McMaster loads up on a big left hand.
That's four minutes gone in the round.
Akinwande throws a body kick that misses
and McMaster cracks him with a counter punch right on the button.
Wooooo! Give it up for these two warriors! They are putting on a show!
Akinwande scores to the head and body with a nice combination!
McMaster listening to his corner there, landing a nice uppercut.
McMaster misses with a looping right.
Akinwande showing good head movement there, avoiding the strikes from McMaster.
Akinwande throws a sloppy head kick and McMaster moves out of range easily.
McMaster looks like he wants to counter punch here.
Akinwande throws a wild combination but nothing lands.
And an attempted straight right on the counter from McMaster! But no joy.
McMaster moves out of range as Akinwande throws a body kick.
McMaster is loading up here, looking for a big counter of his own.
A head kick by Akinwande misses
and McMaster counters with a crisp hook to the side of the head.
Akinwande scores with a jab.
And thats the end of the round the fighters go back to their corners.
Henry Akinwande dominated that round.
The cut man is working on Anthony McMaster's cut.
That's time! Back to the action!
McMaster throws a combination that misses
and Akinwande counters with a good right hand that lands right on the jaw.
Akinwande steps to the side to avoid the strikes from McMaster.
Akinwande lands with a shot to the body.
Akinwande misses with a half-hearted attempt at a head kick.
A solid body kick from Akinwande.
Akinwande pulls out of a head kick attempt.
McMaster with poor footwork there. He got himself in a bit of a tangle, enabling Akinwande to score with a decent uppercut.
Akinwande swinging wildly here.
A countering left hand to the body from McMaster misses.
We've had a slow start to the round here - hopefully the action picks up.
Akinwande bobbing and weaving, closes the distance and lands a hook to the side of McMaster's head.
That's one minute gone in the round.
Akinwande gets his head snapped back by a nice shot there.
Henry Akinwande is looking to throw some combinations by the looks of things.
Akinwande misses with a body kick.
Akinwande ducks under an overhand right and circles away with a smile on his face.
Akinwande misses with a wild combination.
Akinwande moves into the clinch successfully.
Akinwande swings wildly with an uppercut but McMaster uses good head movement to avoid it.
A head punch blocked on the inside by Akinwande.
McMaster swings wildly with an uppercut but Akinwande uses good head movement to avoid it.
Akinwande lands a shoulder strike.
That's two minutes gone in the round.
Akinwande lands a right hand.
Akinwande lands a body punch in the clinch.
McMaster manages to get underhooks and slows down the pace for a moment.
McMaster has had enough of the clinch and is looking to separate.
McMaster breaks from the clinch.
A punch lands to the side of McMaster 's head but he takes it in his stride.
Akinwande throws a hook to the body but it doesn't connect.
Akinwande is looking to score with low kicks.
McMaster throws out a counter right but Akinwande avoids it with no problem.
It looks like Akinwande has been trying to sharpen up his punching technique, as it looks crisper than last time we saw him.
Wooooo! Give it up for these two warriors! They are putting on a show!
Akinwande lunges at McMaster with a hook that half lands and is half blocked by McMaster's hand.
Akinwande is really dominating this fight. Is there anything that McMaster can do to turn this around?
McMaster rushes Akinwande and presses him up against the cage.
McMaster has had enough of the clinch but Akinwande keeps him there for the moment.
Akinwande works on McMaster's body with a couple of short punches.
Akinwande lands on the inside with an uppercut.
Henry Akinwande has scored more points in the clinch so far.
That's three minutes gone in the round.
Akinwande content to slow the pace in the clinch.
Akinwande scores with a nice hook to the head.
McMaster is rocked!
Akinwande effectively controlling the action here.
McMaster wants to get back to striking at distance but Akinwande won't allow it.
Akinwande scores with an uppercut up the middle.
Nice body punch from Akinwande.
McMaster misses with a short punch on the inside.
A frustrated look appears on McMaster's face as he tries to break the clinch.
McMaster wants to stall.
Akinwande lands a body punch - he's looking to wear down McMaster.
McMaster is breathing heavily.
Akinwande working on landing some head shots here - that one got through nicely.
Akinwande lands punches inside but they're not really causing much damage.
Akinwande lands punches inside but they're not really causing much damage.
McMaster is still on wobbly legs! Can Akinwande finish him?
Akinwande lands a hook that snaps the head of McMaster backwards.
McMaster misses with a punch on the inside.
Akinwande has McMaster pressed against the cage, preventing McMaster from circling away and getting back to striking at range.
Akinwande lands a hook that snaps the head of McMaster backwards.
That's four minutes gone in the round.
Akinwande lands a nice shot to the body.
Akinwande manages to get underhooks and slows down the pace for a moment.
This has been an exciting period of action!
McMaster misses with a punch on the inside.
McMaster seems to have recovered his senses.
Akinwande leaning his opponent against the cage.
McMaster can't break the clinch.
Akinwande lands a left hand.
A short left from Akinwande.
Akinwande lands a body shot in the clinch.
It really doesn't seem like the step up in weight is hurting Akinwande here at all. He's more than holding his own against the bigger man.
Akinwande works on McMaster's body with a couple of short punches.
A short right hand to the side of the head by Akinwande.
Akinwande is leaning against McMaster and scores with a nice uppercut to the body.
A short right from Akinwande on the inside.
Akinwande lands an uppercut.
Akinwande lands with a quick shot inside that doesn't really do much damage.
Akinwande stalls.
And thats the end of the round the fighters go back to their corners.
Henry Akinwande dominated that second round.
The cut man is working on Anthony McMaster's cut.
Well, the break between rounds is over. Let's get back to the scrappin!
A big left from McMaster misses.
Akinwande lands a big uppercut and this one is all over! His foe lies motionless on the canvas - a massive one punch knockout!
Ladies and gentlemen, after 0:09 of round 3, we have a winner by way of KO (Punch). Henry Akinwande!
Henry Akinwande retains his heavyweight title!
A victorious Henry Akinwande thanked his army of followers in his post fight interview, telling people to make sure they follow him on Twitter.
|
|
|
|
|
|
|
|
|
|
|
|
|
|
|
|
|
|
|
|
|
|
|
| S |
C
A |
G |
S |
C
B |
G |
|
S |
C |
G |
|
energy
A | B |
|
hype
A | B |
|
pop
A | B |
|
mgr
A | B |
|
FIGHT
RATING
51% |
|
|
|
|
|
|
|
Main event
|
Coming up we have a super heavyweight MMA rules bout between Ricco McGregor (ranked 3683 p4p, 154 weight class) and Turd McPherson (ranked 1108 p4p, 57 weight class). Turd McPherson told me before the fight that he's been watching a lot of DVDs so let's see if that helps him in this one! I can't wait to find out!
 |
|
 |
| 212 cm
23
300 lbs
21 - 4 - 0 |
|
225 cm
29
292 lbs
13 - 9 - 0 |
BJJ Blue Belt
Excellent boxer
Cardio machine |
|
Good wrestler
Basic striking
Good gas tank |
|
| |
|
Ladies and gentlemen. This fight is 3 rounds, in the super heavyweight division.
Introducing the fighter to my left, fighting out of the red corner.
With a record of
21 - 4 - 0, fighting out of Las Vegas, Ricco McGregor!
And introducing the fighter to my right, fighting out of the blue corner.
With a record of
13 - 9 - 0, fighting out of New York, Turd McPherson!
The judges for this bout are Arvi Lind, Marco Blurström and Anni Minnemäki.
The bell rings for round one and we are underway!
McGregor fakes a jab and then connects with a hook.
McGregor keeps his opponent at a distance with a nice jab.
McGregor feints a straight left to the body, then turns around with a flashy move and hits McPhersons jaw with a dramatic spinning back fist!
McPherson has been spending a lot of time sparring his boxing in the run up to the fight, trying to sharpen up those hands and look for a knockout.
McPherson looks for a takedown but McGregor sprawls well.
McGregor fails to land with a series of punches.
McGregor misses with a few strikes there.
McGregor moves into the clinch successfully.
Our sources have told us that McGregor has been working on his knees in the buildup to the fight.
McGregor breaks from the clinch.
Jab, cross, leg kick. Nice combination by McGregor!
McGregor looks to land a right hand but McPherson moved out of range.
McGregor connects with an inside leg kick.
Wooooo! Give it up for these two warriors! They are putting on a show!
McPherson will have to do better than that with his takedown attempts.
McPherson fakes an overhand right and shoots for a takedown. McGregor sprawls well initially but McPherson persists and gets the takedown into half guard.
McPherson working some ground and pound from close in. He's looking to maintain this position and strike for a while by the looks of things... although he'll probably advance to full mount in a minute now I've said that.
McGregor wants to get back to his feet.
McGregor is doing well to control the position and prevent McPherson from advancing to side control.
McPherson lands strikes from half guard.

It looks like Ricco McGregor has been cut.
McGregor wants to improve his position but McPherson is controlling well.
That's one minute gone in the round.
McPherson missing with the ground and pound from half guard.
McPherson working some ground and pound from close in. He's looking to maintain this position and strike for a while by the looks of things... although he'll probably advance to full mount in a minute now I've said that.
McPherson lands a big shot. The thud that echoes around the arena is like music to the fans' ears.
McGregor on the receiving end of some nice ground and pound.
The fighters are pressed up against the cage, both looking to find a bit of space to work.
McGregor is trying to get back to full guard.
McPherson not throwing his punches with enough precision this time.
McGregor is trying to control but can't.
McPherson working McGregor over with strikes.
Ricco McGregor's cut is getting worse.
McPherson lands a massive shot from half guard that has rocked McGregor! More strikes land and this one is all over! McPherson jumps to his feet and is applauded loudly by the crowd!
Ladies and gentlemen, after 2:55 of round 1, we have a winner by way of TKO (Strikes). Turd McPherson!
Turd McPherson thanked the fans post fight for their support.
|
|
|
|
|
|
|
|
|
|
|
|
|
|
|
|
|
|
|
|
|
|
|
| S |
C
A |
G |
S |
C
B |
G |
|
S |
C |
G |
|
energy
A | B |
|
hype
A | B |
|
pop
A | B |
|
mgr
A | B |
|
FIGHT
RATING
63% |
|
|
|
|
|
|
|
|
|
|

