 |
AKT 9 PBP Commentary |
Undercard bout
|
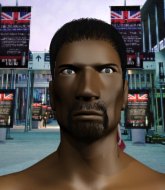
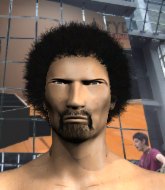
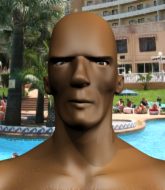
Coming up we have a featherweight kickboxing rules bout between Da Baby (ranked 5467 p4p, 373 weight class) and Ken Irrawaddy (ranked 4105 p4p, 326 weight class). Baby comes to the ring accompanied by DaBaby Ft Money Man - Above The Rim. Irrawaddy has chosen Laos Rules! as his entrance music. Ken Irrawaddy is the more experienced fighter, so let's see if that makes a difference tonight.
 |
|
 |
| 177 cm
25
131 lbs
1 - 1 - 0 |
|
173 cm
21
155 lbs
4 - 2 - 0 |
Excellent MT
Cuts easily
|
|
Decent boxing
Granite chin
|
|
| |
|
Ladies and gentlemen. This fight is 3 rounds, in the featherweight division.
Introducing the fighter to my left, fighting out of the red corner.
With a record of
1 - 1 - 0, fighting out of Amsterdam, Da Baby!
And introducing the fighter to my right, fighting out of the blue corner.
With a record of
4 - 2 - 0, fighting out of Las Vegas, Ken Irrawaddy!
The judges for this bout are Wagner Zegers, Daniel Blasius and Paulsen Ambrosius.

The bell rings for round one and we are underway!
Irrawaddy jabs at Baby's body.
Baby misses with a hook
and Baby takes a counter punch right on the button for his troubles.
Irrawaddy dips down and scores with a jab to the body.
Baby throws an uppercut from half a mile away. Irrawaddy sees it coming and avoids it easily.
Irrawaddy connects nicely with a jab. Noted by the judges no doubt.

It looks like Da Baby has been cut.
Baby lands a beauty of a right hand that gets the crowd cheering.
Baby buckles his opponent's knee momentarily with a nice leg kick.
Baby smiles there as he lands a nice right hand right on the button.
This fight brought to you by 5M nutrition - it's mmmmm tasty. Nice jab by Baby.
The crowd cheering loudly, showing their appreciation for the quality fight we're seeing here.
Irrawaddy ducks under a wild hook from Baby.
Baby misses the jab.

Irrawaddy clinches up with Baby and pushes him back against the ropes.
A hook to the body from Irrawaddy.
A left hand lands to the body for Baby.
Irrawaddy gets through Baby's defenses to land a nice punch to the side of the head.

Baby is rocked!
Irrawaddy lands a shoulder strike that jolts his opponent's head backwards.
Oh Baby is still all over the place! His legs are completely gone! Will he be able to recover?!!
Irrawaddy lands a nice uppercut.
Irrawaddy breaks the clinch momentarily and cracks Baby with a big right hook that drops him to the canvas! Baby looks like he might be in big trouble here! The referee has started the count straight away and we're up to 5 already. Baby get to one knee - can he make it back to his feet? No, he's flopped back to the mat - he's out - this one is all over!
Ladies and gentlemen, after 0:57 of round 1, we have a winner by way of TKO (Punch). Ken Irrawaddy!
|
|
|
|
|
|
|
|
|
|
|
|
|
|
|
|
|
|
|
|
|
|
|
| S |
C
A |
G |
S |
C
B |
G |
|
S |
C |
G |
|
energy
A | B |
|
hype
A | B |
|
pop
A | B |
|
mgr
A | B |
|
FIGHT
RATING
100% |
|
|
|
|
|
|
|
Undercard bout
|
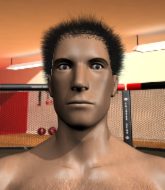
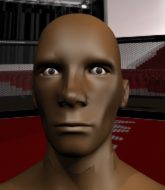
Coming up we have a featherweight kickboxing rules bout between Bruno Brackin (ranked 3415 p4p, 285 weight class) and Berklerk Pinsinchai (ranked 24217 p4p, 439 weight class). Both fighter's entrance songs getting the crowd jumping here.
 |
|
 |
| 188 cm
18
154 lbs
1 - 0 - 1 |
|
165 cm
26
145 lbs
5 - 5 - 0 |
Excellent MT
Very quick
|
|
Excellent MT
Knockout power
|
|
| |
|
Ladies and gentlemen. This fight is 3 rounds, in the featherweight division.
Introducing the fighter to my left, fighting out of the red corner.
With a record of
1 - 0 - 1, fighting out of Amsterdam, Bruno Brackin!
And introducing the fighter to my right, fighting out of the blue corner.
With a record of
5 - 5 - 0, fighting out of Tokyo, Berklerk Pinsinchai!
The judges for this bout are Radbod Blank, Aafke Stam and Nard Betker.
The bell rings for round one and we are underway!
Pinsinchai instigates a clinch.

Pinsinchai breaks the clinch and we return to the middle of the mat.
Pinsinchai gets to the clinch - let's see what his plan is here.
Pinsinchai creates a bit of space for himself and sneaks an elbow through Brackin's defenses.
Brackin tried to land a shot to the body but connects with Pinsinchai's elbow.
Pinsinchai looks more muscular than last time we saw him. He must have been on the weights.
Brackin looks like he'd prefer to be striking at range right now.
Brackin wants to push off and get back to the center of the mat but Pinsinchai has him pressed against the ropes.
Pinsinchai pushes off an throws an elbow but Brackin leans to the side and avoids it. We're back to clinching against the ropes.
Brackin avoids the elbow strike from Pinsinchai, against the ropes.
Brackin managing to block the knees to the body from Pinsinchai.
Brackin wants to get back to striking at distance but Pinsinchai won't allow it.
Pinsinchai throws a nice elbow but it doesn't land.
We've had a slow start to the round here - hopefully the action picks up.
Pinsinchai manages to break the clinch.
Pinsinchai misses with a body shot
and Brackin counters with a left and a right that stings Pinsinchai.
Pinsinchai lands with a head kick! That's gotta hurt.
Brackin throws a quick head kick that skims the top of Pinsinchai's head.
The crowd cheering loudly, showing their appreciation for the quality fight we're seeing here.
Pinsinchai gets to the clinch - let's see what his plan is here.

That's one minute gone in the round.
Brackin tries a body shot but Pinsinchai blocks it.
Pinsinchai keeps the fight in the clinch, despite Brackin's efforts to push away.
Pinsinchai breaks the clinch.
Brackin wants to clinch.
Brackin throws a right and a left that both miss.
Brackin is looking to clinch.
Pinsinchai clinches.
Brackin really does look like a pencil wearing a pair of gloves. Let's hope he has a gameplan to suit that ridiculous body shape.
Pinsinchai creates a bit of distance and throws an elbow that only just misses.
Brackin wants to push off and get back to the center of the mat but Pinsinchai has him pressed against the ropes.
Pinsinchai throws an elbow that misses.
Brackin wants to strike at distance but he can't break free of the clinch.
Pinsinchai lands with a quick shot inside that doesn't really do much damage.
Pinsinchai escapes the clinch and we're back to striking.

That's two minutes gone in the round.
Brackin scores with a nice body kick.
Pinsinchai throws a combination but comes up with nothing but fresh air.
Pinsinchai plants his feet and lands a nice head kick!
Pinsinchai pulls out of a head kick attempt.
Pinsinchai has taken the fight to the clinch.
Wooooo! Give it up for these two warriors! They are putting on a show!
Pinsinchai breaks the clinch and we return to the middle of the mat.
Pinsinchai will need to tighten up his combinations if he doesn't want to gas himself out, swinging at thin air.
Brackin tries to clinch there but Pinsinchai circles away.
Pinsinchai gets a clinch.
Pinsinchai trying to land knees to the body.
Pinsinchai misses with an elbow strike.
Pinsinchai breaks the clinch.
Pinsinchai misses with a two punch combination.
Brackin tries to keep at a distance but Pinsinchai has taken the fight into the clinch.
Both guys are working to get underhooks.

That's three minutes gone in the round.
Pinsinchai misses with an elbow strike.
Pinsinchai lands a nice elbow.
Brackin is trying to slow down the pace in the clinch, to catch his breath.
Pinsinchai throws an elbow but it's blocked.
Pinsinchai gets an overhook and lands an elbow to the side of the head.
Both fighters working to control the clinch.
Brackin is trying to push Pinsinchai away but Pinsinchai has him pressed against the ropes, so he's going nowhere.
Pinsinchai breaks from the clinch.
Brackin tries to clinch up.
Pinsinchai gets in close and instigates a clinch.
Pinsinchai blocks a body shot from Brackin.
Pinsinchai scores with a nice hook to the head.

That's four minutes gone in the round.
Pinsinchai throws an elbow but it's blocked.
Brackin has had enough of the clinch and is looking to separate.
Brackin looks to be in better condition than last time we saw him fight. Obviously he's been working hard on his cardio.
Pinsinchai lands an elbow that stopped Brackin in his tracks for a moment.
Pinsinchai throws an elbow but it's blocked.
Good anti-grappling being displayed by Pinsinchai as Brackin tries to tie him up.
Pinsinchai dodges an elbow strike from Brackin.
Pinsinchai lands with a right to the head.
Still in the clinch, Pinsinchai scores with a nice short uppercut.
This has been an exciting period of action!
Brackin wants to get back to striking at distance but Pinsinchai won't allow it.
Pinsinchai breaks the clinch and we're back to striking at distance.
Pinsinchai pushes Brackin up against the ropes in a clinch.
Brackin is trying to break the clinch but Pinsinchai has him pressed against the ropes.
Pinsinchai manages to break the clinch.
And thats the end of the round the fighters go back to their corners.
Berklerk Pinsinchai dominated that round.
OK. That's time! The bell goes and we're back to the action.

Brackin looks to land a left hand but Pinsinchai moved out of range nicely.
Berklerk Pinsinchai seems to be getting the better of the standup.
Pinsinchai moves into the clinch.
Pinsinchai throws a nice elbow but it doesn't land.
Brackin tries to circle away but Pinsinchai has him pinned against the ropes.
A short left from Pinsinchai.
Pinsinchai throws a nice elbow but it doesn't land.
Brackin avoids a wild elbow strike from Pinsinchai.
Pinsinchai scores with an uppercut up the middle.
A head punch blocked on the inside by Pinsinchai.
Brackin blocks the elbow strike.
We've had a slow start to the round here - hopefully the action picks up.
Pinsinchai creates a bit of distance and throws an elbow that only just misses.
Pinsinchai lands an elbow just above Brackin 's eye.
Pinsinchai breaks the clinch and we're back to striking at distance.
Brackin is looking to take this fight into the clinch.
Pinsinchai unleashes a big counter combination but Brackin bobs and weaves and avoids any damage.
That's one minute gone in the round.
Pinsinchai fakes with an overhand right and moves in to clinch with Brackin, pushing him back against the ropes.
A real battle for position is taking place between these two warriors.
Brackin blocks an elbow strike from Pinsinchai.
Pinsinchai has Brackin pressed against the ropes, preventing Brackin from circling away and getting back to striking at range.
Pinsinchai breaks from the clinch.
Pinsinchai gets in close and instigates a clinch.
Pinsinchai avoiding damage as Brackin throws knees to the body.
Pinsinchai creates a bit of distance and throws an elbow that only just misses.
Brackin tries to break the clinch but Pinsinchai is controlling the position.
Pinsinchai lands a short shot on the inside that snaps the head of Brackin backwards.
Pinsinchai's corner calls for him to break the clinch, which he does.
Bruno Brackin is looking to throw some combinations by the looks of things.
Brackin chopping away at his opponent's legs.
Pinsinchai throws a nice head kick!
Brackin is rocked!
Pinsinchai misses with a head kick.
Brackin seem to be loading up, looking for a big counter.
Oh Brackin is still all over the place! His legs are completely gone! Will he be able to recover?!!
Pinsinchai throws a sloppy head kick and Brackin moves out of range easily.
Pinsinchai jabs Brackin to the body, keeping him at a distance.
That's two minutes gone in the round.
Pinsinchai is stalking his opponent - BOOM! Switch kick out of nowhere! Brackin is not moving; he is out cold!! Wow, what a quick finish that was.
Ladies and gentlemen, after 2:06 of round 2, we have a winner by way of KO (Head Kick). Berklerk Pinsinchai!
|
|
|
|
|
|
|
|
|
|
|
|
|
|
|
|
|
|
|
|
|
|
|
| S |
C
A |
G |
S |
C
B |
G |
|
S |
C |
G |
|
energy
A | B |
|
hype
A | B |
|
pop
A | B |
|
mgr
A | B |
|
FIGHT
RATING
53% |
|
|
|
|
|
|
|
Undercard bout
|
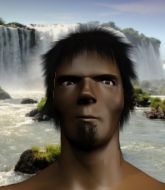
Coming up we have a super heavyweight kickboxing rules bout between Mario Eikmeyer (ranked 3797 p4p, 133 weight class) and Bob Cook (ranked 940 p4p, 14 weight class). Cook comes into a darkened arena with his song building. Lil Baby - Southside kicks in, the lights come on and the crowd goes wild! What a showman! I'm sure you'll be fascinated to know that I was talking to some pointless Z list celebrity before the fight and he thought that Bob Cook was going to win. Let's see if he was right.
 |
|
 |
| 190 cm
44
272 lbs
35 - 56 - 2 |
|
169 cm
35
161 lbs
20 - 19 - 0 |
Solid boxing
Very quick
|
|
World class MT
Good gas tank
|
|
| |
|
Ladies and gentlemen. This fight is 3 rounds, in the super heavyweight division.
Introducing the fighter to my left, fighting out of the red corner.
With a record of
35 - 56 - 2, fighting out of Amsterdam, Mario Eikmeyer!
And introducing the fighter to my right, fighting out of the blue corner.
With a record of
20 - 19 - 0, fighting out of Las Vegas, Bob Cook!
The judges for this bout are Patrick Alders, Daniel Blasius and Nard Betker.
The bell rings for round one and we are underway!
Eikmeyer walks into a jab.
Eikmeyer takes a jab on the nose. He smiles like he loves it and keeps coming.
Cook avoids the body shot from Eikmeyer.
Eikmeyer throws a hook to the body but it doesn't connect.
Mario Eikmeyer seems to be the more aggressive standup fighter in this bout.
Cook lands three nice shots there - that looked like it hurt!
Cook paws at his opponent with the jab and then lunges in with a straight, right on the button.
Cook moves into range and lands a nice leg kick.
The crowd cheers as Cook lands an impressive looking overhand right. Eikmeyer doesn't seem phased though.
Cook slips a jab and a cross from Eikmeyer.
The crowd are loving this. Great action here.
Cook lands a leg kick that knocks Eikmeyer off balance momentarily.
A big right from Eikmeyer misses.
Eikmeyer misses with a wild combination.
Nice jab there from Cook.
Eikmeyer misses with a wild body shot.
Cook lands with a cross to side of his opponent's head.
Cook keeping a good distance there, avoiding the body shot.
Cook scores with a punch to the gut of his opponent.
Cook lands a nice shot to the body.
A big right from Eikmeyer misses.
Eikmeyer throws out a token jab with nothing on it.
That's one minute gone in the round.
Cook's jab looks to have found its range, popping Eikmeyer under the eye.
Eikmeyer tries to close the distance and clinch up but Cook swats him away and circles back towards the center.
A shot to the body from Eikmeyer misses
and Cook counters with a nice body shot.
Sloppy strikes from Eikmeyer. Those never looked like landing.
Eikmeyer is breathing heavily.
Eikmeyer walks into a stiff left hand from Cook.
Eikmeyer takes an uppercut right on the button but keeps his composure.
Cook scores with a nice head shot.
Eikmeyer is rocked!
Eikmeyer tries to get into range but Cook steps to the side and lands a beautiful hook that drops Eikmeyer! He's faceplanted into the mat, ass in the air... he's out cold! That's an image he won't want to show his grandkids when he gets older! Cook scores the big KO victory!
Ladies and gentlemen, after 1:28 of round 1, we have a winner by way of KO (Punch). Bob Cook!
After winning the bout, Bob Cook thanked all his fans and promised he'd do even better in his next fight. The crowd seemed to love his humility.
|
|
|
|
|
|
|
|
|
|
|
|
|
|
|
|
|
|
|
|
|
|
|
| S |
C
A |
G |
S |
C
B |
G |
|
S |
C |
G |
|
energy
A | B |
|
hype
A | B |
|
pop
A | B |
|
mgr
A | B |
|
FIGHT
RATING
89% |
|
|
|
|
|
|
|
Undercard bout
|
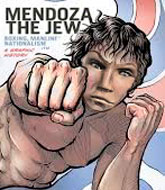
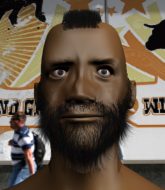
Coming up we have a featherweight kickboxing rules bout between Wilfred Keter (ranked 23426 p4p, 441 weight class) and Daniel Mendoza (ranked 4125 p4p, 329 weight class). These two fighters really are very evenly matched on the feet - it will be fascinating to see who can assert themselves in that aspect of the fight.
 |
|
 |
| 179 cm
20
153 lbs
1 - 2 - 0 |
|
170 cm
19
160 lbs
5 - 0 - 0 |
Excellent MT
Very quick
|
|
Excellent boxer
Good gas tank
|
|
| |
|
Ladies and gentlemen. This fight is 5 rounds, for the featherweight championship of the world!
Introducing the champion to my left, fighting out of the red corner.
With a record of
1 - 2 - 0, fighting out of New York, Wilfred Keter!
And introducing the challenger to my right, fighting out of the blue corner.
With a record of
5 - 0 - 0, fighting out of Amsterdam, Daniel Mendoza!
The judges for this bout are Paulsen Ambrosius, Paul Aken and Nard Betker.
The bell rings for round one and we are underway!
Mendoza rushes in with a sloppy looking punch
and Keter counters with a straight right hand.
Keter avoids a punch combination nicely.
Keter misses with an uppercut.
Daniel Mendoza seems to be the more aggressive standup fighter in this bout.
Mendoza throws a poor cross that misses
and Keter counters with a straight right hand.
Mendoza lands with a straight right. Keter didn't see that one coming.

Keter walks into a straight right hand and goes down! Mendoza rushes to a neutral corner so the count doesn't get delayed but Keter has made it back to his feet on 5. He's OK so we're back to the action.
It looks like Wilfred Keter has been cut.
The crowd cheering loudly, showing their appreciation for the quality fight we're seeing here.
Mendoza misses with a left hand
and Mendoza takes a counter punch right on the button for his troubles.
Mendoza scores with a jab to the body.
Keter uses good head movement to avoid the hook from Mendoza.
Keter looks to throw the jab but Mendoza is out of range.
Mendoza chopped to the floor by a nice leg kick but he springs right back up before Keter can pounce on him.
That's one minute gone in the round.
Keter misses with the combination.
Mendoza misses with a left hand
and Mendoza takes a counter punch right on the button for his troubles.
Ouch! a nice leg kick from Keter, right into the meat.
Mendoza throws a monster uppercut resembling something out of street fighter but it doesn't land.
A jab from Mendoza misses.
Keter avoids the body shot from Mendoza.
Mendoza tries to land with a swinging hook to the body but Keter was well out of range. Poor timing from Mendoza.
A left lands for Mendoza.
Keter looks to have improved his striking defense since last time we saw him fight.
Mendoza tries to land with a swinging hook to the body but Keter was well out of range. Poor timing from Mendoza.
That's two minutes gone in the round.
Keter lands a leg kick that knocks Mendoza off balance momentarily.
A lazy left from Mendoza finds it's target.
Keter keeping a good distance there, avoiding the body shot.
Keter chopping away at his opponent's legs.
No joy there for Mendoza, who threw a few shots but didn't land.
The fans in attendance giving it up for the two fighters, who have really let it all hang out in the last minute or so!
Keter slips a straight right by Mendoza.
Mendoza lands a slapping body shot.
Keter avoids a lazy jab quite easily.
Mendoza misses with a shot to the body
and Keter counters with a straight right hand.
Keter misses with a low kick.
Mendoza with a body punch. A glancing blow.
That's three minutes gone in the round.
Mendoza throws a right hand that misses
and Keter counters with a nice body kick.
A left and a right from Mendoza both land. Nice combination.
Good leg kick by Keter there. It's the ones that make that thud noise that hurt and that was an almighty thud.
Mendoza swings for the body but Keter moves out of range.
Keter takes a punch right to his stomach. That took the wind out of him momentarily.
Mendoza throws the left hand but Keter avoids the punch easily.
Mendoza looks to land a combination but Keter avoids it well.
Mendoza throws a series of punches but Keter moves out of range.
Keter throws a body kick despite being completely out of range
and Keter takes a counter punch right on the button for his troubles.
Mendoza throws a poor cross that misses
and Keter counters with a leg kick that reverborates around the arena.
That's four minutes gone in the round.
Wooooo! Give it up for these two warriors! They are putting on a show!
Mendoza looks to score with a jab to the body but Keter is just out of range.
A lazy body kick from Keter
and Mendoza counters with a lovely straight right hand!
Keter keeping a good distance there, avoiding the body shot.
Keter takes a really solid shot there but just smiles back and shrugs his shoulders.
Mendoza misses with an uppercut.
Mendoza throws out a loose jab but Keter uses good head movement to avoid it.
Mendoza misses with a hook. Keter ducked under it nicely.
Mendoza tries to land with a swinging hook to the body but Keter was well out of range. Poor timing from Mendoza.
Keter throwing a counter right hand but Mendoza manages to avoid it.
Mendoza misses with a left hand
and Keter counters with a straight right hand.
Keter is using his height advantage well here, landing a good percentage of his punches.
Keter connects with a solid leg kick.
Keter takes a body punch but keeps moving.

That's five minutes gone in the round.
Keter misses with a combination
and Mendoza counters with a left to the body.
Mendoza takes a swing at Keter's ribcage but misses.
Keter fakes a jab and scores with a low kick.
Keter looks to score with a jab to the body but Mendoza is just out of range.
Keter misses with a body shot. Nice footwork from Mendoza.
A lazy left from Mendoza finds it's target.
A big left from Mendoza misses.
Mendoza throws a lazy uppercut
and Keter counters with a leg kick that reverborates around the arena.
Nice shot by Mendoza.

That's six minutes gone in the round.
Mendoza has a nice red mark on his side after a thudding body kick by Keter.
Nice body punch from Mendoza.
Mendoza misses with an uppercut
and Keter counters with a nice low kick that buckles Mendoza's knee momentarily.
Mendoza is landing a lot of head punches in this opening round! Keter had better start moving his head a bit unless he wants his face to turn into pâté.
Keter misses with an uppercut. Mendoza saw that one coming.
This has been an exciting period of action!
Mendoza misses with a lunging right hand
and Keter cracks him with a counter punch right on the button.
Mendoza misses the jab.
Jab by Mendoza.
Keter is rocked!
Keter takes a shot right to the liver - Bas would have been proud of that punch.
Oh Keter is still all over the place! His legs are completely gone! Will he be able to recover?!!
Mendoza thows a left - swing and a miss!
Mendoza misses with a hook.
Keter seems to have got his legs back now.
Mendoza's leg has a nasty welt from taking a succession of leg kicks. That must be slowing him down.

That's seven minutes gone in the round.
Keter attempts a leg kick but it's missed by a good margin.
Keter scores with a jab to the body.
Keter avoids a lazy jab quite easily.
Mendoza throws a left and a right that both miss
and Keter counters with a nice body shot.
Sloppy strikes from Keter. Those never looked like landing.
Mendoza looked like he wanted to counter with a punch but didn't throw it.
Mendoza misses with a double jab
and Keter makes the exchange count by landing a cracking kick to the body. Mendoza really felt that one!
Mendoza misses the shot to the body.
That kick from Keter tenderised Mendoza's leg. Mendoza is trying to keep his angry face on.

That's eight minutes gone in the round.
Mendoza misses with a hook.
Mendoza scores with a jab to the jaw of his opponent.
Keter drops his hands and takes a jab to the jaw for his troubles.
Keter throws an ugly left hook that misses
and Mendoza counters with a lovely shot to the body.
Mendoza fails to land with the punch combination there - jab, cross, hook, miss, miss, miss.
Keter fires out a quick counter leg kick but Mendoza just manages to avoid it.
This is a great period of action - very entertaining stuff!
Mendoza misses with a body punch
and Keter counters with a crisp hook to the side of the head.
Mendoza throws a lazy uppercut
letting Keter counter with a right hand.
Keter dances in quickly and lands a nice inside leg kick on Mendoza. That did some damage!
Mendoza scores with a jab.
Mendoza throws an off balance right hand
and Keter counters with a left and a right that stings Mendoza.

That's nine minutes gone in the round.
Mendoza fakes high and swings low for a body shot but Keter manages to avoid it.
An attempted straight right counter from Keter misses the target.
Mendoza throws an ugly left hook that misses
and Keter counters with a straight punch to the midsection.
Mendoza throws a body punch but Keter moves out of range.
Mendoza swings and misses with a shot to the body
and Keter counters with an inside leg kick.
Nice uppercut lands for Keter. That snapped Mendoza's head back.
Mendoza looks to throw the jab but Keter is out of range.
Keter throws an ugly left hook that misses
and Mendoza counters with a lovely shot to the body.
Mendoza throws a body punch but Keter moves out of range.
Mendoza lands a right hook to the body.
Mendoza dips to his left and cracks Keter with an uppercut!
And thats the end of the round the fighters go back to their corners.
Having scored a knockdown, Daniel Mendoza should take round 1, putting pressure on his opponene back strong in round 2.
The cut man is working on Wilfred Keter's cut.
OK. That's time! The bell goes and we're back to the action.
Mendoza misses the body punch
and Keter cracks him with a counter punch right on the button.
Keter lands with a thumping leg kick.
Keter pulls out of a head kick attempt.
Mendoza misses with a looping left.
Keter avoids a lazy jab quite easily.
Mendoza throws a hook but Keter avoids it easily.
Mendoza jabbing away but nothing is landing.
We've had a slow start to the round here - hopefully the action picks up.
Keter throws a head kick that half lands.

It looks like Daniel Mendoza has been cut.
Keter takes one to the side of the head.
Mendoza stumbles momentarily as he takes a strong leg kick from Keter.
That's one minute gone in the round.
Keter fakes a head punch and goes low to the body. Nicely done.
Keter throws a series of punches but Mendoza avoids them all with ease.
Mendoza throws a combination that misses
and Keter counters with a low kick, right behind Mendoza 's knee.
Mendoza throws a looping overhand right but Keter ducks down to avoid it.
A lazy left from Mendoza finds it's target.
Keter slips under a jab from Mendoza.
A swing and a miss from Mendoza.
Keter steps to the side to avoid the strikes from Mendoza.
Mendoza throws a hard body shot but it just misses.
Keter fires out a quick counter leg kick but Mendoza just manages to avoid it.
Mendoza pushing out the jab but it's not landing.
That's two minutes gone in the round.
Mendoza throws a lazy uppercut
and Mendoza takes a counter punch right on the button for his troubles.
Keter throws a body punch but Mendoza moves out of range.
Keter avoids the body shot from Mendoza.
Keter misses with a body shot. Nice footwork from Mendoza.
A shot to the body from Mendoza misses
and Keter counters with a low kick, right behind Mendoza 's knee.
Daniel Mendoza seems to be getting the better of the standup.
Mendoza throws an off balance right hand
and Keter counters with an outside leg kick.
We've seen a great period of action over the last minute or so - credit to both fighters for going all out!
Some wild striking there from Mendoza.
Keter half committed to a counter leg kick.
Keter swings wildly with a couple of big hooks
and Mendoza counters with a nice uppercut.
Mendoza throws out a loose jab but Keter uses good head movement to avoid it.
That's three minutes gone in the round.
Mendoza misses with a right hand
and he gets countered with a snapping leg kick.
Mendoza scores with a punch to the gut of his opponent.
Mendoza scores with a body shot.
Keter staying out of range there.
Mendoza throws a combination that misses
letting Keter counter with a right hand.
Keter ducks under an overhand right and circles away with a smile on his face.
Keter turns his hip over beautifully as he lands a nice leg kick.
Mendoza throws a hook to the body but it doesn't connect.
Mendoza throws a poor cross that misses
and Mendoza takes a counter punch right on the button for his troubles.
That's four minutes gone in the round.
Mendoza dips down and scores with a jab to the body.
Keter steps to the side to avoid the strikes from Mendoza.
Mendoza throws a sloppy body shot
and Keter counters with a leg kick that reverborates around the arena.
Keter looks to land a left hand but Mendoza moved out of range nicely.
Keter tries to work over Mendoza's front leg with a kick but Mendoza checks it.
This is a great period of action - very entertaining stuff!
Mendoza misses with a hook
and Keter counters with a leg kick that reverborates around the arena.
Keter lunges in with swinging rights and lefts but Mendoza circles away quickly and effectively.
Mendoza throws an off balance right hand
and Keter counters with a body kick that stops Mendoza in his tracks momentarily.
Mendoza throws a wild combination but nothing lands.
Mendoza is breathing heavily.
Mendoza swings widly with a right hand
enabling Keter to counter with a crisp jab.
That's five minutes gone in the round.
Nice shot by Mendoza.
Mendoza looks to score with a jab to the body but Keter is just out of range.
Keter blocks a jab.
Mendoza misses with a right hand
and Keter makes him pay by landing a nice hook to the body before moving out of range.
Keter lands a head shot.
Mendoza will need to tighten up his combinations if he doesn't want to gas himself out, swinging at thin air.
Mendoza looks to score with a jab to the body but Keter is just out of range.
Keter avoids a lazy jab quite easily.
That's six minutes gone in the round.
Mendoza misses with a hook
and Keter counters with a lovely straight right hand!
A shot to the body from Mendoza misses
and Keter counters with a big head kick but Mendoza shrugs it off.
Keter connects with a leg kick. Mendoza looked like he was expecting something else and didn't defend it.
Mendoza thuds a left hand into Keter's body.
The crowd are loving this. Great action here.
Mendoza throws a hook but Keter blocks it.
Mendoza connects with a crisp jab.
Keter bobbing and weaving, closes the distance and lands a hook to the side of Mendoza's head.
Keter slips a straight right by Mendoza.
Mendoza ducks down and throws a hook to the body but Keter moves away.
Mendoza rushes in with a sloppy looking punch
and Keter counters with a shot to the ribs. That looked like it hurt.
That's seven minutes gone in the round.
Mendoza throws a hook to the side of Keter's head but Keter sees it coming and ducks under it beautifully.
Mendoza scores with a hook to the body. Keter takes a step back and tries to catch his breath.
Mendoza is the aggressor but that punch slipped nicely by Keter.
Keter is looking to counter punch.
Keter lands a nice looking kick to the body. Mendoza takes a step back to recover.
Mendoza scores with a jab to the jaw.
Keter misses with a head kick.
Mendoza lands a beauty of a right hand that gets the crowd cheering.
Keter throws a nice looking combination but Mendoza bobs and weaves to avoid any damage.
That's eight minutes gone in the round.
Mendoza waving his hands out in front of him, looking to distract Keter.
Keter lands a jab to the nose.
Mendoza misses with a jab and misses with a cross straight after too.
Keter misses with a low kick as Mendoza jumps back.
Nice defenses there by Keter.
Keter appeared to be looking to counter that last move with a leg kick.
A nice inside leg kick there by Keter. That's going to slow Mendoza down.
Wooooo! Give it up for these two warriors! They are putting on a show!
Mendoza misses with a wild body shot.
Keter throwing a counter right hand but Mendoza manages to avoid it.
A head kick misses from Keter.
Mendoza misses with a looping left.
Keter throwing a counter right hand but Mendoza manages to avoid it.
A nice inside leg kick there by Keter. That's going to slow Mendoza down.
That's nine minutes gone in the round.
Keter moves away from the strike by Mendoza.
Keter avoids a lazy jab quite easily.
Mendoza just misses with a punch to the body.
Mendoza looks to score with a combo but nothing lands.
Mendoza walks into a left hand.
Mendoza throws a right and a left that both miss.
Mendoza swinging wildly here.
Keter lands with a good body shot.
And thats the end of the round the fighters go back to their corners.
That was a close second round but I would say that Wilfred Keter will probably get the nod.
Both fighters have cut men working on them during the interval.
That's the end of the round. The referee orders the cornermen out of the ring so we can get back down to business.

Mendoza misses with an uppercut.
Keter looked to counter that last move with a leg kick but didn't pull the trigger.
Mendoza throws a sloppy body shot
and Keter counters with a nice body kick.
Mendoza throws a hook but Keter blocks it.
Keter throws a nice outside leg kick.
Keter tries to score with a low kick but Mendoza moves his leg out of the way.
Mendoza fakes high and swings low for a body shot but Keter manages to avoid it.
Nice uppercut lands for Mendoza. That snapped Keter's head back.
We've had a slow start to the round here - hopefully the action picks up.
Mendoza on the wrong end of a nice low kick. He's acting like it's no big deal but he doesn't want to take many more of those.
Keter slips a straight right by Mendoza.
Keter is looking for a counter combo.
Mendoza pushing out the jab but it's not landing.
Mendoza has a pretty nasty looking mouse under his right eye.
That's one minute gone in the round.
Nice defenses there by Keter.
Keter went nuts there looking for a big combo counter but none of the flurry connected.
A slow jab from Mendoza misses its intended target.
Mendoza has developed a nice purple lump on his ribcage, as a result of some heavy body kicks from Keter.
A shot to the body from Mendoza misses
and Keter counters with a good right hand that lands right on the jaw.
Mendoza misses with a body shot
and Keter counters with a quick right hand to the jaw.
Keter cracks the inside of Mendoza's front leg.
Keter blocks a jab.
Keter looked to counter with a high kick but didn't commit.
Mendoza swings and misses with a hook to the body.
Keter throws a hook to the body but it doesn't connect.
Mendoza misses with an uppercut. Keter saw that one coming.
That's two minutes gone in the round.
Keter misses with a body shot.
Keter throws a hook to the side of Mendoza's head but Mendoza sees it coming and ducks under it beautifully.
Mendoza keeping a good distance there, avoiding the body shot.
Mendoza is the aggressor but that punch slipped nicely by Keter.
Keter seem to be loading up, looking for a big counter.
Mendoza connects with a body shot that sends Keter's belly button to the back.
Keter throws a leg kick but Mendoza sees it coming and checks it nicely.
A jab from Mendoza misses.
As Mendoza looks to move away, Keter throws a big counter combo but Mendoza just gets out of the way.
Keter cracks Mendoza with a nice right hand that draws applause from the crowd.
Mendoza misses with a hook to the body
and Keter counters with a lovely shot to the body.
The crowd are loving this. Great action here.
Mendoza swings wildly with a right hand that was never going to find it's target.
That's three minutes gone in the round.
Mendoza pushing out the jab but it's not landing.
Keter tried to counter with a leg kick but Mendoza avoided it.
Mendoza lunges in with swinging rights and lefts but Keter circles away quickly and effectively.
Keter throws a body kick that sends a sickening thudding noise reverberating around the arena.
Keter takes a solid shot to the body. That one hurt him but he's trying not to show it.
Keter thuds his shin into the meat of Mendoza's side.
Keter lunges at Mendoza with a hook that half lands and is half blocked by Mendoza's hand.
Mendoza staying out of range there.
Keter with a hook.
Mendoza misses with a looping right.
Keter seem to be loading up, looking for a big counter.
That's four minutes gone in the round.
Mendoza throws an ugly left hook that misses
and Keter counters with a good low kick that Mendoza was not able to check.
Mendoza looks to land a combination. Keter sees it coming but can only parry a couple of the shots.
The crowd are loving this. Great action here.
Mendoza swings away with a body shot that misses
and Keter connects with a straight left hand counter down the middle.
Keter scores with a leg kick.
Mendoza throws an off balance right hand
and Keter counters with a solid body kick.
Mendoza takes a big intake of breath there - he's definitely tired.
Keter takes a jab on the nose. He smiles like he loves it and keeps coming.
Keter lands a leg kick. The shin dug right into the meat of the thigh.
Mendoza misses with an uppercut. Keter saw that one coming.
A leg kick checked by Mendoza.
That's five minutes gone in the round.
Mendoza misses with a telegraphed body shot
and Keter counters with a crisp hook to the side of the head.
Mendoza lunges in with swinging rights and lefts but Keter circles away quickly and effectively.
Keter appeared to be looking to counter that last move with a leg kick.
Mendoza pushing out the jab but it's not landing.
Mendoza scores with a shot to the body.
Mendoza digs a good hook to Keter's body.
Mendoza throws a sloppy body shot
and Keter connects with a straight left hand counter down the middle.
Mendoza bobbing and weaving, closes the distance and lands a hook to the side of Keter's head.
Keter moves into range and connects with a jab.
A big right from Mendoza misses.
That's six minutes gone in the round.
Mendoza misses with a hook.
Mendoza throws a combination that misses
and Keter counters with a straight right hand.
Mendoza misses with a body shot.
Mendoza takes a nasty kick to the mid section... That should keep him thinking. Does he try and block and risk a head kick landing?
The crowd cheering loudly, showing their appreciation for the quality fight we're seeing here.
A punch lands to the side of Keter 's head but he takes it in his stride.
Mendoza throws a poor cross that misses
letting Keter counter with a right hand.
Keter lands a nice shot that snaps Mendoza's head back.
Mendoza throws an ugly left hook that misses
letting Keter counter with a right hand.
Mendoza pushing out the jab but it's not landing.
That's seven minutes gone in the round.
Mendoza throws a left and a right that both miss
enabling Keter to counter with a crisp jab.
Mendoza throws a body shot but no joy.
Keter feinted there with a counter leg kick.
A looping hook to the body misses from Mendoza. Keter does a little dance to reset his feet.
A lazy left from Keter finds it's target.
Keter takes a really solid shot there but just smiles back and shrugs his shoulders.
Mendoza misses with an uppercut. Keter saw that one coming.
Mendoza throws a poor cross that misses
and Keter counters with a right hand to the body.
Mendoza thuds a left hand into Keter's body.
Mendoza takes a shot to the nose. Hopefully that hasn't broken it.
That's eight minutes gone in the round.
Mendoza looks to score with a jab to the body but Keter is just out of range.
Mendoza throws a shot to the body.
Keter uses decent footwork to sidestep a right hand from Mendoza.
Mendoza moves forwards but Keter connects with a nice, crisp jab.
We've seen a great period of action over the last minute or so - credit to both fighters for going all out!
Mendoza ducks low and lands a nice hook to the body of his opponent.
A telegraphed right hand from Mendoza misses the target.
A telegraphed right hand from Mendoza misses the target.
Mendoza misses with a right hand
and Keter counters with a head kick.

Mendoza is rocked!
Keter throws a nice outside leg kick.
Mendoza is still on wobbly legs! Can Keter finish him?
A good leg kick by Keter.
That's nine minutes gone in the round.
Keter throws a hook to the body but it doesn't connect.
Mendoza throws a hook but Keter avoids it easily.
Mendoza just manages to avoid a counter high kick fromKeter.
Keter scores with a shot to the body.
Keter lands a nice looking body kick.
Keter lands a front kick.
Nice body kick from Keter.
Mendoza misses with an uppercut
letting Keter counter with a right hand.
Mendoza misses with a body punch
and Keter counters with a slapping leg kick.
Keter ducks under an overhand right and circles away with a smile on his face.
Mendoza takes a shot right to the bread basket.
Keter connects with a high kick.
Mendoza throws a monster uppercut resembling something out of street fighter but it doesn't land.
As Mendoza backs away, Keter returns fire with a leg kick that just misses.
Mendoza misses with a right hand
and Keter counters with a thumping low kick.
Fantastic stuff here - a very entertaining period of action, which has drawn cheers from the crowd.
Mendoza takes a thudding leg kick, right into the meat of the thigh.
Nice defenses there by Keter.
Keter is looking to counter with head kicks.
Keter keeping a good distance there, avoiding the body shot.
Keter throws a right hand that Mendoza ducks under and follows up with a left that Mendoza also avoids with ease.
It seemed like Mendoza was going to counter with the hook but didn't fully commit to it.
And thats the end of the round the fighters go back to their corners.
Wilfred Keter clearly takes that round.
Both fighters have cut men working on them during the interval.
Well, the break between rounds is over. Let's get back to the scrappin!

Keter scores with a leg kick.
Mendoza misses with a looping right.
Keter swung with a counter punch to the body but it didn't connect.
Mendoza throws a poor cross that misses
and Keter counters with a lovely straight right hand!
Like a baseball bat into the meat of his leg there - nice leg kick by Keter.
Mendoza throws a lazy uppercut
and Keter counters with a good, hard body kick but Mendoza shrugs it off.
Mendoza misses with a double jab
and Keter counters with a nice low kick that buckles Mendoza's knee momentarily.
Mendoza misses with a hook to the body
and Keter counters with a nice leg kick.
Mendoza throws a hook but Keter avoids it easily.
Mendoza falls off balance throwing a combination
letting Keter counter with a right hand.
Mendoza drops his guard momentarily, allowing Keter to crack him with a picture perfect lead left hook! Boom! Down goes Mendoza! Oh, he's in big trouble - I don't like his chances here as the referee's count reaches 5. 6,7,8,9...10! He's out! Keter takes it!
Ladies and gentlemen, after 0:57 of round 4, we have a winner by way of TKO (Punch). Wilfred Keter!
Wilfred Keter is the new featherweight champion!
After winning the bout, Wilfred Keter thanked all his fans and promised he'd do even better in his next fight. The crowd seemed to love his humility.
|
|
|
|
|
|
|
|
|
|
|
|
|
|
|
|
|
|
|
|
|
|
|
| S |
C
A |
G |
S |
C
B |
G |
|
S |
C |
G |
|
energy
A | B |
|
hype
A | B |
|
pop
A | B |
|
mgr
A | B |
|
FIGHT
RATING
60% |
|
|
|
|
|
|
|
Co-main event
|
Coming up we have a welterweight kickboxing rules bout between Shiny Aoki (ranked 1019 p4p, 154 weight class) and Batuhan Jaruud (ranked 1879 p4p, 252 weight class). Aoki kept the crowd waiting but all that was forgotten when his ring entrance music started. The incomparable musical genius that is Stunna 4 Vegas Ft. Moneybagg Yo - Tomorrow . Jaruud has chosen Three 6 Mafia - Side to Side as his entrance music. Batuhan Jaruud has the better chin. Will he look to stand and bang today?
 |
|
 |
| 176 cm
32
171 lbs
21 - 5 - 0 |
|
186 cm
33
186 lbs
20 - 8 - 0 |
World class boxer
Insanely flexible
|
|
World class MT
Good gas tank
|
|
| |
|
Ladies and gentlemen. This fight is 1 rounds, in the welterweight division.
Introducing the fighter to my left, fighting out of the red corner.
With a record of
21 - 5 - 0, fighting out of Las Vegas, Shiny Aoki!
And introducing the fighter to my right, fighting out of the blue corner.
With a record of
20 - 8 - 0, fighting out of Las Vegas, Batuhan Jaruud!
The judges for this bout are Nard Betker, Albert Achterberg and Saam Ante.
The bell rings for round one and we are underway!
Jaruud has Aoki up against the ropes in a clinch.
With the fighters clinched against the ropes, Aoki creates a bit of distance for himself and scores with a nice uppercut.
Aoki swings away with an uppercut that misses.
Jaruud lands with a left to the head.
Jaruud tries a knee to the head but Aoki blocks it.
Both fighters working to control the clinch.

Aoki breaks the clinch and we're back to striking at distance.
Jaruud throws a good cross that connects.
Nice shot lands for Jaruud.
Jaruud is looking to clinch.
Aoki fires out a quick counter leg kick but Jaruud just manages to avoid it.
Jaruud connects with the punch.
Jaruud scores a knockdown with a big right hand! Aoki beats the count and gets back to his feet. The referee asks him to walk forwards and it appears he is OK so we'll continue the bout.
Aoki is rocked!
We've seen a great period of action over the last minute or so - credit to both fighters for going all out!
Jaruud looks to land a right hand but Aoki moved out of range.
Aoki throwing a counter right hand but Jaruud manages to avoid it.
Jaruud rushes Aoki and pushes him back against the ropes in a clinch.
Aoki tries a shoulder strike but it doesn't do any damage.
Both fighters working to control the clinch.
Jaruud misses with a short punch on the inside.
That's one minute gone in the round.
A head punch on the inside from Jaruud fails to land.
Aoki works for underhooks and lands a body shot in the process.
Jaruud misses with some punches.
Aoki working aggressively here.
Aoki misses with a short punch on the inside.
Aoki tries to break free but Jaruud pushes him back against the ropes.
Aoki swings wildly with an uppercut but Jaruud uses good head movement to avoid it.
Aoki misses with a hook from the clinch.
Aoki working hard to break the clinch.
Jaruud looking to slow down the pace here.
Jaruud struggles to land a body shot inside as Aoki controls his hands.
Jaruud swings away with an uppercut that misses.
Jaruud can't find room to land a body shot as Aoki controls the action.
Aoki lands a left hand.
Aoki pushes off and circles away, back to the middle of the mat.
Jaruud tries to clinch but Aoki moves out of range.
Jaruud looks to throw the jab but Aoki is out of range.
That's two minutes gone in the round.
Jaruud slips a straight right by Aoki.
Jaruud misses with a double jab
and Aoki counters with a straight right hand.
It looks like Batuhan Jaruud has been cut.
Jaruud tries to clinch but is not successful on this occasion.
Jaruud moves into range and lands a nice body kick.
Jaruud throws a one two combo.
Aoki looks to have improved his striking defense since last time we saw him fight.
This has been an exciting period of action!
Both fighters circling a little - Jaruud finishes the exchange with a kick to the body.
Jaruud connects with a crisp jab.
Jaruud scores with a nice right hand.
Aoki keeping his hands up high there, blocking the jab from Jaruud.
Aoki feinted there with a counter leg kick.
The crowd applaud the fighters' efforts here as the round comes to an end.
Aoki gets tackled into the ropes by Jaruud. Jaruud maintains the clinch.
Aoki lands a left hand that snaps the head of Jaruud backwards.
Jaruud misses with the head strike.
Jaruud misses with a punch to the body.
And that's the end of the fight!
Batuhan Jaruud comfortably won the final round on my scorecard.
Well Jaruud has outworked and out performed his opponent in all aspects of the game today. He was simply too good and the decision should be no more than a formality. Over to the ring announcer for the scorecards.
Ladies and gentlemen, after 1 round of action, we go to the scorecards for a decision.
Judge Nard Betker scores the fight 8:10
Judge Albert Achterberg scores the fight 8:10
Judge Saam Ante scores the fight 8:10
In favor of your winner, by unanimous decision... Batuhan Jaruud!
Our winner, Batuhan Jaruud, made sure he spent some time buttering up the crowd during his post fight interview, which will no doubt bring him a few more fans.
Shiny Aoki was interviewed post fight and said 'ill be around bitch'.
|
|
|
|
|
|
|
|
|
|
|
|
|
|
|
|
|
|
|
|
|
|
|
| S |
C
A |
G |
S |
C
B |
G |
|
S |
C |
G |
|
energy
A | B |
|
hype
A | B |
|
pop
A | B |
|
mgr
A | B |
|
FIGHT
RATING
78% |
|
|
|
|
|
|
|
Main event
|
Coming up we have a welterweight kickboxing rules bout between Henry Armstrong (ranked 2942 p4p, 350 weight class) and Darren Tellkins (ranked 1838 p4p, 248 weight class). Armstrong comes to the ring accompanied by 999 - Homicide. Tellkins has chosen Stunna 4 Vegas - Punch me in Pt 4 as his entrance music. Fingers crossed for an exciting fight - I'm sure both fighters are looking for a nice under the table bonus!
 |
|
 |
| 165 cm
31
160 lbs
8 - 12 - 0 |
|
178 cm
24
174 lbs
14 - 8 - 0 |
Excellent boxer
Cardio machine
|
|
Excellent MT
Good gas tank
|
|
| |
|
Ladies and gentlemen. This fight is 1 rounds, in the welterweight division.
Introducing the fighter to my left, fighting out of the red corner.
With a record of
8 - 12 - 0, fighting out of Sydney, Henry Armstrong!
And introducing the fighter to my right, fighting out of the blue corner.
With a record of
14 - 8 - 0, fighting out of Las Vegas, Darren Tellkins!
The judges for this bout are Daniel Blasius, Wagner Zegers and Paul Aken.
The bell rings for round one and we are underway!

Tellkins gets tackled into the ropes by Armstrong. Armstrong maintains the clinch.
A head punch on the inside from Armstrong fails to land.
Tellkins pushes off and circles away, back to the middle of the mat.
Armstrong tries to clinch but Tellkins is having none of it.
Armstrong moves in looking to clinch but Tellkins pushes him off.
Armstrong doesn't manage to clinch there - Tellkins circles away.
Armstrong tries to close the distance and clinch but Tellkins swats him to one side with an open hand palm strike and circles away.
Tellkins rushes Armstrong and pushes him back against the ropes in a clinch.
Tellkins lands a hook to the side of the head.
Tellkins blocking some punches.
Tellkins breaks from the clinch.
Armstrong tries to clinch but Tellkins moves out of range.
Tellkins only half commits to the counter leg kick.
Tellkins swats away the attempt to clinch by Armstrong.
Tellkins circles away from the clinch attempt.
Armstrong is looking to take this fight into the clinch.
We've had a slow start to the round here - hopefully the action picks up.
Tellkins misses with the combination.
That kick from Tellkins tenderised Armstrong's leg. Armstrong is trying to keep his angry face on.
Armstrong looks to have improved his striking defense since last time we saw him fight.
Armstrong takes a jab right on the nose. That must have hurt but he shrugs his shoulders and looks to return the favor.
It looks like Henry Armstrong has been cut.
Armstrong gets a clinch.
That's one minute gone in the round.
Tellkins lands a nice uppercut.
Tellkins escapes the clinch and we're back to striking.
Armstrong tries to grapple but his opponent circles
and Tellkins counters with a two punch combo.
Armstrong takes a shot to the body in his stride.
Tellkins throws a nice looking combination but Armstrong bobs and weaves to avoid any damage.
Tellkins keeps the fight on the outside.
Armstrong tries to close the distance and clinch up but Tellkins swats him away and circles back towards the center.
Tellkins tries to move into range but Armstrong moves to the side and lands with a nice right hand.
Armstrong wants to clinch up but Tellkins keeps it at a distance.
Armstrong throws a shot from downtown. Tellkins moves away and avoids it.
Tellkins takes the fight into the clinch.
Tellkins working some nice short punches in the clinch.
The crowd cheering loudly, showing their appreciation for the quality fight we're seeing here.
Tellkins misses with a body punch.
Tellkins breaks from the clinch.
Armstrong is looking to take this fight into the clinch.
Armstrong throws a left and a right that both miss
and Tellkins counters with a straight right hand.
That's two minutes gone in the round.
Armstrong on the wrong end of a nice jab.
Armstrong tries to clinch but Tellkins is having none of it.
Armstrong moves out of range of the strikes.
A combination from Armstrong does no damage.
Tellkins jabs Armstrong right on the nose. Armstrong blinks but takes it well.
Tellkins avoids the clinch attempt nicely.
Armstrong tries to close the distance and clinch but Tellkins swats him to one side with an open hand palm strike and circles away.
Tellkins fakes with a right hand and throws a good leg kick, right into the thigh. That had to hurt Armstrong.
Armstrong uses decent footwork to sidestep a right hand from Tellkins.
Tellkins avoids the clinch attempt nicely.
Armstrong tries to clinch but Tellkins moves out of range.
Armstrong throws a low kick but it's checked well by Tellkins.
Tellkins is using his reach advantage to land shots from outside his opponent's range.
Armstrong tries to clinch up but Tellkins circles away and keeps his distance.
Tellkins has used his reach advantage pretty well so far tonight.
The fight stays on the outside here - Armstrong looks like he's thinking about clinching though.
Tellkins misses with a wild combination.
It looked like Armstrong wanted to counter with a hook but didn't fully commit.
Armstrong uses some good footwork to avoid the body shot by Tellkins.
An attempted straight right counter from Armstrong misses the target.
Tellkins uses some good footwork to avoid the body shot by Armstrong.
That's three minutes gone in the round.
Tellkins lands with a cross to side of his opponent's head.
Armstrong wants to clinch but Tellkins slips to the side
and Tellkins counters with a stiff right hand.
Tellkins swings for the body but Armstrong moves out of range.
Armstrong tries to clinch but Tellkins is having none of it.
It seemed like Tellkins was going to counter with the hook but didn't fully commit to it.
Armstrong has his front leg slapped to the side - a nice low kick landing there from Tellkins.
Tellkins dances in quickly and lands a nice inside leg kick on Armstrong. That did some damage!
Armstrong throws a right hand that Tellkins ducks under and follows up with a left that Tellkins also avoids with ease.
Armstrong tries to clinch but is not successful on this occasion.
The fight stays on the outside here - Armstrong looks like he's thinking about clinching though.
A nice side step and Tellkins releases a counter shot to the body, but it doesn't find it's home.
Armstrong gets in close and instigates a clinch.
Armstrong lands a hook that snaps the head of Tellkins backwards.
Tellkins pushes off and circles away, back to the middle of the mat.
Tellkins swats away the attempt to clinch by Armstrong.
Armstrong wants to clinch
and Tellkins counters with a lovely straight right hand!
Fantastic stuff here - a very entertaining period of action, which has drawn cheers from the crowd.
Tellkins takes a shot right to the bread basket.
Armstrong is looking to clinch but Tellkins is avoiding it.
That's four minutes gone in the round.
Armstrong throws a leg kick that misses.
Armstrong is looking to clinch but Tellkins is avoiding it.
Tellkins swings away with a counter right hand but no contact made.
Armstrong walks into a jab.
Tellkins slips a jab and a cross from Armstrong.
Tellkins scores with a leg kick.
Armstrong wants to clinch.
Tellkins wants to counter the offense by Armstrong and move into the clinch position.
The fight stays on the outside here - Armstrong looks like he's thinking about clinching though.
A little jabbing left from Tellkins on the counter but it doesn't find it's target.
Armstrong wants to clinch
and Tellkins counters with a straight punch to the midsection.
Armstrong tries to clinch up.
Armstrong tries to clinch up.
Tellkins closes the distance and presses his opponent up against the ropes.
The crowd applaud the fighters' efforts here as the round comes to an end.
Tellkins manages to break the clinch.
Armstrong closes the distance but Tellkins moves to the side
and Tellkins counters with a shot to the ribs. That looked like it hurt.
Armstrong looks to clinch
and Tellkins cracks him with a counter punch right on the button.
And that's the end of the fight!
Darren Tellkins comfortably won the final round on my scorecard.
Well Tellkins has outworked and out performed his opponent in all aspects of the game today. He was simply too good and the decision should be no more than a formality. Over to the ring announcer for the scorecards.
Ladies and gentlemen, after 1 round of action, we go to the scorecards for a decision.
Judge Daniel Blasius scores the fight 9:10
Judge Wagner Zegers scores the fight 9:10
Judge Paul Aken scores the fight 9:10
In favor of your winner, by unanimous decision... Darren Tellkins!
Darren Tellkins very nearly forgot to thank Trap-Alot-Clothing amongst all the excitement of his win but just as the interview came to a close, he screamed their name. Hopefully he'll get a few nice freebies in the mail as a thank you.
|
|
|
|
|
|
|
|
|
|
|
|
|
|
|
|
|
|
|
|
|
|
|
| S |
C
A |
G |
S |
C
B |
G |
|
S |
C |
G |
|
energy
A | B |
|
hype
A | B |
|
pop
A | B |
|
mgr
A | B |
|
FIGHT
RATING
71% |
|
|
|
|
|
|
|
|
|
|

