 |
Tribal Stage Round 3 PBP Commentary |
Undercard bout
|
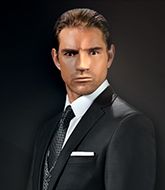
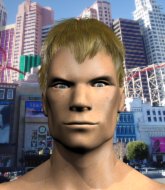
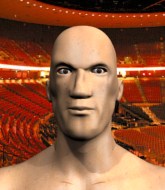
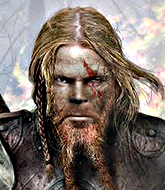
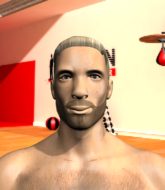
Coming up we have a light heavyweight MMA rules bout between Harold Nicolas (ranked 0 p4p, 0 weight class) and Brian Page (ranked 0 p4p, 0 weight class). Fingers crossed for an exciting fight - I'm sure both fighters are looking for a nice under the table bonus!
 |
|
 |
| 187 cm
18
219 lbs
2 - 1 - 0 |
|
190 cm
18
210 lbs
2 - 1 - 0 |
BJJ White Belt
Excellent boxer
Granite chin |
|
BJJ Brown Belt
Basic striking
Determined |
|
| |
|
Ladies and gentlemen. This fight is 3 rounds, in the light heavyweight division.
Introducing the fighter to my left, fighting out of the red corner.
With a record of
2 - 1 - 0, fighting out of London, Harold Nicolas!
And introducing the fighter to my right, fighting out of the blue corner.
With a record of
2 - 1 - 0, fighting out of Amsterdam, Brian Page !
The judges for this bout are Konstantin Menshow, Vladimir Khabensky and Fedor Mirinova.

The bell rings for round one and we are underway!
Nicolas checks the leg kick nicely there.
Page throws a low kick, looking for Nicolas's leg but Nicolas calmly moves out of range.
A jab from Nicolas misses.
Page throws a body shot but no joy.
Harold Nicolas seems to be the more aggressive standup fighter in this bout.
Nicolas uses good footwork to avoid the strikes from Page .
Nicolas connects nicely with a jab. Noted by the judges no doubt.

It looks like Brian Page has been cut.
Page shoots in for a takedown but Nicolas shows good takedown defense.
Page misses with a low kick.
Nicolas was looking to counter that move with a punch but didn't quite pull the trigger.
A swing and a miss from Nicolas.
Page shoots in and drives through. Nicolas sprawls well.
Page looks more muscular than last time we saw him. He must have been on the weights.
Nicolas is the aggressor but that punch slipped nicely by Page .
Nicolas looks to have improved his striking defense since last time we saw him fight.
Nicolas misses with a straight left.
Page tries to land a front kick but Nicolas steps back. That was a bit too telegraphed.
We've had a slow start to the round here - hopefully the action picks up.
Nicolas throws a shot from downtown. Page moves away and avoids it.
Nicolas throws a hook but Page avoids it easily.
Page throws out a leg kick but Nicolas moves out of range and Page only half commits.
Page swings for the body but Nicolas moves out of range.
Page swings and misses with a hook to the body.
Page tries to close the distance and clinch up but Nicolas swats him away and circles back towards the center.

That's one minute gone in the round.
Page keeping his hands up high there, blocking the jab from Nicolas.
Nicolas throws a shot from downtown. Page moves away and avoids it.
Nicolas misses with a straight left.
Page slips under a jab from Nicolas.
Nicolas throws a lazy right hand but Page sees it coming a mile off and sidesteps it easily.
Page attempts a leg kick but it's missed by a good margin.
The fighters circling - Nicolas throws out the jab but it was never going to land.
Nicolas throws a big shot that misses.
Page shoots in with a takedown attempt and he has Nicolas pinned against the cage. Nicolas gets the underhooks and manages to circle away.
Harold Nicolas has stuffed three takedown attempts in the round now. That's going to take a lot out of Brian Page .
A big left from Nicolas misses.
Nicolas is really head hunting here, hardly looking to strike to the body at all.
Nicolas tests Page 's chin there with a solid looking shot.
Nicolas avoids the body shot from Page .
Page throws a body kick but he wasn't in range.
Nicolas takes a step back and watches a body kick go sailing past his mid section.
Page displays some good footwork, moving neatly out of range as Nicolas throws out the jab.

That's two minutes gone in the round.
Page throws a leg kick but Nicolas moved away.
Page takes one to the side of the head.
Nicolas throws a big shot that misses.

Nicolas sends Page crashing to the mat with a devastating uppercut! Nicolas is motioning to the referee to let Page up. He wants to try and finish this one on the feet!

Page is rocked!
This has been an exciting period of action!
BAM! Nicolas delivers a spinning backfist that drops Page like a ragdoll! This is all oooooveeeer! He was out before he hit the ground!
Ladies and gentlemen, after 2:23 of round 1, we have a winner by way of KO (Spinning Backfist). Harold Nicolas!
Jumping up and down and very excited, Harold Nicolas waved his t-shirt featuring Sully's Bar & Grill's logo in front of the cameras.
|
|
|
|
|
|
|
|
|
|
|
|
|
|
|
|
|
|
|
|
|
|
|
| S |
C
A |
G |
S |
C
B |
G |
|
S |
C |
G |
|
energy
A | B |
|
hype
A | B |
|
pop
A | B |
|
mgr
A | B |
|
FIGHT
RATING
57% |
|
|
|
|
|
|
|
Undercard bout
|
|
|
|
Undercard bout
|
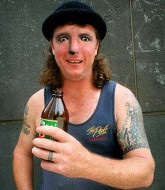
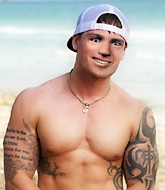
Coming up we have a light heavyweight MMA rules bout between Marshall Montgomery (ranked 0 p4p, 0 weight class) and Julian Lane (ranked 0 p4p, 0 weight class). Both these guys have solid standup skills and neither is particularly fantastic on the ground, so let's hope for a nice standup war!
 |
|
 |
| 187 cm
18
208 lbs
2 - 1 - 0 |
|
185 cm
18
220 lbs
2 - 1 - 0 |
BJJ White Belt
Excellent MT
Granite chin |
|
Decent wrestler
Decent boxing
Prefers standup |
|
| |
|
Ladies and gentlemen. This fight is 3 rounds, in the light heavyweight division.
Introducing the fighter to my left, fighting out of the red corner.
With a record of
2 - 1 - 0, fighting out of Montreal, Marshall Montgomery!
And introducing the fighter to my right, fighting out of the blue corner.
With a record of
2 - 1 - 0, fighting out of Los Angeles, Julian Lane!
The judges for this bout are Dmitry Maklakov, Ivan Kurochkin and Illya Tyunina.
The bell rings for round one and we are underway!
Montgomery bobs and weaves and then throws a good body kick.
We've been told by Montgomery's head coaches at GWad's Playpen that he's been working on his takedown defense in preparation for this fight.
Montgomery lands a big right hand that sends Lane crashing to the mat! Montgomery stays standing though and waves Lane back to his feet!
It looks like Julian Lane has been cut.
Lane misses with a hook
and Montgomery counters with a body kick.
Lane looks winded!
Montgomery lands an uppercut, right on the button! Lane tumbles backwards into the cage, staring vacantly into space! He's got no idea where he is, who he is or what day it is... Poor guy.
Ladies and gentlemen, after 0:13 of round 1, we have a winner by way of KO (Punch). Marshall Montgomery!
|
|
|
|
|
|
|
|
|
|
|
|
|
|
|
|
|
|
|
|
|
|
|
| S |
C
A |
G |
S |
C
B |
G |
|
S |
C |
G |
|
energy
A | B |
|
hype
A | B |
|
pop
A | B |
|
mgr
A | B |
|
FIGHT
RATING
100% |
|
|
|
|
|
|
|
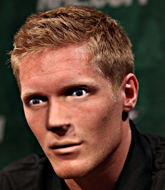
Undercard bout
|
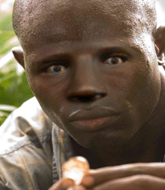
Coming up we have a light heavyweight MMA rules bout between Jaime Lannister (ranked 0 p4p, 0 weight class) and Jamie Bounty (ranked 0 p4p, 0 weight class). Both fighters look fresh as a daisy as they make their way towards the cage.
 |
|
 |
| 182 cm
18
209 lbs
3 - 0 - 0 |
|
188 cm
18
205 lbs
0 - 2 - 0 |
Decent wrestler
Solid boxing
Big right hand |
|
Good wrestler
Basic striking
Granite chin |
|
| |
|
Ladies and gentlemen. This fight is 3 rounds, in the light heavyweight division.
Introducing the fighter to my left, fighting out of the red corner.
With a record of
3 - 0 - 0, fighting out of London, Jaime Lannister!
And introducing the fighter to my right, fighting out of the blue corner.
With a record of
0 - 2 - 0, fighting out of Amsterdam, Jamie Bounty!
The judges for this bout are Illya Tyunina, Aleksei Zolotukhin and Sergei Dronov.
The bell rings for round one and we are underway!
Lannister misses with a wild body shot.
Bounty scores with a hook.
Lannister has been working on his boxing with his coaches at Umbrella Laboratories in the buildup to the fight.
Bounty defending well as Lannister loads up on a big left hand.
Bounty connects with the punch.
Lannister walks straight into an uppercut. Luckily it didn't land flush.
Bounty ducks down and throws a hook to the body but Lannister moves away.
A looping hook to the body misses from Lannister. Bounty does a little dance to reset his feet.
Bounty fakes high and swings low for a body shot but Lannister manages to avoid it.
Lannister scores with a jab to the head.
Bounty misses with a body shot
and Lannister counters with a good right hand that lands right on the jaw.
Lannister ducks down and throws a hook to the body but Bounty moves away.
Nice shot by Bounty.
Bounty misses with a looping left.
An attempted straight right counter from Lannister misses the target.
The crowd are loving this. Great action here.
Lannister throws an overhand right that lands on Bounty's shoulder, as Bounty tries to avoid the shot.
Lannister throws an ugly left hook that misses

and Bounty holds on and brings the fighters into a clinch.
Lannister tries a body shot but Bounty blocks it.
That's one minute gone in the round.
Bounty lands a hook to the side of the head.
Bounty tries a body shot but Lannister blocks it.
Bounty blocking some punches.
Lannister swings wildly with an uppercut but Bounty uses good head movement to avoid it.
Lannister tried to land a shot to the body but connects with Bounty's elbow.
Lannister letting Bounty take a breather here.
Lannister swings away with an uppercut that misses.
Lannister wants to break free but Bounty has control.
Bounty misses with a shot to the kidneys.
Lannister misses with a short punch on the inside.
Bounty throws a head punch that misses.
Good body shot from Bounty.
Bounty stalling.
Bounty presses Lannister against the cage and delivers a mid-strength body shot.
Lannister tries to work over Bounty's body with a swooping hook but it only glances the target.
Lannister misses with a hook to the ribs.
Bounty tried to land a shot to the body but connects with Lannister's elbow.
That's two minutes gone in the round.
Lannister tries to work over Bounty's body with a swooping hook but it only glances the target.
A short body shot lands from Bounty as the two fighters clinch.
A shot in the inside from Bounty.
Lannister blocks an uppercut.
Bounty digs a right hand underneath Lannister's ribcage. Lannister let out a lung full of air as it connected.
Lannister is breathing heavily.
Bounty doesn't land with the attempted body shot.
Lannister wants to strike at distance but he can't break free of the clinch.
Lannister tries to throw a body punch but Bounty avoids it by throwing Lannister back against the cage.
Bounty blocks an uppercut.
Bounty lands a right hand.
Fantastic stuff here - a very entertaining period of action, which has drawn cheers from the crowd.
Bounty lands a shoulder strike.
Bounty blocks a couple of punches on the inside.
A right hook to the body lands for Bounty.
Lannister misses with some punches.
Bounty lands a right uppercut that snaps the head of Lannister backwards.
Bounty misses with a shot to the kidneys.
A nice left hand lands by Bounty.
Lannister misses with a short punch on the inside.

That's three minutes gone in the round.
Bounty misses with the head strike.
Bounty throws a punch but it's blocked by Lannister.
Bounty blocking some punches.
Bounty blocks an uppercut.
Lannister misses with a shot to the kidneys.
Lannister wants to push off and get back to the center of the mat but Bounty has him pressed against the cage.
A hook to the body from Bounty.
Lannister blocks an uppercut.
Bounty lands an uppercut.
Lannister working aggressively here.
Bounty softening up his opponent with strikes, against the cage.
Bounty scores with a hook to the body.
Bounty lands with a right to the head.
Lannister prevents a body shot from Bounty.
Bounty scores with a shot to the side of Lannister's head.
A nice right hand lands inside from Lannister.
Lannister goes for a body shot but it's blocked.

Lannister breaks the clinch and we're back to striking at distance.
Lannister needs to keep his hands up - Bounty had a free shot at his head there.

Lannister is rocked!

That's four minutes gone in the round.
Fantastic stuff here - a very entertaining period of action, which has drawn cheers from the crowd.
Lannister misses with a straight left.
Bounty bobs and weaves well there to avoid the strikes.
Lannister lands with a cross.
Lannister keeping his hands up high there, blocking the jab from Bounty.
Bounty throws a wild combination but nothing lands.
Lannister looks to land a left hand but Bounty moved out of range nicely.
Bounty defending well as Lannister loads up on a big left hand.
Bounty lands with an overhand left.
Lannister keeping a good distance there, avoiding the body shot.
An attempted straight right counter from Lannister misses the target.
Lannister jabs. That one connects to the head of his opponent.
Bounty swings for the body but Lannister moves out of range.
Lannister keeping a good distance there, avoiding the body shot.
Lannister slips a jab from Bounty.
It looked like Lannister was looking amped, ready to throw a big counter but didn't commit.
Bounty clinches up with Lannister and pushes him back against the cage.
And thats the end of the round the fighters go back to their corners.
Jamie Bounty dominated that round.
That's the end of the interval. I'm sure that seemed a lot quicker than a minute for our two fighters! Back to the action.

Bounty ducks under a wild hook from Lannister.
Lannister avoids a lazy jab quite easily.
Lannister looks to throw the jab but Bounty is out of range.
We are yet to see a takedown attempt from Bounty in the fight. On paper you would think he is the more dominant ground fighter so let's see if these unusual tactics pay off.
Lannister defending well as Bounty loads up on a big left hand.
Bounty tries to land with a swinging hook to the body but Lannister was well out of range. Poor timing from Bounty.
It looked like Lannister wanted to counter with a hook but didn't fully commit.
Lannister connects with a crisp jab.
Lannister misses with a hook. Bounty ducked under it nicely.
Lannister ducks under a wild hook from Bounty.
Lannister gets cracked there but stands up to it.
Lannister throws a poor cross that misses
and Bounty counters with a quick right hand to the jaw.
We've had a slow start to the round here - hopefully the action picks up.
Bounty lands a right hook to the body.
Lannister throws out a token jab with nothing on it.
Bounty clinches up against the cage.
Lannister swings wildly with an uppercut but Bounty uses good head movement to avoid it.
Bounty lands a right hand that snaps the head of Lannister backwards.
That's one minute gone in the round.
Bounty misses with a hook from the clinch.
Lannister goes for a body shot but it's blocked.
Lannister lands with a right to the head.
Bounty swings away with an uppercut that misses.
With the fighters clinched against the cage, Lannister creates a bit of distance for himself and scores with a nice uppercut.
A quick uppercut on the inside from Bounty.
Bounty doesn't land with the attempted body shot.
Lannister tries a shoulder strike but it doesn't do any damage.
Bounty blocks a body shot from Lannister.
Bounty tries to land a shot to the body but it's blocked.
Bounty lands with a short shot to the head.
An uppercut on the inside fails to land for Lannister.
Lannister escapes the clinch and we're back to striking.
Bounty throws an overhand right that lands on Lannister's shoulder, as Lannister tries to avoid the shot.
Bounty has been the more effective fighter overall so far.
Bounty scores with a hook to the body. Lannister takes a step back and tries to catch his breath.
Bounty scores with a nice head shot.
Lannister throws a big shot that misses.
Bounty steps in looking to clinch after the strikes miss from Lannister.
That's two minutes gone in the round.
Lannister misses with a hook. Bounty ducked under it nicely.
This has been an exciting period of action!
Bounty closes the distance and presses his opponent up against the cage.
Bounty misses with a punch to the body.
Lannister lands with a right to the head.
Bounty throws a blind hook that connects with the side of Lannisters head.
Lannister lands with a quick shot inside that doesn't really do much damage.
Bounty scores with a shot to the side of Lannister's head.
Lannister pushes Bounty back against the cage and lands a hook to the side of the head.
Lannister lands a shot to the body.
Lannister's head jolts backwards as he takes an uppercut right on the button!
Lannister swings wildly with an uppercut but Bounty uses good head movement to avoid it.
Bounty lands a right uppercut that snaps the head of Lannister backwards.
Lannister tries a shoulder strike but it doesn't do any damage.
Lannister misses with a punch to the body.
Lannister working aggressively here.
That's three minutes gone in the round.
Bounty swings away with an uppercut that misses.
Bounty has been looking to improve his clinch game in recent weeks. Lannister seems to have the measure of him in the clinch so far, so let's see if Bounty can turn it around.
Lannister misses with the head strike.
Lannister pushes Bounty back against the cage and lands a hook to the side of the head.
Bounty fails to land with a short punch on the inside.
Bounty misses with a punch to the body.
Bounty trying to stall but Lannister improves his position.
Lannister misses with some punches.
Lannister tries a shoulder strike but it doesn't do any damage.
Jamie Bounty seems to be working more effectively in the clinch in the fight so far.
A short right from Lannister.
A short body shot lands from Lannister as the two fighters clinch.
Lannister looks like he'd prefer to be striking at range right now.
Lannister scores with a shoulder strike.
Bounty has a couple of punches blocked by Lannister.
A head punch blocked on the inside by Lannister.
A short right hand to the side of the head by Bounty.
Lannister throws a head punch that misses.
Bounty lands with a left to the head.
That's four minutes gone in the round.
Bounty working aggressively here.
Lannister misses with the head strike.
Bounty lands with a light punch inside.
This has been an exciting period of action!
Bounty misses with a shot to the kidneys.
Bounty tries a body shot but Lannister blocks it.
Bounty tried to land a shot to the body but connects with Lannister's elbow.
Lannister blocks a body shot from Bounty.
Bounty misses with a hook to the ribs.
Lannister working aggressively here.
Bounty blocks an uppercut.
Lannister tries to throw a body punch but Bounty avoids it by throwing Lannister back against the cage.
Lannister escapes the clinch and we're back to striking.
Lannister loads up on a big right hand but Bounty slips the punch.
A looping hook to the body misses from Bounty. Lannister does a little dance to reset his feet.
Lannister uses good head movement to avoid the hook from Bounty.
Lannister takes a shot to the body in his stride.
Lannister misses with a looping right.
And thats the end of the round the fighters go back to their corners.
Jamie Bounty showed his class in that round. I'd imagine he'll take it on all the scorecards.
The minute break is over - no more time for sponges and pep talks - back to the action! And we move into the final round!

Boom, another hit is landed. "You're gunna get knocked out" taunts Lannister, as that shot connected.
Bounty misses with a hook.
It looked like Lannister wanted to counter with a hook but didn't fully commit.
Bounty throws a looping overhand right but Lannister ducks down to avoid it.
Lannister was looking to counter that last move with a shot to the body but he didn't commit.
Bounty cracks Lannister with an open hand slap.
A jab from Lannister misses.
Nice cross by Lannister.
Bounty forces Lannister back against the cage and clinches.
Bounty has a couple of punches blocked by Lannister.
Lannister breaks the clinch and we return to the middle of the mat.
Bounty takes a swing at Lannister's ribcage but misses.
We've had a slow start to the round here - hopefully the action picks up.
Bounty steps to the side to avoid the strikes from Lannister.
Lannister misses with a straight right.
Lannister avoids a punch combination nicely.
Jamie Bounty seems to be getting the better of the standup.
Bounty missing with a left hand there. Lannister was out of range so wasted energy throwing that one.
That's one minute gone in the round.
Bounty throws a body punch but Lannister moves out of range.
Bounty slips a jab and a cross from Lannister.
Lannister looks shocked there as he takes a right hand to the temple.
Lannister scores with a jab to the jaw of his opponent.
Bounty throws a shot from downtown. Lannister moves away and avoids it.
An attempted straight right counter from Lannister misses the target.
Lannister keeping a good distance there, avoiding the body shot.
A jab from Lannister misses.
Sloppy strikes from Lannister. Those never looked like landing.
Bounty swinging wildly here.
Bounty tries to land with a swinging hook to the body but Lannister was well out of range. Poor timing from Bounty.
Lannister jabs at Bounty's body.
Lannister loads up on a big right hand but Bounty slips the punch.
Bounty slips a straight right by Lannister.
Jamie Bounty is fighting for a decision - hopefully he's judged it right and he's actually winning the fight.
That's two minutes gone in the round.
Lannister throws a looping overhand right but Bounty ducks down to avoid it.
Bounty takes a swing at Lannister's ribcage but misses.
A little feinted left hand from Lannister on the counter but he doesn't commit to it.
Lannister looks to land a right hand but Bounty moved out of range.
A slow jab from Bounty misses its intended target.
Lannister uses good footwork to avoid the strikes from Bounty.
The fans in attendance giving it up for the two fighters, who have really let it all hang out in the last minute or so!
Lannister with a hook.
Lannister throws a hook but Bounty avoids it easily.
Bounty throws out a counter right but Lannister avoids it with no problem.
Bounty closes the distance and lands a one-two.
Bounty misses with a straight left.
Lannister keeping a good distance there, avoiding the body shot.
Bounty misses with an uppercut. Lannister saw that one coming.
Bounty looks to score with a jab to the body but Lannister is just out of range.
Lannister looks to land a left hand but Bounty moved out of range nicely.
That's three minutes gone in the round.
Bounty swings widly with a right hand
enabling Lannister to counter with a crisp jab.
Lannister throws a body shot but no joy.
Lannister throws a predictable looking body shot
enabling Bounty to counter with a crisp jab.
Lannister slips under a jab from Bounty.
A telegraphed right hand from Lannister misses the target.
Bounty looked like he wanted to counter with a punch but didn't throw it.
Bounty takes a solid shot to the body. That one hurt him but he's trying not to show it.
The crowd cheers as Bounty lands an impressive looking overhand right. Lannister doesn't seem phased though.
Lannister is really head hunting here, hardly looking to strike to the body at all.
Bounty cracks Lannister with a good shot that sees him stumbling back into the cage.
Lannister connects with a looping right hand.
A jab from Lannister misses.
Lannister feints a straight left to the body, then turns around with a flashy move and hits Bountys jaw with a dramatic spinning back fist!
The fighters circling - Bounty throws out the jab but it was never going to land.
Lannister throws a hook but Bounty avoids it easily.
Bounty forces Lannister back against the cage and clinches.
That's four minutes gone in the round.
This has been an exciting period of action!
Bounty lands a nice shot to the body.
Lannister throws a head punch that misses.
Lannister lands a nice uppercut.
Lannister tried to land a shot to the body but connects with Bounty's elbow.
Bounty blocks a couple of punches on the inside.
Bounty blocks a punch to the side of the head.
Lannister misses with a hook from the clinch.
Lannister misses with a body punch.
Lannister lands on the inside with an uppercut.
Lannister goes for a body shot but it's blocked.
Jaime Lannister has stepped it up - he knows he needs a finish here!
Lannister tries a shoulder strike but it doesn't do any damage.
And that's the end of the fight!
That was a close round. You could make an argument for either fighter but I would give it to Jaime Lannister.
Well Bounty has outworked and out performed his opponent in all aspects of the game today. He was simply too good and the decision should be no more than a formality. Over to the ring announcer for the scorecards.
Ladies and gentlemen, after 3 rounds of action, we go to the scorecards for a decision.
Judge Illya Tyunina scores the fight 28:29
Judge Aleksei Zolotukhin scores the fight 28:29
Judge Sergei Dronov scores the fight 28:29
In favor of your winner, by unanimous decision... Jamie Bounty!
|
|
|
|
|
|
|
|
|
|
|
|
|
|
|
|
|
|
|
|
|
|
|
| S |
C
A |
G |
S |
C
B |
G |
|
S |
C |
G |
|
energy
A | B |
|
hype
A | B |
|
pop
A | B |
|
mgr
A | B |
|
FIGHT
RATING
65% |
|
|
|
|
|
|
|
Undercard bout
|
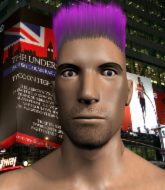
Coming up we have a light heavyweight MMA rules bout between Ryu Aokison (ranked 0 p4p, 0 weight class) and Hafpor Sigurjonsson (ranked 0 p4p, 0 weight class). Sigurjonsson has chosen I'm A Survivor as his entrance music. Both fighters look fresh as a daisy as they make their way towards the cage.
 |
|
 |
| 192 cm
18
208 lbs
2 - 1 - 0 |
|
194 cm
18
205 lbs
1 - 1 - 0 |
BJJ Purple Belt
Counter fighter
Granite chin |
|
BJJ White Belt
Excellent MT
Solid chin |
|
| |
|
Ladies and gentlemen. This fight is 3 rounds, in the light heavyweight division.
Introducing the fighter to my left, fighting out of the red corner.
With a record of
2 - 1 - 0, fighting out of New York, Ryu Aokison!
And introducing the fighter to my right, fighting out of the blue corner.
With a record of
1 - 1 - 0, fighting out of London, Hafpor Sigurjonsson!
The judges for this bout are Igor Prikhodko, Aleksei Zolotukhin and Illya Tyunina.
The bell rings for round one and we are underway!
Aokison checks a low kick. Bone on bone - not my idea of a good time.
Sigurjonsson lands an overhand left. A wild punch that just about connected.
Aokison avoids the head kick by Sigurjonsson.
A good leg kick by Sigurjonsson.
Sigurjonsson throws a low kick but Aokison avoids it.
Sigurjonsson keeps Aokison at a distance using the push kick.
Sigurjonsson throws a lazy head kick

and Aokison decides to take the opportunity to score a takedown. He's landed in Sigurjonsson's guard.
Sigurjonsson utilising some decent striking defenses from the guard, preventing the ground and pound.
Aokison with a nice head shot there.
Aokison in full guard, throwing the ground and pound. No damage this time.
Sigurjonsson looking to control.

Aokison drops back for a leg! It's a sloppy attempt though and Aokison jumps back into guard quickly, to retain the dominant position.
The fighters are pressed up against the cage, both looking to find a bit of space to work.
The crowd are loving this. Great action here.
Aokison seems content to control from guard here. He's going to have to remain active though if he doesn't want to get stood back up.
That's one minute gone in the round.
Aokison tries to free his leg and advance position but Sigurjonsson is retaining full guard.
Aokison controls the pace of the fight for a moment.
Aokison is pushing down on Sigurjonsson's leg trying to pass to half guard. Sigurjonsson is fighting to maintain full guard but Aokison has managed to sneak the leg through.
Aokison looks over to his corner - he wants some instructions but his corner are not responding.
Aokison is thwarting Sigurjonsson's attempts to control the position.
Aokison is thinking about going for an arm triangle but he can't free his leg.
Sigurjonsson really doesn't want to stay on the ground with Aokison. If he can't get it back to his feet, it's only a matter of time before he'll be tapping out.
Aokison seems to be looking for submissions.
That's two minutes gone in the round.
Aokison is looking for a kimura but he's never going to get it from there.
Sigurjonsson keeping his head moving to avoid the ground and pound.
Aokison controlling the action here.
Aokison has been looking to land a fair amount of strikes on the ground. He might be looking to soften his opponent up in order to work for a submission.
Aokison is trying for a kimura here. Sigurjonsson looks like he's in a lot of pain... and he's tapping out! Aokison wins by kimura!
Ladies and gentlemen, after 2:56 of round 1, we have a winner by way of Submission (Kimura). Ryu Aokison!
|
|
|
|
|
|
|
|
|
|
|
|
|
|
|
|
|
|
|
|
|
|
|
| S |
C
A |
G |
S |
C
B |
G |
|
S |
C |
G |
|
energy
A | B |
|
hype
A | B |
|
pop
A | B |
|
mgr
A | B |
|
FIGHT
RATING
46% |
|
|
|
|
|
|
|
Undercard bout
|
Coming up we have a light heavyweight MMA rules bout between Richard Cranium (ranked 0 p4p, 0 weight class) and Kingston Franklin (ranked 0 p4p, 0 weight class). Over to our ring announcer for the fighter introductions!
 |
|
 |
| 188 cm
18
209 lbs
2 - 0 - 0 |
|
185 cm
18
215 lbs
0 - 2 - 0 |
Good wrestling
Good kicks
Good chin |
|
Good wrestler
Brawler
Granite chin |
|
| |
|
Ladies and gentlemen. This fight is 3 rounds, in the light heavyweight division.
Introducing the fighter to my left, fighting out of the red corner.
With a record of
2 - 0 - 0, fighting out of Amsterdam, Richard Cranium !
And introducing the fighter to my right, fighting out of the blue corner.
With a record of
0 - 2 - 0, fighting out of Las Vegas, Kingston Franklin!
The judges for this bout are Illya Tyunina, Fedor Mirinova and Konstantin Menshow.
The bell rings for round one and we are underway!
Franklin tries to clinch there but Cranium circles away.
Cranium attempts a low kick but it misses it's target.
Cranium throws the kick towards the body but Franklin avoids it.
Franklin throws a body shot but no joy.
And Cranium counters with a quick kick to the body but Franklin blocks it.
Franklin drives through and clinches with Cranium against the cage.
Cranium goes for a takedown attempt but Franklin pushes him away and we're back to fighting at a distance.
Franklin moves into the clinch successfully.
Franklin throws a punch but it's blocked by Cranium .
A short right from Franklin.
Franklin is defending well against a takedown attempt.
Franklin misses with a short punch on the inside.
We've had a slow start to the round here - hopefully the action picks up.
Cranium blocks a punch to the side of the head.
Cranium wants to take the fight to the mat but Franklin manages to get underhooks and keep the fight in the clinch.
That's three failed takedown attempts in the round for Richard Cranium . That's going to take a lot out of him.
Cranium tries for a takedown but Franklin manages to get underhooks.
Cranium is trying to drag Franklin to the mat but Franklin just about manages to keep his footing. He used the cage to his advantage there.
Franklin misses with a short punch on the inside.
That's one minute gone in the round.
Franklin lands a right uppercut that snaps the head of Cranium backwards.
Franklin lands with a left to the head.
Cranium has hold of a leg and is looking for a trip takedown. Franklin avoids it nicely though and we remain in the clinch.
Cranium tries for a takedown but Franklin manages to get underhooks.
Cranium tries for a takedown but Franklin manages to get underhooks.
Cranium blocks a punch to the side of the head.
Cranium wants to take the fight to the mat but Franklin manages to get underhooks and keep the fight in the clinch.
Cranium has a body lock and is looking for a takedown. Franklin is bouncing around trying to prevent the takedown and somehow he has indeed managed to stay on his feet.
I was talking to Cranium 's coach per-fight and he was telling me that they'd been working on the clinch in the runup to this fight.
A short right hand to the side of the head by Franklin.
Cranium is working on a leg, looking for a takedown but Franklin is defending well.
Franklin makes some space for himself and lands an uppercut.
Franklin prevents a takedown attempt there.
Cranium is breathing heavily.
Cranium has a body lock and is looking for a takedown. Franklin is bouncing around trying to prevent the takedown and somehow he has indeed managed to stay on his feet.
Cranium is working for a takedown up against the cage. He can't get it on this occasion though.
Cranium can't get the takedown.
Franklin lands a right uppercut that snaps the head of Cranium backwards.
Franklin makes some space for himself and lands an uppercut.
Franklin throws an elbow that misses.
Franklin gets through Cranium 's defenses to land a nice punch to the side of the head.
Wooooo! Give it up for these two warriors! They are putting on a show!
Franklin swings wildly with an uppercut but Cranium uses good head movement to avoid it.
Franklin misses with a hook from the clinch.
That's two minutes gone in the round.
Franklin misses with a short punch on the inside.
Franklin lands a right hand.
Cranium is working for a takedown up against the cage. He can't get it on this occasion though.
Franklin lands with a short punch from the clinch.
Franklin lands a body punch in the clinch.
A body shot lands from Franklin.
A right hook to the body lands for Franklin.
Franklin looks to throw an elbow but misses.
Cranium blocks an elbow strike from Franklin.
Franklin lands with a short punch from the clinch.
Franklin comes over the top with an elbow. That landed flush.
Franklin makes some space for himself and lands an uppercut.
Franklin lands with a left to the head.
Cranium blocks an uppercut.
Cranium goes for a takedown in the clinch but Franklin prevents it.
Cranium blocks a couple of punches on the inside.
Franklin lands a right hand.
Franklin lands with a right to the head.
Franklin's coach down at Restricted area was telling us pre-fight that they have been working on Franklin's balance. Obviously they view that as a key factor in the outcome of this fight.
Cranium has hold of a leg and is looking for a trip takedown. Franklin avoids it nicely though and we remain in the clinch.
That's three minutes gone in the round.
Franklin makes some space for himself and lands an uppercut.
Franklin misses with a hook from the clinch.
Franklin throws a head punch that misses.
Cranium is trying to work for a single leg takedown but Franklin pulls him back up using the underhooks.
Franklin lands with a short shot to the head.
A short right from Franklin.
Franklin is leaning against Cranium and scores with a nice uppercut to the body.
Franklin lands with a right to the head.
Franklin lands with a good tight uppercut to the head.
With the two fighters working up against the cage, Franklin just misses with a elbow thrown towards Cranium 's brow.
Cranium looking for a takedown.
Franklin stays in close to his opponent and throws a right hand to the body.
Cranium avoids the elbow strike from Franklin, against the cage.
Franklin lands a body shot in the clinch.
Franklin lands punches inside but they're not really causing much damage.
The crowd cheering loudly, showing their appreciation for the quality fight we're seeing here.
Franklin scores with a shoulder strike.
Cranium takes a shot to the head.
Cranium has dropped down and is looking to force the takedown but it's defended by Franklin after a bit of a struggle.
Cranium 's head jolts backwards as he takes an uppercut right on the button!
A nice right hand lands inside from Franklin.
That's four minutes gone in the round.
Franklin lands an uppercut.
Cranium changes levels and goes for a takedown here. Franklin fights it off and pushes away nicely.
Franklin connects with a body shot that sends Cranium 's belly button to the back.
Kingston Franklin seems to be the more aggressive standup fighter in this bout.
Franklin tries to clinch but Cranium is having none of it.
Franklin looks to score with a combo but nothing lands.
Cranium misses with a kick to the body
and Franklin counters with a straight right hand.
Cranium slips under a jab from Franklin.
Franklin pushes Cranium up against the cage in a clinch.
Franklin lands with a right to the head.
Franklin lands with a quick shot inside that doesn't really do much damage.
Franklin goes for a body shot but it's blocked.
The crowd applaud the fighters' efforts here as the round comes to an end.
Franklin fails to land with a short punch on the inside.
Franklin lands a body shot.
Cranium blocking some punches.
Cranium lands a takedown into guard.
Cranium prevents Franklin from getting back to his feet.
And thats the end of the round the fighters go back to their corners.
Kingston Franklin dominated that round.
The referee calls time. The cornermen exit stage left and we're back to business.
Franklin feints a straight left to the body, then turns around with a flashy move and hits Cranium s jaw with a dramatic spinning back fist!
A punch combination from Franklin misses.
Nice jab there from Franklin.
A big left from Franklin misses.
Franklin tries to clinch but Cranium is having none of it.
Franklin misses with a hook. Cranium ducked under it nicely.
Franklin has been the more effective fighter overall so far.
Franklin darts in and clinches Cranium up against the cage.
Franklin throws a hook to the body. More of an arm punch but it's all scoring with the judges.
Cranium is looking for a takedown.
Franklin lands a right uppercut that snaps the head of Cranium backwards.
An uppercut on the inside fails to land for Franklin.
Franklin lands with a left to the head.
Franklin lands a body punch.
Franklin softening up his opponent with strikes, against the cage.
The crowd are loving this. Great action here.
Franklin lands a left hand.
Franklin lands a right uppercut that snaps the head of Cranium backwards.
Both fighters are absolutely exhausted here.
Cranium is working for takedown but Franklin is calmly controlling the position for now.
Cranium avoids a wild elbow strike from Franklin.
That's one minute gone in the round.
Franklin scores with a shoulder strike.
Franklin misses with an elbow strike.
With the fighters clinched against the cage, Franklin creates a bit of distance for himself and scores with a nice uppercut.
Franklin lands a right hand that snaps the head of Cranium backwards.
Cranium is rocked!
Franklin is leaning against Cranium and scores with a nice uppercut to the body.
Oh Cranium is still all over the place! His legs are completely gone! Will he be able to recover?!!
Cranium looking for a takedown.
That's three failed takedown attempts in the round for Richard Cranium . That's going to take a lot out of him.
Franklin can't find room to land a body shot as Cranium controls the action.
Cranium seems to have got his legs back now.
Franklin lands a shoulder strike that jolts his opponent's head backwards.
Franklin lands a short shot on the inside that snaps the head of Cranium backwards.
Franklin lands an uppercut.
With the fighters clinched against the cage, Franklin creates a bit of distance for himself and scores with a nice uppercut.
Franklin swings away with an uppercut that misses.
Franklin goes for a body shot but it's blocked.
Franklin misses with the head strike.
Cranium tries for a takedown but Franklin manages to get underhooks.
Franklin lands a right hand that snaps the head of Cranium backwards.
We've seen a great period of action over the last minute or so - credit to both fighters for going all out!
Cranium is trying to work for a single leg takedown but Franklin pulls him back up using the underhooks.
Franklin lands on the inside with an uppercut.
Cranium avoids a wild elbow strike from Franklin.
Franklin swings away with an uppercut that misses.
That's two minutes gone in the round.
Franklin lands a left hand that snaps the head of Cranium backwards.
Franklin lands a shot to the body.
Franklin scores with a shot to the side of Cranium 's head.
Franklin tries a shoulder strike but it doesn't do any damage.
Cranium is trying to drag Franklin to the mat but Franklin just about manages to keep his footing. He used the cage to his advantage there.
Franklin is working Cranium over against the cage.
Cranium has hold of a leg and is looking for a trip takedown. Franklin avoids it nicely though and we remain in the clinch.
Franklin presses Cranium against the cage and delivers a mid-strength body shot.
Franklin pushes off and fires off an elbow that misses, before clinching up again, against the cage.
Franklin scores with a nice hook to the head.
A quick uppercut on the inside from Franklin.
Franklin lands a right hand.
Franklin lands a shoulder strike.
Still in the clinch, Franklin scores with a nice short uppercut.
Franklin scores with a shoulder strike.
Cranium blocks a body shot from Franklin.
Franklin lands an uppercut.
Kingston Franklin seems to be working more effectively in the clinch in the fight so far.
That's three minutes gone in the round.
Franklin lands a shoulder strike that jolts his opponent's head backwards.
Franklin pushes Cranium against the cage. Franklin is working some dirty boxing. Franklin pushes off with a quick right hook! Cranium goes down! Cranium tries to stand but stumbles back to his kness! Franklin moves in to finish and the ref steps in to prevent any more damage!
Ladies and gentlemen, after 3:12 of round 2, we have a winner by way of TKO (Strikes). Kingston Franklin!
Kingston Franklin thanked the fans post fight for their support.
|
|
|
|
|
|
|
|
|
|
|
|
|
|
|
|
|
|
|
|
|
|
|
| S |
C
A |
G |
S |
C
B |
G |
|
S |
C |
G |
|
energy
A | B |
|
hype
A | B |
|
pop
A | B |
|
mgr
A | B |
|
FIGHT
RATING
79% |
|
|
|
|
|
|
|
Undercard bout
|
Coming up we have a light heavyweight MMA rules bout between Djimon Babayega (ranked 0 p4p, 0 weight class) and Doctor Rockso (ranked 0 p4p, 0 weight class). The key to victory for Djimon Babayega has got to be keeping the fight on the feet.
 |
|
 |
| 190 cm
18
205 lbs
3 - 0 - 0 |
|
190 cm
18
210 lbs
2 - 1 - 0 |
BJJ White Belt
Counter fighter
Big right hand |
|
Good wrestler
Basic striking
Intelligent |
|
| |
|
Ladies and gentlemen. This fight is 3 rounds, in the light heavyweight division.
Introducing the fighter to my left, fighting out of the red corner.
With a record of
3 - 0 - 0, fighting out of London, Djimon Babayega!
And introducing the fighter to my right, fighting out of the blue corner.
With a record of
2 - 1 - 0, fighting out of St Petersburg, Doctor Rockso!
The judges for this bout are Ivan Kurochkin, Fedor Mirinova and Konstantin Menshow.
The bell rings for round one and we are underway!
Rockso takes a shot right to the bread basket.
Rockso forces Babayega back against the cage and clinches.
Babayega working on landing some head shots here - that one got through nicely.
Babayega struggles to land a body shot inside as Rockso controls his hands.
Babayega definitely looks more muscular than last time we saw him fight.
Babayega tries a body shot but Rockso blocks it.
Rockso is looking for a takedown up against the cage. Babayega gets underhooks though and prevents the takedown attempt.
Babayega misses with a punch on the inside.
Babayega breaks the clinch and we're back to striking at distance.
Rockso takes a body punch that cleary hurt but he's trying not to show any weakness.
Babayega scores with a body shot.
Babayega connects with a looping right hand.
Rockso tries to clinch up against the cage, rushing in to close the distance. Babayega manages to break the clinch and circles back to the middle of the mat.
Babayega throws a shot to the body.
Wooooo! Give it up for these two warriors! They are putting on a show!

Rockso throws the overhand right but ducks down into a quick takedown attempt. Babayega was covering up waiting for the punch and Rockso finishes the takedown easily into guard.
Babayega is working an open guard here, looking to improve his position. No doubt that will leave him open to counters but at least he's being more offensive.
That's one minute gone in the round.
Rockso slows down the pace of the fight, as he sits in guard.
Rockso throwing strikes from guard but Babayega blocks nicely.
Babayega controls Rockso momentarily but Rockso frees himself.
Babayega being controlled here, momentarily.
Babayega trying to control the position.
The fighters are pressed up against the cage, both looking to find a bit of space to work.
That's two minutes gone in the round.
My god... these two guys really need to pick up the pace or everyone will leave to go get a beer.
Rockso scoring with punches to the head and body.
Rockso passes Babayega's left leg - he's now in half guard.
Rockso takes a deep breath and rests his weight momentarily on top of his opponent, to control the position.
Rockso is pressing down on Babayega's thigh, looking to free his foot. Babayega is holding on for now.
Rockso passes to side control.
Rockso fails to land a wild elbow strike.
That's three minutes gone in the round.
Rockso in side control, throwing shots but Babayega defends.
Rockso has knee on belly and moves into mount.
Babayega tries to lock up and control but Rockso gives him a forearm to the face and pushes him away.
Rockso lands a heavy elbow.
Rockso landing strikes from the mount.
Rockso lands a couple of good shots and Babayega has given up his back, trying to escape the position!
Rockso biding his time, controlling Babayega.
That's four minutes gone in the round.
Rockso lands a punch to the side of the head from the back.
Babayega knows he needs to get back to his feet asap. He's simply no match for Rockso on the ground.
The fighters are starting to get a bit slippery now, which will make submissions a bit more difficult.
Rockso misses with a punch to the head.
Rockso punches Babayega on the ear.
Rockso scores with a nice shot to the head of his opponent. Babayega is looking for a way out.
We've seen a great period of action over the last minute or so - credit to both fighters for going all out!
Rockso gets his hooks in and is throwing strikes.
Rockso punches Babayega on the ear.
Rockso has Babayega flattened out and is raining down punches.
A bit of a pause in the action here. Rockso controlling the positon.
Rockso connects with a series of strikes and the referee is calling for Babayega to escape the position.
And thats the end of the round the fighters go back to their corners.
Doctor Rockso dominated that round.
Well, the break between rounds is over. Let's get back to the scrappin!
Rockso walks straight into a jab right on the nose. That one stung - he's blinking and trying to clear his head.
Babayega dips to his left and cracks Rockso with an uppercut!
Rockso takes one on the button.
Rockso clinches with his opponent.
With the fighters clinched against the cage, Babayega creates a bit of distance for himself and scores with a nice uppercut.
Babayega fails to land with a short punch on the inside.
Babayega working some nice short punches in the clinch.
Babayega breaks the clinch.
Rockso shoots and misses
and Babayega counters with a nice uppercut.
Rockso gets in close and instigates a clinch.
We've seen a great period of action over the last minute or so - credit to both fighters for going all out!
Babayega pushes off and circles away, back to the middle of the mat.
Babayega scores with a shot to the body.
Rockso closes the distance looking to clinch
and Babayega cracks him with a counter punch right on the button.
That's one minute gone in the round.
Babayega lands with a right hand.
Rockso gets clipped by a big right hand and goes down spinning to the canvas! Babayega gets the back mount and begins to drop bombs on his rocked foe! Rockso is too out of it to defend against the strikes and the referee jumps in to save him from the beatdown!
Ladies and gentlemen, after 1:13 of round 2, we have a winner by way of TKO (Strikes). Djimon Babayega!
A very excited looking Djimon Babayega made sure he remembered to thank all the fans both in the arena and on the internet. He said all the coolest people spend all day on MMA websites, which got a big reaction.
|
|
|
|
|
|
|
|
|
|
|
|
|
|
|
|
|
|
|
|
|
|
|
| S |
C
A |
G |
S |
C
B |
G |
|
S |
C |
G |
|
energy
A | B |
|
hype
A | B |
|
pop
A | B |
|
mgr
A | B |
|
FIGHT
RATING
47% |
|
|
|
|
|
|
|
Undercard bout
|
Coming up we have a light heavyweight MMA rules bout between Ernest Shackleton (ranked 0 p4p, 0 weight class) and Junkyard Dog (ranked 0 p4p, 0 weight class). I don't know about you partner, but I'm pumped for this one!
 |
|
 |
| 180 cm
18
220 lbs
1 - 1 - 0 |
|
182 cm
18
210 lbs
2 - 0 - 0 |
Good wrestling
Basic striking
Granite chin |
|
Good wrestler
Counter fighter
Powerful |
|
| |
|
Ladies and gentlemen. This fight is 3 rounds, in the light heavyweight division.
Introducing the fighter to my left, fighting out of the red corner.
With a record of
1 - 1 - 0, fighting out of Las Vegas, Ernest Shackleton!
And introducing the fighter to my right, fighting out of the blue corner.
With a record of
2 - 0 - 0, fighting out of Amsterdam, Junkyard Dog!
The judges for this bout are Dmitry Maklakov, Fedor Mirinova and Sergei Dronov.
The bell rings for round one and we are underway!
Shackleton gets tackled into the cage by Dog. Dog maintains the clinch.
Shackleton misses with a short punch on the inside.
Dog lands a shoulder strike that jolts his opponent's head backwards.

It looks like Ernest Shackleton has been cut.
A head punch on the inside from Dog fails to land.
Shackleton tries a shoulder strike but it doesn't do any damage.
Dog doesn't land with the attempted body shot.
Dog lands a left hand.
Shackleton blocks a couple of punches on the inside.
Dog lands with a quick shot inside that doesn't really do much damage.
A right hook to the body lands for Shackleton.
Shackleton goes for a body shot but it's blocked.
Shackleton tried to land a shot to the body but connects with Dog's elbow.
Dog lands with a right to the head.
A short uppercut from Shackleton.
Dog blocks a couple of punches on the inside.
Dog lands a shot to the body.
Wooooo! Give it up for these two warriors! They are putting on a show!
A head punch blocked on the inside by Shackleton.
Dog scores with an uppercut up the middle.
Dog tries to work over Shackleton's body with a swooping hook but it only glances the target.
Dog can't find room to land a body shot as Shackleton controls the action.
Shackleton throws a punch but it's blocked by Dog.
Shackleton misses with a hook from the clinch.
Dog scores with a shoulder strike.
Shackleton lands with a short punch from the clinch.
Dog tried to land a shot to the body but connects with Shackleton's elbow.
That's one minute gone in the round.
Shackleton throws a head punch that misses.
A nice right hand lands inside from Dog.
Dog swings wildly with an uppercut but Shackleton uses good head movement to avoid it.
A short left from Dog.
Dog looks more muscular than last time we saw him. He must have been on the weights.
An uppercut on the inside fails to land for Dog.
Dog lands a body punch.
Shackleton is breathing heavily.
Dog working some nice short punches in the clinch.
Dog lands a left hand that snaps the head of Shackleton backwards.
Dog tried to land a shot to the body but connects with Shackleton's elbow.
Dog misses with a punch on the inside.
Still in the clinch, Dog scores with a nice short uppercut.
Dog tries to land a shot to the body but it's blocked.
Dog lands a right hand that snaps the head of Shackleton backwards.
Shackleton throws a punch but it's blocked by Dog.
Dog scores with a shoulder strike.
The crowd cheering loudly, showing their appreciation for the quality fight we're seeing here.
Shackleton misses with a punch on the inside.
Dog goes for a body shot but it's blocked.
A shot in the inside from Dog.
A body shot lands from Dog.
Dog lands a body punch - he's looking to wear down Shackleton.
Dog throws a head punch that misses.
That's two minutes gone in the round.
Dog makes some space for himself and lands an uppercut.
Shackleton lands punches inside but they're not really causing much damage.
Dog lands with a right to the head.
Dog scores with a shot to the side of Shackleton's head.
A head punch blocked on the inside by Shackleton.
Dog pushes Shackleton back against the cage and unloads with a body punch.
Dog scores with a shoulder strike.
Dog scores with an uppercut up the middle.
Dog lands a body punch - he's looking to wear down Shackleton.
A short left from Dog.
Dog lands a shoulder strike.
Dog lands a shot to the body.
Dog lands with a left to the head.
A short body shot lands from Dog as the two fighters clinch.
Dog lands a body punch - he's looking to wear down Shackleton.
Good body shot from Dog.
Dog lands with a good tight uppercut to the head.
Shackleton takes a shot to the head.
Dog lands a body punch - he's looking to wear down Shackleton.
The fighters are pressed against the cage, as the pace of the fight slows.
Dog blocks an uppercut.
That's three minutes gone in the round.
A shot in the inside from Dog.
Dog can't find room to land a body shot as Shackleton controls the action.
Dog lands a shoulder strike.
Dog throws a blind hook that connects with the side of Shackletons head.
Dog lands a right hand.
A quick uppercut on the inside from Dog.
Dog lands a shoulder strike.
Dog gets through Shackleton's defenses to land a nice punch to the side of the head.
Dog digs a right hand into Shackleton's ribs. Those have got to be taking their toll on Shackleton's gas tank.
Dog misses with a shot to the kidneys.
Dog lands a shoulder strike.
Shackleton tries to work over Dog's body with a swooping hook but it only glances the target.
A short uppercut from Dog.
This has been an exciting period of action!
Dog lands a nice shot to the body.
Dog scores with a shot to the side of Shackleton's head.
Dog lands with a good tight uppercut to the head.
Shackleton is rocked!
Dog throws a head punch that misses.
Dog working some nice short punches in the clinch.
Oh Shackleton is still all over the place! His legs are completely gone! Will he be able to recover?!!
The fighters are starting to perspire pretty heavily.
Dog lands a body shot.
Shackleton seems to have got his legs back now.
Dog blocks a couple of punches on the inside.
A hook to the body from Dog.
That's four minutes gone in the round.
A body shot lands from Dog.
Dog pushes Shackleton back against the cage and lands a hook to the side of the head.
Dog scores with a shoulder strike.
Dog is working Shackleton over against the cage.
Dog lands a right hand that snaps the head of Shackleton backwards.
Dog throws a blind hook that connects with the side of Shackletons head.
Dog blocks a punch to the side of the head.
Dog lands a big right hand that drops Shackleton! The killer instinct kicks in and Dog finishes his opponent with a series of strikes from mount. A dominating finish by Dog!
Ladies and gentlemen, after 4:28 of round 1, we have a winner by way of TKO (Strikes). Junkyard Dog!
Junkyard Dog decided to thank the fans in attendance for making a great atmosphere. It seemed to go down pretty well.
|
|
|
|
|
|
|
|
|
|
|
|
|
|
|
|
|
|
|
|
|
|
|
| S |
C
A |
G |
S |
C
B |
G |
|
S |
C |
G |
|
energy
A | B |
|
hype
A | B |
|
pop
A | B |
|
mgr
A | B |
|
FIGHT
RATING
78% |
|
|
|
|
|
|
|
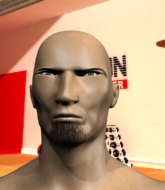
Co-main event
|
Coming up we have a light heavyweight MMA rules bout between Emilio Orsini (ranked 0 p4p, 0 weight class) and Saul Victoro (ranked 0 p4p, 0 weight class). Both these guys have really solid chins. Will we see a standup war or will they both decide that a knockout is unlikely and try to win the fight elsewhere?
 |
|
 |
| 186 cm
18
206 lbs
1 - 1 - 0 |
|
179 cm
18
209 lbs
3 - 0 - 0 |
BJJ White Belt
Excellent MT
Granite chin |
|
BJJ White Belt
Brawler
Granite chin |
|
| |
|
Ladies and gentlemen. This fight is 3 rounds, in the light heavyweight division.
Introducing the fighter to my left, fighting out of the red corner.
With a record of
1 - 1 - 0, fighting out of Amsterdam, Emilio Orsini!
And introducing the fighter to my right, fighting out of the blue corner.
With a record of
3 - 0 - 0, fighting out of Amsterdam, Saul Victoro!
The judges for this bout are Dmitry Maklakov, Illya Tyunina and Aleksandr Martynov.
The bell rings for round one and we are underway!
Victoro throws a hard body shot but it just misses.
Orsini bobs and weaves and unloads with a good uppercut.
Victoro throws a shot from downtown. Orsini moves away and avoids it.
Victoro throws a body shot but no joy.
Orsini is looking to counter with a shot to the body.
Victoro tries to land with a swinging hook to the body but Orsini was well out of range. Poor timing from Victoro.
Victoro looks more muscular than last time we saw him. He must have been on the weights.
Orsini thuds his right hand into Victoro's forehead from close range. That could be painful for both fighters.
Victoro uses some good footwork to avoid the body shot by Orsini.
Victoro swings away with a counter right hand but no contact made.
Orsini throws a hook but Victoro avoids it easily.
Victoro is looking for the big counter here.
Victoro throws a body punch but Orsini moves out of range.
A swing and a miss from Orsini.
Orsini takes a body punch that cleary hurt but he's trying not to show any weakness.
Victoro throws a body punch but Orsini moves out of range.
We've had a slow start to the round here - hopefully the action picks up.
Orsini throws a body punch but Victoro moves out of range.
Orsini fakes a jab and then connects with a hook.
Orsini drops his hands and takes a jab to the jaw for his troubles.
We've seen a great period of action over the last minute or so - credit to both fighters for going all out!
Orsini misses with a left hand
enabling Victoro to counter with a crisp jab.
Victoro is throwing a lot of body shots here, looking to wear down Orsini rather than just go for the knockout.
Orsini swings and misses with a hook to the body.
That's one minute gone in the round.
Orsini dodges the punch combination from Victoro.
Victoro on the wrong end of a nice hook.
Orsini misses with a body shot.
Orsini lands with a straight right. Victoro didn't see that one coming.
A looping hook to the body misses from Orsini. Victoro does a little dance to reset his feet.
Nice uppercut lands for Orsini. That snapped Victoro's head back.
Saul Victoro seems to be the more aggressive standup fighter in this bout.
Orsini avoids the body shot from Victoro.
Victoro has his hands up protecting his head but a hook from Orsini finds it's way round the side to connect with Victoro's head.
It looks like Saul Victoro has been cut.
Orsini looks to be in better condition than last time we saw him fight. Obviously he's been working hard on his cardio.
Orsini missing with a left hand there. Victoro was out of range so wasted energy throwing that one.
Victoro moves into range and connects with a jab.
Orsini misses with an uppercut
and Victoro counters with a lovely straight right hand!
Victoro pushing out the jab but it's not landing.
The fans in attendance giving it up for the two fighters, who have really let it all hang out in the last minute or so!
Victoro swings widly with a right hand
and Orsini counters with a shot to the ribs. That looked like it hurt.
Victoro slips in close and lands a nice hook before moving back out of range.
That's two minutes gone in the round.
Victoro throws a shot to the body.
Orsini slips under a jab.
Victoro misses with a lunging right hand
and Orsini counters with a right hand to the body.
Victoro tries to clinch up but Orsini circles away and keeps his distance.
Nice uppercut lands for Orsini. That snapped Victoro's head back.
Victoro loads up on a big right hand but Orsini slips the punch.
Orsini looks to throw the jab but Victoro is out of range.
Orsini walks into a stiff left hand from Victoro.
Orsini bobs and weaves and throws out a fast jab that snaps Victoro's head backwards.
Orsini misses with a straight left.
Victoro lands a nice looking body shot.
Orsini missing with a left hand there. Victoro was out of range so wasted energy throwing that one.
Orsini displays some good footwork, moving neatly out of range as Victoro throws out the jab.
A shot to the liver by Victoro. Beautiful body shot.
Orsini misses with a body shot. Nice footwork from Victoro.
That's three minutes gone in the round.
Victoro steps to the side to avoid the strikes from Orsini.
Orsini connects with a lovely right hand, straight down the pipe.
Orsini is really peppering his opponent's head with punches.
Victoro jabbing away but nothing is landing.
Victoro connects with a body shot.
Orsini tries to land with a swinging hook to the body but Victoro was well out of range. Poor timing from Orsini.
Orsini uses good footwork to get in and out and land a nice right hand before Victoro has time to react.
A jab from Orsini misses.
Victoro lands a glancing blow to the side of Orsini's head.
Victoro takes a really solid shot there but just smiles back and shrugs his shoulders.
Orsini swings and misses with a hook to the body.
Orsini lands with a shot to the body.
Victoro swings for the body but Orsini moves out of range.
Orsini has his head snapped back a nice jab. A little nod from Orsini there as he acknowledges the shot.
Orsini is using his height advantage well here, landing a good percentage of his punches.
The crowd are loving this. Great action here.
Victoro ducks under a wild hook from Orsini.
Victoro throws a monster uppercut resembling something out of street fighter but it doesn't land.
That's four minutes gone in the round.
Victoro misses with a telegraphed body shot
and Orsini connects with a straight left hand counter down the middle.
Victoro instigates a clinch.
Orsini lands a body shot.
Victoro softening up his opponent with strikes, against the cage.
Orsini lands with a short shot to the head.
Orsini is trying to break the clinch but Victoro has him pressed against the cage.
Victoro tries to throw a body punch but Orsini avoids it by throwing Victoro back against the cage.
A short right hand to the side of the head by Orsini.
Nice body punch from Victoro - that landed with a thud.
Good anti-grappling being displayed by Victoro as Orsini tries to tie him up.
Victoro misses with a punch on the inside.
A right handed body shot lands from Victoro.
Orsini is breathing heavily.
The crowd applaud the fighters' efforts here as the round comes to an end.
A short body shot lands from Victoro as the two fighters clinch.
Orsini blocks a body shot from Victoro.
Victoro lands with a light punch inside.
Victoro scores with a shot to the side of Orsini's head.
And thats the end of the round the fighters go back to their corners.
A close round but Saul Victoro will probably get the nod.
The cut man is working on Saul Victoro's cut.
Well, the break between rounds is over. Let's get back to the scrappin!
Victoro lands a nice hook to Orsini's body. Orsini takes it in his stride and looks to land his own strikes.
Victoro swings and misses with a hook to the body.
Victoro lands a pitter patter jab to the forehead of his opponent.
Victoro fakes with an overhand right and moves in to clinch with Orsini, pushing him back against the cage.
Orsini swings wildly with an uppercut but Victoro uses good head movement to avoid it.
Victoro tried to land a shot to the body but connects with Orsini's elbow.
Orsini lands a right uppercut that snaps the head of Victoro backwards.
A right hook to the body lands for Victoro.
Victoro lands a body punch in the clinch.
Orsini misses with the head strike.
Orsini is trying to push Victoro away but Victoro has him pressed against the cage, so he's going nowhere.
We've had a slow start to the round here - hopefully the action picks up.
Victoro misses with a body punch.
Both fighters are absolutely exhausted here.
Victoro scores with a shoulder strike.
Orsini misses with a hook from the clinch.
Victoro misses with a punch to the body.
Orsini swings wildly with an uppercut but Victoro uses good head movement to avoid it.
Orsini lands a right hand.
That's one minute gone in the round.
Orsini tried to land a shot to the body but connects with Victoro's elbow.
Victoro misses with a punch to the body.
Victoro doesn't land with the attempted body shot.
Victoro's head jolts backwards as he takes an uppercut right on the button!
Victoro lands a hook that snaps the head of Orsini backwards.
Victoro misses with a hook to the ribs.
Victoro has a couple of punches blocked by Orsini.
Orsini stays in close to his opponent and throws a right hand to the body.
A right handed body shot lands from Victoro.
Orsini working hard to break the clinch.
Victoro lands a hook that snaps the head of Orsini backwards.
Victoro lands a body punch.
Orsini's head jolts backwards as he takes an uppercut right on the button!
Victoro stays in close to his opponent and throws a right hand to the body.
Victoro goes for a body shot but it's blocked.
Orsini misses with some punches.
The fighters are starting to perspire pretty heavily.
Victoro lands with a light punch inside.
That's two minutes gone in the round.
Victoro is pushing Orsini up against the cage, for a bit of lean and pray action. Action being used the in the loosest possible sense of the word.
Orsini misses with a shot to the kidneys.
Victoro misses with a shot to the kidneys.
Orsini tries a body shot but Victoro blocks it.
Wooooo! Give it up for these two warriors! They are putting on a show!
Orsini prevents a body shot from Victoro.
Victoro lands a hook to the body. It's hard to tell if that hurt Orsini or not.
Orsini misses with some punches.
Victoro works for underhooks and lands a body shot in the process.
Victoro lands a shot to the body.
Victoro has been the more effective fighter overall so far.
A shot in the inside from Victoro.
Nice body punch from Victoro.
Victoro works for underhooks and lands a body shot in the process.
Nice body punch from Victoro - that landed with a thud.
Victoro lands with a light punch inside.
A right hook to the body lands for Victoro.
That's three minutes gone in the round.
Victoro lands a shoulder strike.
Victoro scores with an uppercut up the middle.
Nice body punch from Victoro.
The fighters are pressed against the cage, as the pace of the fight slows.
Victoro misses with a punch to the body.
A short right from Victoro on the inside.
Nice body punch from Victoro.
Victoro working some nice short punches in the clinch.
Orsini is rocked!
Saul Victoro seems to be working more effectively in the clinch in the fight so far.
Victoro creates some distance for himself and unleashes a massive uppercut that sends Orsini's eyes rolling into the back of his head! Orsini drops to his knees and Victoro pours it on with more strikes until the referee steps in to end the bout!
Ladies and gentlemen, after 3:44 of round 2, we have a winner by way of TKO (Strikes). Saul Victoro!
|
|
|
|
|
|
|
|
|
|
|
|
|
|
|
|
|
|
|
|
|
|
|
| S |
C
A |
G |
S |
C
B |
G |
|
S |
C |
G |
|
energy
A | B |
|
hype
A | B |
|
pop
A | B |
|
mgr
A | B |
|
FIGHT
RATING
71% |
|
|
|
|
|
|
|
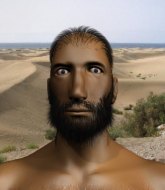
Main event
|
Coming up we have a light heavyweight MMA rules bout between Hati Hroovitnisson (ranked 0 p4p, 0 weight class) and Red Lofgren (ranked 0 p4p, 0 weight class). Hroovitnisson comes into the arena with Child of Wonder blaring out of the sound system. Well, I have no idea who's going to take this one!
 |
|
 |
| 192 cm
18
210 lbs
3 - 0 - 0 |
|
190 cm
18
208 lbs
1 - 1 - 0 |
Good wrestling
Good kicks
KO power |
|
BJJ Blue Belt
Basic striking
Solid chin |
|
| |
|
Ladies and gentlemen. This fight is 3 rounds, in the light heavyweight division.
Introducing the fighter to my left, fighting out of the red corner.
With a record of
3 - 0 - 0, fighting out of London, Hati Hroovitnisson!
And introducing the fighter to my right, fighting out of the blue corner.
With a record of
1 - 1 - 0, fighting out of New York, Red Lofgren!
The judges for this bout are Aleksei Zolotukhin, Fedor Mirinova and Dmitry Maklakov.
The bell rings for round one and we are underway!
Hroovitnisson throws a monster uppercut resembling something out of street fighter but it doesn't land.
Hroovitnisson moves out of range of the strikes.
An attempted straight right counter from Hroovitnisson misses the target.
Hroovitnisson looks to throw the jab but Lofgren is out of range.
Hroovitnisson misses with a telegraphed body shot
enabling Lofgren to counter with a crisp jab.
Lofgren pushing out the jab but it's not landing.
Hroovitnisson looks to land a right hand but Lofgren moved out of range.
Lofgren has done a lot of speed work in the buildup to this fight.
Hroovitnisson blocks the body kick.
Hroovitnisson thuds a left hand into Lofgren's body.
Hroovitnisson misses with a telegraphed body shot
and Lofgren counters with a straight right hand.
Lofgren pulls out of a head kick attempt.
Lofgren throws a big shot that misses.
Lofgren sees a low kick coming and goes to check it, but it's actually a body kick and it thuds into his unprotected ribs.
Good shot there by Hroovitnisson.
Hroovitnisson lands with a nice low kick. That'll leave a bruise.
Hroovitnisson has been working on his boxing with his coaches at Wolf Training Lair in the buildup to the fight.
We've seen a great period of action over the last minute or so - credit to both fighters for going all out!
Lofgren fakes high and swings low for a body shot but Hroovitnisson manages to avoid it.
Nice uppercut there from Hroovitnisson.
It looks like Red Lofgren has been cut.
Lofgren misses with a straight right.
Hroovitnisson throws a push kick but Lofgren slaps the foot to one side.
That's one minute gone in the round.
Hroovitnisson swings and misses with a hook to the body.
Lofgren flicks out a counter leg kick but Hroovitnisson steps away.
Lofgren misses with an uppercut. Hroovitnisson saw that one coming.
Lofgren blocks a jab.
Lofgren tries to counter with a clinch but Hroovitnisson shakes him off and moves away.
Lofgren throws an off balance right hand
and Hroovitnisson cracks him with a counter punch right on the button.
A swing and a miss from Lofgren.
Lofgren slips a jab from Hroovitnisson.
Hroovitnisson looking to throw a kick but he's pulled out of it.
Hroovitnisson throws a body punch but Lofgren moves out of range.
A jab lands there for Lofgren.
Hroovitnisson tries to land with a swinging hook to the body but Lofgren was well out of range. Poor timing from Hroovitnisson.
Hroovitnisson walks into a stiff left hand from Lofgren.
Lofgren moves forwards but Hroovitnisson connects with a nice, crisp jab.
Hroovitnisson throws out a token jab with nothing on it.
Hroovitnisson throws a big shot that misses.
A swing and a miss from Lofgren.
Lofgren throws a half hearted mid kick.
Hroovitnisson swings for the body but Lofgren moves out of range.
That's two minutes gone in the round.
Lofgren throws an overhand right that lands on Hroovitnisson's shoulder, as Hroovitnisson tries to avoid the shot.
We've seen a great period of action over the last minute or so - credit to both fighters for going all out!
Hroovitnisson fakes a couple of low kicks, before throwing one on the third attempt. It connects and Lofgren has to reset his feet before getting ready to engage.
Lofgren moves out of range of the body kick from Hroovitnisson.
Hroovitnisson blocks a jab.
Lofgren walks into a stiff left hand from Hroovitnisson.
Hroovitnisson uses good footwork to avoid the strikes from Lofgren.
Lofgren tries to bum rush Hroovitnisson with a series of wild strikes but Hroovitnisson uses good footwork to avoid the assault.
Lofgren tries to close the distance and clinch but Hroovitnisson swats him to one side with an open hand palm strike and circles away.
Lofgren misses the jab.
The fighters circling - Lofgren throws out the jab but it was never going to land.
Hroovitnisson connects with a leg kick. Lofgren looked like he was expecting something else and didn't defend it.
Hroovitnisson uses some good footwork to avoid the body shot by Lofgren.
Hroovitnisson looks to score with a jab to the body but Lofgren is just out of range.
Hroovitnisson misses with a hook. Lofgren ducked under it nicely.
Lofgren misses with a low kick as Hroovitnisson jumps back.
Hroovitnisson fakes high and swings low for a body shot but Lofgren manages to avoid it.
That's three minutes gone in the round.
Hroovitnisson keeping a good distance there, avoiding the body shot.
Lofgren cracks Hroovitnisson with a right hand to the side of the head.
Hroovitnisson looks for the body kick but Lofgren saw that one coming.
Hroovitnisson ducks under a wild hook from Lofgren.
Hroovitnisson lands a head shot.
Decent striking displayed by Lofgren there.
Hroovitnisson misses with a body shot. Nice footwork from Lofgren.
Hroovitnisson moves away from the strike by Lofgren.
Hroovitnisson needs to keep his hands up - Lofgren had a free shot at his head there.
Lofgren is looking to clinch but Hroovitnisson is avoiding it.
Jab from Lofgren.
Jab, jab by Hroovitnisson - just one landing.
Hroovitnisson fakes a head shot and lands one to the body.
This has been an exciting period of action!
Lofgren thows a left - swing and a miss!
Hroovitnisson digs a good hook to Lofgren's body.
Lofgren looks winded!
Lofgren is holding his hands too far apart here. Hroovitnisson throws a hard, straight punch right down the pipe and BOOM! Lofgren is out! That punch landed square on the jaw - what a shot!
Ladies and gentlemen, after 4:58 of round 1, we have a winner by way of KO (Punch). Hati Hroovitnisson!
A victorious Hati Hroovitnisson thanked his army of followers in his post fight interview, telling people to make sure they follow him on Twitter.
|
|
|
|
|
|
|
|
|
|
|
|
|
|
|
|
|
|
|
|
|
|
|
| S |
C
A |
G |
S |
C
B |
G |
|
S |
C |
G |
|
energy
A | B |
|
hype
A | B |
|
pop
A | B |
|
mgr
A | B |
|
FIGHT
RATING
57% |
|
|
|
|
|
|
|
|
|
|
