|
Play
by Play - Fighter's Fight Commentary
|
Event:
EFL 2: Double Main Event
Date: Sep 30, 2023 |
#R1#
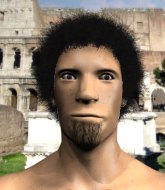
Williamson scores with a nice strike.#CUT#It looks like Kyoto Fujiwara has been cut.
Fujiwara looks really tired already! That doesn't bode well for a good, competitive fight!
Fujiwara swinging wildly here.
Kyoto Fujiwara seems to be the more aggressive standup fighter in this bout.#KD#
Williamson lands a big right hand that sends Fujiwara crashing to the mat! Williamson stays standing though and waves Fujiwara back to his feet!
Williamson with a body punch. A glancing blow.
Williamson lands with a good body shot.
This is a great period of action - very entertaining stuff!
Williamson digs a good hook to Fujiwara's body.
Fujiwara walks right into a perfectly timed right hook and goes down hard! He's out cold! The ref cradles Fujiwara limp body while Williamson jumps on to the cage and waves to the roaring crowd. Wow that was just a brutal knockout!
Ladies and gentlemen, after 0:29 of round 1, we have a winner by way of KO (Punch). Marion Williamson!
Marion Williamson really struggled to get his t-shirt on before his hand was raised. Making sure that Sakura Style logo gets some air time is pretty tricky when you're all sweaty. |
|
|
|
Event:
Quick Fight Championship
Date: Sep 01, 2023 |
#R1#
Mackintosh defends well against a solid takedown attempt from Fujiwara.
Fujiwara looks really tired already! That doesn't bode well for a good, competitive fight!
Mackintosh throws a nice hook to the body that draws an oooh from the crowd.
Fujiwara should think about turning a few of those tyres round his middle into muscle if he wants people to take him seriously as an athlete.
Mackintosh will need to tighten up his combinations if he doesn't want to gas himself out, swinging at thin air.
Mackintosh scores with a slapping inside leg kick.
Fujiwara has been spending a lot of time sparring his boxing in the run up to the fight, trying to sharpen up those hands and look for a knockout.
Mackintosh throws a right high kick that is partially blocked by Fujiwara.
A nice leg kick lands there from Mackintosh.
Mackintosh swings and misses with a hook to the body.
Mackintosh tries to land with a swinging hook to the body but Fujiwara was well out of range. Poor timing from Mackintosh.
Mackintosh connects with a high kick.
Fujiwara takes a thudding leg kick, right into the meat of the thigh.
Fujiwara takes a body punch that cleary hurt but he's trying not to show any weakness.
Johnathon Mackintosh seems to be the more aggressive standup fighter in this bout.
A slapping leg kick lands for Mackintosh.
This is a great period of action - very entertaining stuff!
Mackintosh connects with a leg kick. He turned his hip over nicely there.
Mackintosh darts in and out, connecting with a jab.
A head kick from Mackintosh lands but Fujiwara takes it in his stride. #T1#
Fujiwara misses with a takedown
and Mackintosh counters with a nice leg kick.
Mackintosh throws a good cross that connects.
Mackintosh's corner calls for a 1-2. Mackintosh obliges with the 1 part as he scores the single shot and moves back out of range.
Mackintosh throws a feint and then finishes with a kick to the body.
Mackintosh lands with a slapping head kick.
Fujiwara on the wrong end of a vicious looking body shot.
Mackintosh is using his reach advantage well here, landing the more effective single shots from range.
Mackintosh throws a quick inside leg kick.
Mackintosh fakes the leg kick and cracks Fujiwara in the body.
A slapping body kick lands there for Mackintosh.
The fighters circle, before Mackintosh throws a beautiful high kick that crashes into Fujiwara's neck, sending him stumbling to the floor! Mackintosh lands more strikes and forces a referee stoppage! That one ended in an instant!
Ladies and gentlemen, after 1:51 of round 1, we have a winner by way of TKO (Kick & Punches). Johnathon Mackintosh! |
|
|
|
Event:
VTD Grappling 1
Date: Aug 18, 2023 |
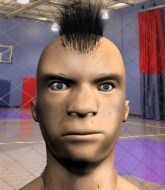
This TWGC bout is 1 fifteen minute round in the heavyweight division. Introducing today's competitors. In the red corner, competing out of New York, with a TWGC record of 0 wins and 0 losses; Roman Bellic! And in the blue corner, fighting out of Tokyo, with a TWGC record of 0 wins and 0 losses; Kyoto Fujiwara!
The judges for this bout are Tatsuya Matsuyama, Hirohito Nitta and Yukihiro Shimada.
Let's get this grappling contest under way! Who will be victorious?
Fujiwara defends well against a solid takedown attempt from Bellic.
Jeez, both these guys look absolutely knackered already, that's not a good sign!
Fujiwara shoots in for a takedown - he's clinched up with Bellic but Bellic pushes him off and we're back to square one.#CL2#
Fujiwara rushes Bellic and presses him up against the ropes.
Bellic is working on a leg, looking for a takedown but Fujiwara is defending well.
Bellic is trying to pull guard but Fujiwara turns him against the ropes and we stay in the clinch.
That's three failed takedown attempts in the round for Roman Bellic. That's going to take a lot out of him.
Bellic fails to pull guard.
We've had a slow start to the round here - hopefully the action picks up.
Fujiwara is trying to drag Bellic to the mat but Bellic just about manages to keep his footing. He used the ropes to his advantage there.#TD#
Bellic jumps guard.
#T1##SUB2#
Fujiwara drops back for a leg! It's a sloppy attempt though and Fujiwara jumps back into guard quickly, to retain the dominant position.
Fujiwara trying to control the position from guard on top but Bellic is wriggling around, looking for whatever he can.
Bellic tries to land a sweep but no joy.
Fujiwara trying to control the position from guard on top but Bellic is wriggling around, looking for whatever he can. #SUB#
Bellic working for a triangle but Fujiwara defends it easily.
Bellic trying to control the position.
#T2#
Fujiwara passes easily into side control. Nice work. Score +3 for passing guard: Bellic (0) vs (3) Fujiwara
Fujiwara trying to control the action but Bellic is working from the bottom. #T3##SUB2#
Fujiwara working hard here to secure a kimura but he's not really in the right position for it.
Bellic wants to control but Fujiwara postures up.#T4#
Bellic is positioning himself to get back to half guard. #SUB2#
Fujiwara working hard here to secure a kimura but he's not really in the right position for it.
Bellic could do with losing a few pounds - he looks very soft around the mid section, to put it politely.
You can see the frustration on Bellic's face, being in this tough position on the bottom.#SUB2#
Fujiwara thinks about going for a far side armbar but bails out and retains the dominant position instead. #T5#
Bellic tries to get back to half guard but can't.
Fujiwara trying to control the action but Bellic is working from the bottom.
Bellic regains half guard.#T6#
Fujiwara working to pass to mount. He's got his hand pressing down on Bellic's thigh. Bellic counters though and makes it back to full guard.
Bellic keeping full guard, as Fujiwara tries to pass.
Bellic looking for a sweep. Not yet Bellic, not yet.
There's a bit of a scramble here and now Bellic is on top in guard.
Score +2 for sweep to guard / half guard: Bellic (2) vs (3) Fujiwara
Fujiwara keeping moving, preventing Bellic from controlling successfully. #T7##SUB2#
Fujiwara is looking for a guillotine. You can't force these things though and Bellic defends well.
Bellic trying to control but Fujiwara is working from the bottom.
Fujiwara trying to control the position.
#T8##SUB#
Bellic is trying to work a guillotine from the top, or something like that? Don't know how he thinks he's going to get a finish from there.
Bellic has to be careful here, sitting in the guard of a superior BJJ player.#SUB2#
Fujiwara had isolated an arm as going for a kimura. Bellic defends it easily.
Bellic wants to control from the top but Fujiwara keeps moving. #T9##SUB2#
Fujiwara has a loose triangle. He'll be looking to tighten that up but Bellic can see exactly what he's planning and manages to posture up and free himself. #SUB2#
Fujiwara has a loose triangle. He'll be looking to tighten that up but Bellic can see exactly what he's planning and manages to posture up and free himself. #SUB2#
Fujiwara had isolated an arm as going for a kimura. Bellic defends it easily.#T10#
Fujiwara looking to sweep here. No luck so far.
Fujiwara keeping moving, preventing Bellic from controlling successfully. #SUB2#
Fujiwara throws his legs up looking to secure a triangle. Oh, that looks pretty tight, I gotta say! Bellic escapes and throws Fujiwara's legs to the side, diving into side control! Score +3 for passing guard: Bellic (5) vs (3) Fujiwara
Bellic is looking to take a break and control but Fujiwara is keeping him honest, looking to work from the bottom. #T11##SUB#
Bellic wants to work for a kimura but he's foiled early by Fujiwara, who protects the arm well.
You can see the frustration on Fujiwara's face, being in this tough position on the bottom.
The fighters are trapped in the ropes so we're going to have a reposition here. The ref calls for a break and repositions the fighters in the center of the ring.#T12#
Fujiwara is looking to regain half guard here but Bellic keeps moving and retains side control.
Bellic is looking to take a break and control but Fujiwara is keeping him honest, looking to work from the bottom.
Fujiwara is trying to control Bellic's posture but Bellic avoids it. #T13#
Fujiwara is positioning himself to get back to half guard.
Fujiwara prevents Bellic from improving position.
Fujiwara can't do much from the bottom here.
We've been informed that Fujiwara has been working hard on his conditioning in the buildup to the fight.#SUB#
Bellic tries for an arm triangle. That looks pretty tight to me. Is this one over!?! Possibly, maybe, no Bellic has let go of the choke. Obviously it wasn't as tight as we thought! #T14#
Bellic trying to control the position but Fujiwara is working away.
Fujiwara manages to get one leg in to regain half guard. #SUB#
Bellic is trying for a guillotine from the top but the pressure isn't in the right place so Fujiwara is just riding it out for now. Bellic eventually gives up the hold.
Boooooooooooooooooooo!!! God, this has been a terrible round. Come on you two, sort yourselves out!#SUB2#
Fujiwara actively working from the bottom here.
And that's the end of the fight!
Bellic takes the fight on points by 5 to 3.
Roman Bellic is the new heavyweight champion! |
|
|
|
Event:
Friday Night Fights 1
Date: Aug 11, 2023 |
#R1#
Fujiwara dives in and grabs Bellic's left leg, looking for a takedown. Bellic pushes down on Fujiwara's head and hops out.
Fujiwara closes this distance looking for a takedown but Bellic circles away.
Bellic walks forward and throws out a flicking leg kick. Fujiwara checks it nicely though, as he moves to the side. #CL#
Bellic forces Fujiwara back against the ropes and clinches.
Bellic wants a takedown but no success here.
Bellic is pressed up against the ropes. Fujiwara has hold of a leg and is looking to drag Bellic down to the mat. Bellic avoids the attempt though and has circled away. We're back to striking at a distance.
Roman Bellic has stuffed three takedown attempts in the round now. That's going to take a lot out of Kyoto Fujiwara.
Fujiwara chopped to the floor by a nice leg kick but he springs right back up before Bellic can pounce on him.
#CL#
Bellic clinches. #BC#
Bellic's corner calls for him to break the clinch, which he does.
We've had a slow start to the round here - hopefully the action picks up.
Bellic is looking to take this fight into the clinch.
Fujiwara wants to counter the offense by Bellic and move into the clinch position.
Fujiwara with a poor takedown
and Bellic counters with a three punch combination, finished off with a leg kick. Nice work.
Bellic really is a fat lump.#TD#
Bellic drops down and drives through with a powerful takedown into guard.
Fujiwara looks winded!
The crowd cheering loudly, showing their appreciation for the quality fight we're seeing here.
Bellic is just sitting in guard, looking to avoid any submissions. #T1#
Bellic makes a bit of distance and scores with some ground and pound, still in guard.
Fujiwara throwing some rather feeble looking strikes off his back.
Bellic wants to stand but Fujiwara has a closed guard, so he can't escape.
The fighters are tangled up in the ropes here. We might need a restart if the fighters can't break free themselves.
Fujiwara being controlled here, momentarily.
Fujiwara looking to hit a scissor sweep but Bellic is one step ahead there.
Bellic has decided he wants to stand but the closed guard of Fujiwara is proving hard to escape from. #REF3#
The referee has motioned to the fighters to stand back up.#T2#
Well. There's a bit of a lull in the action here and the crowd are starting to get restless.#TD#
Fujiwara gets caught on his heels momentarily as he allows Bellic to score an easy takedown into full guard.
Bellic has decided he wants to stand but the closed guard of Fujiwara is proving hard to escape from.
Fujiwara looking to hit a scissor sweep but Bellic is one step ahead there.
Bellic lands a nice shot whilst sitting in his opponent's guard.#T3#
Bellic postures up and lands some nice ground and pound.
Bellic keeps in close for a moment and lands a decent shot to the side of Fujiwara's head.
Bellic wanted to stand there but Fujiwara had control of the position. #ES2#
Fujiwara manages to wriggle out and sneak his way back up to his feet, so the fighters are now clinched up against the ropes.
Bellic fails to pull the fight into his guard.
Bellic tries to land a knee to the body but he is off balance and Fujiwara avoids it.
Fujiwara is looking to take this one to the mat.#T4##BC#
Bellic's corner calls for him to break the clinch, which he does.
Bellic fails with a takedown attempt.
Bellic tries to drive through with a takedown attempt but Fujiwara defends well and Bellic ends up having to push Fujiwara into the ropes where they will battle it out in the clinch.
Bellic gets double underhooks to prevent a takedown attempt from Fujiwara.
#BC#
Bellic breaks from the clinch.
#CL2#
Bellic tries to keep at a distance but Fujiwara has taken the fight into the clinch.
The crowd thankful this round is nearly over.
Bellic keeps control of Fujiwara as he tries to wriggle out of the double underhooks.
Bellic tries for a takedown. No joy.
And that is the end of the round. The fighters go back to their corners.
Roman Bellic dominated that round.
The corners get their ten second warning. Both fighters stand from their stools and stare each other down, ready to get back to the action.#R2#
Bellic moves in looking to clinch but Fujiwara pushes him off.
Fujiwara tries to grapple but his opponent circles
and Bellic counters with a lovely straight right hand!
Bellic shoots in with a takedown attempt and he has Fujiwara pinned against the ropes. Fujiwara gets the underhooks and manages to circle away.
Bellic sets himself, and Fujiwara steps forward looking for the clinch! Bellic avoids it this time.
Fujiwara is looking to clinch but Bellic is avoiding it.
Fujiwara tries to close the distance and clinch but Bellic swats him to one side with an open hand palm strike and circles away.
We've had a slow start to the round here - hopefully the action picks up.#CL2#
Fujiwara has Bellic up against the ropes in a clinch.
Fujiwara has Bellic pressed against the ropes, preventing Bellic from circling away and getting back to striking at range.#BC2#
Fujiwara escapes the clinch and we're back to striking.
#T1#
Bellic dives in and grabs Fujiwara's left leg, looking for a takedown. Fujiwara pushes down on Bellic's head and hops out.
Bellic is really dominating this fight. Is there anything that Fujiwara can do to turn this around?
Bellic misses with a half-hearted attempt at a head kick.
Nice takedown defense from Fujiwara. No joy for Bellic on that attempt.
That's three failed takedown attempts in the round for Roman Bellic. That's going to take a lot out of him.
Both fighters are absolutely exhausted here.
Fujiwara throws a combination but comes up with nothing but fresh air.
Bellic has his takedown stuffed#CL2#
and Fujiwara holds on and brings the fighters into a clinch.
Bellic tries to take the fight to the ground by pulling guard but can't manage it.
#TD2#
Fujiwara jumps guard.
Bellic stopping the sweep attempt from Fujiwara.
Bellic trying to control but Fujiwara is working from the bottom.
Fujiwara has Bellic pulled in close to control his posture. #T2##SUB2#
Fujiwara looking for submissions from the bottom here. Moving his hips around, possibly looking for an armbar.
#SUB2#
Fujiwara is throwing his legs up, looking for submissions. Bellic is aware though and is defending well.
Bellic is just sitting in guard, looking to avoid any submissions.
It looks like the ref is thinking about a standup.
Fujiwara trying to strike off his back.
#REF3#
The referee has stepped in and called for a break in the action. We'll restart on the feet.
Fujiwara with a lazy takedown attempt
and Bellic counters with a kick to the head that grazes his opponent. Fujiwara is lucky that one didn't land flush. #T3#
Bellic shoots in but no luck this time.
Bellic shoots in for a takedown but Fujiwara shows good takedown defense there and keeps this one on the feet.
Fujiwara misses with a low kick as Bellic jumps back.
Bellic appears to be looking for a counter takedown.
Fujiwara tries to drive through with a takedown attempt but Bellic defends well and Fujiwara ends up having to push Bellic into the ropes where they will battle it out in the clinch.#CL#
Bellic gets a clinch. #BC#
Bellic breaks the clinch.
A telegraphed takedown attempt from Bellic is defended easily by Fujiwara.
Bellic tries for a takedown but Fujiwara circles away easily#CL2#
and Fujiwara counters by moving into the clinch. #T4#
Bellic misses with a punch to the body.
Bellic is trying to pull guard but Fujiwara turns him against the ropes and we stay in the clinch.#BC2#
Fujiwara's corner calls for him to break the clinch, which he does.#CL2#
Fujiwara instigates a clinch.
Fujiwara tries to circle away but Bellic has him pinned against the ropes.#TD2#
Fujiwara jumps guard.
Fujiwara controls Bellic momentarily but Bellic frees himself.
Bellic wants to get up but he can't break Fujiwara's closed guard. He needs to be careful trying to break the legs open, as he's open to submissions here.
Boooooooooooooooooooo!!! God, this has been a terrible round. Come on you two, sort yourselves out!
Bellic stands up and looks to throw the legs aside to pass to side control. Fujiwara swivels though and keeps the full guard.
And that is the end of the round. The fighters go back to their corners.
Kyoto Fujiwara showed his class in that round. I'd imagine he'll take it on all the scorecards.
That's time! Bellic's corner gives him a slap on the ass as he gets ready to fight. Ladies and gentlemen, this is the final round!#R3#
Bellic tries to score a power double leg takedown but Fujiwara sees that one coming and sprawls well. That will dishearten Bellic somewhat.
Bellic throws a low kick but his opponent is out of range.
Bellic displays good takedown defense there as he swats away a double leg from Fujiwara.
Bellic wants to clinch.
Roman Bellic is looking to throw some combinations by the looks of things.
We've had a slow start to the round here - hopefully the action picks up.#CL2#
Fujiwara gets a clinch.
Fujiwara takes a big intake of breath there - he's definitely tired.#T1##BC2#
Fujiwara manages to break the clinch.
Fujiwara stuffs a takedown. It's all about dictating where the fight takes place and Fujiwara wants it to stay on the feet.
Nice sprawl there from Bellic as Fujiwara shoots in.#CL2#
Fujiwara gets a clinch. #BC2#
Fujiwara breaks from the clinch.
Fujiwara moves out of range of the strikes.
Bellic shoots in and drives through. Fujiwara sprawls well.
That's three failed takedown attempts in the round for Roman Bellic. That's going to take a lot out of him.
Fujiwara fails with a takedown attempt.
Bellic tries to clinch but Fujiwara moves out of range.
Fujiwara wants to counter the offense by Bellic and move into the clinch position.#T2#
Fujiwara displays good takedown defense there as he swats away a double leg from Bellic.
Bellic tries to clinch but is not successful on this occasion.
Bellic fails with a rather predictable takedown attempt.
Fujiwara fakes high and shoots in for a takedown but Bellic avoids it really well and circles away.
Roman Bellic is winning the standup battle so far.
Bellic tries to shoot in for a takedown. He's got hold of a leg but Fujiwara swivels and escapes.
Bellic fails with an attempt to clinch.
Nice takedown defense from Bellic. No joy for Fujiwara on that attempt. #T3#
Fujiwara shoots in but doesn't get the takedown
and Bellic counters with a three punch combination, finished off with a leg kick. Nice work.
Bellic misses with a body kick.
Fujiwara is looking for the big counter here.#TD#
Bellic shoots in from a long way out. He's driving through with the takedown attempt and he eventually gets it, landing in Fujiwara's guard.

Fujiwara is edging up against the ropes. He's using the ropes to get back to his feet. Nice work there - the fighters are clinched. #TD2#
Fujiwara manages to pull guard. Let's see whether he can land a sub off his back.
Fujiwara wants to hit a sweep here but Bellic passes into full mount! Oh no, disaster for Fujiwara there!
The crowd are loving this. Great action here.
Bellic tries to control but Fujiwara wriggling away.
The fighters are trapped in the ropes so we're going to have a reposition here. The ref calls for a break and repositions the fighters in the center of the ring.#T4#
Fujiwara is wriggling around trying to escape.
Bellic trying to control but Fujiwara is having none of it. #SU#
Bellic stands up from the dominant position, so we're back on the feet.
The crowd thankful this round is nearly over.
Bellic moves into range and throws a lovely three punch combination.
And that's the end of the fight!
That was a close round. You could make an argument for either fighter but I would give it to Roman Bellic.
I think Bellic has won this one but let's see what the judges have to say. Over to the ring announcer for the scorecards.
Ladies and gentlemen, after 3 rounds of action, we go to the scorecards for a decision.
Judge Hirohito Nitta scores the fight for Roman Bellic!
Judge Yukihiro Yamamoto scores the fight for Kyoto Fujiwara!
Judge Shigeki Fujiwara scores the fight for Roman Bellic!
Roman Bellic wins by split decision! |
|
|
|
|
|
|