|
Play
by Play - Fighter's Fight Commentary
|
Event:
TOF 88
Date: Mar 15, 2024 |
#R1#
Yogpeeth scores with a jab to the body.
Yogpeeth blocks a leg kick.
Yogpeeth misses with a hook. Karlsson ducked under it nicely.
A decent looking cross lands there for Yogpeeth.
Yogpeeth throws an overhand right that lands on Karlsson's shoulder, as Karlsson tries to avoid the shot.
Karlsson is looking for a counter combo.
Yogpeeth throws a leg kick
and Karlsson counters with a lovely straight right hand!
Karlsson throws a leg kick but Yogpeeth sees it coming and moves out of range.
Yogpeeth throws a head kick but Karlsson moves out of range.
Yogpeeth throws a series of punches but Karlsson moves out of range.
We've had a slow start to the round here - hopefully the action picks up.
Yogpeeth connects with an inside leg kick.
Karlsson lands a two punch combo.
Karlsson cracks Yogpeeth with a good jab.
This is a great period of action - very entertaining stuff!
Karlsson swings wildly with a couple of big hooks
#CL2#
and Yogpeeth counters by clinching up. #T1#
Karlsson is trying to break the clinch but Yogpeeth has him pressed against the cage.
Yogpeeth doesn't land with the attempted body shot.
Yogpeeth throws a punch but it's blocked by Karlsson. #BC#
Karlsson breaks the clinch.
A head kick misses from Yogpeeth.
Karlsson throws a big counter combination but Yogpeeth scrambles out of danger and avoids any damage.
Yogpeeth throws a body kick but he was well out of range there.
Yogpeeth lands a leg kick and bounces back out of range.
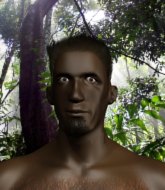
Rudra Yogpeeth seems to be the more aggressive standup fighter in this bout.
Yogpeeth misses with a kick to the body.
#CL#
Karlsson takes the fight into the clinch.
Yogpeeth swings away with an uppercut that misses.
Karlsson tries to throw a body punch but Yogpeeth avoids it by throwing Karlsson back against the cage. #BC#
Karlsson's corner calls for him to break the clinch, which he does.
Yogpeeth takes a punch right to his stomach. That took the wind out of him momentarily.#T2#
Yogpeeth throws a jab when Karlsson was well out of range.
Karlsson goes for a spinning back kick but it misses.
Yogpeeth follows through with a counter body kick but it doesn't land.
Yogpeeth throws a quick inside leg kick.
Yogpeeth throws a shot from downtown. Karlsson moves away and avoids it.
Karlsson is looking to counter punch.
We've been told by Karlsson's head coaches at Heavy Metal that he's been working on his takedown defense in preparation for this fight.#CL2#
Yogpeeth gets in close and instigates a clinch.
Karlsson blocks a couple of punches on the inside.
Yogpeeth misses with an elbow strike.
The crowd are loving this. Great action here.
A head punch on the inside from Yogpeeth fails to land.
Karlsson fails to land with a short punch on the inside.
Karlsson throws a head punch that misses.
An uppercut to the body lands inside from Karlsson.
Karlsson lands with a good tight uppercut to the head.
An uppercut to the body lands inside from Karlsson.
Yogpeeth blocks a couple of punches on the inside.
#BC#
Karlsson's corner calls for him to break the clinch, which he does.#T3#
Karlsson wants to clinch up but Yogpeeth keeps it at a distance.
Yogpeeth pivots, looking for a leg kick but Karlsson is out of range and Yogpeeth settles back down.
Yogpeeth connects with a looping left hand that seems like it dazed Karlsson momentarily.
Yogpeeth throws a head kick but Karlsson moves out of range.
Karlsson uses good footwork to get in and out and land a nice right hand before Yogpeeth has time to react.#ROC#Yogpeeth is rocked!#CUT#It looks like Rudra Yogpeeth has been cut.
Karlsson scores with a body shot.
Yogpeeth is still on wobbly legs! Can Karlsson finish him?
Yogpeeth looks winded!
Karlsson ducks down and throws a hook to the body.
Yogpeeth ducks into an uppercut from Karlsson and that's knocked him out cold! This one is all over!
Ladies and gentlemen, after 3:36 of round 1, we have a winner by way of KO (Punch). Jonas Karlsson!
During a confident post fight interview, Jonas Karlsson thanked all his fans. He seemed very genuine when describing how motivated his fans keep him. |
|
|
|
Event:
TOF 64
Date: Dec 24, 2023 |
#R1#
Yogpeeth is looking to chop away at Mendoza's legs.
Yogpeeth looks to have improved his striking defense since last time we saw him fight.
Mendoza steps to his left, right into the path of a big body kick from Yogpeeth. That one must have hurt.
Mendoza is a painfully thin specimen of a man. You do wonder whether a good body kick would snap him clean in two.
Mendoza throws a hook to the body but it doesn't connect.
Mendoza is looking to clinch.
Mendoza scores with a jab. Yogpeeth acknowledges it with a nod of the head.
Yogpeeth misses with a hook. Mendoza ducked under it nicely.
Mendoza moves out of range as Yogpeeth throws a body kick.
Yogpeeth getting the better of the striking in that exchange.
Yogpeeth misses with a half-hearted attempt at a head kick.
A head kick misses from Yogpeeth.
We've had a slow start to the round here - hopefully the action picks up.
Yogpeeth throws a head kick that looked like it stung.
#CUT#It looks like Carlos Mendoza has been cut.
Mendoza tries to check a leg kick but that clearly hurt him.
Yogpeeth throws a sloppy head kick and Mendoza moves out of range easily.
Mendoza staying out of range there.
Mendoza fails with a takedown attempt.
Yogpeeth swung with a counter right hand that didn't connect.#T1#
Yogpeeth throws an overhand right that lands on Mendoza's shoulder, as Mendoza tries to avoid the shot.
Yogpeeth ducks down and throws a hook to the body but Mendoza moves away.
Mendoza takes a big uppercut there. He seems a bit wobbly but no, he's OK.
The crowd cheers as Yogpeeth lands an impressive looking overhand right. Mendoza doesn't seem phased though.
Mendoza takes a jab right on the kisser.
Yogpeeth chopping away at his opponent's legs.
Yogpeeth lands a glancing blow to the side of Mendoza's head.#CL2#
Mendoza closes the distance and clinches.
Mendoza lands a right uppercut that snaps the head of Yogpeeth backwards.
A short right from Mendoza on the inside.
An uppercut on the inside fails to land for Mendoza.
Yogpeeth blocks a knee to the body. He'll have a nicely bruised forearm in the morning.
The crowd are loving this. Great action here.#TD2#
Mendoza pulls guard effortlessly. #T2#
Yogpeeth engaging in some classic timewasting tactics.
Yogpeeth trying to control the position from guard on top but Mendoza is wriggling around, looking for whatever he can. #SUB2#
Mendoza looking for submissions off his back, moving his hips, looking for an opening.
Yogpeeth stands up and looks to throw the legs aside to pass to side control. Mendoza swivels though and keeps the full guard. #SUB2#
Mendoza isolates an arm and boxes in a triangle. Yogpeeth stacks Mendoza on his neck as he steps over and passes to the side. He's now in a much more dominant position where he can look to do some serious damage. Nice move by Yogpeeth!
Mendoza is not content to let Yogpeeth control the position. #T3#
Mendoza wants to control but Yogpeeth postures up.
Yogpeeth misses with an attempted head punch from side control.
Mendoza is trying to improve his position.
Mendoza is being controlled here.
Mendoza felt the need to train up his defensive grappling in the buildup to the fight. Presumably he was expecting to be in a difficult position like this, so let's see if he can get out of it.
Mendoza trying his best to control but Yogpeeth has mounted him.
Yogpeeth punching from mount but Mendoza doing a good job of avoiding damage.
Mendoza is trying to escape the mount.
Yogpeeth lands with some vicious ground and pound - can Mendoza hang on?#T4#
Mendoza manages to regain half guard. Good work.
The referee calls for the fighters to work.
Mendoza has his hands clasped together around Yogpeeth's back. He's all about the action.
Yogpeeth with a momentary lay and pray from half guard.
Mendoza is looking to improve his position.
Yogpeeth lands strikes from half guard.#T5#
Yogpeeth is trying to control the action in half guard but Mendoza is working away on the bottom, looking perhaps to get back to full guard.
Yogpeeth controlling the action here.
Mendoza tries to roll over but Yogpeeth keeps him under control.
Yogpeeth performing his best blanket impression for a moment. #SUB2#
Mendoza is working on a guillotine. He's managed to get to full guard and he's really squeezing tight! Yogpeeth is tapping! Great win for Mendoza!
Ladies and gentlemen, after 5:48 of round 1, we have a winner by way of Submission (Guillotine). Carlos Mendoza!
After winning the bout, Carlos Mendoza thanked all his fans and promised he'd do even better in his next fight. The crowd seemed to love his humility. |
|
|
|
Event:
TOF 56
Date: Nov 26, 2023 |
#R1#
Beocca ducks under a wild hook from Yogpeeth.
Yogpeeth scores with a hook to the body. Beocca takes a step back and tries to catch his breath.
Yogpeeth connects with a nice looking jab.
#CUT2#It looks like Sir Beocca has been cut.
Yogpeeth misses with a body punch
and Yogpeeth takes a counter punch right on the button for his troubles.
Yogpeeth moves out of range as Beocca strikes.
A looping hook to the body misses from Yogpeeth. Beocca does a little dance to reset his feet.
Beocca is looking to counter punch.
Yogpeeth looks to land a right hand but Beocca moved out of range.
Beocca throws a big counter combination but Yogpeeth scrambles out of danger and avoids any damage.
A head kick misses from Yogpeeth.
An attempted straight right counter from Beocca misses the target.
Yogpeeth throws a lazy body kick
and Beocca counters with a crisp hook to the side of the head.
We've had a slow start to the round here - hopefully the action picks up.
Yogpeeth throws a right hand that misses
and Beocca counters with a low kick, right behind Yogpeeth 's knee.
Beocca misses with a few strikes there.
Beocca throws a jab but it's blocked by Yogpeeth. #T1#
Yogpeeth tries a switch kick but it misses it's target.
Yogpeeth lands with a nice body punch.
Yogpeeth bobs and weaves well there to avoid the strikes.
Yogpeeth tries to score with a low kick but Beocca moves his leg out of the way.
Yogpeeth shapes like he's going to throw a leg kick but settles back down.
Yogpeeth misses with a straight right.
Rudra Yogpeeth seems to be the more aggressive standup fighter in this bout.
Yogpeeth throws a body punch but Beocca moves out of range.
Yogpeeth lands a slapping body shot.
Beocca blocks a leg kick.
Beocca looks to have improved his striking defense since last time we saw him fight.
Yogpeeth scores with a punch to the head.
Yogpeeth throws a head kick but Beocca moves out of range.
A telegraphed right hand from Yogpeeth misses the target. #T2#
A head kick misses from Yogpeeth.
Yogpeeth missing with a left hand there. Beocca was out of range so wasted energy throwing that one.
Beocca throws a shot from downtown. Yogpeeth moves away and avoids it.
Yogpeeth just misses with a punch to the body.
Yogpeeth scores with a leg kick.
A head kick misses from Yogpeeth.
Yogpeeth swings for the body but Beocca moves out of range.
The fans in attendance giving it up for the two fighters, who have really let it all hang out in the last minute or so!
Beocca avoids a low kick by using good footwork.
It looked like Beocca wanted to counter with a hook but didn't fully commit.
Yogpeeth closes the distance and lands a one-two.
Yogpeeth lands a nice looking body shot.
Beocca walks straight into an uppercut. Luckily it didn't land flush.#T3#
Beocca looks to land a right hand but Yogpeeth moved out of range.
Yogpeeth ducks down and throws a hook to the body but Beocca moves away.
Beocca thows a leg kick but Yogpeeth checks it
and Yogpeeth counters with a thumping low kick.
A lazy body kick from Yogpeeth
enabling Beocca to counter with a crisp jab.
Jab from Beocca .
Beocca moves out of range of the body kick.
Beocca looks to land a combination but Yogpeeth avoids it well.
Yogpeeth is looking to land body kicks.
Beocca on the wrong end of a nice jab.
Yogpeeth swings and misses with a hook to the body.
Beocca throws a head kick that misses. #T4#
Yogpeeth throws an off balance right hand
and Beocca cracks him with a counter punch right on the button.#CUT#It looks like Rudra Yogpeeth has been cut.
Beocca blocks a leg kick.
Beocca fails with an attempt to clinch.
Yogpeeth looks to throw a body kick
and Beocca counters with a stiff right hand.
The crowd are loving this. Great action here.
Yogpeeth lands with a good body shot.
Yogpeeth misses with a shot to the body
and Beocca counters with a crisp right that sends Yogpeeth to the canvas! Beocca follows up with punches from the mount and this one is all over!
Ladies and gentlemen, after 4:34 of round 1, we have a winner by way of TKO (Strikes). Sir Beocca !
An out of breath Sir Beocca thanked his loyal fans in his post fight interview, giving them credit for his success over the course of his career. |
|
|
|
Event:
TOF 48
Date: Oct 28, 2023 |
#R1#
Nielson throws a big shot that misses.
Nielson lands a nice shot that snaps Yogpeeth's head back.
Yogpeeth throws a head kick but Nielson moves out of range.
Nielson swings and misses with a shot to the body
and Nielson takes a counter punch right on the button for his troubles.
Yogpeeth looks to throw a body kick
and Yogpeeth takes a counter punch right on the button for his troubles.
Yogpeeth fakes with a right hand and throws a good leg kick, right into the thigh. That had to hurt Nielson.
Nielson throws a body punch but Yogpeeth moves out of range.
Nielson misses with an uppercut
and Yogpeeth counters with a nice leg kick.
Yogpeeth fakes high and swings low for a body shot but Nielson manages to avoid it.
Nielson takes an uppercut right on the jaw but it doesn't phase him.
Yogpeeth thows a left - swing and a miss! #CL2#
Nielson drives through and clinches with Yogpeeth against the cage.
Yogpeeth doesn't land with the attempted body shot.
Nielson tries to land a shot to the body but it's blocked.
We can't be sure of the tactics at this early stage but we have heard that Nielson has been working on his takedowns a lot in the buildup to the fight and we can only assume he's going to look to take this to the mat.
We've seen a great period of action over the last minute or so - credit to both fighters for going all out!
A short right hand to the side of the head by Yogpeeth.#T1#
Still in the clinch, Nielson scores with a nice short uppercut.
Nielson blocking some punches.
Nielson tried to land a shot to the body but connects with Yogpeeth's elbow.
Nielson avoiding damage as Yogpeeth throws knees to the body.
Yogpeeth misses with the head strike.
Nielson blocking some punches.
Nielson goes for a takedown in the clinch but Yogpeeth prevents it.
Nielson misses with the head strike.
Nielson throws a punch but it's blocked by Yogpeeth.
Yogpeeth swings away with an uppercut that misses.
Yogpeeth working on landing some head shots here - that one got through nicely.
Nielson misses with a punch to the body.
Yogpeeth misses with a shot to the kidneys.
A nice left hand lands by Yogpeeth.
#T2#
Nielson misses with some punches.
Yogpeeth takes a shot to the head.
An uppercut on the inside fails to land for Yogpeeth.
A nice right hand lands inside from Yogpeeth.
Nielson has a couple of punches blocked by Yogpeeth.
This is a great period of action - very entertaining stuff!
Nielson is looking for a takedown.
Nielson misses with a hook from the clinch.
Nielson tries to take the fight to the ground by pulling guard but can't manage it.
Rudra Yogpeeth has stuffed three takedown attempts in the round now. That's going to take a lot out of Patrick Nielson.
Nielson tries a body shot but Yogpeeth blocks it.
Nielson throws a head punch that misses.
Both guys are working to get underhooks.
Nielson blocks a couple of punches on the inside.
Nielson blocks a couple of punches on the inside.
Nielson lands with a short head shot on the inside.
A shot in the inside from Nielson. #T3#
Nielson misses with a punch on the inside.
Nielson can't find room to land a body shot as Yogpeeth controls the action.
#TD2#
Nielson jumps guard.
#SUB2#
Nielson is looking for a guillotine. You can't force these things though and Yogpeeth defends well.#SUB2#
Nielson is working actively off his back, looking to secure an arm or perhaps work for a triangle.
The fighters are pressed up against the cage, both looking to find a bit of space to work.
Yogpeeth missing there with some ground and pound from the guard. #SUB2#
Yogpeeth got a little sloppy there for a moment and Nielson has worked his way into a loose triangle - can he finish it?! No, Yogpeeth has managed to get both his arms back between Nielson's legs - danger averted.
Yogpeeth has to be careful here, sitting in the guard of a superior BJJ player.
Yogpeeth distracts Nielson with his right hand and drops a big elbow with his other arm.#T4##SUB2#
Nielson has a loose triangle. He'll be looking to tighten that up but Yogpeeth can see exactly what he's planning and manages to posture up and free himself.
Yogpeeth trying to control the position from guard on top but Nielson is wriggling around, looking for whatever he can.
Yogpeeth scoring with some ground and pound.
Nielson keeping moving, preventing Yogpeeth from controlling successfully.
Nielson avoiding any damage from the ground and pound.
Yogpeeth trying to control but Nielson is working from the bottom.
Nielson lands a beautiful sweep and he's now moved into his opponent's guard.#REVB##T5#
Nielson missing there with some ground and pound from the guard. #SUB#
Yogpeeth is working actively off his back, looking to secure an arm or perhaps work for a triangle.
Yogpeeth can't do much from the bottom at the moment, as Nielson controls the pace.#SUB#
Yogpeeth has his foot on Nielson's thigh. He's trying to push off and get in position for a triangle, I think. Nielson works his way back into a safe position though.
Nielson pressing down on his opponent's thigh, looking to pass guard. Yogpeeth is keeping the position for now.
Nielson is looking to work some ground and pound but Yogpeeth has wrist control.#SUB2#
Nielson drops back for a leg! It's a sloppy attempt though and Nielson jumps back into guard quickly, to retain the dominant position.
Nielson is stalling in the full guard. #T6#
There's not a lot going on here and the crowd are letting the fighters know they're not willing to tolerate a lack of action.
Nielson is working the ground and pound from guard. He might want to try advancing position though to get more of an impact.
Nielson postures up and lands some nice ground and pound. #SUB#
Nielson got a little sloppy there for a moment and Yogpeeth has worked his way into a loose triangle - can he finish it?! No, Nielson has managed to get both his arms back between Yogpeeth's legs - danger averted.
Nielson throwing strikes but missing.
Nielson tries to free his leg and advance position but Yogpeeth is retaining full guard. #SUB#
Yogpeeth has his foot on Nielson's thigh. He's trying to push off and get in position for a triangle, I think. Nielson works his way back into a safe position though.#T7#
Yogpeeth is trying to hold Nielson in close to prevent damage but Nielson has managed to pass into half guard.
Nielson takes advantage of the dominant position to land a couple of big hammer fists.
Nielson is figuring out what he wants to do next.
Nielson uses his free foot to push down on Yogpeeth's thigh. Eventually he works his other foot free and he's advanced to mount - this is trouble for Yogpeeth. #SUB2#
Nielson working to secure an arm triangle but it's not happening for him just yet.
Yogpeeth is looking to improve his position but Nielson isn't that keen on the idea.
Nielson lands a heavy elbow. #T8#
Yogpeeth is just holding on here. Nielson manages to take his back.
Nielson punishes Yogpeeth with strikes from the back mount.
Yogpeeth tries to escape the position.
#SUB2#
Nielson working for a choke but Yogpeeth is defending well.
Yogpeeth covering up well and avoiding damage.
Yogpeeth takes a big shot to the side of the head.
#T9##SUB2#
Nielson is looking for the choke from the back position but Yogpeeth is controlling his hands well.
Yogpeeth prevents Nielson from getting a body triangle.#SUB2#
Nielson patiently working for the choke. Which fighter will keep their nerve here?
Yogpeeth wants to control his opponent's hands but Nielson gets his hands free.
Yogpeeth is really stuck here.
Yogpeeth looks to control his opponent's hands but he's not mananging it at the moment.
Nielson is working the ground and pound here and the referee is taking a close look at Yogpeeth. He must escape soon or this one will be stopped.
Yogpeeth is defending well here and trying to improve his position.
Nielson tries to get the hooks in deep but Yogpeeth pushed the leg off.
And that is the end of the round. The fighters go back to their corners.
Patrick Nielson dominated that round.
The minute break is over - no more time for sponges and pep talks - back to the action!#R2#
Nielson bobs and weaves well there to avoid the strikes.
Nielson stuns Yogpeeth with a nice body shot, before stepping back out of range.
Nielson pulls out of a head kick attempt.
Nielson tries to work over Yogpeeth's front leg with a kick but Yogpeeth checks it.
Yogpeeth misses with a body kick.
Nielson scores with a nice head shot.
Yogpeeth throws a monster uppercut resembling something out of street fighter but it doesn't land.
Nielson now looks to counter with a shot at the body.
Yogpeeth does a little shimmy and throws a leg kick. The leg kick missed by a considerable margin though, making him look a little bit silly for doing the shimmy.
Yogpeeth looks to have improved his striking defense since last time we saw him fight.
Yogpeeth avoids the head kick by Nielson.
Nielson fails in his attempt to clinch.
We've had a slow start to the round here - hopefully the action picks up.
Yogpeeth throws a leg kick but Nielson sees it coming and checks it nicely.
Yogpeeth keeping his hands up high there, blocking the jab from Nielson.
It looked like Yogpeeth was trying to counter with a body shot coming off that last attack from Nielson.
Yogpeeth lands a nice shot that snaps Nielson's head back.
Yogpeeth lands a leg kick that knocks Nielson off balance momentarily.#T1##CL2#
Nielson pushes Yogpeeth up against the cage in a clinch.
Yogpeeth gets double underhooks to prevent a takedown attempt from Nielson.
Nielson throws a punch but it's blocked by Yogpeeth.
Nielson misses with a punch to the body.
Yogpeeth works for underhooks and lands a body shot in the process.
Yogpeeth prevents a takedown attempt there.
Yogpeeth lands with a light punch inside.
Yogpeeth misses with a punch to the body.
An uppercut on the inside fails to land for Nielson.
Nielson lands a shoulder strike.
The fighters are pressed against the cage, as the pace of the fight slows.
Nielson has been the more effective fighter overall so far.#T2#
Yogpeeth swings wildly with an uppercut but Nielson uses good head movement to avoid it.
Nielson is looking to take this one to the mat.
Rudra Yogpeeth has stuffed three takedown attempts in the round now. That's going to take a lot out of Patrick Nielson.
Yogpeeth fails to land with a short punch on the inside.
Yogpeeth's head jolts backwards as he takes an uppercut right on the button!
Yogpeeth throws a head punch that misses.
Nielson is trying to pull guard but being pressed up against the cage enables Yogpeeth to keep the fight standing.
Nielson is trying to drag Yogpeeth to the mat but Yogpeeth just about manages to keep his footing. He used the cage to his advantage there.
Nielson misses with a hook to the ribs.
A head punch on the inside from Nielson fails to land. #T3#
Yogpeeth lands a hook to the side of the head.
Nielson blocks an elbow strike from Yogpeeth.
A short right hand to the side of the head by Nielson.
Nielson struggles to land a body shot inside as Yogpeeth controls his hands.
Nielson drops down for a takedown but doesn't get it.
Nielson prevents a body shot from Yogpeeth.
Nielson lands with a short head shot on the inside.
Yogpeeth misses with a hook from the clinch.
Yogpeeth doesn't land with the attempted body shot.
#TD2#
Nielson decides to pull guard.
Nielson has the superior BJJ but he's also working some ground strikes into his gameplan.#SUB2#
Nielson working from the bottom, still in full guard. He's managed to get a loose triangle. Yogpeeth doesn't seem to be doing much to defend here, obviously he feels comfortable in the position. Yogpeeth manages to throw the legs off his shoulder and he's back into guard - no problem.
Nielson trying to control the position.
#T4#
Yogpeeth tries to free his leg and advance position but Nielson is retaining full guard.
Nielson seems keen to control rather than go for a submission, at least for now. #SUB2#
Nielson had isolated an arm as going for a kimura. Yogpeeth defends it easily.
Nielson trying to keep a closed guard but Yogpeeth is proving a slippery customer.
Yogpeeth trying to control but Nielson is working from the bottom. #T5#
Nielson trying to control the position.
Yogpeeth being controlled here momentarily. #REF3#
The referee has stepped in and called for a break in the action. We'll restart on the feet.
Oooooooooooh, not good. A low kick from Yogpeeth lands where it shouldn't have, right in the... well, you know what he did? He kicked him in the penis. He's injured, injured bad. The referee sends both fighters to their corners and Nielson has 5 minutes to recover. He's OK now though... a thumbs up from Nielson and we're back underway with a touch of gloves.
Yogpeeth misses with a looping right.#CL2#
Nielson clinches with his opponent.
Nielson throws a head punch that misses.
A head punch on the inside from Yogpeeth fails to land.
Yogpeeth throws a hook to the body. More of an arm punch but it's all scoring with the judges.
Nielson prevents a body shot from Yogpeeth. #T6#
Nielson blocks a couple of punches on the inside.
Yogpeeth misses with some punches.
Yogpeeth struggles to land a body shot inside as Nielson controls his hands.
Yogpeeth pushes Nielson back against the cage and lands a hook to the side of the head.
Yogpeeth swings wildly with an uppercut but Nielson uses good head movement to avoid it.
Yogpeeth working aggressively here.
Nielson tries to pull guard but Yogpeeth holds him up against the cage and eventually Nielson drops back down to his feet.
Nielson misses with a punch to the body.
Yogpeeth misses with a short punch on the inside.
Yogpeeth misses with a punch on the inside.
Yogpeeth lands a hook to the side of the head.
Nielson blocks a couple of punches on the inside.
#T7#
Nielson has a body lock and is looking for a takedown. Yogpeeth is bouncing around trying to prevent the takedown and somehow he has indeed managed to stay on his feet.
Yogpeeth takes a shot to the head. #TD2#
Nielson successfully pulls guard.
Nielson keeping moving, preventing Yogpeeth from controlling successfully. #SUB2#
Nielson is working actively off his back, looking to secure an arm or perhaps work for a triangle.
Yogpeeth controls the pace of the fight for a moment.
Yogpeeth wants to control from the top but Nielson keeps moving.
Yogpeeth is really struggling to control Nielson but he's trying to hold on to the position.#T8#
Yogpeeth chips away with some ground and pound.
Patrick Nielson has got the better of the ground game so far.
Nielson has his hands on Yogpeeth's head, controlling the position.
Yogpeeth with a couple of shots to the head there. Not particularly brutal.#SUB2#
Nielson is looking for a triangle but Yogpeeth pushes his legs off easily.
Yogpeeth tries to free his leg and advance position but Nielson is retaining full guard. #SUB2#
Yogpeeth is posturing up here but Nielson has hold of an arm and he's gone for an armbar! Yogpeeth tries to roll out but it's too tight and Yogpeeth has to tap! Slick submission there by Nielson!
Ladies and gentlemen, after 9:57 of round 2, we have a winner by way of Submission (Armbar). Patrick Nielson!
Patrick Nielson decided to go for the less than humble approach in his post fight interview, telling everyone how he is going to conquer the world. The crowd seemed to like it when really that sort of approach could have gone either way. |
|
|
|
Event:
CFC 579
Date: Aug 12, 2023 |
#R1#
Brewer slips in close and lands a nice hook before moving back out of range.
Yogpeeth throws a low kick, looking for Brewer's leg but Brewer calmly moves out of range.
Good leg kick by Yogpeeth.
Brewer on the receiving end of a decent leg kick there by Yogpeeth. Yogpeeth obviously looking to wear him down.
Yogpeeth ducks under a wild hook from Brewer.
A low kick from Brewer is predictable there
and Yogpeeth counters with a quick right hand to the jaw.#CUT2#It looks like Leroy Brewer has been cut.
Yogpeeth takes a big uppercut there. He seems a bit wobbly but no, he's OK.
#CL2#
Brewer tries to keep at a distance but Yogpeeth has taken the fight into the clinch.
Brewer prevents the takedown attempt.
#BC#
Brewer breaks the clinch.
Yogpeeth misses with a wild combination.
Yogpeeth uses good head movement to avoid the hook from Brewer.
Yogpeeth ducks under an overhand right and circles away with a smile on his face.
Brewer lands with a right hand.
The crowd cheering loudly, showing their appreciation for the quality fight we're seeing here.
Yogpeeth swings and misses with a hook to the body.
Nice jab there from Brewer.
Yogpeeth looking to land some kicks to the body here.
Brewer throws a front kick that sends Yogpeeth stumbling back into the cage.
Brewer is using his reach advantage well here, landing the more effective single shots from range.#T1#
Yogpeeth throws a hard body shot but it just misses.
Yogpeeth is the aggressor but that punch slipped nicely by Brewer.
Yogpeeth looks to score with a jab to the body but Brewer is just out of range.
Brewer jabbing away but nothing is landing.
Yogpeeth steps to the side to avoid the strikes from Brewer.
Brewer lands a pitter patter jab to the forehead of his opponent.
Yogpeeth fakes with the hands and throws a leg kick but Brewer is out of range.
Sloppy strikes from Yogpeeth. Those never looked like landing.
It looked like Brewer was trying to counter with a body shot coming off that last attack from Yogpeeth.
Yogpeeth moves forwards but Brewer connects with a nice, crisp jab.
Yogpeeth misses with a body shot. Nice footwork from Brewer.
Yogpeeth misses the jab.
Brewer misses with an uppercut. Yogpeeth saw that one coming.
A looping hook to the body misses from Yogpeeth. Brewer does a little dance to reset his feet.
Both fighters circling a little - Brewer finishes the exchange with a kick to the body.
Brewer lunges at Yogpeeth with a hook that half lands and is half blocked by Yogpeeth's hand.
Yogpeeth keeping at a good range here, avoiding a leg kick.
Brewer throws the kick towards the body but Yogpeeth avoids it.
A little jabbing left from Yogpeeth on the counter but it doesn't find it's target.#T2#
Yogpeeth slips under a jab from Brewer.
Yogpeeth wants to counter with a clinch but Brewer pushes him away.
Wooooo! Give it up for these two warriors! They are putting on a show!
Yogpeeth throws a hard body shot but it just misses.
A nice leg kick from Yogpeeth, right into the meat of the thigh.
The sound of bone on bone echoes around the arena as Brewer checks a leg kick.
Brewer tries to work over Yogpeeth's front leg with a kick but Yogpeeth checks it.
Yogpeeth tries a switch kick but it misses it's target.
Brewer lands a powerful looking uppercut that connected with his opponent's jaw.
Brewer looks to have improved his striking defense since last time we saw him fight.
Yogpeeth throws a body shot but no joy.
Yogpeeth moves out of range of the body kick.
Brewer lands a really nice looking cross but Yogpeeth seems unphased.
Brewer punishes Yogpeeth's body with a nice straight punch.
Yogpeeth tries to close the distance and clinch but Brewer swats him to one side with an open hand palm strike and circles away.
Brewer lunges in with swinging rights and lefts but Yogpeeth circles away quickly and effectively.
Yogpeeth tries to counter with a clinch but Brewer shakes him off and moves away.
Brewer throws a hook to the body but it doesn't connect.
Brewer misses with a straight left.
A looping hook to the body misses from Yogpeeth. Brewer does a little dance to reset his feet.
Oooooooooooh, not good. A low kick from Yogpeeth lands where it shouldn't have, right in the... well, you know what he did? He kicked him in the penis. He's injured, injured bad. The referee sends both fighters to their corners and Brewer has 5 minutes to recover. He's OK now though... a thumbs up from Brewer and we're back underway with a touch of gloves.#T3#
Brewer thuds his shin into the meat of Yogpeeth's side.
Yogpeeth walks straight into a jab right on the nose. That one stung - he's blinking and trying to clear his head.
Yogpeeth misses with a low kick as Brewer jumps back.#CL2#
Yogpeeth moves into range and clinches up with Brewer.
Yogpeeth prevents a body shot from Brewer.
A short right hand to the side of the head by Brewer.#ROC#Yogpeeth is rocked!
Brewer lands on the inside with an uppercut.
Yogpeeth is still on wobbly legs! Can Brewer finish him?
A head punch on the inside from Yogpeeth fails to land.
A left hand lands to the body for Brewer.
A right hook to the body lands for Brewer.
Yogpeeth takes a shot to the head.
Good body shot from Brewer.
Yogpeeth looks winded!
Brewer lands a big right hand that drops Yogpeeth! The killer instinct kicks in and Brewer finishes his opponent with a series of strikes from mount. A dominating finish by Brewer!
Ladies and gentlemen, after 3:39 of round 1, we have a winner by way of TKO (Strikes). Leroy Brewer! |
|
|
|
Event:
CFC 571
Date: Jul 15, 2023 |
#R1#
An inside leg kick from Yogpeeth misses.
Crusher on the receiving end of a decent leg kick there by Yogpeeth. Yogpeeth obviously looking to wear him down.
Rudra Yogpeeth seems to be the more aggressive standup fighter in this bout.
Crusher moves into range and lands a nice leg kick.
Crusher misses with a head kick.
Yogpeeth misses with a looping right.
Yogpeeth looks to score with a jab to the body but Crusher is just out of range.
Yogpeeth throws a sloppy head kick
enabling Crusher to counter with a crisp jab.
A cross from Yogpeeth lands.
Yogpeeth moves in looking to clinch but Crusher pushes him off.
It appears Crusher was looking to counter with a kick there.
Crusher blocks a jab.
Crusher half committed to a counter leg kick.
Yogpeeth takes a kick to the body and keeps moving.
Yogpeeth jabs Crusher right on the nose. Crusher blinks but takes it well.
Crusher misses with a leg kick
and Yogpeeth counters with a lovely straight right hand!
Crusher definitely looks more muscular than last time we saw him fight.
This is a great period of action - very entertaining stuff!
Yogpeeth tries to clinch up but Crusher circles away and keeps his distance.
Nice defenses there by Yogpeeth.#T1#
Crusher works Yogpeeth's body with a nice hook.
Crusher throws a right hand that Yogpeeth ducks under and follows up with a left that Yogpeeth also avoids with ease.
Crusher throws a leg kick that is checked
and Yogpeeth counters with a huge uppercut, hook combination that drops Crusher! The ref has seen enough - he's dived in to stop the fight! Brutal strikes by Yogpeeth!
Ladies and gentlemen, after 1:14 of round 1, we have a winner by way of TKO (Strikes). Rudra Yogpeeth! |
|
|
|
Event:
TWGC 39 (265lbs, D4): Finals - Round 1
Date: May 24, 2023 |
This TWGC bout is 1 fifteen minute round in the heavyweight division. Introducing today's competitors. In the red corner, competing out of New York, with a TWGC record of 2 wins and 0 losses; Rudra Yogpeeth! And in the blue corner, fighting out of Las Vegas, with a TWGC record of 2 wins and 1 losses; Whole Nutz!
The judges for this bout are Jonathan Paton, Steve Montenegro and Chad Campbell.
The fighters bow as they face eachother in the middle of the mat and we are under way.#CL#
Yogpeeth pushes Nutz up against the cage in a clinch.
Nutz fails to pull guard.
#TD2#
Nutz pulls guard successfully.
Yogpeeth is frustrating his opponent with some stalling tactics from top position.
Yogpeeth tries to free his leg and advance position but Nutz is retaining full guard.
Yogpeeth is intent on slowing down the pace of the fight, simply looking to control.
Nutz working a defensive guard here.
We've had a slow start to the round here - hopefully the action picks up.#SUB2#
Nutz working for submissions but it's allowed Yogpeeth to get to half guard.
The referee calls for the fighters to work.
#T1#
Nutz is holding on to half guard well.
Nutz is trying to maintain the position but Yogpeeth is very close to passing his half guard.
Yogpeeth controlling the pace. #T2#
Yogpeeth's ground tactics aren't going to win him many fans. Let's hope he's got fireworks for us if he gets back to his feet because he's not doing much on the ground.
Further stalling from Yogpeeth.
Nutz is looking to regain full guard. Not this time though. #SUB2#
Nutz actively working from the bottom here.#T3#
Yogpeeth seems content to maintain position for now, rather than mounting any offense.
Nutz is looking for a sweep. Yogpeeth is wise to his cunning plan and keeps the top position.
Yogpeeth is controlling the pace.
Nutz trying to control from the bottom.
#T4#
Nutz is trying to avoid being dragged into an even worse position than he's already in but Yogpeeth is staying active.
Yogpeeth trying to control the pace.
Yogpeeth is thwarting Nutz's attempts to control the position.
The fighters are battling for position here. Nutz manages to regain full guard. Nice work. #T5##SUB2#
Nutz is active off his back here, looking for submissions.
Nutz is trying to control the position from the bottom.
Yogpeeth tries to free his leg and advance position but Nutz is retaining full guard. #SUB2#
Nutz working for a triangle but Yogpeeth defends it easily.
Yogpeeth is just sitting in guard, looking to avoid any submissions. #T6#
Nutz is adopting a defensive guard.
Nutz keeping full guard, as Yogpeeth tries to pass. #SUB2#
Nutz is looking for a triangle but Yogpeeth pushes his legs off easily.
#SUB2#
Nutz working for submissions but it's allowed Yogpeeth to get to half guard.
#T7#
Nutz tries to roll over but Yogpeeth keeps him under control.
Nutz is looking to control Yogpeeth's leg but it's slowly edging free. Can Nutz avoid being mounted?
Nutz is looking to regain full guard. Not this time though. #T8#
Nutz has no desire to be mounted, so is trying to control. Yogpeeth is working away from the top position though.#SUB2#
Nutz is looking to sinch up a guillotine here but Yogpeeth pulls his head out easily.
Yogpeeth perhaps working for something from half guard, or maybe not. It looks like he's just sitting there.
Nutz is trying to control but can't.
Yogpeeth is looking to advance position but Nutz won't allow it. #T9#
Nutz wants to control but Yogpeeth is keeping busy and won't allow it.
The fighters are pressed up against the cage, both looking to find a bit of space to work.
Nutz gets full guard.#SUB2#
Yogpeeth avoids a guillotine attempt easily.
Yogpeeth wants to control from the top but Nutz keeps moving.
Yogpeeth sitting in guard here, content to control. #T10#
Nutz is trying to control the position from the bottom.
Yogpeeth's corner is telling him to maintain position.#SUB2#
Nutz looking for submissions from the bottom here. Moving his hips around, possibly looking for an armbar.
Yogpeeth passes into half guard.
Yogpeeth is controlling the pace.
#T11#
Nutz manages to get to full guard.
#T12#
Nutz keeping full guard, as Yogpeeth tries to pass.
Nutz not looking particularly offensive just at the moment.
Nutz is working an open guard here, looking to improve his position. No doubt that will leave him open to counters but at least he's being more offensive.
Yogpeeth pressing down on his opponent's thigh, looking to pass guard. Nutz is keeping the position for now.
Nutz being controlled here, momentarily. #T13#
Yogpeeth won't allow Nutz to sweep him here.
Yogpeeth tries to free his leg and advance position but Nutz is retaining full guard.
Yogpeeth showing good wrestling skills to control the position. #SUB2#
Nutz looking for a guillotine here but Yogpeeth defends easily.
Yogpeeth trying to pass the guard but can't manage it just yet. #T14#
Yogpeeth is working hard here to advance position.
There's a bit of a scramble here and now Nutz is on top in guard.
Score +2 for sweep to guard / half guard: Yogpeeth (0) vs (2) Nutz
Yogpeeth keeping moving, preventing Nutz from controlling successfully.
Boooooooooooooooooooo!!! God, this has been a terrible round. Come on you two, sort yourselves out!
And that's the end of the fight!
Nutz wins on points by 2 to 0.
An out of breath Whole Nutz thanked his loyal fans in his post fight interview, giving them credit for his success over the course of his career. |
|
|
|
Event:
TWGC 39 (265lbs, D4): Montreal Qualifier - Round 2
Date: May 16, 2023 |
This TWGC bout is 1 fifteen minute round in the heavyweight division. Introducing today's competitors. In the red corner, competing out of Rio de Janeiro, with a TWGC record of 1 wins and 0 losses; Robert Cleese! And in the blue corner, fighting out of New York, with a TWGC record of 1 wins and 0 losses; Rudra Yogpeeth!
The judges for this bout are Ian Loll, Trevor Gratis and William Peck.
The fighters connect hands in the middle of the mat and we are under way.#CL2#
Yogpeeth gets a clinch. #TD2#
Yogpeeth tightens his grip and picks Cleese up, before dumping him to the ground. Cleese manages to land in guard. Score +2 for takedown into guard / half guard: Cleese (0) vs (2) Yogpeeth
Yogpeeth works a leg free and moves into half guard.
Cleese gets full guard.
Cleese bucks up whilst keeping hold of a body lock, managing to reverse the position. Now he's in top in Yogpeeth's guard. Score +2 for sweep to guard / half guard: Cleese (2) vs (2) Yogpeeth
Yogpeeth has a butterfly guard looking to sweep but Cleese has passed into side control.
Score +3 for passing guard: Cleese (5) vs (2) Yogpeeth
Cleese taking a break here but Yogpeeth is having none of it and regains half guard.
Cleese is keen to just control but Yogpeeth is a slippery customer.
We've had a slow start to the round here - hopefully the action picks up.#SUB#
Cleese is looking for an arm triangle, whilst trying to pass to side control. Yogpeeth doesn't seem that keen to cooperate though. No luck this time Cleese. #SUB#
Cleese seems to be working for a kimura but Yogpeeth defends the submission attempt.#T1#
Yogpeeth is looking to improve his position.
Cleese is looking to stall here but Yogpeeth recovers full guard.
Yogpeeth has his hands on Cleese's head, controlling the position. #T2#
Cleese wants to pass the guard but Yogpeeth is keeping the position.
Cleese looking to sit in guard and control but Yogpeeth gets the butterfly guard and sweeps. He's now in the guard on the top. Score +2 for sweep to guard / half guard: Cleese (5) vs (4) Yogpeeth
Cleese trying to keep a closed guard but Yogpeeth is proving a slippery customer.
Yogpeeth must be cautious of submissions here, given that his opponent has the superior Jiu Jitsu.
Yogpeeth tries to free his leg and advance position but Cleese is retaining full guard.
Cleese is working an open guard here, looking to improve his position. No doubt that will leave him open to counters but at least he's being more offensive.#T3#
Yogpeeth postures up.
The ref warns both fighters not to hold the cage as they work up against the meshing.
Yogpeeth is intent on slowing down the pace of the fight, simply looking to control.
Cleese wants to sweep here but Yogpeeth controlling him for the moment.
Cleese controls Yogpeeth momentarily but Yogpeeth frees himself.
Yogpeeth slows down the pace of the fight, as he sits in guard.
Let's hope that Yogpeeth has the urge to step up the pace any second now because for the last 15 or 20 seconds he's just been holding on tight.#T4#
Yogpeeth looking to pass the guard.
Cleese trying to control the position.
Cleese can't do much from the bottom at the moment, as Yogpeeth controls the pace.
Yogpeeth pressing down on his opponent's thigh, looking to pass guard. Cleese is keeping the position for now. #T5#
Yogpeeth showing good wrestling skills to control the position.
Cleese will need to keep those long limbs tucked in whilst he's on the ground, to prevent any submissions.
Yogpeeth forces his way into half guard.
Yogpeeth takes a deep breath and rests his weight momentarily on top of his opponent, to control the position.
Cleese won't allow Yogpeeth to pass to mount.
Yogpeeth controlling the action here.
Cleese is looking to improve his position.
#T6#
Still in half guard, Yogpeeth seems content to control.
Cleese wants to improve his position but Yogpeeth is controlling well.
Yogpeeth seems content to maintain position for now, rather than mounting any offense.
Cleese tries to get to full guard but Yogpeeth has control of the leg.
The fighters are battling for position here. Cleese manages to regain full guard. Nice work.
Cleese is working an open guard here, looking to improve his position. No doubt that will leave him open to counters but at least he's being more offensive.
Cleese wants to control but Yogpeeth passes easily into half guard.
#T7#
Cleese wants to improve his position but Yogpeeth is controlling well.
The fighters are pressed up against the cage, both looking to find a bit of space to work.
Cleese trying to control but Yogpeeth postures up.
Yogpeeth controlling the action here.#T8#
Yogpeeth tries to pass to full mount but Cleese defends it.
Yogpeeth trying to control the pace.
Cleese trying to control from the bottom.
Yogpeeth stalling. #T9#
Yogpeeth prevents Cleese from improving his position.
Cleese trying to hold on to Yogpeeth's head to control him but Yogpeeth postures up.
Cleese is looking to improve his position.
Yogpeeth controlling the pace.
Cleese wants to improve his position but Yogpeeth is controlling well.
Cleese tries to regain full guard. Instead though, Yogpeeth has advanced to mount. Uh oh. Score +3 for passing guard: Cleese (5) vs (7) Yogpeeth#T10#
Yogpeeth avoids the attempt from Cleese to control.
Cleese can't escape the position.
Cleese tries to hold on but Yogpeeth pushes him away.
Yogpeeth looking to control and managing it successfully.
Cleese is looking to get to half guard.
Yogpeeth looking to control and managing it successfully. #T11#
Cleese is writhing around trying to get back to his feet.
Yogpeeth controlling from the full mount.
Cleese wants to improve position but instead he's given up his back. Score +3 for taking back: Cleese (5) vs (10) Yogpeeth
Yogpeeth is hanging on to Cleese's back as he tries to escape.
You know, I was talking to some of our celebrities at ringside tonight and they were split right down the middle on who was going to win this fight.
Yogpeeth is continuing to stall.#T12#
Cleese is defending well here and trying to improve his position.
Cleese just trying to survive but Yogpeeth is wriggling into a better position, looking to finish.
Yogpeeth keeps control of the position as Cleese tries to break free.
I would not like to be Cleese right now.
#T13#
Cleese trying to control the action but Yogpeeth just sinks the hooks in.
Yogpeeth keeps control of the position as Cleese tries to break free.
Cleese turns into Yogpeeth and is now in his guard.
Score +2 for sweep to guard / half guard: Cleese (7) vs (10) Yogpeeth#T14#
Yogpeeth pulls Cleese in close to prevent any damage.
Cleese is looking to pass into half guard but Yogpeeth pushes him away with his feet and jumps on top - now Yogpeeth is in guard. Score +2 for sweep to guard / half guard: Cleese (7) vs (12) Yogpeeth
Yogpeeth stands up and looks to throw the legs aside to pass to side control. Cleese swivels though and keeps the full guard.
Yogpeeth sitting in guard, not really doing much.
Boooooooooooooooooooo!!! God, this has been a terrible round. Come on you two, sort yourselves out!
Yogpeeth won't allow Cleese to sweep him here.
And that's the end of the fight!
Yogpeeth wins on points by 12 to 7. |
|
|
|
Event:
TWGC 39 (265lbs, D4): Montreal Qualifier - Round 1
Date: May 15, 2023 |
This TWGC bout is 1 fifteen minute round in the heavyweight division. Introducing today's competitors. In the red corner, competing out of New York, with a TWGC record of 0 wins and 0 losses; Rudra Yogpeeth! And in the blue corner, fighting out of London, with a TWGC record of 0 wins and 1 losses; Crazy Boco!
The judges for this bout are Alec Ball, Robert Douchet and Trevor Gratis.
The official calls the fighters to the middle and the contest is under way.#CL#
Yogpeeth moves into the clinch.
Boco gets underhooks to prevent Yogpeeth's takedown attempt.
Yogpeeth is working on a leg, looking for a takedown but Boco is defending well.
Boco goes for a takedown in the clinch but Yogpeeth prevents it.
Yogpeeth is working for takedown but Boco is calmly controlling the position for now.
That's three failed takedown attempts in the round for Rudra Yogpeeth. That's going to take a lot out of him.
Yogpeeth wants to take the fight to the mat but Boco manages to get underhooks and keep the fight in the clinch.
Yogpeeth gets underhooks to prevent Boco's takedown attempt.
Yogpeeth looking for a takedown.
Boco has a body lock and is looking for a takedown. Yogpeeth is bouncing around trying to prevent the takedown and somehow he has indeed managed to stay on his feet.
Boco drops down for a takedown but doesn't get it.
Boco has Yogpeeth pressed up against the cage and is working for takedown. Yogpeeth manages to improve position though and keeps the fight standing.
Yogpeeth drops down looking for an ankle pick but Boco pulls his leg out and moves away.
#CL#
Yogpeeth moves into the clinch.
We've had a slow start to the round here - hopefully the action picks up.
Boco goes for a takedown attempt but Yogpeeth pushes him away and we're back to fighting at a distance.
#CL#
Yogpeeth clinches up against the cage.#T1#
Boco is defending well against a takedown attempt.
Yogpeeth is defending well against a takedown attempt.
Yogpeeth prevents a takedown attempt there.
Yogpeeth is pressed up against the cage. Boco has hold of a leg and is looking to drag Yogpeeth down to the mat. Yogpeeth avoids the attempt though and has circled away. We're back to striking at a distance. #CL#
Yogpeeth closes the distance and presses his opponent up against the cage.
Yogpeeth tries for a takedown but Boco manages to get underhooks.
Yogpeeth tries for a takedown. No joy.
Yogpeeth goes for a takedown in the clinch but Boco prevents it.
Boco can't get the takedown.
Yogpeeth is looking for a takedown.
Yogpeeth has dropped down and is looking to force the takedown but it's defended by Boco after a bit of a struggle.
Boco has dropped down and is looking to force the takedown but it's defended by Yogpeeth after a bit of a struggle.
Yogpeeth tries for a takedown. No joy.
Yogpeeth has dropped down and is looking to force the takedown but it's defended by Boco after a bit of a struggle.
Yogpeeth is looking for a takedown.
Boco gets double underhooks to prevent a takedown attempt from Yogpeeth.
#TD#
Yogpeeth has picked Boco up - he's going for a ride! Yogpeeth dumps his opponent to the mat with a thud and settles into half guard. Score +2 for takedown into guard / half guard: Yogpeeth (2) vs (0) Boco
Yogpeeth is breathing heavily.#T2##SUB2#
Boco looking for submissions off his back.
Boco wants to get back to full guard.
Yogpeeth trying to control the pace. #T3#
Boco is looking to improve his position.
#SUB2#
Boco looking for submissions from an awkward position here.
Yogpeeth is figuring out what he wants to do next.#T4#
Boco wants to control but Yogpeeth is keeping busy and won't allow it.
The ref warns both fighters not to hold the cage as they work up against the meshing.
Boco is trying to control but Yogpeeth passes into side control!
Score +3 for passing guard: Yogpeeth (5) vs (0) Boco
Boco looking for a sweep but Yogpeeth has passed into full mount! Oh no! Score +2 for reaching mount: Yogpeeth (7) vs (0) Boco
Yogpeeth content just to control the position here.
Boco tries to lock up and control but Yogpeeth gives him a forearm to the face and pushes him away.
Boco sneaks a leg back under and regains half guard and is working straight away to try and get back to guard. He hasn't managed just yet though.
Yogpeeth tries to pass the half guard into mount. Boco knows what he's doing though and prevents the attempt. #T5#
Boco trying to control here but he's found himself mounted! Oh no!
Score +3 for passing guard: Yogpeeth (10) vs (0) Boco
Boco tries to lock up and control but Yogpeeth gives him a forearm to the face and pushes him away.
Yogpeeth controlling from mount.
Boco is desperately trying to get back to half guard.
Boco has given up his back.
Score +3 for taking back: Yogpeeth (13) vs (0) Boco
Boco is trying to break free.
Yogpeeth controls the position.#T6#
Yogpeeth continues to stall.
Boco tries to escape the position.
Boco is very frustrated here, being controlled quite effectively by Yogpeeth.
#T7#
Boco looks to control his opponent's hands but he's not mananging it at the moment.
Yogpeeth keeps control of the position as Boco tries to break free.
Boco just trying to survive but Yogpeeth is wriggling into a better position, looking to finish.
Yogpeeth controls the position.#T8#
Boco wants to escape the position.
Yogpeeth has the hooks sunk in and you can see the will to fight slowly draining out of Boco's body.
Boco wants to control his opponent's hands but Yogpeeth gets his hands free.
Boco tries to escape the position.
Yogpeeth controls the action.
Yogpeeth has controlled the position for a good 20 seconds, which will no doubt be starting to frustrate his opponent.#T9#
Yogpeeth has the hooks in. Boco is trying to push off one leg but he has to do so cautiously to avoid being submitted.
Yogpeeth not allowing Boco to control his hands.
Yogpeeth just keeping the dominant position. He can't wait too long though, otherwise the referee will stand them back up.
Yogpeeth's ground tactics aren't going to win him many fans. Let's hope he's got fireworks for us if he gets back to his feet because he's not doing much on the ground.#T10#
Boco can't escape the position.
Yogpeeth avoiding Boco 's attempts to control his hands.
Yogpeeth really has the hooks in deep now - there seems like no escape for Boco.
Boco looks to control his opponent's hands but he's not mananging it at the moment.
I would not like to be Boco right now.
#T11#
Boco wants to control his opponent's hands but Yogpeeth gets his hands free.
Yogpeeth biding his time, controlling Boco.
Yogpeeth keeps control of the position as Boco tries to break free.
Boco is very frustrated here, being controlled quite effectively by Yogpeeth.
#T12#
Further stalling from Yogpeeth.
Boco is in bad spot here.
Yogpeeth avoiding Boco 's attempts to control his hands.
Boco tries to break free.
Yogpeeth controlling the position well here. Boco rolled but Yogpeeth kept the hooks locked in and stayed in the dominant position.
#T13#
Yogpeeth gets his hands free as Boco looks to control.
Good control from Yogpeeth.
Boco tries to break free.
Yogpeeth slows the pace down here. Having a little breather whilst he's in a dominant position, looking to rest and regain some energy, ready to go for the finish.
More hug and hope from Yogpeeth.#T14#
This is a sustained period of stalling by Yogpeeth.
Yogpeeth keeps control of the position as Boco tries to break free.
The fighters are pressed up against the cage, both looking to find a bit of space to work.
Yogpeeth controlling from the back.
Boco tries to escape the position.
I would not like to be Boco right now.
Boooooooooooooooooooo!!! God, this has been a terrible round. Come on you two, sort yourselves out!
Yogpeeth has the hooks in. Boco is trying to push off one leg but he has to do so cautiously to avoid being submitted.
And that's the end of the fight!
Yogpeeth takes the fight on points by 13 to 0. |
|
|
|
|
|
|