|
Play
by Play - Fighter's Fight Commentary
|
Event:
TWGC 29 (265lbs, D4): Sydney Qualifier - Round 2
Date: Apr 18, 2020 |
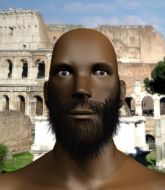
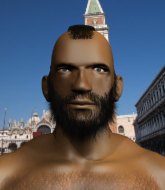
Coming up we have a heavyweight Tycoon World Grappling Championship rules bout between Aaron Sainsbury (ranked 4408 p4p, 0 weight class) and Tres Sulvar (ranked 6905 p4p, 154 weight class). The crowd giving both fighters a great reception on their way into the arena. That's good to see.
This TWGC bout is 1 fifteen minute round in the heavyweight division. Introducing today's competitors. In the red corner, competing out of Sydney, with a TWGC record of 1 wins and 0 losses; Aaron Sainsbury! And in the blue corner, fighting out of Tokyo, with a TWGC record of 1 wins and 0 losses; Tres Sulvar!
The judges for this bout are Winston Howard, Bruno Hogan and Skip Squint.
The fighters bow as they face eachother in the middle of the mat and we are under way.
Sainsbury is looking to clinch.
Sainsbury looks exhausted already! Oh dear, he should have come in in better shape than this!
Sulvar misses with a takedown attempt - Sainsbury sprawls well and throws a nice strike on the way out which just misses.

Sainsbury has Sulvar up against the cage in a clinch.
Sulvar jumps guard but Sainsbury turns him against the cage and keeps the fight standing.
Sulvar tries for a takedown but Sainsbury manages to get underhooks.
Aaron Sainsbury has stuffed three takedown attempts in the round now. That's going to take a lot out of Tres Sulvar.
Sainsbury is pressed up against the cage. Sulvar has hold of a leg and is looking to drag Sainsbury down to the mat. Sainsbury avoids the attempt though and has circled away. We're back to striking at a distance.
Sainsbury stuffs the takedown attempt from Sulvar. Sulvar gets slowly back to his feet.

Sulvar feints and then dives in with a takedown. That was a long way out but the feint bought him enough time to close the distance and complete the takedown. Now we'll play guard for a bit and see who can get the better of that position. Score +2 for takedown into guard / half guard: Sainsbury (0) vs (2) Sulvar
We've had a slow start to the round here - hopefully the action picks up.
Sulvar wants to pass the guard but Sainsbury is keeping the position.
Sulvar pushes down on Sainsbury's leg and manages to get into half guard.

That's one minute gone in the round.
Sulvar frees up his trapped foot and advances to mount. Score +3 for passing guard: Sainsbury (0) vs (5) Sulvar

Sulvar working for a submission but Sainsbury is keeping him at bay.
Sulvar with some aggressive grappling here. He's looking for submissions here, rather than waiting for the opportunity to counter.
Sulvar is working on an americana here. Ooh, that looks pretty nasty! Nope, Sainsbury has managed to escape the submission attempt.
Sulvar jumps to the side looking to secure the arm triangle
. Ooooh, that looks tight
Sainsbury is gargling but he's managed to escape! Nice work there by Sainsbury and Sulvar has given up the dominant position trying to land that submission.
The ref warns both fighters not to hold the cage as they work up against the meshing.
Sainsbury prevents Sulvar from improving position.
We've been hearing good reports from Sainsbury's training camp. Apparently he has been rolling around with some good quality BJJ practitioners and has been sharpening his skills. Let's see if that has an impact on the fight today.
Sulvar tries for a kimura. Not really close to a finish though.

That's two minutes gone in the round.
Sulvar is trying to land an Americana. He has the arm isolated but Sainsbury is keeping cool and he's avoided the danger for now.
Sulvar is trying to land an Americana. He has the arm isolated but Sainsbury is keeping cool and he's avoided the danger for now.
Sulvar tries to advance to mount but can't.
Sainsbury is trying to get back to half guard.

That's three minutes gone in the round.
Sulvar tries to move into full mount but can't pass Sainsbury's legs.
Sulvar thinks about going for a far side armbar but bails out and retains the dominant position instead.
Sulvar tries to move to mount but Sainsbury blocks the move with his legs.
Sulvar wants to work for a kimura but he's foiled early by Sainsbury, who protects the arm well.
Sulvar tries for a kimura but Sainsbury is defending well.
Sainsbury prevents Sulvar from moving into mount.

That's four minutes gone in the round.
You can see the frustration on Sainsbury's face, being in this tough position on the bottom.
Sainsbury prevents Sulvar from moving into mount.
Sulvar is trying to land an Americana. He has the arm isolated but Sainsbury is keeping cool and he's avoided the danger for now.
Sulvar wants to work for a kimura but he's foiled early by Sainsbury, who protects the arm well.
Sainsbury prevents Sulvar from moving into mount.
Sulvar is looking for a kimura. He might have it! No, Sainsbury has escaped the position, nice work there.
Sulvar tries to move into full mount but can't pass Sainsbury's legs.

That's five minutes gone in the round.
Sulvar advances nicely into full mount. Score +2 for reaching mount: Sainsbury (0) vs (7) Sulvar
Sulvar wants to finish this one by submission but Sainsbury is holding onto his waist, trying to prevent any attacks from Sulvar.
Sulvar looks like he's working for a submission but he's not found anything just yet.
Sulvar with some aggressive grappling here. He's looking for submissions here, rather than waiting for the opportunity to counter.
Sulvar working for a guillotine from mount but Sainsbury is in no mood to give up.
Sainsbury wants to control but Sulvar is having none of it.

That's six minutes gone in the round.
Sulvar wants to finish this one by submission but Sainsbury is holding onto his waist, trying to prevent any attacks from Sulvar.
Sulvar is working on an americana here. Ooh, that looks pretty nasty! Nope, Sainsbury has managed to escape the submission attempt.
Sulvar is in full mount, looking to secure a guillotine but Sainsbury is surviving well by controlling Sulvar's body position as best he can.
Sainsbury wants to hold on but Sulvar pushes him away.
Sulvar looking to secure an arm triangle but Sainsbury defends it well.
Sulvar has control of Sainsbury's right arm, working for a kimura. It's a bit of a token attempt though and Sainsbury regains control of the situation pretty easily.
Sulvar working for a guillotine from mount but Sainsbury is in no mood to give up.

That's seven minutes gone in the round.
Sulvar working to secure an arm triangle but it's not happening for him just yet.
The fighters are pressed up against the cage, both looking to find a bit of space to work.
Sulvar looking for a guillotine from mount but Sainsbury is having none of it.
Sulvar has control of Sainsbury's right arm, working for a kimura. It's a bit of a token attempt though and Sainsbury regains control of the situation pretty easily.
Sainsbury is writhing around trying to get back to his feet.
Sulvar looking to secure an arm triangle but Sainsbury defends it well.
Sulvar looking for an armbar but decides to keep the dominant position instead.

That's eight minutes gone in the round.
Sulvar is working for a guillotine from mount but Sainsbury frees his head quite easily.
Sainsbury defends a decent attempt at a guillotine from Sulvar.
Sulvar has control of Sainsbury's right arm, working for a kimura. It's a bit of a token attempt though and Sainsbury regains control of the situation pretty easily.
Sulvar wants to finish this one by submission but Sainsbury is holding onto his waist, trying to prevent any attacks from Sulvar.
Sulvar has hold of Sainsbury's left arm, perhaps looking for a submission. The two fighters tussle over control of the isolated limb and Sainsbury manages to get his arm back to his side and away from danger.

That's nine minutes gone in the round.
Sulvar looking to secure an arm triangle but Sainsbury defends it well.
Sulvar is working for a guillotine from mount but Sainsbury frees his head quite easily.
Sulvar looking for a guillotine from mount but Sainsbury is having none of it.
Sulvar working for a submission but Sainsbury is keeping him at bay.
Sulvar working to secure an arm triangle but it's not happening for him just yet.
Sulvar has control of Sainsbury's right arm, working for a kimura. It's a bit of a token attempt though and Sainsbury regains control of the situation pretty easily.

That's ten minutes gone in the round.
Sulvar wants to finish this one by submission but Sainsbury is holding onto his waist, trying to prevent any attacks from Sulvar.
Sulvar looking for a guillotine from mount but Sainsbury is having none of it.
Sulvar working to secure an arm triangle but it's not happening for him just yet.
Sulvar is working on an americana here. Ooh, that looks pretty nasty! Nope, Sainsbury has managed to escape the submission attempt.
Sulvar goes for an armbar but Sainsbury turns quickly into his guard - lovely anticipation from Sainsbury. Score +2 for sweep to guard / half guard: Sainsbury (2) vs (7) Sulvar

That's eleven minutes gone in the round.
Sulvar working for submissions but it's allowed Sainsbury to get to half guard.
Sulvar works his way to full guard. Good work.
Sulvar escapes his hips to the side and looks to be working for an armbar. Sainsbury gives him a little smile and shakes his head. No chance.
Sulvar is looking to sweep but instead, Sainsbury has passed into half guard.
Sulvar felt the need to train up his defensive grappling in the buildup to the fight. Presumably he was expecting to be in a difficult position like this, so let's see if he can get out of it.
Sulvar is looking for a sweep. Sainsbury is wise to his cunning plan and keeps the top position.

That's twelve minutes gone in the round.
Sulvar is pressing down on Sainsbury's left leg trying to get back to full guard. He's managed it.
Sulvar tries to land a sweep but no joy.
Sulvar bucks up whilst keeping hold of a body lock, managing to reverse the position. Now he's in top in Sainsbury's guard. Score +2 for sweep to guard / half guard: Sainsbury (2) vs (9) Sulvar
Sulvar slips effortlessly into side control - very nice. Score +3 for passing guard: Sainsbury (2) vs (12) Sulvar
Sulvar tries for a kimura. Not really close to a finish though.
Sulvar tries to advance to mount but can't.

That's thirteen minutes gone in the round.
Sulvar thinks about going for a far side armbar but bails out and retains the dominant position instead.
Sainsbury tries to bench press Sulvar off him but Sulvar keeps the position.
Sainsbury prevents Sulvar from improving position.
Sulvar working hard here to secure a kimura but he's not really in the right position for it.
Sainsbury tries to work a leg under to get back to half guard but Sulvar wriggles his own leg back out and remains in side control.

That's fourteen minutes gone in the round.
Sulvar is trying to land an Americana. He has the arm isolated but Sainsbury is keeping cool and he's avoided the danger for now.
Sulvar tries to advance to mount but Sainsbury denies him.
Sulvar is looking to finish here, going for an Americana. Sainsbury knows the correct defense though, so he's OK.
Sulvar advances nicely into full mount. Score +2 for reaching mount: Sainsbury (2) vs (14) Sulvar
Boooooooooooooooooooo!!! God, this has been a terrible round. Come on you two, sort yourselves out!
Sainsbury defends a decent attempt at a guillotine from Sulvar.
Sulvar looking for a guillotine from mount but Sainsbury is having none of it.
Sulvar looks like he's working for a submission but he's not found anything just yet.
And that's the end of the fight!
Sulvar wins on points by 14 to 2. |
|
|
|
Event:
TWGC 29 (265lbs, D4): Sydney Qualifier - Round 1
Date: Apr 17, 2020 |
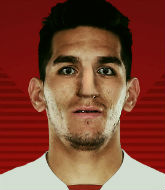
Coming up we have a heavyweight Tycoon World Grappling Championship rules bout between Tarik Kongo (ranked 4092 p4p, 150 weight class) and Aaron Sainsbury (ranked 4391 p4p, 0 weight class). Aaron Sainsbury looks lathargic as he enters the arena. Wake up son, you're about to have a fight!
This TWGC bout is 1 fifteen minute round in the heavyweight division. Introducing today's competitors. In the red corner, competing out of London, with a TWGC record of 0 wins and 0 losses; Tarik Kongo! And in the blue corner, fighting out of Sydney, with a TWGC record of 0 wins and 0 losses; Aaron Sainsbury!
The judges for this bout are Topper Green, Chris Dean and Ben Hemmingworth.
The fighters connect hands in the middle of the mat and we are under way.
Kongo moves in looking to clinch but Sainsbury pushes him off.
Sainsbury looks really tired already! That doesn't bode well for a good, competitive fight!
Kongo takes the fight into the clinch.
Sainsbury has double underhooks and is working for a body lock takedown. He's got it. The fighters land in half guard but Kongo regains guard immediately. Score +2 for takedown into guard / half guard: Kongo (0) vs (2) Sainsbury

Kongo has his foot on Sainsbury's thigh. He's trying to push off and get in position for a triangle, I think. Sainsbury works his way back into a safe position though.
Kongo working for a triangle but Sainsbury defends it easily.
Kongo has his foot on Sainsbury's thigh. He's trying to push off and get in position for a triangle, I think. Sainsbury works his way back into a safe position though.
We've had a slow start to the round here - hopefully the action picks up.
Kongo looking to control but Sainsbury passes into half guard.
My spies in Cozad MMA Sydney inform me that Sainsbury has been getting involved in the gym's BJJ sparring sessions. Let's see whether that pays dividends!
That's one minute gone in the round.
Kongo looking to work for a kimura from the bottom.
Kongo is trying to get back to full guard.
Kongo is looking to sinch up a guillotine here but Sainsbury pulls his head out easily.
Kongo is looking to control Sainsbury's leg but it's slowly edging free. Can Kongo avoid being mounted?
That's two minutes gone in the round.
Kongo looking to work for a kimura from the bottom.
Sainsbury wants to control but Kongo is keeping him busy.
The ref warns both fighters not to hold the cage as they work up against the meshing.
Sainsbury looks over to his corner - he wants some instructions but his corner are not responding.
That's three minutes gone in the round.
Kongo wants to control but Sainsbury is keeping busy.
Kongo is looking to regain full guard. Not this time though.
Sainsbury performing his best blanket impression for a moment.
Kongo wants to control but Sainsbury is keeping busy.
That's four minutes gone in the round.
Sainsbury prevents Kongo from improving his position.
Sainsbury is sneakily working for an arm triangle but Kongo sees it coming and defends easily.
Kongo actively working from the bottom here.
Kongo looking for submissions off his back.
That's five minutes gone in the round.
Kongo is looking to sinch up a guillotine here but Sainsbury pulls his head out easily.
Kongo looking to work for a kimura from the bottom.
Kongo has no desire to be mounted, so is trying to control. Sainsbury is working away from the top position though.
That's six minutes gone in the round.
Kongo is looking to improve his position.
Kongo wants to get back to full guard but Sainsbury has mounted him! Score +3 for passing guard: Kongo (0) vs (5) Sainsbury
Kongo is desperately trying to improve his position but Sainsbury has a good base and remains in mount.
Sainsbury controlling from mount.
That's seven minutes gone in the round.
Kongo is desperately trying to improve his position but Sainsbury has a good base and remains in mount.
Kongo has given up his back here.
Score +3 for taking back: Kongo (0) vs (8) Sainsbury
Kongo trying to control the action but Sainsbury just sinks the hooks in.
Kongo rolls, trying to escape but Sainsbury keeps control of the position.
Kongo wants to control his opponent's hands but Sainsbury gets his hands free.
That's eight minutes gone in the round.
Kongo tries to break free.
Kongo defending nicely against the rear naked choke attempt.
You can see the frustration on Kongo's face
He knows he is in trouble unless he improves his position sooner rather than later.
A bit of a pause in the action here. Sainsbury controlling the positon.
You can see the frustration on Kongo's face
He knows he is in trouble unless he improves his position sooner rather than later.
That's nine minutes gone in the round.
Kongo trying to control the position but Sainsbury manages to sink in the hooks.
Sainsbury is working for the choke. It looks like he might have got it... has he...? Yes! Kongo is tapping out! This one is all over!
Ladies and gentlemen, after 9:47 of round 1, we have a winner by way of Submission (RNC). Aaron Sainsbury! |
|
|
|
Event:
Quick Fight Championship
Date: Apr 08, 2020 |
#R1#
Dievski with a nice cross.
Sainsbury is looking to take this fight into the clinch.
Dievski closes the distance and lands a one-two.
Sainsbury on the wrong end of a nice low kick. He's acting like it's no big deal but he doesn't want to take many more of those.
Sainsbury misses the jab.
Dievski tries to counter by moving into the clinch but Sainsbury manages to circle out of the way.
Dievski lands with a good body shot.
Sainsbury throws a nice looking combination but Dievski bobs and weaves to avoid any damage.
Dievski tests Sainsbury's chin there with a solid looking shot.
The crowd cheers as Dievski lands an impressive looking overhand right. Sainsbury doesn't seem phased though.
Dievski ducks under a wild hook from Sainsbury.
Nice uppercut lands for Dievski. That snapped Sainsbury's head back.
The fans in attendance giving it up for the two fighters, who have really let it all hang out in the last minute or so!
Dievski scores with a punch to the gut of his opponent.
Sainsbury swings widly with a right hand
and Dievski makes him pay by landing a nice hook to the body before moving out of range.
Sainsbury takes one to the side of the head.
Dievski dips down and scores with a jab to the body.#T1#
Dievski on the wrong end of a decent looking cross there.
Dievski throws a monster uppercut resembling something out of street fighter but it doesn't land.
Dievski lands a nice hook to Sainsbury's body. Sainsbury takes it in his stride and looks to land his own strikes.
Dievski misses with a body shot. Nice footwork from Sainsbury.
Sainsbury is loading up here, looking for a big counter of his own.
Sainsbury moves out of range of the strikes.
Sainsbury is definitely looking for the counter takedowns here.#CL#
Dievski closes the distance and clinches.
Sainsbury wants to break the clinch but can't.
Sainsbury prevents a body shot from Dievski.
Sainsbury trying to stall but Dievski improves his position.
Dievski lands a body punch.
Sainsbury swings wildly with an uppercut but Dievski uses good head movement to avoid it.
Sainsbury drops down looking for an ankle pick but Dievski pulls his leg out and moves away.
Dievski thuds his right hand into Sainsbury's forehead from close range. That could be painful for both fighters.#T2#
Dievski connects with a looping right hand.
Sainsbury throws a combination but comes up with nothing but fresh air.
Dievski lands a jab.
Dievski throws a looping overhand right but Sainsbury ducks down to avoid it.
Fantastic stuff here - a very entertaining period of action, which has drawn cheers from the crowd.
Dievski lands a jab.
Zus Dievski seems to be the more aggressive standup fighter in this bout.
Sainsbury misses with a takedown attempt - Dievski sprawls well and throws a nice strike on the way out which just misses.
Sainsbury throws a head kick that misses.
Sainsbury uses some good footwork to avoid the body shot by Dievski.
Sainsbury on the wrong end of a nice jab.
Dievski blocks a head kick by Sainsbury.
Sainsbury looks winded!
A low kick from Sainsbury is predictable there
and Dievski counters with a good right hand that lands right on the jaw.#CL#
Dievski clinches up against the cage.
Dievski misses with a short punch on the inside.
Dievski lands punches inside but they're not really causing much damage. #T3#
The referee is keeping an eye on Dievski - much more stalling and he will separate the fighters.
Dievski is stalling here. The referee will be looking to step in if he doesn't pick up the pace.
Dievski throws a punch but it's blocked by Sainsbury.
Dievski tries to throw a body punch but Sainsbury avoids it by throwing Dievski back against the cage. #BC2#
Sainsbury breaks the clinch.
Dievski throws a shot to the body.
Dievski throws a body shot but no joy.
Dievski throws a low kick, looking for Sainsbury's leg but Sainsbury calmly moves out of range.
A countering left hand to the body from Sainsbury misses.
A looping hook to the body misses from Dievski. Sainsbury does a little dance to reset his feet.
Sainsbury lets it all go there with a big combo counter but none of the punches connected.
Dievski lands a body shot.
Dievski cracks Sainsbury with an open hand slap.
Dievski throws a half hearted mid kick.
Dievski looks to land a left hand but Sainsbury moved out of range nicely.
A nice side step and Sainsbury releases a counter shot to the body, but it doesn't find it's home.
Dievski throws a combination but it was largely blocked by Sainsbury. #T4#
Sainsbury tries to close the distance and clinch up against the cage but Dievski paws at him with a jab and circles away.
Dievski throws a shot from downtown. Sainsbury moves away and avoids it.
Dievski connects with a lovely jab that went straight through the gap between Sainsbury's hands.
A jab lands there for Dievski.
Sainsbury doesn't manage to clinch there - Dievski circles away.
We've seen a great period of action over the last minute or so - credit to both fighters for going all out!
Dievski fakes high and swings low for a body shot but Sainsbury manages to avoid it.
Sainsbury wants to clinch up but Dievski keeps it at a distance.
Sainsbury wants to clinch up but Dievski keeps it at a distance.
Sainsbury tries to clinch there but Dievski circles away.
Dievski is really peppering his opponent's head with punches.
Sainsbury takes a swing at Dievski's ribcage but misses.
Dievski lands with a cross to side of his opponent's head.#CL#
Dievski forces Sainsbury back against the cage and clinches.
Dievski lands a hook to the side of the head.#BC2#
Sainsbury breaks the clinch and we're back to striking at distance.
Sainsbury fails with a rather predictable takedown attempt.
And thats the end of the round the fighters go back to their corners.
Zus Dievski dominated that round.
The fighters get back to their feet, the hooter sounds and we're back to the action!
#R2#
Dievski stuffs a takedown. It's all about dictating where the fight takes place and Dievski wants it to stay on the feet.
Dievski lands a body shot.
Sainsbury looks for a takedown but Dievski sprawls well.
Dievski tries to counter by clinching up but Sainsbury breaks away and moves out of range.
Zus Dievski is winning the standup battle so far.
Dievski takes a swing at Sainsbury's ribcage but misses.
Sainsbury throws out a counter right but Dievski avoids it with no problem.
Dievski scores with a body shot.
Sainsbury moves out of range as Dievski throws a body kick.
Sainsbury steps in looking to clinch after the strikes miss from Dievski.
Dievski jabbing away but nothing is landing.
Aaron Sainsbury is looking to throw some combinations by the looks of things.
Dievski throws a body kick but he was well out of range there.
A nice side step and Sainsbury releases a counter shot to the body, but it doesn't find it's home.
Dievski wants to land a leg kick but Sainsbury is out of range.
Sainsbury doesn't fully commit to the body shot counter.
Dievski is really dominating this fight. Is there anything that Sainsbury can do to turn this around?
Sainsbury fails with an attempt to clinch.
We've had a slow start to the round here - hopefully the action picks up.
A combination from Sainsbury does no damage.
Sainsbury shoots in but doesn't get the takedown #CL#
and Dievski counters by moving into the clinch. Good anticipation by Dievski.
Zus Dievski has stuffed three takedown attempts in the round now. That's going to take a lot out of Aaron Sainsbury.
Dievski lands with a short punch from the clinch.
Sainsbury is breathing heavily.
Dievski is pressed up against the cage. Sainsbury has hold of a leg and is looking to drag Dievski down to the mat. Dievski avoids the attempt though and has circled away. We're back to striking at a distance. #T1##CL#
Dievski pushes Sainsbury up against the cage in a clinch.
A short body shot lands from Dievski as the two fighters clinch.
A short uppercut from Dievski.
A short right hand to the side of the head by Dievski.
A battle for position here, against the cage.
Dievski lands with a right to the head.
Sainsbury can't get the takedown.
#BC#
Dievski breaks the clinch and we return to the middle of the mat.
Sainsbury checks a leg kick.
Dievski throws a wild body kick that Sainsbury sees coming a mile off.
Sainsbury appears to be waiting to throw a counter punch to the body.
Dievski is moving around nicely and scores here with a single head shot.
Sainsbury tries to drive through with a takedown attempt but Dievski defends well and Sainsbury ends up having to push Dievski into the cage where they will battle it out in the clinch.
Sainsbury on the wrong end of an overhand right that came out of nowhere.
Dievski lands a vicious shot with the stealth of a sniper and the strength of a viper. Are vipers that strong? I can think of lots of things that are stronger than a viper - not many rhyme with sniper though.
#T2#
Dievski cracks a nice hook into Sainsbury's ribs.
We've seen a great period of action over the last minute or so - credit to both fighters for going all out!
Dievski lands a right hook to the body.
Dievski fakes and then throws a beautiful body shot. Sainsbury looks a bit winded and takes a step backwards to take a breath.
Sainsbury on the receiving end of a decent leg kick there by Dievski. Dievski obviously looking to wear him down.
Sainsbury drops his hands momentarily and Dievski takes advantage with a crisp shot to the head.
Sainsbury misses with a jab, cross combination.
Dievski swung with a counter right hand that didn't connect.
Dievski swings wildly with a hook that is half blocked by Sainsbury.
Dievski fakes a jab and scores with a low kick.
Dievski lands the left hand.
Sainsbury takes one on the chin but keeps coming.
#CL#
Dievski has closed the distance and engaged Sainsbury in a clinch.
Dievski gets double underhooks to prevent a takedown attempt from Sainsbury.
Sainsbury blocks a body shot from Dievski. #T3#
Dievski lands a shot to the body.
Sainsbury being controlled against the cage.#BC#
Dievski pushes off and circles away, back to the middle of the mat.
Dievski uses good footwork to get in and out and land a nice right hand before Sainsbury has time to react.
Dievski lands a leg kick that knocks Sainsbury off balance momentarily.
Dievski jabs Sainsbury right on the nose. Sainsbury blinks but takes it well.
Dievski blocks a jab.
Dievski lands an overhand right.
Sainsbury takes a big uppercut there. He seems a bit wobbly but no, he's OK.
Dievski tries to land with a swinging hook to the body but Sainsbury was well out of range. Poor timing from Dievski.
Sainsbury throws a nice looking combination but Dievski bobs and weaves to avoid any damage.
Dievski lands a straight punch to the body, keeping Sainsbury at a distance.
#CL#
Dievski closes the distance and pushes Sainsbury back into the cage.#T4#
Dievski scores with an uppercut up the middle.
This is a great period of action - very entertaining stuff!
Dievski throws a punch but it's blocked by Sainsbury.
Zus Dievski has scored more points in the clinch so far.#BC#
Dievski breaks the clinch.
Dievski throws a couple of head shots and lands with the final one - a decent hook, which struck Sainsbury on the side of the head.
Dievski slips in close and lands a nice hook before moving back out of range.
Sainsbury will need to tighten up his combinations if he doesn't want to gas himself out, swinging at thin air.
Sainsbury with poor footwork there. He got himself in a bit of a tangle, enabling Dievski to score with a decent uppercut.
Sainsbury has a pretty nasty looking mouse under his right eye.
Sainsbury on the wrong end of an overhand right that came out of nowhere.
A jab from Dievski finds it's way through Sainsbury's defenses.
Dievski fakes with a right hand and throws a good leg kick, right into the thigh. That had to hurt Sainsbury.
Dievski lands with a cross.
Dievski with a nice cross.#ROC#
Sainsbury is rocked!
Sainsbury takes a hook to the side of the head. I wonder if that's got his ears ringing.
And thats the end of the round the fighters go back to their corners.
Zus Dievski dominated that second round.
That's the end of the round. The referee orders the cornermen out of the cage so we can get back down to business. This is the final round!
#R3#
Dievski motions for Sainsbury to come forward. Dievski throws a leg kick but it misses it's target.
Sainsbury lets it all go there with a big combo counter but none of the punches connected.
Sainsbury is still on wobbly legs! Can Dievski finish him?
Sainsbury moves in looking to clinch but Dievski pushes him off.
Sainsbury seems to have recovered his senses.
Sainsbury slips under a jab.
Dievski's jab looks to have found its range, popping Sainsbury under the eye.
Dievski lands a beauty of a right hand that gets the crowd cheering.
Sainsbury tries to clinch but Dievski is having none of it.
Dievski throws a body kick that misses.
Sainsbury pivots as if he's going to throw a leg kick but stops half way.
Sainsbury has a takedown stuffed.
Dievski thuds his right hand into Sainsbury's forehead from close range. That could be painful for both fighters.
Sainsbury takes a big intake of breath there - he's definitely tired.
We've had a slow start to the round here - hopefully the action picks up.
Sainsbury tries to clinch but is not successful on this occasion.
Dievski misses with a body shot.
Dievski lands a nice hook to Sainsbury's body. Sainsbury takes it in his stride and looks to land his own strikes.
Sainsbury takes a jab on the nose there. A little bit of blood seems to be coming out. Hopefully that won't affect his breathing.
#T1#
Dievski's jab looks to have found its range, popping Sainsbury under the eye.
Dievski sizes up Sainsbury with a pawing jab and scores with a straight right down the middle.
Dievski sizes up Sainsbury with a pawing jab and scores with a straight right down the middle.
Dievski misses with a body shot. Nice footwork from Sainsbury.
Sainsbury tries to drive through with a takedown attempt but Dievski defends well and Sainsbury ends up having to push Dievski into the cage where they will battle it out in the clinch.#CL#
The fight moves into the clinch position.#BC#
Dievski pushes off and circles away, back to the middle of the mat.
Dievski connects with the punch.
Good standup being displayed there by Dievski as he connects with a hook.
Sainsbury tries to move into range but Dievski moves to the side and lands with a nice right hand.
Dievski uses good footwork to get in and out and land a nice right hand before Sainsbury has time to react.
Sainsbury walks straight into an uppercut. Luckily it didn't land flush.
The crowd cheering loudly, showing their appreciation for the quality fight we're seeing here.
Dievski jabs Sainsbury to the body, keeping him at a distance.
Zus Dievski is looking to keep the fight on the feet at all costs.#T2#
Dievski blocks a jab.
Sainsbury misses with a half-hearted attempt at a head kick.
Sainsbury throws a push kick but Dievski slaps the foot to one side.
Sainsbury takes a shot right to the bread basket.
A lazy left from Dievski finds it's target.
Dievski fakes low and throws an overhand right that catches Sainsbury on the side of the head.#CL#
The fight moves into the clinch position.#BC#
Dievski escapes the clinch and we're back to striking.
Nice body punch from Dievski.
Sainsbury keeping a good distance there, avoiding the body shot.
Dievski scores with a jab.
Dievski throws a good cross that connects.
#CL2#
Sainsbury closes the distance and clinches.#T3#
Sainsbury tries for a takedown but Dievski manages to get underhooks.
Zus Dievski has stuffed three takedown attempts in the round now. That's going to take a lot out of Aaron Sainsbury.
Dievski leaning against his opponent.
Dievski lands a nice uppercut.
Dievski misses with a punch on the inside.
Dievski lands a left hand.
Sainsbury wants to get back to striking at distance but Dievski won't allow it.
Dievski can't find room to land a body shot as Sainsbury controls the action.
Dievski tries to land a shot to the body but it's blocked.
Dievski will no doubt start fighting again in a minute but for now he's just having a little rest, leaning Sainsbury up against the cage.
A head punch on the inside from Sainsbury fails to land.
Dievski gets double underhooks to prevent a takedown attempt from Sainsbury.
Sainsbury is trying to push Dievski away but Dievski has him pressed against the cage, so he's going nowhere.#T4#
A nice left hand lands by Dievski.
Dievski stalls.
Dievski throws a blind hook that connects with the side of Sainsburys head.
Nice body punch from Dievski.
Dievski lands a right hand.
Dievski throws a blind hook that connects with the side of Sainsburys head.
Dievski pressing his opponent against the cage.
Dievski is struggling to control the position.
Dievski seems to have come into the fight with the intention of avoiding any damage in the clinch, rather than actually showing any aggression.
Dievski works for underhooks and lands a body shot in the process.
Aaron Sainsbury has stepped it up - he knows he needs a finish here!
Zus Dievski is fighting for a decision here - he's started to take the cautious approach.
Sainsbury swings away with an uppercut that misses.
Dievski is working Sainsbury over against the cage.
And that's the end of the fight!
Zus Dievski showed his dominance in that final round.
Well Dievski has outscored his opponent in every aspect of the fight today. Only a scarily incompetent judge or two will keep him from a well deserved win... Over to the ring announcer for the scorecards.
Ladies and gentlemen, after 3 rounds of action, we go to the scorecards for a decision.
Judge Skip Squint scores the fight 30:25
Judge Darius Henderson scores the fight 30:25
Judge Bruno Hogan scores the fight 30:25
In favor of your winner, by unanimous decision... Zus Dievski!
|
|
|
|
Event:
Quick Fight Championship
Date: Apr 05, 2020 |
#R1#
Williams on the receiving end of a decent leg kick there by Sainsbury. Sainsbury obviously looking to wear him down.
Williams looks exhausted already! Oh dear, he should have come in in better shape than this!#CL2#
Sainsbury rushes Williams and pushes him back against the cage in a clinch.
Sainsbury pressing his opponent against the cage.
A head punch on the inside from Williams fails to land. #TD2#
Sainsbury gets double underhooks and manages to take the fight to the ground.
Sainsbury trying to land body shots but he keeps hitting the mat.
Williams being controlled here, momentarily.
Sainsbury is sitting in guard, working some ground and pound.
We've had a slow start to the round here - hopefully the action picks up.
Sainsbury's corner is telling him to maintain position.#T1#
The fighters are pressed up against the cage, both looking to find a bit of space to work.
Sainsbury scores with a decent looking elbow strike.
Williams can't do much from the bottom at the moment, as Sainsbury controls the pace.#REF3#
The ref stands the fighters back up due to a lack of activity.#T2#
The crowd are showing their displeasure at the lack of action as loud boos ring out around the arena.#KD2#
Sainsbury lands a left and a right that send Williams crashing to the mat, dazed. Sainsbury thinks about following him to the mat but decides to wave him back up to his feet!#ROC2#
Williams is rocked!#CUT2#
It looks like Shawn Williams has been cut.#TD2#
Sainsbury shoots in for a takedown. Oh, that's a huge slam! Williams is on queer street and Sainsbury is pounding down on him with a barage of strikes. The ref is forced to step in and stop the fight. Great finish!
Ladies and gentlemen, after 2:14 of round 1, we have a winner by way of TKO (Slam). Aaron Sainsbury!
|
|
|
|
|
|
|