|
Play
by Play - Fighter's Fight Commentary
|
Event:
TWGC 25 (170lbs, D4): Finals - Round 3
Date: Aug 06, 2019 |
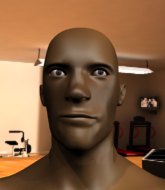
Coming up we have a welterweight Tycoon World Grappling Championship rules bout between Jose Landi (ranked 6108 p4p, 0 weight class) and Bret Harris (ranked 6337 p4p, 0 weight class). This should be a great matchup!
This TWGC bout is 1 fifteen minute round in the welterweight division. Introducing today's competitors. In the red corner, competing out of Montreal, with a TWGC record of 4 wins and 0 losses; Jose Landi! And in the blue corner, fighting out of Las Vegas, with a TWGC record of 4 wins and 0 losses; Bret Harris!
The judges for this bout are James Glass, Paul Tew and James Ackerman.
The fighters bow as they face eachother in the middle of the mat and we are under way.
Landi shoots in looking for a takedown. Harris tries to sprawl out of it but Landi keeps driving through. The fighters are pinned against the cage. Harris manages to get underhooks and after a bit of a struggle, circles away and we're back to standing.
Harris misses with a takedown attempt. He shot from a bit too far out.
Harris shoots in with a takedown attempt and he has Landi pinned against the cage. Landi gets the underhooks and manages to circle away.

Landi closes the distance and presses his opponent up against the cage.
We've had a slow start to the round here - hopefully the action picks up.

Harris pulls guard effortlessly.
Landi slips nicely into half guard.
Landi prevents Harris from improving his position.

That's one minute gone in the round.

Landi looking for a kimura but he'll have to free his other leg if he wants to finish that. Perhaps he's just using it as a distraction technique.
Landi seems to be looking for submissions.
Harris is pressing down on Landi's left leg trying to get back to full guard. He's managed it.
Landi trying to control the position from guard on top but Harris is wriggling around, looking for whatever he can.

That's two minutes gone in the round.
Landi not doing a lot at the moment. He'll have to show some more aggression or the fight will get stood up.
Landi trying to control the position from guard on top but Harris is wriggling around, looking for whatever he can.

Harris working away from the bottom but not quite defensive enough there because Landi has passed into half guard!
Landi is looking for a kimura but he's never going to get it from there.
Landi is trying a forearm choke
I don't think that's going to do much at this level of the game.

That's three minutes gone in the round.
Landi is thinking about going for an arm triangle but he can't free his leg.
Harris is a painfully thin specimen of a man. You do wonder whether a good body kick would snap him clean in two.
Landi is trying a forearm choke
I don't think that's going to do much at this level of the game.
Landi is trying to work for a kimura. This could be trouble! No, Harris has managed to free his arm - good work.

That's four minutes gone in the round.
Harris makes his way to full guard. A much better position for Harris.
Harris is controlling Landi's posture.
Harris throwing his legs up looking for a triangle.
Landi has gone for a leg lock! Harris slips out almost immediately though and dives into Landi's guard. Score +2 for sweep to guard / half guard: Landi (0) vs (2) Harris

That's five minutes gone in the round.
Landi is active off his back here, looking for submissions.
Harris stands up and looks to throw the legs aside to pass to side control. Landi swivels though and keeps the full guard.
Harris pushes down on Landi's leg and manages to get into half guard.
Harris looking to pass the half guard. Not this time.
Harris is working for a submission of some sort.
Harris is looking for a kimura here.

That's six minutes gone in the round.
Harris looking for a kimura but he'll have to free his other leg if he wants to finish that. Perhaps he's just using it as a distraction technique.
Landi is refusing to be controlled, as Harris sits in half guard.

That's seven minutes gone in the round.
Landi trying to control from the bottom.
Landi slips a foot under and gets full guard. Nice work.
Harris wants to pass the guard but Landi is keeping the position.
Landi has an active guard here but Harris has managed to pass into half guard.
Landi looking to work for a kimura from the bottom.

That's eight minutes gone in the round.
Landi is not content to let Harris control the position.
Harris moves into side control, avoiding a weak kimura attempt from Landi. Score +3 for passing guard: Landi (0) vs (5) Harris
Harris tries to move to mount but Landi blocks the move with his legs.
Landi sneaks back into half guard.

That's nine minutes gone in the round.
Landi moves his hips nicely and gets into full guard.
Harris stands up and looks to throw the legs aside to pass to side control. Landi swivels though and keeps the full guard.
Landi looking to sweep here. No luck so far.
Landi had isolated an arm as going for a kimura. Harris defends it easily.
Harris pressing down on his opponent's thigh, looking to pass guard. Landi is keeping the position for now.
Landi controls Harris momentarily but Harris frees himself.

That's ten minutes gone in the round.
Landi working from the bottom, still in full guard. He's managed to get a loose triangle. Harris doesn't seem to be doing much to defend here, obviously he feels comfortable in the position. Harris manages to throw the legs off his shoulder and he's back into guard - no problem.
Harris works a leg free and moves into half guard.
Harris wants to pass to mount but Landi is defending the position.
Landi controlling the position for now.
Harris is trying to control the action in half guard but Landi is working away on the bottom, looking perhaps to get back to full guard.

That's eleven minutes gone in the round.
Landi trying to control but Harris postures up.
Landi actively working from the bottom here.
Harris looking to pass the half guard. Not this time.
Harris is looking to take a break and control but Landi is keeping him honest, looking to work from the bottom.
Landi is trying to control but can't.
Harris trying to pass the guard but Landi defending well.
The fighters are battling for position here. Landi manages to regain full guard. Nice work.

That's twelve minutes gone in the round.
Harris trying to pass the guard but can't manage it just yet.
Landi working for a triangle but Harris defends it easily.
The ref warns both fighters not to hold the cage as they work up against the meshing.
Landi looking for submissions from the bottom but instead Harris passes into half guard.
Harris trying to control the pace.

That's thirteen minutes gone in the round.
Landi looking for submissions off his back.
Landi is looking to control Harris's leg but it's slowly edging free. Can Landi avoid being mounted?
Landi is trying to get back to full guard.
Landi is trying to control but can't.

That's fourteen minutes gone in the round.
Harris looking for a kimura but he'll have to free his other leg if he wants to finish that. Perhaps he's just using it as a distraction technique.
Harris wants to pass the guard but Landi is defending well.
Boooooooooooooooooooo!!! God, this has been a terrible round. Come on you two, sort yourselves out!
Landi trying to hold on to Harris's head to control him but Harris postures up.
Harris is trying a forearm choke
I don't think that's going to do much at this level of the game.
And that's the end of the fight!
Harris wins on points by 5 to 0.
Bret Harris is the new welterweight champion!
A victorious Bret Harris thanked his army of followers in his post fight interview, telling people to make sure they follow him on Twitter. |
|
|
|
Event:
TWGC 25 (170lbs, D4): Finals - Round 2
Date: Aug 05, 2019 |
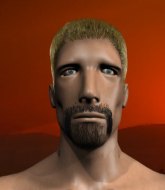
Coming up we have a welterweight Tycoon World Grappling Championship rules bout between Bret Harris (ranked 6293 p4p, 0 weight class) and Umberto Grena (ranked 16524 p4p, 0 weight class). Over to our ring announcer for the fighter introductions!
This TWGC bout is 1 fifteen minute round in the welterweight division. Introducing today's competitors. In the red corner, competing out of Las Vegas, with a TWGC record of 3 wins and 0 losses; Bret Harris! And in the blue corner, fighting out of Tokyo, with a TWGC record of 3 wins and 0 losses; Umberto Grena!
The judges for this bout are Colin Fotheringham, James Atkins and Steven Brown.
The official calls the fighters to the middle and the contest is under way.
Harris closes the distance and presses his opponent up against the cage.
Harris gets underhooks to prevent Grena's takedown attempt.
Grena gets double underhooks and manages to take the fight to the ground. Score +2 for takedown into guard / half guard: Harris (0) vs (2) Grena
Harris throwing his legs up looking for a triangle.
Grena sitting in guard doing not very much at all here. Harris doesn't need a second invitation though! He's locked up a guillotine and he's squeezing tight! That is tiiiiiiiiight! Grena paying the price for stalling here - he's pushing hard on the arm trying to free himself but it's no use! He's tapped! WOW, quick submission from Harris - great work!
Ladies and gentlemen, after 0:33 of round 1, we have a winner by way of Submission (Guillotine). Bret Harris!
Bret Harris decided to thank the fans in attendance for making a great atmosphere. It seemed to go down pretty well. |
|
|
|
Event:
TWGC 25 (170lbs, D4): Finals - Round 1
Date: Aug 04, 2019 |
Coming up we have a welterweight Tycoon World Grappling Championship rules bout between Fart Minarsich (ranked 24852 p4p, 0 weight class) and Bret Harris (ranked 6259 p4p, 0 weight class). Bret Harris has the eye of the tiger tonight.
This TWGC bout is 1 fifteen minute round in the welterweight division. Introducing today's competitors. In the red corner, competing out of Los Angeles, with a TWGC record of 2 wins and 0 losses; Fart Minarsich! And in the blue corner, fighting out of Las Vegas, with a TWGC record of 2 wins and 0 losses; Bret Harris!
The judges for this bout are Andrew Berry, Richard Clark and James Ackerman.
The fighters bow as they face eachother in the middle of the mat and we are under way.
No luck for Harris with that takedown attempt.
Minarsich tries to counter by moving into the clinch but Harris manages to circle out of the way.
Harris closes the distance and looks for a trip takedown... aaaand he's got it - Harris lands in his opponent's guard. Score +2 for takedown into guard / half guard: Minarsich (0) vs (2) Harris
Minarsich is trying to control the position but Harris postures up.
Minarsich working from the bottom, still in full guard. He's managed to get a loose triangle. Harris doesn't seem to be doing much to defend here, obviously he feels comfortable in the position. Harris manages to throw the legs off his shoulder and he's back into guard - no problem.
Harris stays in close to Minarsich's body and controls the position.
We've had a slow start to the round here - hopefully the action picks up.
Minarsich looking for submissions from the bottom here. Moving his hips around, possibly looking for an armbar.
That's one minute gone in the round.
Harris's corner is telling him to maintain position.
Harris pressing down on his opponent's thigh, looking to pass guard. Minarsich is keeping the position for now.
Minarsich keeping moving, preventing Harris from controlling successfully.
Harris stands up and looks to throw the legs aside to pass to side control. Minarsich swivels though and keeps the full guard.
Minarsich can't keep his opponent in guard - Harris advances to half guard, no doubt looking to mount.
Harris trying to control the action but Minarsich is working from the bottom.
That's two minutes gone in the round.
Harris tries to pass to full mount but Minarsich defends it.
Harris stalling away here and it's allowed Minarsich to slip out his trapped foot and regain full guard.
Harris's corner is telling him to maintain position.
Harris wants to control from the top but Minarsich keeps moving.
The fighters are pressed up against the cage, both looking to find a bit of space to work.
Harris looking to pass the guard.
The ref warns both fighters not to hold the cage as they work up against the meshing.
That's three minutes gone in the round.
Harris is trying to work a guillotine from the top, or something like that? Don't know how he thinks he's going to get a finish from there.
Harris looking to control the position here, rather than advance.
Harris trying to control the position from guard on top but Minarsich is wriggling around, looking for whatever he can.
That's four minutes gone in the round.
Harris slips effortlessly into side control - very nice. Score +3 for passing guard: Minarsich (0) vs (5) Harris
Minarsich really is a fat lump.
Harris advances nicely into full mount. Score +2 for reaching mount: Minarsich (0) vs (7) Harris
Harris trying to control but Minarsich is having none of it.
Harris has hold of an arm here, looking to extend it. He's committed to the armbar attempt here! Will he get it?! Yes! Minarsich is forced to tap!
Ladies and gentlemen, after 4:56 of round 1, we have a winner by way of Submission (Armbar). Bret Harris!
A relieved looking Bret Harris thanked the fans for their support and gave the usual line about them being amazing. They seemed to believe that he actually meant it. |
|
|
|
Event:
TWGC 25 (170lbs, D4): Rio de Janeiro Qu - R2
Date: Jul 27, 2019 |
Coming up we have a welterweight Tycoon World Grappling Championship rules bout between Marcos Vinicius (ranked 5328 p4p, 0 weight class) and Bret Harris (ranked 5888 p4p, 0 weight class). On his way into the cage it seems that Marcos Vinicius has been attacked by a crazed fan! It looks like it might have been the just bleed guy! Luckily Marcos Vinicius seems to be OK! I thought that lunatic was in prison!?
This TWGC bout is 1 fifteen minute round in the welterweight division. Introducing today's competitors. In the red corner, competing out of London, with a TWGC record of 1 wins and 0 losses; Marcos Vinicius! And in the blue corner, fighting out of Las Vegas, with a TWGC record of 1 wins and 0 losses; Bret Harris!
The judges for this bout are Emerson Jorge, Leandro Rodrigues and Alexandre Firmino.
The fighters connect hands in the middle of the mat and we are under way.
Vinicius moves in looking to clinch but Harris pushes him off.
Harris tries a counter takedown but it's more of a dummy move, and he uses it to push himself away.
Vinicius has his takedown stuffed
and Harris counters with a driving takedown into guard. Nice work there by Harris. Score +2 for takedown into guard / half guard: Vinicius (0) vs (2) Harris
Harris wants to control from the top but Vinicius keeps moving.
Harris pressing down on his opponent's thigh, looking to pass guard. Vinicius is keeping the position for now.
Vinicius working for a triangle but Harris defends it easily.
Harris looking to pass the guard.
That's one minute gone in the round.
We've had a slow start to the round here - hopefully the action picks up.
Harris keeps trying to improve his position.
Vinicius trying to control the position.
Harris pushing down on Vinicius's thigh, trying to pass to half guard. He's managed it... Nice work.
Vinicius might be looking to lock onto one of his opponent's long limbs for a submission, whilst we're on the ground.
Vinicius has no desire to be mounted, so is trying to control. Harris is working away from the top position though.
Harris is a painfully thin specimen of a man. You do wonder whether a good body kick would snap him clean in two.
Harris prevents Vinicius from improving his position.
Vinicius is trying to control but Harris passes into side control!
Score +3 for passing guard: Vinicius (0) vs (5) Harris
That's two minutes gone in the round.
Harris tries to move into full mount but can't pass Vinicius's legs.
You can see the frustration on Vinicius's face, being in this tough position on the bottom.
Vinicius manages to get back to half guard.
Vinicius looking for submissions off his back.
Harris tries to pass to full mount but Vinicius defends it.
Harris wants to control but Vinicius is keeping him busy.
That's three minutes gone in the round.
Harris is working hard to pass the guard. He's done it - he's now in full mount! Trouble for Vinicius! Score +3 for passing guard: Vinicius (0) vs (8) Harris
Vinicius could do with losing a few pounds - he looks very soft around the mid section, to put it politely.
Harris is going oldschool here, as he tries to force Vinicius to tap using a forearm choke. This isn't 1993 though, so Vinicius shrugs it off.
Harris can't quite control the action as he would like just now, as Vinicius is looking to escape.
Harris wants to take Vinicius's back here but Vinicius is holding on to an arm, himself looking to escape.
The ref warns both fighters not to hold the cage as they work up against the meshing.
Vinicius working to try and regain half guard.
That's four minutes gone in the round.
Vinicius wants to hold on but Harris pushes him away.
Harris takes a little breather and maintains the position. The referee will be looking for him to stay active from such a dominant position though.
Harris moves to his opponent's back but Vinicius bucks him off and ends up in guard. A bit of a disaster there for Harris. Score +2 for sweep to guard / half guard: Vinicius (2) vs (8) Harris
The fighters are pressed up against the cage, both looking to find a bit of space to work.
Vinicius drops back for a leg but he's not going to get it - he lets go and Harris dives on top into guard. Score +2 for sweep to guard / half guard: Vinicius (2) vs (10) Harris
Harris trying to pass the guard but can't manage it just yet.
That's five minutes gone in the round.
Vinicius is throwing his legs up, looking for submissions. Harris is aware though and is defending well.
Harris trying to control but Vinicius is working from the bottom.
Harris wants to pass the guard but Vinicius is keeping the position.
Harris trying to control the position from guard on top but Vinicius is wriggling around, looking for whatever he can.
Harris looking to pass the guard.
Harris trying to control but Vinicius is working from the bottom.
That's six minutes gone in the round.
Vinicius wants to sweep but no luck.
Harris not doing a lot at the moment. He'll have to show some more aggression or the fight will get stood up.
Harris stands up and looks to throw the legs aside to pass to side control. Vinicius swivels though and keeps the full guard.
Vinicius throws his legs up looking to secure a triangle. Oh, that looks pretty tight, I gotta say! Harris escapes and throws Vinicius's legs to the side, diving into side control! Score +3 for passing guard: Vinicius (2) vs (13) Harris
Vinicius is trying to get back to half guard.
That's seven minutes gone in the round.
Harris advances nicely into full mount. Score +2 for reaching mount: Vinicius (2) vs (15) Harris
Harris is dominating on the ground here - he's now on his opponent's back, looking to sink in the hooks. Vinicius is in real trouble.
Score +3 for taking back: Vinicius (2) vs (18) Harris
Vinicius trying to control the hands but Harris breaks the grip.
Harris is hanging on to Vinicius's back as he tries to escape.
Vinicius trying to control the hands but Harris breaks the grip.
What can Vinicius do to escape this position? He's going to have to figure it out pretty quick if he wants to stay in the fight!
Harris trying to control.
That's eight minutes gone in the round.
Harris has his hand under the chin of his opponent looking for the choke. He's nearly got it! This one could be all over! But no, Vinicius has freed his hand and lives to survive another
well, another couple of seconds at least!
Vinicius is staying cool under pressure, defending well against the rear naked choke attempt from his opponent.
Vinicius is displaying good submission defense - not really looking in danger of submitting to the rear naked choke at the moment. That could change in an instant of course if Harris gets his way!
That's nine minutes gone in the round.
Vinicius fending off the submission attempt from Harris.
Harris is working for the choke. I would put my money on him to finish from this position. He's rolled onto his back and has dragged Vinicius with him. Vinicius is trying to defend but Harris has an arm under the chin now! Vinicius grimaces and is forced to tap out!
Ladies and gentlemen, after 9:40 of round 1, we have a winner by way of Submission (RNC). Bret Harris!
Bret Harris decided to thank the fans in attendance for making a great atmosphere. It seemed to go down pretty well. |
|
|
|
Event:
TWGC 25 (170lbs, D4): Rio de Janeiro Qu - Round 1
Date: Jul 26, 2019 |
Coming up we have a welterweight Tycoon World Grappling Championship rules bout between Bret Harris (ranked 5851 p4p, 0 weight class) and Francisco Dimasalang (ranked 23624 p4p, 426 weight class). Bret Harris has the edge in experience - let's see if he can make that count tonight.
This TWGC bout is 1 fifteen minute round in the welterweight division. Introducing today's competitors. In the red corner, competing out of Las Vegas, with a TWGC record of 0 wins and 0 losses; Bret Harris! And in the blue corner, fighting out of Los Angeles, with a TWGC record of 0 wins and 0 losses; Francisco Dimasalang!
The judges for this bout are Luis Engracia, Emerson Jorge and Seu Braga.
Let's get this grappling contest under way! Who will be victorious?
Dimasalang wants to clinch but Harris slips to the side

and Harris counters with a driving takedown into guard. Nice work there by Harris. Score +2 for takedown into guard / half guard: Harris (2) vs (0) Dimasalang
Dimasalang looking to hit a scissor sweep but Harris is one step ahead there.
Dimasalang keeps trying to improve his position.
Harris sneaks a leg through and gets to half guard. That was like a knife through butter how easily he passed Dimasalang's guard.
Harris is trying a forearm choke
I don't think that's going to do much at this level of the game.
Dimasalang trying to get back to full guard but Harris takes advantage of the position and moves to full mount! Score +3 for passing guard: Harris (5) vs (0) Dimasalang
We've had a slow start to the round here - hopefully the action picks up.
Dimasalang tries to lock up and control but Harris gives him a forearm to the face and pushes him away.
That's one minute gone in the round.
Dimasalang is trying to escape the mount but Harris keeps good control and instead manages to take Dimasalang's back.
Score +3 for taking back: Harris (8) vs (0) Dimasalang
Dimasalang really doesn't want to stay on the ground with Harris. If he can't get it back to his feet, it's only a matter of time before he'll be tapping out.
Harris has the rear naked choke here! This is very bad for Dimasalang! Can he survive? No! He's out! Harris gets to his feet and celebrates with his cornermen. He looks absolutely delighted. In the post fight interviews he takes time to thank his parents and everyone who has believed in him from the start. How sweet.
Ladies and gentlemen, after 1:34 of round 1, we have a winner by way of Submission (RNC). Bret Harris!
A relieved looking Bret Harris thanked the fans for their support and gave the usual line about them being amazing. They seemed to believe that he actually meant it. |
|
|
|
Event:
Friday Night Summer Madness
Date: Jun 28, 2019 |
#R1##TD2#
Harris throws a loose over hand right and dives in with a double leg takedown. Orsic tries to sprawl but it's too late and the fighters hit the mat. Harris is in Orsic's guard.#SUB#
Orsic is working actively off his back, looking to secure an arm or perhaps work for a triangle. #SUB#
Orsic working from the bottom, still in full guard. He's managed to get a loose triangle. Harris doesn't seem to be doing much to defend here, obviously he feels comfortable in the position. Harris manages to throw the legs off his shoulder and he's back into guard - no problem. #SUB#
Orsic looking for submissions from the bottom here. Moving his hips around, possibly looking for an armbar.
Orsic is working an open guard here, looking to improve his position. No doubt that will leave him open to counters but at least he's being more offensive.#SUB#
Orsic throwing his legs up looking for a triangle.
We've had a slow start to the round here - hopefully the action picks up.
Harris looking to pass the guard. #T1##SUB#
Orsic looking for submissions off his back, moving his hips, looking for an opening.
Orsic looking to sweep here. No luck so far. #SUB#
Orsic is looking to cinch up a triangle. Harris throws the leg off to one side though and gets in tight to Orsic's body to avoid the submission. Orsic has instead reached around Harris's neck and now has a guillotine! Oh, this is biiiig trouble! Orsic arches his back and squeezes and forces the tap from his hapless opponent.
Ladies and gentlemen, after 1:44 of round 1, we have a winner by way of Submission (Guillotine). Mate Orsic!
Bret Harris was interviewed post fight and said 'This Has To Be A DREAM!!!'.
|
|
|
|
Event:
Sacrament II
Date: Jun 14, 2019 |
#R1#
Barbarian ducks down and throws a hook to the body.#TD2#
Harris decides to change it up a bit and drives through with a nice takedown into half guard.
Barbarian won't allow Harris to pass to mount. #SU2#
Harris stands up out of the half guard.
Barbarian misses with a wild combination.
Harris with the counter takedown but Barbarian avoids it easily.
Barbarian digs a good hook to Harris's body.
Barbarian keeps the fight on the outside.
Barbarian lands with a nice body punch.
A cross from Barbarian lands.
Harris shoots in but doesn't get the takedown
and Barbarian counters with a left to the body.
We've seen a great period of action over the last minute or so - credit to both fighters for going all out!
Barbarian misses with a wild combination.
#T1##TD2#
Harris shoots in from a long way out. He's driving through with the takedown attempt and he eventually gets it, landing in Barbarian's guard.#ES#
Barbarian uses the cage to get back to his feet.
Barbarian really does look like a pencil wearing a pair of gloves. Let's hope he has a gameplan to suit that ridiculous body shape.
Harris is looking to land body kicks.
Harris takes a body punch but keeps moving.
Harris takes a shot right to the bread basket.
Barbarian throws a two punch combo that lands nicely.
#CUT#
It looks like Bret Harris has been cut.
Conan Barbarian is looking to keep the fight on the feet at all costs.
We've seen a great period of action over the last minute or so - credit to both fighters for going all out!
Barbarian throws a combination but comes up with nothing but fresh air.
#TD2#
Harris closes the distance and gets a double leg, slamming Barbarian to the mat! Barbarian manages to get full guard. #ES#
Barbarian has scooted to the edge of the canvas and used the cage to get back to his feet. Harris has stuck on his opponent and is forcing him back against the cage.
Harris wants a takedown but no success here.
Barbarian wants to break free but Harris has control.
#T2#
Barbarian wants to strike at distance but he can't break free of the clinch.
Harris stalling the fight.
Harris has Barbarian pressed against the cage, preventing Barbarian from circling away and getting back to striking at range.
Harris is trying to drag Barbarian to the mat but Barbarian just about manages to keep his footing. He used the cage to his advantage there.
Conan Barbarian has stuffed three takedown attempts in the round now. That's going to take a lot out of Bret Harris.
The two fighters are working to gain dominance in the clinch.
A frustrated look appears on Barbarian's face as he tries to break the clinch.
Harris wants to take the fight to the mat but Barbarian manages to get underhooks and keep the fight in the clinch.#T3#
Harris jumps guard but Barbarian turns him against the cage and keeps the fight standing.
Harris changes levels and goes for a takedown here. Barbarian fights it off and pushes away nicely.
Harris closes the distance and clinches up with Barbarian, looking for a takedown. Harris pushes Barbarian against the cage but Barbarian circles to the side and manages to break the clinch.
Barbarian looks to have improved his striking defense since last time we saw him fight.
Barbarian lands a jab. Then a cross. Then finally a nice hook to the body. Good work there by Barbarian.#ROC#
Harris is rocked!#TD2#
Harris drives through with a takedown into Barbarian's guard. Let's see what he can do from the top position.
Harris is still in real trouble! Can Barbarian finish him?
Harris wants to control from the top but Barbarian keeps moving.
Harris won't allow Barbarian to get back to his feet.
Harris seems to have recovered his senses.#ES#
Barbarian uses the cage to get back to his feet.
#KD#
Barbarian drops Harris with a beautiful combination! Harris stares up at his opponent, who ushers him back to his feet - Barbarian is looking for the KO!
This has been an exciting period of action!
Harris fails in his attempt to clinch.
Barbarian stuffs a takedown. It's all about dictating where the fight takes place and Barbarian wants it to stay on the feet.#T4#
Barbarian throws a left jab followed by a right to the body, Oh Harris colapses and takes a barrage of punches from Barbarian as he moves to mount! the ref stops the fight and Harris is left battered and dazed whilst Barbarian and his camp cheer!
Ladies and gentlemen, after 4:10 of round 1, we have a winner by way of TKO (Strikes). Conan Barbarian!
Bret Harris was interviewed post fight and said 'This Has To Be A DREAM!!!'.
|
|
|
|
Event:
Judgement Night III
Date: May 10, 2019 |
#R1##TD2#
Harris shoots in and gets a takedown into Billeray's guard.
Billeray keeping full guard, as Harris tries to pass.
Billeray being controlled here, momentarily.
Billeray looking to sweep here. No luck so far.
Harris must be cautious of submissions here, given that his opponent has the superior Jiu Jitsu.
Harris stands up and looks to throw the legs aside to pass to side control. Billeray swivels though and keeps the full guard.
We've had a slow start to the round here - hopefully the action picks up.
Harris is persisting with the attempt to improve his position.
Harris trying to control the position from guard on top but Billeray is wriggling around, looking for whatever he can. #T1#
Harris wants to stand but Billeray has a closed guard, so he can't escape.
Harris pressing down on his opponent's thigh, looking to pass guard. Billeray is keeping the position for now.
Billeray looking for a sweep. Not yet Billeray, not yet.
Harris trying to control but Billeray is working from the bottom. #REF3#
The referee has decided to stand the fighters back up, so we'll restart on the feet.
Harris thows a leg kick but Billeray checks it #TD#
so Billeray counters with a double leg into guard. Good agility.
Harris not looking particularly offensive just at the moment.
Billeray stands up over Harris, holding his feet. He dives back in and lands a decent shot to the head.
Billeray trying to control but Harris is working from the bottom. #T2#
Billeray loading up with the ground and pound but he's missing more than he's landing in this flurry. #SUB2#
Billeray got a little sloppy there for a moment and Harris has worked his way into a loose triangle - can he finish it?! No, Billeray has managed to get both his arms back between Harris's legs - danger averted.
The fighters are starting to get a bit slippery now, which will make submissions a bit more difficult.
Billeray is in close to Harris's body, working some short punches and elbows.#SUB2#
Harris is active off his back here, looking for submissions.
The fighters are pressed up against the cage, both looking to find a bit of space to work.
Harris utilising some decent striking defenses from the guard, preventing the ground and pound. #SUB#
Billeray is trying to work a guillotine from the top, or something like that? Don't know how he thinks he's going to get a finish from there.
Harris is a painfully thin specimen of a man. You do wonder whether a good body kick would snap him clean in two.
Billeray trying to control the position from guard on top but Harris is wriggling around, looking for whatever he can. #SUB2#
Harris is throwing his legs up, looking for submissions. Billeray is aware though and is defending well.
Harris keeping moving, preventing Billeray from controlling successfully. #T3##SUB2#
Harris is looking for a triangle but Billeray pushes his legs off easily.
#SUB#
Billeray drops back looking for a leg! Harris is in trouble here! The fighters roll with the hold and Harris manages to kick Billeray off! Billeray jumps back into Harris's guard.
Harris is working from a closed guard but he's struggling to control his opponent.
Billeray stands up over Harris, holding his feet. He dives back in and lands a decent shot to the head. #SUB#
Billeray has gone for a leg lock! Harris slips out almost immediately though and dives into Billeray's guard.#REVB#
Billeray keeping full guard, as Harris tries to pass.
Harris trying to control but Billeray is working from the bottom. #T4##SU2#
Harris decides he's had enough of playing guard and decides to stand. Come on Billeray, up you get!
Billeray shoots in for a takedown but Harris shows good takedown defense there and keeps this one on the feet.#TD2#
Harris looking for a takedown here - he's got it.#SU2#
Harris decides he's had enough of playing guard and decides to stand. Come on Billeray, up you get! #CL2#
Harris darts in and clinches Billeray up against the cage.#TD2#
Harris has double underhooks and is working for a body lock takedown. He's got it. The fighters land in half guard but Billeray regains guard immediately.
This is a great period of action - very entertaining stuff!
The crowd thankful this round is nearly over.
Billeray working a defensive guard here.
And thats the end of the round the fighters go back to their corners.
Bret Harris dominated that round.
That's the end of the interval. I'm sure that seemed a lot quicker than a minute for our two fighters! Back to the action.
#R2##TD2#
Harris shoots in and gets a takedown into half guard. Harris showed some decent athleticism there. #ES#
Billeray kicks off Harris and gets to his feet. #TD2#
Harris shoots in looking for a single leg takedown. Billeray is trying to defend but Harris finishes it well and ends up in half guard. Let's see if he can advance position further.
Harris stalling.
Billeray won't allow Harris to pass to mount.
Billeray trying to keep hold of his opponent's head but Harris manages to pass to mount!
Billeray might be looking to lock onto one of his opponent's long limbs for a submission, whilst we're on the ground.
This is a great period of action - very entertaining stuff!
Billeray is wriggling around trying to escape.
The ref warns both fighters not to hold the cage as they work up against the meshing.#T1#
Harris wants to stand but Billeray is holding on to him, trying to stop him posturing up.
Billeray bucks up and manages to get a nice reversal! He's in guard on the top - nicely done!
Billeray wants to control from the top but Harris keeps moving. #SUB2#
Harris had isolated an arm as going for a kimura. Billeray defends it easily.
Billeray lands a couple of elbows.#SUB2#
Harris had isolated an arm as going for a kimura. Billeray defends it easily.#SUB#
Billeray drops back for a leg but he's not going to get it - he lets go and Harris dives on top into guard.#REVB##T2#
Harris passes Billeray's right leg, so he's now in half guard. #SUB2#
Harris is looking for a kimura but he's never going to get it from there.
Billeray tries to roll over but Harris keeps him under control.
Billeray moves his hips nicely and gets into full guard.
Billeray looking for a sweep. Not yet Billeray, not yet.
Billeray trying to control the position.
Harris trying to pass the guard but can't manage it just yet. #SUB#
Billeray working for a triangle but Harris defends it easily.
#T3#
Harris passes into half guard.
The fighters are battling for position here. Billeray manages to regain full guard. Nice work.
Billeray is working from a closed guard but he's struggling to control his opponent.
Billeray looking to sweep here. No luck so far. #T4#
The crowd are hurling abuse towards the fighters... You can hardly blame them though because there isn't a lot going on in the fight.
Harris wants to stand and escape but instead Billeray has hit a sweep and he's now on top in guard. #REVR#
Billeray looking to sit in guard and control but Harris gets the butterfly guard and sweeps. He's now in the guard on the top. #REVB##SUB#
Billeray looks to be working for a triangle here. Oh, it looks like he might have it! Harris has picked Billeray up and slammed him! Billeray can't keep hold of the triangle and Harris manages to pass to side control!
Bret Harris has got the better of the ground game so far.#SUB2#
Harris working hard here to secure a kimura but he's not really in the right position for it.
Harris wants to stand but Billeray has his arm trapped. #SUB2#
Harris wants to work for a kimura but he's foiled early by Billeray, who protects the arm well. #SUB2#
Harris wants to work for a kimura but he's foiled early by Billeray, who protects the arm well.
And thats the end of the round the fighters go back to their corners.
Bret Harris showed his class in that round. I'd imagine he'll take it on all the scorecards.
That's the end of the round. The referee orders the cornermen out of the cage so we can get back down to business. Let's get this one finished - here comes the final round!
#R3##TD2#
Harris manages to get an easy takedown there - catching Billeray on his heels. He'll look to pass Billeray's guard now, I'm sure.
Harris stands up and looks to throw the legs aside to pass to side control. Billeray swivels though and keeps the full guard.
Billeray controls Harris momentarily but Harris frees himself.
Harris advances position into side control!
We've had a slow start to the round here - hopefully the action picks up.
Harris tries to get to his feet but he's trapped momentarily.
Billeray manages to land a sweep and he's now on top! Lovely Jiu Jitsu!
Harris is trying to get back to full guard.#T1#
Harris is refusing to be controlled, as Billeray sits in half guard. #SUB#
Billeray is looking for a kimura but he's never going to get it from there.
Billeray trying to pass the guard but Harris defending well.
Billeray looks to be in better condition than last time we saw him fight. Obviously he's been working hard on his cardio.#SUB#
Billeray is looking for a kimura but he's never going to get it from there. #SUB#
Billeray is working for a kimura here but Harris manages to reverse the position and he's now in Billeray's guard.
Billeray keeping full guard, as Harris tries to pass. #T2#
Harris won't allow Billeray to sweep him here.
Harris has decided he wants to stand but the closed guard of Billeray is proving hard to escape from.
Harris pressing down on his opponent's thigh, looking to pass guard. Billeray is keeping the position for now.
Harris keeps trying to improve his position.
Harris wants to control from the top but Billeray keeps moving. #SU2#
Harris stands and steps away. Billeray gets to his feet too and we're back to the striking game. #TD2#
Billeray gets caught on his heels momentarily as he allows Harris to score an easy takedown into full guard.#ES#
Billeray uses the cage to get back to his feet.
#T3##TD2#
Harris darts in and lands a nice takedown into half guard.
Harris takes a big intake of breath there - he's definitely tired.
Harris passes into side control, despite Billeray's attempt to control the position.
Harris has been the more effective fighter overall so far.
Billeray is trying to control Harris's posture but Harris avoids it.
Billeray tries to control but Harris manages to take his back.
Billeray tries to escape but Harris has the hooks in and won't let him break free.
Will Harris go for the finish here or will he try and keep control of the position?
#T4#
Billeray can't escape the position.
Billeray wants to control his opponent's hands but Harris gets his hands free.
Billeray is trying to break free.
Billeray looks to control his opponent's hands but he's not mananging it at the moment.
Tom Billeray has stepped it up - he knows he needs a finish here!
Bret Harris is fighting for a decision - hopefully he's judged it right and he's actually winning the fight.
The crowd thankful this round is nearly over.
Billeray is very frustrated here, being controlled quite effectively by Harris.
Billeray rolls and manages to get back to half guard. Nicely done.
And that's the end of the fight!
Bret Harris comfortably won the final round on my scorecard.
Well Harris has outworked and out performed his opponent in all aspects of the game today. He was simply too good and the decision should be no more than a formality. Over to the ring announcer for the scorecards.
Ladies and gentlemen, after 3 rounds of action, we go to the scorecards for a decision.
Judge Andrew Berry scores the fight 27:30
Judge James Atkins scores the fight 27:30
Judge Richard Clark scores the fight 27:30
In favor of your winner, by unanimous decision... Bret Harris!
An out of breath Bret Harris thanked his loyal fans in his post fight interview, giving them credit for his success over the course of his career.
|
|
|
|
Event:
Apocalypse
Date: Apr 13, 2019 |
#R1##CL#
Baker clinches with his opponent.
A short right from Baker on the inside.
Baker is struggling to control the position.
Baker cracks Harris with a nice body shot.#BC2#
Harris breaks the clinch.
Harris on the wrong end of a vicious looking body shot. #CL2#
Harris has taken the fight to the clinch.
Baker lands with a quick shot inside that doesn't really do much damage. #TD#
Baker is trying to trip Harris. He has hold of a leg but Harris is hopping around, keeping his balance for the moment. Baker persists though and gets the takedown into guard.
Baker wants to control from the top but Harris keeps moving.
Baker has to be careful here, sitting in the guard of a superior BJJ player.
Baker trying to land body shots but he keeps hitting the mat.
The crowd cheering loudly, showing their appreciation for the quality fight we're seeing here.
Baker trying to control but Harris is working from the bottom.
Baker with a couple of shots to the head there. Not particularly brutal.
The fighters are pressed up against the cage, both looking to find a bit of space to work.#T1#
Baker wants to control from the top but Harris keeps moving.
Baker with a flurry of punches that miss.
Baker cracks Harris with a solid left hand.#SUB2#
Harris is looking for a triangle but Baker pushes his legs off easily.
Baker throwing shots from guard but he's hitting more mat than opponent.
Harris keeping moving, preventing Baker from controlling successfully.
Baker looking to pass the guard.
Baker throws a strike but Harris rolls with it and manages to sweep. Now he's in guard on top. #REVB##T2#
A real slowdown in the pace of the fight for a moment, as Baker holds on and takes a little breather.
Harris preventing the sweep. #SU2#
Harris stands and steps away. Baker gets to his feet too and we're back to the striking game.
Jab, cross, leg kick. Nice combination by Baker!
#ROC#
Harris is rocked!#CUT#
It looks like Bret Harris has been cut.
Harris throws a head kick but Baker moves out of range.
Harris shoots in but no luck this time.
Boom, another hit is landed. "You're gunna get knocked out" taunts Baker, as that shot connected.
Harris is still on wobbly legs! Can Baker finish him?
Baker connects with a looping left hand that seems like it dazed Harris momentarily.
We've seen a great period of action over the last minute or so - credit to both fighters for going all out!
A combination from Harris does no damage.
Baker dips down and scores with a jab to the body.
Harris looks frustrated there after his takedown attempt is stuffed easily.
Baker drops Harris with a straight left! Oh this is bad for Harris! Baker dives in and starts dropping bombs - the referee has no choice but to step in and save him!
Ladies and gentlemen, after 3:57 of round 1, we have a winner by way of TKO (Strikes). Jonny Baker!
Jonny Baker tried to hype himself up post fight but didn't word it too well and it ended up with him sounding like a bit of a tool.
Bret Harris was interviewed post fight and said 'This Has To Be A DREAM!!!'.
|
|
|
|
Event:
Quick Fight Championship
Date: Mar 19, 2019 |
#R1##TD2#
Ragozin shoots in with a lovely double leg takedown. Harris manages to land in full guard to minimise the damage.
Harris manages to sweep nicely, so he's now on top. Ragozin manages to get himself to full guard.
#REVR#
The fighters are pressed up against the cage, both looking to find a bit of space to work.
Harris passes Ragozin's left leg - he's now in half guard.
Ragozin has no desire to be mounted, so is trying to control. Harris is working away from the top position though.
Harris trying to control the pace.
We've had a slow start to the round here - hopefully the action picks up.#SUB#
Ragozin is looking to regain full guard. He's left an arm up in the air though and Harris has latched onto it... Big trouble! Harris pivots for an armbar - it's in tight and it Ragozin is tapping in no time flat! Great counter grappling there from Harris!
Ladies and gentlemen, after 1:18 of round 1, we have a winner by way of Submission (Armbar). Bret Harris!
A relieved looking Bret Harris thanked the fans for their support and gave the usual line about them being amazing. They seemed to believe that he actually meant it.
|
|
|
|
Event:
PSE 15
Date: Nov 24, 2018 |
#R1##TD2#
Harris drives through with a takedown into ExPeRiMeNt I's guard. Let's see what he can do from the top position.
The fighters are pressed up against the cage, both looking to find a bit of space to work.#SUB#
ExPeRiMeNt I working from the bottom, still in full guard. He's managed to get a loose triangle. Harris doesn't seem to be doing much to defend here, obviously he feels comfortable in the position. Harris manages to throw the legs off his shoulder and he's back into guard - no problem. #SUB#
ExPeRiMeNt I working from the bottom, still in full guard. He's managed to get a loose triangle. Harris doesn't seem to be doing much to defend here, obviously he feels comfortable in the position. Harris manages to throw the legs off his shoulder and he's back into guard - no problem. #SUB#
ExPeRiMeNt I had isolated an arm as going for a kimura. Harris defends it easily.#SUB#
ExPeRiMeNt I is looking for a guillotine. You can't force these things though and Harris defends well.
We've had a slow start to the round here - hopefully the action picks up.
ExPeRiMeNt I controls Harris momentarily but Harris frees himself.
Harris wants to pass the guard but ExPeRiMeNt I is keeping the position.#T1#
Harris preventing the sweep. #SUB#
ExPeRiMeNt I looks to be working for a triangle here. Oh, it looks like he might have it! Harris has picked ExPeRiMeNt I up and slammed him! ExPeRiMeNt I can't keep hold of the triangle and Harris manages to pass to side control!#SU2#
Harris decides to stand back up.
ExPeRiMeNt I misses with a half-hearted attempt at a head kick.
#TD2#
Harris drives through with a takedown into ExPeRiMeNt I's guard. Let's see what he can do from the top position.
Harris wants to pass the guard but ExPeRiMeNt I is keeping the position.
ExPeRiMeNt I wants to sweep but no luck.
ExPeRiMeNt I might be looking to lock onto one of his opponent's long limbs for a submission, whilst we're on the ground.#SU2#
Harris stands up and waves to ExPeRiMeNt I to follow him.
ExPeRiMeNt I fails with a takedown attempt.#T2##TD2#
Harris closes the distance and scores a nice trip takedown into half guard. ExPeRiMeNt I did well to prevent Harris getting side control.
ExPeRiMeNt I tries to get to full guard but Harris has control of the leg. #SUB2#
Harris seems to be looking for submissions.
ExPeRiMeNt I moves into full guard.
#SUB#
ExPeRiMeNt I looking for submissions off his back, moving his hips, looking for an opening.
#T3#
ExPeRiMeNt I trying to control the position.
#SUB#
The fighters are starting to perspire pretty heavily.
ExPeRiMeNt I throwing his legs up looking for a triangle.
Harris looking to pass the guard.
Harris slips effortlessly into side control - very nice.
ExPeRiMeNt I is trying to get back to half guard. He's pushing on Harris's leg. He's managed it. Nice work.
The ref warns both fighters not to hold the cage as they work up against the meshing.
ExPeRiMeNt I moves his hips nicely and gets into full guard.#T4##SUB#
ExPeRiMeNt I looking for submissions off his back, moving his hips, looking for an opening.
Harris wants to pass the guard but ExPeRiMeNt I is keeping the position.
ExPeRiMeNt I is working from a closed guard but he's struggling to control his opponent.
Harris looks more muscular than last time we saw him. He must have been on the weights.
Harris must be cautious of submissions here, given that his opponent has the superior Jiu Jitsu.
Harris looking to pass the guard. #SUB#
ExPeRiMeNt I looking for submissions from the bottom here. Moving his hips around, possibly looking for an armbar.
The crowd thankful this round is nearly over.#SUB#
ExPeRiMeNt I has a loose triangle. He'll be looking to tighten that up but Harris can see exactly what he's planning and manages to posture up and free himself.
Harris works a leg free and moves into half guard.
And thats the end of the round the fighters go back to their corners.
A close round but Bret Harris will probably get the nod.
Well, the break between rounds is over. Let's get back to the scrappin!
#R2#
ExPeRiMeNt I is trying hard to land a takedown here. Harris sprawls well and keeps this one on the feet.
And Harris tries to counter it with a takedown but ExPeRiMeNt I pushes his down on his head and steps out.#TD2#
ExPeRiMeNt I gets taken down but at least he's managed to land in guard.#SUB#
ExPeRiMeNt I is looking for a guillotine. You can't force these things though and Harris defends well.
Harris tries to free his leg and advance position but ExPeRiMeNt I is retaining full guard.
Harris is taking a break and basically stalling. The referee will not allow him to do that for long.
We've had a slow start to the round here - hopefully the action picks up.#SUB#
Harris is posturing up here but ExPeRiMeNt I has hold of an arm and he's gone for an armbar! Harris tries to roll out but it's too tight and Harris has to tap! Slick submission there by ExPeRiMeNt I!
Ladies and gentlemen, after 0:59 of round 2, we have a winner by way of Submission (Armbar). Cozzy ExPeRiMeNt I!
Bret Harris spoke after the fight, saying 'This Has To Be A DREAM!!!'.
|
|
|
|
Event:
Quick Fight Championship
Date: Nov 04, 2018 |
#R1#
Harris throws a head kick that half lands.
Killmore moves out of range of the strikes.#CL#
Killmore clinches with his opponent.
Harris is trying to break the clinch but Killmore is controlling him.#BC2#
Harris's corner calls for him to break the clinch, which he does.
Harris is a painfully thin specimen of a man. You do wonder whether a good body kick would snap him clean in two.#TD2#
Excellent takedown into side control there by Harris.
Killmore gets back to half guard.#SU2#
Harris gets to his feet - back to striking we go!
Killmore avoids a low kick by using good footwork.
Killmore was looking to counter that move with a punch but didn't quite pull the trigger.
Killmore looks for a takedown but Harris sprawls well.#T1##CL#
Killmore closes the distance and presses his opponent up against the cage.
Killmore is trying to drag Harris to the mat but Harris just about manages to keep his footing. He used the cage to his advantage there.#BC2#
Harris's corner calls for him to break the clinch, which he does.
Harris will need to tighten up his combinations if he doesn't want to gas himself out, swinging at thin air.
#CL2#
Harris drives through and clinches with Killmore against the cage.
Harris wants to get back to striking at distance but Killmore won't allow it.
#T2#
Killmore tries to take the fight to the ground by pulling guard but can't manage it.
That's three failed takedown attempts in the round for Jake Killmore. That's going to take a lot out of him.
Killmore tries for a takedown. No joy.
#BC2#
Harris escapes the clinch and we're back to striking.
#CL2#
Harris has managed to clinch.
Killmore tries to score a body lock takedown but Harris shows good agility there to stay on his feet.
Harris gets underhooks to prevent Killmore's takedown attempt.
Killmore is trying to pull guard but being pressed up against the cage enables Harris to keep the fight standing.#BC2#
Harris's corner calls for him to break the clinch, which he does.#TD2#
Harris shoots in with a lovely double leg takedown. Killmore manages to land in full guard to minimise the damage.
Harris is standing up over Killmore. Killmore looks to escape but Harris dives into side control.
The crowd cheering loudly, showing their appreciation for the quality fight we're seeing here.#SU2#
Harris decides to stand back up. #T3#
Killmore dives in for a single leg takedown but Harris sprawls and the fighters end up clinched against the cage.
Harris is definitely looking for the counter takedowns here.
Harris looks to land a right hand but Killmore moved out of range.
Killmore ducks under a wild hook from Harris.
A head kick misses from Harris.
Killmore seem to be loading up, looking for a big counter.#CL2#
Harris clinches up against the cage.
Killmore wants a takedown but no success here.
#BC2#
Harris escapes the clinch and we're back to striking.
Killmore shoots in and drives through. Harris sprawls well.
Killmore looks for a takedown but Harris sprawls well.#T4##CL2#
Harris moves into the clinch.#BC2#
Harris manages to break the clinch.
Harris throws a head kick that misses and slips in the process. He scrambles back to his feet and the fighters circle.
Killmore went nuts there looking for a big combo counter but none of the flurry connected.#CL2#
Harris moves into the clinch successfully.
Killmore tries to pull guard but Harris won't allow it.
Killmore jumps guard but his hands slip and he falls flat on his back. Well, he's made himself look a right mug there, as Harris walks away with a smile on his face. Killmore gets slowly back to his feet and shakes his head. #CL2#
Harris has closed the distance and engaged Killmore in a clinch.
Harris is struggling to control the position.
Killmore changes levels and goes for a takedown here. Harris fights it off and pushes away nicely.
And thats the end of the round the fighters go back to their corners.
Bret Harris dominated that round.
The referee calls time. The cornermen exit stage left and we're back to business.
#R2#
Harris lunges in with swinging rights and lefts but Killmore circles away quickly and effectively.
Bret Harris seems to be the more aggressive standup fighter in this bout.
Harris misses with the combination.
#CL#
Killmore moves into the clinch.
Killmore goes for a takedown attempt but Harris pushes him away and we're back to fighting at a distance.
Some wild striking there from Harris.
We've had a slow start to the round here - hopefully the action picks up.
Killmore shoots in for a takedown but Harris shows good takedown defense.
Harris throws a head kick but Killmore moves out of range.
Nice takedown defense from Harris. No joy for Killmore on that attempt.
That's three failed takedown attempts in the round for Jake Killmore. That's going to take a lot out of him.#T1#
Killmore swings and misses with a hook to the body.
Harris throws a leg kick but Killmore sees it coming and moves out of range.
Harris misses with a straight right. #CL2#
Harris moves into range and clinches up with Killmore.#BC2#
Harris breaks the clinch and we're back to striking at distance.
Jake Killmore is looking to throw some combinations by the looks of things.
Killmore tries for a takedown but Harris sees it coming a mile off and avoids it easily.#CL2#
Harris has managed to clinch.
Harris is trying to force a seperation but Killmore has the dominant position.
Harris is defending well against a takedown attempt.
Harris tries to break the clinch but Killmore is controlling the position.
Harris has been looking to improve his clinch game in recent weeks. Killmore seems to have the measure of him in the clinch so far, so let's see if Harris can turn it around.
Killmore can't get the takedown.
#T2#
Good anti-grappling being displayed by Harris as Killmore tries to tie him up.
Killmore drops down for a takedown but doesn't get it.
Both fighters are absolutely exhausted here.#BC2#
Harris breaks from the clinch.
Killmore throws a looping left and ducks down for a takedown. He's got his arms around Harris's waist but Harris gets an underhook and avoids the takedown by throwing Killmore off to one side.
Harris throws a sloppy head kick and Killmore moves out of range easily.
Killmore tries to counter by clinching up but Harris breaks away and moves out of range.#CL#
Killmore closes the distance and pushes Harris back into the cage.#BC2#
Harris's corner calls for him to break the clinch, which he does.
Harris throws a hook to the body but it doesn't connect.
#T3#
A really sloppy takedown attempt there from Killmore.
Harris has been the more effective fighter overall so far.
Killmore slips a jab and a cross from Harris.
#CL2#
Harris has taken the fight to the clinch.
Harris content to slow the pace in the clinch.
Killmore is working on a leg, looking for a takedown but Harris is defending well.#BC2#
Harris breaks the clinch and we're back to striking at distance.
#TD2#
Harris looking for a takedown here - he's got it.#ES#
Killmore has managed to wall walk up one of the corner posts to get back to his feet. Harris is pushing him up against the cage, looking to control the position.#T4#
Killmore is stalling here.
Harris gets double underhooks to prevent a takedown attempt from Killmore.
Fantastic stuff here - a very entertaining period of action, which has drawn cheers from the crowd.
Harris blocks a knee to the body. He'll have a nicely bruised forearm in the morning.
Harris prevents a takedown attempt there.
Killmore goes for a takedown in the clinch but Harris prevents it.
The crowd thankful this round is nearly over.#BC2#
Harris manages to break the clinch.
#CL2#
Harris has closed the distance and engaged Killmore in a clinch.
And thats the end of the round the fighters go back to their corners.
Bret Harris showed his class in that round. I'd imagine he'll take it on all the scorecards.
The minute break is over - no more time for sponges and pep talks - back to the action! This is the final round!
#R3##CL2#
Harris gets a clinch.
Killmore wants to push off and get back to the center of the mat but Harris has him pressed against the cage.
Killmore goes for a takedown attempt but Harris pushes him away and we're back to fighting at a distance.
#CL2#
Harris moves into the clinch successfully.
Harris wants to break free. God knows he wants to breaaaak freeee.#BC2#
The fighters are starting to perspire pretty heavily.
Harris pushes off and circles away, back to the middle of the mat.
We've had a slow start to the round here - hopefully the action picks up.#CL2#
Harris has Killmore up against the cage in a clinch.
Killmore tries for a takedown. No joy.
Killmore stalling the fight.
#T1#
Killmore is working on a leg, looking for a takedown but Harris is defending well.
That's three failed takedown attempts in the round for Jake Killmore. That's going to take a lot out of him.
Harris can't break the clinch.
#BC2#
Harris breaks the clinch.
#CL2#
Killmore tries to keep at a distance but Harris has taken the fight into the clinch.
Killmore goes for a body shot but it's blocked.
Killmore tries to pull guard but Harris holds him up against the cage and eventually Killmore drops back down to his feet.
Killmore is trying to pull guard but Harris turns him against the cage and we stay in the clinch.#BC2#
Harris breaks from the clinch.
Killmore moves out of range of the body kick.
Bret Harris seems to be getting the better of the standup.#CL2#
Harris moves into the clinch.#T2##BC2#
Harris breaks from the clinch.
Harris tries a head kick but it misses.
Killmore appears to be looking for a big counter.#TD2#
Harris darts in and lands a nice takedown into half guard.
Harris takes a deep breath and rests his weight momentarily on top of his opponent, to control the position.#SU2#
Harris stands up and beckons Killmore to join him on the feet.
Harris throws a head kick but Killmore moves out of range.
Killmore tried to counter with a leg kick but Harris avoided it.#CL2#
Harris clinches with his opponent.
Wooooo! Give it up for these two warriors! They are putting on a show!
Harris wants to break free. God knows he wants to breaaaak freeee.#T3#
Killmore drops to a knee looking for a takedown but Harris gets the underhooks and prevents it.
#TD2#
Harris ties up his opponent against the cage and manages to drag the fight down to the ground. Harris no doubt will be looking to work submissions from his guard.
Killmore advances to half guard.
Harris flails away from the bottom but he's not doing any damage.
Harris moves into full guard.
#ES2#
Harris uses the cage to get back to his feet.
Both fighters are breathing heavily.
Killmore blocks the body kick.
#T4##CL2#
Killmore tries to keep at a distance but Harris has taken the fight into the clinch.
Harris is defending well against a takedown attempt.
Killmore will no doubt start fighting again in a minute but for now he's just having a little rest, leaning Harris up against the cage.
Killmore is trying to work for a single leg takedown but Harris pulls him back up using the underhooks. #BC2#
Harris breaks the clinch.
#TD2#
Harris shoots in looking for a single leg takedown. Killmore is trying to defend but Harris finishes it well and ends up in half guard. Let's see if he can advance position further.
Bret Harris is fighting for a decision - hopefully he's judged it right and he's actually winning the fight.
The fans in attendance giving it up for the two fighters, who have really let it all hang out in the last minute or so!#SUB2#
Harris is looking for a kimura here.
And that's the end of the fight!
Bret Harris comfortably won the final round on my scorecard.
Well Harris has outworked and out performed his opponent in all aspects of the game today. He was simply too good and the decision should be no more than a formality. Over to the ring announcer for the scorecards.
Ladies and gentlemen, after 3 rounds of action, we go to the scorecards for a decision.
Judge Alan Glass scores the fight 27:30
Judge Chris Downing scores the fight 27:30
Judge Gwen Towbar scores the fight 27:30
In favor of your winner, by unanimous decision... Bret Harris!
A very excited looking Bret Harris made sure he remembered to thank all the fans both in the arena and on the internet. He said all the coolest people spend all day on MMA websites, which got a big reaction.
|
|
|
|
Event:
Quick Fight Championship
Date: Oct 17, 2018 |
#R1#
Carney avoids the head kick by Harris.
Bret Harris seems to be the more aggressive standup fighter in this bout.
Harris throws a decent looking leg kick but it doesn't land clean.
Carney appears to be looking for a counter takedown.
Harris throws a body kick, spinning off balance
and Carney counters with a left and a right that stings Harris.
Harris looks to score with a combo but nothing lands.
A low kick from Harris is predictable there
and Carney counters with a series of strikes. Harris will be more careful next time no doubt.
No luck with that takedown attempt from Carney.
Harris is a painfully thin specimen of a man. You do wonder whether a good body kick would snap him clean in two.
Carney dodges the punch combination from Harris.
Harris stuffs the takedown.
Carney is trying hard to land a takedown here. Harris sprawls well and keeps this one on the feet.
That's three failed takedown attempts in the round for Anibal Carney. That's going to take a lot out of him.
Harris throws a combination but it was largely blocked by Carney.
Harris misses with a body kick.#T1##TD2#
Carney gets caught flat footed, as Harris shoots in with a quick takedown into guard.
Carney is looking to stand back up but Harris counters by passing into half guard. Oops... bit sloppy there by Carney. #REVR#
Harris is taking a breather. Carney says something to him but it's hard to make out. Perhaps he's telling him to get on with it and actually do something.
Harris's corner are shouting for him to control the position and he seems happy to oblige.
Harris not landing any meaningful shots this time. #T2#
Harris keeping composed on the top, looking to control the action.
Carney punching from the bottom.
Carney knows he needs to get back to his feet asap. He's simply no match for Harris on the ground.
Harris sitting and controlling from the half guard.
Harris drops an elbow to the side of Carney's head.
The two fighters exchange a few words. I couldn't hear what they were saying but maybe it's more fun if you make it up yourself. Harris connects with a nice short shot to Carney's temple. #SU2#
Harris stands up out of the half guard.
No luck with that takedown attempt from Carney. #CL#
Carney pushes Harris up against the cage in a clinch.#T3#
Harris pressing his opponent against the cage. #TD2#
Harris lands a nice trip takedown into half guard.
Carney wants to stand back up but Harris manages to pass into side control.
Carney could do with losing a few pounds - he looks very soft around the mid section, to put it politely.
Carney might be looking to lock onto one of his opponent's long limbs for a submission, whilst we're on the ground.#SU2#
Harris stands up and beckons Carney to his feet. #TD2#
Carney gets taken down but at least he's managed to land in guard.
Carney is breathing heavily.
Harris content to stall in guard here. #SU2#
Carney is working an open guard so Harris takes the opportunity to get back to his feet.#T4#
Carney shoots in but Harris avoids the takedown attempt easily.
Carney shoots in with a takedown attempt and he has Harris pinned against the cage. Harris gets the underhooks and manages to circle away. #TD2#
Harris closes the distance and clinches up, looking for a takedown. He shifts his weight and gets a nice trip into half guard.
The fans in attendance giving it up for the two fighters, who have really let it all hang out in the last minute or so!
Harris not doing much here.
#SU2#
Harris stands up and beckons Carney to join him on the feet.
And thats the end of the round the fighters go back to their corners.
Bret Harris dominated that round.
Well, the break between rounds is over. Let's get back to the scrappin!
#R2##TD2#
Carney gets caught on his heels momentarily as he allows Harris to score an easy takedown into full guard.
Carney is wriggling around but Harris manages to pass to half guard.
The ref warns both fighters not to hold the cage as they work up against the meshing.#REVR#
Harris performing his best blanket impression for a moment.
Harris landing with strikes to the body and head, softening up his opponent.
We've had a slow start to the round here - hopefully the action picks up.
Harris content to control rather than advance. #T1#
Let's hope that Harris has the urge to step up the pace any second now because for the last 15 or 20 seconds he's just been holding on tight.
Harris throwing punches and elbows but they're not doing any damage. #SU2#
Harris stands up from half guard... He's had enough of that ground malarky for the time being.
Carney checks a leg kick.
Harris throws a head kick but Carney moves out of range.
Carney appears to be looking for a counter takedown.
Nice sprawl there from Harris as Carney shoots in.
Carney shoots in for a takedown but doesn't get it.
Both fighters are absolutely exhausted here.
Harris throws a sloppy head kick
and Carney counters with a one-two to the body. #T2#
Sloppy strikes from Harris. Those never looked like landing. #TD2#
Harris gets a double leg takedown into Carney's guard.
Harris sitting in guard here, content to control.
Harris missing there with some ground and pound from the guard.
Harris content to stall in guard here.
Harris is continuing to stall.
Bret Harris has got the better of the ground game so far.#T3#
Hammerfist, elbow! yells Harris's corner. There ya go! There ya go!
Harris missing there with some ground and pound from the guard.
The fighters are pressed up against the cage, both looking to find a bit of space to work.
Harris slows down the pace of the fight for a moment. He'll need to remain active if he doesn't want to see the fight stood back up. #SU2#
Harris gets to his feet and steps away from his opponent.
A punch combination from Harris misses.
Carney blocks the body kick.
Harris stuffs the takedown.
That's three failed takedown attempts in the round for Anibal Carney. That's going to take a lot out of him.
Carney has a takedown stuffed.#T4##TD2#
Carney gets caught flat footed, as Harris shoots in with a quick takedown into guard.
Carney is wriggling around but Harris manages to pass to half guard.
#REVR#
Harris is taking a breather. Carney says something to him but it's hard to make out. Perhaps he's telling him to get on with it and actually do something.#SU2#
Harris decides to return to a standing position.
Bret Harris seems to be getting the better of the standup.
Harris throws a combination but comes up with nothing but fresh air.
The crowd thankful this round is nearly over.
Harris looks to land a combination but Carney avoids it well. #TD2#
Harris dives in and scores a takedown into Carney's guard.
And thats the end of the round the fighters go back to their corners.
Bret Harris showed his class in that round. I'd imagine he'll take it on all the scorecards.
OK. That's time! The bell goes and we're back to the action. This is the final round!
#R3#
Harris looks to score with a combo but nothing lands.#TD2#
Harris looking to score a takedown here. Carney is defending well but Harris drives through and ends up in Carney's guard.
Harris content to stall in guard here.
Harris forces his way into half guard.
Still in half guard, Harris seems content to control.
We've had a slow start to the round here - hopefully the action picks up.
We're seeing a lot of stalling here from Harris.
Harris landing with strikes to the body and head, softening up his opponent.
Both fighters are breathing heavily.#T1##SU2#
Harris stands up from half guard... He's had enough of that ground malarky for the time being. #TD2#
Harris feints and then dives in with a takedown. That was a long way out but the feint bought him enough time to close the distance and complete the takedown. Now we'll play guard for a bit and see who can get the better of that position.
Carney is wriggling around but Harris manages to pass to half guard.
#REVR#
Harris is working hard to pass the guard. He's done it - he's now in full mount! Trouble for Carney!
Harris controlling the pace for now.
Harris dominating with strikes here.#ROC2#
Carney is rocked!#T2##SUB2#
Harris has isolated one of Carney's arms. Carney looking to fight him off but Harris twists into an armbar. It's tight... Will he tap?? YES, he's tapped! This one is all over!
Ladies and gentlemen, after 2:27 of round 3, we have a winner by way of Submission (Armbar). Bret Harris!
|
|
|
|
Event:
Quick Fight Championship
Date: Oct 13, 2018 |
#R1##TD#
Rogers closes the distance and gets a double leg, slamming Harris to the mat! Harris manages to get full guard.
Rogers is looking to work some ground and pound but Harris has wrist control.
Harris working the defensive guard well to avoid strikes from Rogers.
The fighters are pressed up against the cage, both looking to find a bit of space to work.#SUB2#
Harris has an active guard here but Rogers has managed to pass into half guard.
Rogers missing with some ground and pound from the half guard.
Rogers will need to keep those long limbs tucked in whilst he's on the ground, to prevent any submissions.
Rogers sitting in half guard, looking to land shots. Harris defending well though.
The ref warns both fighters not to hold the cage as they work up against the meshing.#SUB#
Rogers in half guard on the top. He's looking for a kimura... He's got it locked and he's managed to free his trapped foot. Harris tries to escape but it's on too tight and he has to tap! Great BJJ skills there from Rogers!
Ladies and gentlemen, after 0:56 of round 1, we have a winner by way of Submission (Kimura). Landon Rogers!
|
|
|
|
|
|
|