|
|
PBP Commentary |
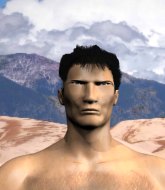
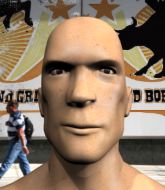
Coming up we have a lightweight MMA rules bout between Ryu Hayabusa (ranked 0 p4p, 0 weight class) and Shinya Koga (ranked 0 p4p, 0 weight class). Rumors backstage are that the fighters have been paid to keep it standing but we know that would never happen in MMA!
 |
|
 |
| 170 cm
20
150 lbs
5 - 5 - 1 |
|
185 cm
22
154 lbs
3 - 0 - 0 |
BJJ Blue Belt
Counter striker
Experienced |
|
BJJ Brown Belt
Brawler
Granite chin |
|
| |
|
Ladies and gentlemen. This fight is 3 rounds, in the lightweight division.
Introducing the fighter to my left, fighting out of the red corner.
With a record of
5 - 5 - 1, fighting out of Tokyo, Ryu Hayabusa!
And introducing the fighter to my right, fighting out of the blue corner.
With a record of
3 - 0 - 0, fighting out of Tokyo, Shinya Koga!
The judges for this bout are Yukihiro Shimada, Kenichi Hosakawa and Yasuomi Hirokawa.

The bell rings for round one and we are underway!
Koga shoots for a takedown but Hayabusa saw that one coming a mile off and avoided it easily.
No luck for Koga with that takedown attempt.
Koga closes this distance looking for a takedown but Hayabusa circles away.
Ryu Hayabusa has stuffed three takedown attempts in the round now. That's going to take a lot out of Shinya Koga.

Hayabusa moves into the clinch.
Hayabusa comes over the top with an elbow. That landed flush.

Hayabusa escapes the clinch and we're back to striking.
Koga misses with a takedown attempt - Hayabusa sprawls well and throws a nice strike on the way out which just misses.
Koga throws a looping left and ducks down for a takedown. He's got his arms around Hayabusa's waist but Hayabusa gets an underhook and avoids the takedown by throwing Koga off to one side.
Koga shoots in for a double leg but Hayabusa sprawls well. That's going to sap some energy.
Koga shoots in for a takedown. "Ole!" shouts Hayabusa as he jumps to the side.
Koga looks gassed!

Koga gets caught flat footed, as Hayabusa shoots in with a quick takedown into guard.
Hayabusa looking to pass the guard.

That's one minute gone in the round.
Koga tries to strike from the bottom.
Koga has the superior BJJ but he's also working some ground strikes into his gameplan.

Koga is looking for a triangle but Hayabusa pushes his legs off easily.
Hayabusa has to be careful here, sitting in the guard of a superior BJJ player.
Hayabusa controlling from the top position.
Hayabusa might be looking to lock onto one of his opponent's long limbs for a submission, whilst we're on the ground.
Hayabusa tries to stand but Koga is controlling from the bottom.

That's two minutes gone in the round.
The crowd are getting on the fighters' backs, as the pace has dropped off in the last minute or so.
Koga trying to control the position.

The referee decides to stand the fighters back up.
Hayabusa closes the distance and clinches.
Hayabusa lands a nice elbow.
Hayabusa pushes off and circles away, back to the middle of the mat.
Hayabusa clinches.
Hayabusa manages to break the clinch.
Hayabusa clinches up against the ropes.
A knee to the head by Hayabusa.
Koga tries to jump guard but he falls flat on his backside. Hayabusa smiles and moves away.
Hayabusa pushes Koga up against the ropes in a clinch.

That's three minutes gone in the round.
Koga takes a knee right on the jaw!
Koga tries for a takedown but Hayabusa manages to get underhooks.
Hayabusa lands a nice elbow from the clinch.
Hayabusa jumps guard.
Hayabusa is looking to stand up but Koga isn't so interested in that idea.

Hayabusa pushes Koga off and scrambles back to his feet.
Hayabusa connects with a high kick.
Koga is a painfully thin specimen of a man. You do wonder whether a good body kick would snap him clean in two.
Koga tries for a takedown but Hayabusa circles away easily
and Hayabusa counters with a takedown into full mount! That could mean trouble for Koga!
Hayabusa controlling from the full mount.

That's four minutes gone in the round.
Hayabusa stands up from the dominant position, so we're back on the feet.
Hayabusa clinches with his opponent.
Hayabusa comes over the top with an elbow. That landed flush.
Hayabusa connects with a nasty looking knee right to Koga's face.
Koga is trying to break the clinch but Hayabusa has him pressed against the ropes.
Hayabusa lands a nice elbow.
Hayabusa is pushing Koga up against the ropes, for a bit of lean and pray action. Action being used the in the loosest possible sense of the word.
Hayabusa gets a nice trip takedown into half guard.
We've seen a great period of action over the last minute or so - credit to both fighters for going all out!
The crowd applaud the fighters efforts here as the round comes to an end.
Koga trying to control from the bottom.
And thats the end of the round the fighters go back to their corners.
Ryu Hayabusa dominated that round.
The corners get their ten second warning. Both fighters stand from their stools and stare eachother down, ready to get back to the action.

Koga fails with the takedown
and Hayabusa counters with a takedown into side control.
Koga wants to control but Hayabusa postures up.
Hayabusa decides to take the fight back to the feet.
Koga gets his takedown attempt stuffed easily
and Hayabusa counters with a shoot takedown. Koga fights it but they end up in guard.
Hayabusa wants to get up but he can't break Koga's closed guard. He needs to be careful trying to break the legs open, as he's open to submissions here.
Koga keeping full guard, as Hayabusa tries to pass.
Both fighters are absolutely exhausted here.
Hayabusa wanted to stand there but Koga had control of the position.
That's one minute gone in the round.
Koga is active off his back here, looking for submissions.
Hayabusa stands up and waves to Koga to follow him.
Hayabusa closes the distance and clinches.
Hayabusa has dropped down and is working for a takedown. Koga is trying to keep an underhook but Hayabusa manages to get the takedown into half guard.
Koga actively working from the bottom here.
Hayabusa is controlling the pace.
That's two minutes gone in the round.
Hayabusa passes into side control, despite Koga's attempt to control the position.
Hayabusa stands up and beckons Koga to his feet.
Koga shoots and misses
and Hayabusa counters with a takedown into side control.
Ryu Hayabusa has stuffed three takedown attempts in the round now. That's going to take a lot out of Shinya Koga.
Koga is looking for a sweep.
That's three minutes gone in the round.
Koga can't do much from the bottom here.
Koga tries to slip a leg under to move to half guard but Hayabusa presses down on the leg and jumps into full mount!
Koga is looking to improve his position but Hayabusa isn't that keen on the idea.
Hayabusa stands up from the dominant position, so we're back on the feet.
Koga tries for a takedown but Hayabusa circles away easily
and Hayabusa decides to take the opportunity to score a takedown. He's landed in Koga's guard.
Hayabusa decides to stand up and beckons his opponent to follow.
That's four minutes gone in the round.
Koga misses with a takedown
and Hayabusa counters with a takedown into side control.
Koga can't do much from the bottom here.
Koga tries to work a leg under to get back to half guard but Hayabusa wriggles his own leg back out and remains in side control.
Hayabusa blocks the strikes from Koga.
As the round comes to an end the crowd are showing their appreciation for a great round of action.
Koga is moving his hips around well on the bottom and has managed to get back to half guard.
The crowd are loving this. Great action here.
Koga is trying to control but can't.
Koga wants to get back to full guard but Hayabusa has passed into side control.
And thats the end of the round the fighters go back to their corners.
Ryu Hayabusa dominated that second round.
That's time! Hayabusa's corner gives him a slap on the ass as he gets ready to fight. This is the final round!

Koga shoots in but doesn't get the takedown
and Hayabusa makes him pay by landing a nice hook to the body before moving out of range.
Hayabusa clinches up with Koga and pushes him back against the ropes.
Koga takes an elbow to the temple.
Hayabusa lands a knee to the head there! That was nasty!
Koga wants to strike at distance but he can't break free of the clinch.
Hayabusa landing knees to the body. They look like they could hurt.
Hayabusa lands a glancing elbow in the clinch.
Hayabusa lands an elbow that stopped Koga in his tracks for a moment.
Hayabusa pulls guard successfully.
Koga postures up as if he's going to throw some strikes but drops back for an ankle! Hayabusa is in big trouble! He looks ready to tap! But no, he's escaped and dives on top of Koga, into his guard.
Hayabusa wants to get up but he can't break Koga's closed guard. He needs to be careful trying to break the legs open, as he's open to submissions here.
Both fighters are breathing heavily.
That's one minute gone in the round.
Hayabusa connects with a couple of short punches.
Hayabusa avoids a guillotine attempt easily.
The fighters are tangled up in the ropes here. We might need a restart if the fighters can't break free themselves.
Koga is trying to control the position but Hayabusa postures up.
Koga wants to sweep but no luck.
Hayabusa pressing down on his opponent's thigh, looking to pass guard. Koga is keeping the position for now.
Koga is active off his back here, looking for submissions.
That's two minutes gone in the round.
There's not a lot going on here and the crowd are letting the fighters know they're not willing to tolerate a lack of action.
Koga controls Hayabusa momentarily but Hayabusa frees himself.
Neither fighter is doing enough for the referee's liking and he's decided to stand them back up.
Koga gets his takedown attempt stuffed easily
and Hayabusa counters with a shoot takedown into half guard.
Hayabusa stands up and beckons Koga to join him on the feet.
Hayabusa moves into range and lands a nice body kick.
Hayabusa wants to clinch up but Koga keeps it at a distance.
That's three minutes gone in the round.
Koga gets his takedown attempt stuffed easily
and Hayabusa counters with a nice shoot takedown that brings the fighters to the ground.
Ryu Hayabusa has stuffed three takedown attempts in the round now. That's going to take a lot out of Shinya Koga.
Hayabusa forces his way into half guard.
Koga is looking to improve his position.
Koga actively working from the bottom here.
Koga trying to control but Hayabusa postures up.
Ryu Hayabusa overall seems to be getting the better of the ground position in the fight so far.
That's four minutes gone in the round.
Koga actively working from the bottom here.
Hayabusa moves into side control, avoiding the strikes from Koga.
Hayabusa stands up and beckons Koga to his feet.
Koga tries for a takedown but Hayabusa circles away easily
and Hayabusa counters with a nice double leg into half guard.
And that's the end of the fight!
Ryu Hayabusa showed his dominance in that final round.
Well Hayabusa has outscored his opponent in every aspect of the fight today. Only a scarily incompetent judge or two will keep him from a well deserved win... Over to the ring announcer for the scorecards.
Ladies and gentlemen, after 3 rounds of action, we go to the scorecards for a decision.
Judge Yukihiro Shimada scores the fight 30:25
Judge Kenichi Hosakawa scores the fight 30:25
Judge Yasuomi Hirokawa scores the fight 30:25
In favor of your winner, by unanimous decision... Ryu Hayabusa!
|
|
|
|
|
|
|
|
|
|
|
|
|
|
|
|
|
|
|
|
|
|
|
| S |
C
A |
G |
S |
C
B |
G |
|
S |
C |
G |
|
energy
A | B |
|
hype
A | B |
|
pop
A | B |
|
mgr
A | B |
|
FIGHT
RATING
51% |
|
|
|
|
|
|
