|
|
PBP Commentary |
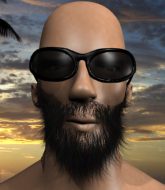
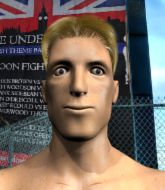
Coming up we have a lightweight MMA rules bout between Brhan Achmed (ranked 0 p4p, 0 weight class) and Eddard Stark (ranked 0 p4p, 0 weight class). Eddard Stark has the better chin. Will he look to stand and bang today?
 |
|
 |
| 173 cm
23
163 lbs
1 - 1 - 0 |
|
180 cm
21
165 lbs
0 - 0 - 0 |
Good takedowns
Brawler
Very quick |
|
BJJ Blue Belt
Brawler
Solid chin |
|
| |
|
Ladies and gentlemen. This fight is 3 rounds, in the lightweight division.
Introducing the fighter to my left, fighting out of the red corner.
With a record of
1 - 1 - 0, fighting out of St Petersburg, Brhan Achmed!
And introducing the fighter to my right, fighting out of the blue corner.
With a record of
0 - 0 - 0, fighting out of St Petersburg, Eddard Stark!
The judges for this bout are Igor Prikhodko, Dmitry Maklakov and Viktor Lagutenko.

The bell rings for round one and we are underway!
Stark stuns Achmed with a nice body shot, before stepping back out of range.
Nice defenses there by Achmed.

Achmed shoots in for a takedown and gets it. Let's see what he's got on the mat.
Achmed wants to control from the top but Stark keeps moving.
Achmed stands up and looks to throw the legs aside to pass to side control. Stark swivels though and keeps the full guard.
Stark looking to hit a scissor sweep but Achmed is one step ahead there.
Stark is persisting with the attempt to improve his position.
Achmed trying to control the position from guard on top but Stark is wriggling around, looking for whatever he can.
Stark really doesn't want to stay on the ground with Achmed. If he can't get it back to his feet, it's only a matter of time before he'll be tapping out.
Achmed stopping the sweep attempt from Stark.

Achmed is trying to work a guillotine from the top, or something like that? Don't know how he thinks he's going to get a finish from there.
Achmed won't allow Stark to sweep him here.

Neither fighter is doing enough for the referee's liking and he's decided to stand them back up.
Stark gets taken down but at least he's managed to land in guard.
We get told so often about how wrestlers don't like to be on their backs. Let's see if Stark can do anything to dispel that myth.

That's one minute gone in the round.
Achmed thinks about going for a leg but decides against it, in order to maintain the position.
The ref warns both fighters not to hold the cage as they work up against the meshing.
Achmed trying to control but Stark is working from the bottom.
Stark wants to stand but Achmed is controlling the position.
Stark keeping moving, preventing Achmed from controlling successfully.
Stark manages to sweep nicely, so he's now on top. Achmed manages to get himself to full guard.
Achmed is looking for a triangle but Stark pushes his legs off easily.
Both fighters really going for it on the ground here!
Achmed is breathing heavily.
Achmed keeping moving, preventing Stark from controlling successfully.
The fighters are starting to perspire pretty heavily.
Stark throwing strikes but missing.
Stark must be cautious of submissions here, given that his opponent has the superior Jiu Jitsu.
Achmed working from the bottom, still in full guard. He's managed to get a loose triangle. Stark doesn't seem to be doing much to defend here, obviously he feels comfortable in the position. Stark manages to throw the legs off his shoulder and he's back into guard - no problem.

That's two minutes gone in the round.
Stark trying to control but Achmed is working from the bottom.
Stark lands a couple of digs.
Achmed is looking for a triangle but Stark pushes his legs off easily.
Achmed has a loose triangle. He'll be looking to tighten that up but Stark can see exactly what he's planning and manages to posture up and free himself.
Stark lands a nice shot whilst sitting in his opponent's guard.
Achmed is working actively off his back, looking to secure an arm or perhaps work for a triangle.
Stark passes Achmed's left leg - he's now in half guard.
Stark winds up and cracks Achmed with a swinging punch to the side of the head.

That's three minutes gone in the round.
Achmed looking to work for a kimura from the bottom.
Stark is trying to control the action in half guard but Achmed is working away on the bottom, looking perhaps to get back to full guard.
Stark looks towards his corner to check for any instructions. The corner give him nothing to work with, so he cracks Achmed with a short hammerfist. I guess that's as good as any advice he could get in this position.
Stark lands with a punch from half guard.
Nice strikes from Stark there.
Stark not landing any meaningful shots this time.
Achmed is looking to regain full guard. Not this time though.
Achmed works his way to full guard. Good work.
Stark tries to free his leg and advance position but Achmed is retaining full guard.
The fighters are pressed up against the cage, both looking to find a bit of space to work.
Achmed trying to control the position.
Stark is looking to work some ground and pound but Achmed has wrist control.

That's four minutes gone in the round.
The crowd are hurling abuse towards the fighters... You can hardly blame them though because there isn't a lot going on in the fight.
Achmed has his foot on Stark's thigh. He's trying to push off and get in position for a triangle, I think. Stark works his way back into a safe position though.
Stark trying to pass the guard but can't manage it just yet.
Achmed wants to sweep here but Stark controlling him for the moment.
Achmed wants to hit a switch here but Stark passes into full mount! Oh no, disaster for Achmed there!
Stark unloading with bombs!
Stark is landing with some decent strikes but Achmed is trying to advance his position so the referee is letting the fight continue.
Achmed regains half guard.
Stark throwing shots but they're hitting the canvas more than the man.
Achmed is trying to maintain the position but Stark is very close to passing his half guard.
Achmed regains full guard. Nicely done.
Achmed has a loose triangle. He'll be looking to tighten that up but Stark can see exactly what he's planning and manages to posture up and free himself.
And thats the end of the round the fighters go back to their corners.
Brhan Achmed dominated that round.
The minute break is over - no more time for sponges and pep talks - back to the action!

Achmed avoids a punch combination nicely.
Stark fakes high and swings low for a body shot but Achmed manages to avoid it.
Stark swings for the body but Achmed moves out of range.
Stark thows a left - swing and a miss!
Achmed throws a looping left and ducks down for a takedown. He's got his arms around Stark's waist but Stark gets an underhook and avoids the takedown by throwing Achmed off to one side.
Achmed feints and then dives in with a takedown. That was a long way out but the feint bought him enough time to close the distance and complete the takedown. Now we'll play guard for a bit and see who can get the better of that position.
Achmed drops back for a leg! It's a sloppy attempt though and Achmed jumps back into guard quickly, to retain the dominant position.
Stark is active off his back here, looking for submissions.
Stark can't keep his opponent in guard - Achmed advances to half guard, no doubt looking to mount.
Achmed moves nicely into side control.
Achmed wants to control but Stark is keeping him busy.
Both fighters are absolutely exhausted here.
That's one minute gone in the round.
Achmed is trying to land an Americana. He has the arm isolated but Stark is keeping cool and he's avoided the danger for now.
Achmed trying to control the position but Stark is working away.
Achmed looking for an arm triangle but it's way too loose to do anything.
Stark gets one leg under and gets the fight to half guard.
Achmed looking to pass the half guard. Not this time.
Stark is looking to control Achmed's leg but it's slowly edging free. Can Stark avoid being mounted?
That's two minutes gone in the round.
My god... these two guys really need to pick up the pace or everyone will leave to go get a beer.
Achmed is thinking about going for an arm triangle but he can't free his leg.
Brhan Achmed overall seems to be getting the better of the ground position in the fight so far.
Achmed seems to be working for a kimura but Stark defends the submission attempt.
Stark is refusing to be controlled, as Achmed sits in half guard.
Stark punching from the bottom.
Achmed is trying to work for a kimura. He's got his hands clasped together - this could be trouble! No, Stark has managed to free his arm - good work.
Stark gets full guard.
Achmed won't allow Stark to sweep him here.
Achmed trying to pass the guard but can't manage it just yet.
That's three minutes gone in the round.
Stark manages to land a sweep and now he's in mount on top!
Achmed slips a leg in and gets back to half guard.
Achmed regains full guard. Nicely done.
Achmed is working the butterfly guard. He manages to land a nice scissor sweep and is now in half guard on the top. Nice move.
Achmed is looking to take a break and control but Stark is keeping him honest, looking to work from the bottom.
Stark wants to improve his position but Achmed is controlling well.
Achmed seems very keen to just sit and control from half guard but Stark does not like that idea so much and is remaining active off his back.
Stark misses with some strikes from the bottom.
That's four minutes gone in the round.
Stark misses with some strikes from the bottom.
Stark is looking to regain full guard. Not this time though.
Achmed wants to lay and pray for a moment but Stark keeps working.
The referee has ruled that neither fighter is active enough on the ground and has stood them back up.
Achmed closes the distance and clinches up, looking for a takedown. He shifts his weight and gets a nice trip into half guard.
Achmed is working for a submission of some sort.
Achmed passes to full mount!
Achmed looking for a guillotine from mount but Stark is having none of it.
Achmed trying to control but Stark is having none of it.
And thats the end of the round the fighters go back to their corners.
Brhan Achmed dominated that second round.
OK. That's time! The bell goes and we're back to the action. Let's get this one finished - here comes the final round!

Stark swings for the body but Achmed moves out of range.
A jab from Stark misses.
Achmed shoots in and drives through. Stark sprawls well.
Stark misses with a looping right.
Stark fakes a head shot and lands one to the body.
Achmed closes this distance looking for a takedown but Stark circles away.
Stark connects with a looping left hand that seems like it dazed Achmed momentarily.
Achmed shoots in and drives through. Stark sprawls well.
That's three failed takedown attempts in the round for Brhan Achmed. That's going to take a lot out of him.
Stark lands a beauty of a right hand that gets the crowd cheering.
Stark scores with a nice right hand.
Stark lands a with a good body shot.
Stark thows a body shot but no joy.
Both fighters are breathing heavily.
Achmed fails with a takedown attempt.
Achmed showing good head movement there, avoiding the strikes from Stark.
That's one minute gone in the round.
Achmed uses decent footwork to sidestep a right hand from Stark.
Achmed shoots in but Stark avoids the takedown attempt easily.
Stark ducks down and throws a hook to the body but Achmed moves away.
Achmed feints and then dives in with a takedown. That was a long way out but the feint bought him enough time to close the distance and complete the takedown. Now we'll play guard for a bit and see who can get the better of that position.
Stark keeping moving, preventing Achmed from controlling successfully.
Stark bucks up whilst keeping hold of a body lock, managing to reverse the position. Now he's in top in Achmed's guard.
Achmed has a loose triangle. He'll be looking to tighten that up but Stark can see exactly what he's planning and manages to posture up and free himself.
Achmed has his foot on Stark's thigh. He's trying to push off and get in position for a triangle, I think. Stark works his way back into a safe position though.
Achmed had isolated an arm as going for an omaplata. Stark is defending the submission well but is in a very vulnerable position. Achmed Is leaning forward trying to finish the omaplata but decides to abandon it, and take Stark's back instead.
That's two minutes gone in the round.
Stark turns into Achmed and is now in his guard.
Achmed not looking particularly offensive just at the moment.
Achmed working from the bottom, still in full guard. He's managed to get a loose triangle. Stark doesn't seem to be doing much to defend here, obviously he feels comfortable in the position. Stark manages to throw the legs off his shoulder and he's back into guard - no problem.
Stark won't allow Achmed to sweep him here.
Stark trying to control but Achmed is working from the bottom.
Achmed working from the bottom, still in full guard. He's managed to get a loose triangle. Stark doesn't seem to be doing much to defend here, obviously he feels comfortable in the position. Oh but Achmed is tightening it up a little... Stark has to be careful here... He's got his foot tucked under now, this looks tight! Stark reacted too slowly and this one could be over in a matter of seconds! YES! Stark taps out! nice BJJ there by Achmed!
Ladies and gentlemen, after 3:05 of round 3, we have a winner by way of Submission (Triangle Choke). Brhan Achmed!
|
|
|
|
|
|
|
|
|
|
|
|
|
|
|
|
|
|
|
|
|
|
|
| S |
C
A |
G |
S |
C
B |
G |
|
S |
C |
G |
|
energy
A | B |
|
hype
A | B |
|
pop
A | B |
|
mgr
A | B |
|
FIGHT
RATING
85% |
|
|
|
|
|
|
