|
|
PBP Commentary |
Coming up we have a bantamweight MMA rules bout between Keith Sardine (ranked 0 p4p, 0 weight class) and John Higgins (ranked 0 p4p, 0 weight class). John Higgins has the power to score a knockout today if he connects clean with Keith Sardine's chin.
 |
|
 |
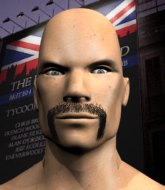
| 198 cm
22
135 lbs
0 - 2 - 0 |
|
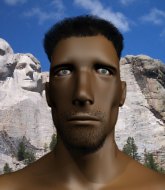
225 cm
22
140 lbs
0 - 0 - 0 |
BJJ Purple Belt
Brawler
Cuts easily |
|
BJJ White Belt
Excellent boxer
Heavy handed |
|
| |
|
Ladies and gentlemen. This fight is 3 rounds, in the bantamweight division.
Introducing the fighter to my left, fighting out of the red corner.
With a record of
0 - 2 - 0, fighting out of London, Keith Sardine!
And introducing the fighter to my right, fighting out of the blue corner.
With a record of
0 - 0 - 0, fighting out of London, John Higgins!
The judges for this bout are James Glass, Paul Tew and Steven Brown.

The bell rings for round one and we are underway!
Higgins throws a right and a left that both miss.
Higgins misses with a two punch combination.
Higgins misses with a few strikes there.
Higgins throws a right hand that Sardine ducks under and follows up with a left that Sardine also avoids with ease.
Sardine fails with a rather predictable takedown attempt.
Higgins lands a head shot.
Higgins stuffs the takedown attempt from Sardine. Sardine gets slowly back to his feet.
Higgins throws a wild combination but nothing lands.
We've had a slow start to the round here - hopefully the action picks up.
Sardine shoots in for a takedown but Higgins shows good takedown defense.
That's three failed takedown attempts in the round for Keith Sardine. That's going to take a lot out of him.
Sardine walks into a straight right hand from Higgins.
Sardine shoots for a double leg takedown but Higgins sprawls well. He's pushed Sardine's face into the mat and manages to get back to his feet relatively easily.
Sardine closes this distance looking for a takedown but Higgins circles away.

That's one minute gone in the round.
Higgins works Sardine's body with a nice hook.
A jab lands there for Higgins.
Sardine on the wrong end of a decent looking cross there.
Higgins displaying good standup as he scores with a three punch combination.
Sardine is on the wrong end of a nice combination from Higgins.
Higgins is using his reach advantage to land shots from outside his opponent's range.
Sardine fails with a takedown attempt from distance.
Sardine is breathing heavily.
Higgins swings away but doesn't land with a series of punches.
Higgins throws a series of punches but Sardine moves out of range.
Higgins keeps the fight standing with a nice sprawl.
Sardine fails miserably with a takedown attempt.

That's two minutes gone in the round.
Higgins misses with a wild combination.
A shot to de liver by Higgins. Beautiful body shot.
Higgins scores with a decent looking hook.
Higgins swings away but doesn't land with a series of punches.
Higgins lands a two punch combo.
Higgins throws a combination but it was largely blocked by Sardine.
Sardine shoots in and drives through. Higgins sprawls well.
Sardine tries for a takedown but Higgins sees it coming a mile off and avoids it easily.
Higgins closes the distance and clinches up with Sardine, looking for a takedown. Higgins pushes Sardine against the cage but Sardine circles to the side and manages to break the clinch.

That's three minutes gone in the round.
Sardine needs to keep his hands up - Higgins had a free shot at his head there.
Sardine changes levels and looks for a double leg takedown. Higgins tries to avoid it but Sardine manages to keep hold of a leg and drag Higgins to the ground. Higgins escapes though and pops straight back up to his feet.
A jab lands there for Higgins.
A really sloppy takedown attempt there from Sardine.
Higgins lands a jab. Then a cross. Then finally a nice hook to the body. Good work there by Higgins.
Higgins misses with a two punch combination.
Sardine misses with a takedown attempt - Higgins sprawls well and throws a nice strike on the way out which just misses.
Higgins misses with a wild combination.

That's four minutes gone in the round.
There's not a lot going on here and the crowd are letting the fighters know they're not willing to tolerate a lack of action.
Sardine closes the distance and clinches up with Higgins, looking for a takedown. Sardine pushes Higgins against the cage but Higgins circles to the side and manages to break the clinch.
Sardine misses with a takedown attempt - Higgins sprawls well and throws a nice strike on the way out which just misses.
Sardine looks for a takedown but Higgins sprawls well.
Higgins throws a nice looking combination but Sardine bobs and weaves to avoid any damage.
Sardine really does look like a pencil wearing a pair of gloves. Let's hope he has a gameplan to suit that ridiculous body shape.
The crowd thankful this round is nearly over.
Nice sprawl there from Higgins as Sardine shoots in.
Sardine shoots in for a takedown. "Ole!" shouts Higgins as he jumps to the side.
And thats the end of the round the fighters go back to their corners.
John Higgins dominated that round.
The corners get their ten second warning. Both fighters stand from their stools and stare eachother down, ready to get back to the action.

Higgins's corner calls for a 1,2 combination and Higgins duly obliges.
Higgins lands with a right hand.
Higgins looks to score with a combo but nothing lands.
Sardine shoots in and drives through. Higgins sprawls well.
Higgins dips to his left and cracks Sardine with an uppercut!
Higgins stuffs the takedown attempt from Sardine. Sardine gets slowly back to his feet.
We've had a slow start to the round here - hopefully the action picks up.
Higgins sizes up Sardine with a pawing jab and scores with a straight right down the middle.
Higgins misses with a wild combination.
Both fighters are absolutely exhausted here.
Sardine will have to do better than that with his takedown attempts.
That's three failed takedown attempts in the round for Keith Sardine. That's going to take a lot out of him.
That's one minute gone in the round.
Higgins shoots in for a takedown. "Ole!" shouts Sardine as he jumps to the side.
Sardine misses with a takedown attempt - Higgins sprawls well and throws a nice strike on the way out which just misses.
Sardine walks into a straight right hand from Higgins.
Higgins might want to mix his strikes up a bit more. He's just going for head shots at the moment and that can become a bit predictable.
Sardine shoots in for a takedown. "I don't think so" says Higgins as he avoids it easily.
No luck for Sardine with that takedown attempt.
Sardine showing good head movement there, avoiding the strikes from Higgins.
That's two minutes gone in the round.
The crowd are hurling abuse towards the fighters... You can hardly blame them though because there isn't a lot going on in the fight.
Higgins stooping low to avoid any incoming strikes and then lunges in with an uppercut come cross that lands flush.
No luck for Sardine with that takedown attempt.
Higgins scores with a jab to the body.
No joy there for Higgins, who threw a few shots but didn't land.
Sardine fails with a takedown attempt from distance.
Sardine shoots in with a takedown attempt and he has Higgins pinned against the cage. Higgins gets the underhooks and manages to circle away.
Higgins cracks Sardine with a nice right hand that draws applause from the crowd.
That's three minutes gone in the round.
Decent striking displayed by Higgins there.
Higgins throws a nice hook to the body that draws an oooh from the crowd.
Sardine looks for a takedown here. Will he get it? Higgins is fending him off so far but Sardine persists. Nope, Higgins circles away and we're back to standing.
Sardine dodges the punch combination from Higgins.
Sardine doesn't succeed with the takedown
and Higgins counters with a stiff right hand.
Sardine checks a leg kick.
A telegraphed right hand from Higgins misses the target.
That's four minutes gone in the round.
A few boos can be heard. I'm sure they will multiply if the fighters don't pick up the pace.
Higgins misses with a hook. Sardine ducked under it nicely.
Sardine shoots in and drives through. Higgins sprawls well.
Sardine stuffs the takedown.
A punch combination from Higgins misses.
Sardine looks for a takedown here. Will he get it? Higgins is fending him off so far but Sardine persists. Nope, Higgins circles away and we're back to standing.
Higgins throws a right and a left that Sardine avoids nicely.
Sardine misses with a takedown attempt. He shot from a bit too far out.
Boooooooooooooooooooo!!! God, this has been a terrible round. Come on you two, sort yourselves out!
Higgins misses with a series of wild punches.
Sardine shoots in for a takedown. "I don't think so" says Higgins as he avoids it easily.
And thats the end of the round the fighters go back to their corners.
John Higgins showed his class in that round. I'd imagine he'll take it on all the scorecards.
The minute break is over - no more time for sponges and pep talks - back to the action! This is the final round!

Higgins misses with a two punch combination.
Sardine has a takedown stuffed.
Higgins throws a one two combo.
Sardine has his hands up protecting his head but a hook from Higgins finds it's way round the side to connect with Sardine's head.
Sardine has his takedown stuffed
and Higgins counters with a right hand to the body.
We've had a slow start to the round here - hopefully the action picks up.
Sardine closes this distance looking for a takedown but Higgins circles away.
That's three failed takedown attempts in the round for Keith Sardine. That's going to take a lot out of him.
Both fighters are breathing heavily.
Higgins scores with a sloppy right hand. Sardine should have avoided that one.
Higgins misses with a few strikes there.
Higgins stuffs the takedown attempt from Sardine. Sardine gets slowly back to his feet.
Sardine looks like he's developed a pretty tasty lump over his left eye. He'll need to avoid taking much more damage to that.
That's one minute gone in the round.
Higgins lands a pitter patter jab to the forehead of his opponent.
Higgins fails to land with the punch combination there - jab, cross, hook, miss, miss, miss.
A really sloppy takedown attempt there from Sardine.
Sardine shoots for a double leg takedown but Higgins sprawls well. He's pushed Sardine's face into the mat and manages to get back to his feet relatively easily.
Sardine avoids a punch combination nicely.
Keith Sardine seems to be the more aggressive standup fighter in this bout.
Sardine will have to do better than that with his takedown attempts.
That's two minutes gone in the round.
A lull in the action here being met with boos from the crowd.
Higgins throws a right hand that Sardine ducks under and follows up with a left that Sardine also avoids with ease.
Higgins will need to tighten up his combinations if he doesn't want to gas himself out, swinging at thin air.
Sardine throws a looping left and ducks down for a takedown. He's got his arms around Higgins's waist but Higgins gets an underhook and avoids the takedown by throwing Sardine off to one side.
Higgins misses with a double jab.
Higgins uses good footwork to get in and out, landing a nice hook.
Higgins misses with a wild body shot.
Sardine shoots in but no luck this time.
Sardine closes the distance and clinches up with Higgins, looking for a takedown. Sardine pushes Higgins against the cage but Higgins circles to the side and manages to break the clinch.
Sardine uses some good footwork to avoid the body shot by Higgins.
That's three minutes gone in the round.
Nice takedown defense from Higgins. No joy for Sardine on that attempt.
Sardine shoots in but no luck this time.
Higgins throws a right and a left that both miss.
Sardine shoots in for a takedown. "Ole!" shouts Higgins as he jumps to the side.
Higgins with a jab.
Sardine will have to do better than that with his takedown attempts.
No luck for Sardine with that takedown attempt.
A punch combination from Higgins misses.
That's four minutes gone in the round.
A lull in the action here being met with boos from the crowd.
Higgins throws a combination but it was largely blocked by Sardine.
Sardine ducks under a wild hook from Higgins.
Sardine throws a looping left and ducks down for a takedown. He's got his arms around Higgins's waist but Higgins gets an underhook and avoids the takedown by throwing Sardine off to one side.
Higgins shoots in for a takedown but doesn't get it.
Higgins misses with a jab and misses with a cross straight after too.
John Higgins is fighting for a decision here - he's started to take the cautious approach.
Higgins scores with a nice right hand.
Higgins swings and misses with a hook to the body.
Boooooooooooooooooooo!!! God, this has been a terrible round. Come on you two, sort yourselves out!
Sardine shoots in for a takedown but doesn't get it.
Higgins misses with a jab and misses with a cross straight after too.
Keith Sardine has stepped it up - he knows he needs a finish here!
Sardine shoots in for a takedown but Higgins shows good takedown defense.
And that's the end of the fight!
John Higgins comfortably won the final round on my scorecard.
Well Higgins has outworked and out performed his opponent in all aspects of the game today. He was simply too good and the decision should be no more than a formality. Over to the ring announcer for the scorecards.
Ladies and gentlemen, after 3 rounds of action, we go to the scorecards for a decision.
Judge James Glass scores the fight 27:30
Judge Paul Tew scores the fight 27:30
Judge Steven Brown scores the fight 27:30
In favor of your winner, by unanimous decision... John Higgins!
|
|
|
|
|
|
|
|
|
|
|
|
|
|
|
|
|
|
|
|
|
|
|
| S |
C
A |
G |
S |
C
B |
G |
|
S |
C |
G |
|
energy
A | B |
|
hype
A | B |
|
pop
A | B |
|
mgr
A | B |
|
FIGHT
RATING
16% |
|
|
|
|
|
|
