|
|
PBP Commentary |
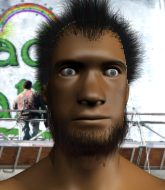
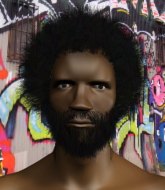
Coming up we have a middleweight MMA rules bout between Russian Experiment II (ranked 0 p4p, 0 weight class) and World B Free (ranked 0 p4p, 0 weight class). Chooooooooon! I think Experiment II might be my favorite fighter, now he's come out to Terminator 2 - Bad to the Bone. Free has chosen Redemption Song -Bob Marley as his entrance music. There are an array of beautiful celebrities at ringside tonight! I wonder if any of them paid for their tickets.
 |
|
 |
| 185 cm
22
183 lbs
1 - 0 - 0 |
|
187 cm
22
195 lbs
1 - 0 - 0 |
BJJ White Belt
Brawler
Good chin |
|
BJJ Purple Belt
Decent boxing
Tends to cut |
|
| |
|
Ladies and gentlemen. This fight is 3 rounds, in the middleweight division.
Introducing the fighter to my left, fighting out of the red corner.
With a record of
1 - 0 - 0, fighting out of Los Angeles, Russian Experiment II!
And introducing the fighter to my right, fighting out of the blue corner.
With a record of
1 - 0 - 0, fighting out of Los Angeles, World B Free!
The judges for this bout are , and .

The bell rings for round one and we are underway!
Experiment II fails to land with a series of punches.
Experiment II waving his hands out infront of him, looking to distract Free.
Free fails with a rather predictable takedown attempt.
Experiment II throws a hook to the body but it doesn't connect.
Experiment II throws an overhand right that lands on Free's shoulder, as Free tries to avoid the shot.
Free misses with a double jab.
The crowd cheers as Experiment II lands an impressive looking overhand right. Free doesn't seem phased though.

It looks like World B Free has been cut.
Free tries to clinch but Experiment II is having none of it.
Experiment II misses with an uppercut. Free saw that one coming.
Nice combo by Experiment II! Oh, that's hurt him - Free falls to the canvas and Experiment II follows him into side control.

Free is rocked!
You can see the frustration on Free's face, being in this tough position on the bottom.
Free is still in real trouble! Can Experiment II finish him?
Free is trying to get back to half guard.

Experiment II stands up and we're back to a striking position.
Free seems to have recovered his senses.
Experiment II misses with a double jab
and Free counters with a three punch combination, finished off with a leg kick. Nice work.

That's one minute gone in the round.
Experiment II throws a body punch but Free moves out of range.
Experiment II throws a jab, cross combination which is slipped
and Free counters with a left to the body.
Experiment II moves out of range as Free strikes.
Russian Experiment II seems to be the more aggressive standup fighter in this bout.
Experiment II misses with a jab and misses with a cross straight after too.
Experiment II misses with the combination.
Free looks frusrated there after his takedown attempt is stuffed easily.
Experiment II looks to score with a combo but nothing lands.
Russian Experiment II is looking to keep the fight on the feet at all costs.
Experiment II throws a poor cross that misses
and Free counters nicely by changing levels and landing a hook to the body.
Experiment II misses with a shot to the body
and Free counters with a three punch combo that has Experiment II backing up. Experiment II nods at Free to acknowledge the strikes.
Free fails with a rather predictable takedown attempt.
Russian Experiment II has stuffed three takedown attempts in the round now. That's going to take a lot out of World B Free.
Experiment II falls off balance throwing a combination
and Free counters with a one-two to the body.
Experiment II falls off balance throwing a combination
and Free makes him pay by landing a nice hook to the body before moving out of range.
Experiment II is breathing heavily.

That's two minutes gone in the round.
Experiment II throws a left and a right that both miss
and Free counters with a one-two to the body.

Experiment II moves into range and clinches up with Free.
Free tries for a takedown but Experiment II manages to get underhooks.
A hook to the body from Experiment II.
Experiment II lands a body shot in the clinch.
A short uppercut from Experiment II.
Experiment II lands with a short shot to the head.
Experiment II lands with a left to the head.
Free wants to break free but Experiment II has control.
Experiment II scores with a shot to the side of Free's head.
Experiment II stops a takedown attempt from Free.
A right handed body shot lands from Experiment II.
Experiment II lands a right uppercut that snaps the head of Free backwards.
Experiment II lands a left hand.
A quick uppercut on the inside from Experiment II.
A right hook to the body lands for Experiment II.
Free throws a head punch that misses.
Experiment II stops a takedown attempt from Free.
Experiment II scores with a hook to the body.
Experiment II lands with a good tight uppercut to the head.
A short uppercut from Experiment II.
Free tries to stall but Experiment II uses the opportunity to gain a better position.
Experiment II lands a right hand that snaps the head of Free backwards.
Free drops down looking for an ankle pick but Experiment II pulls his leg out and moves away.
Experiment II throws a body punch but Free moves out of range.

That's three minutes gone in the round.
Free throws a series of punches but Experiment II moves out of range.
A shot to the body from Experiment II misses
and Free counters with a series of strikes. Experiment II will be more careful next time no doubt.
Experiment II lands with a two punch combination before moving back out of range.
Free slips a jab and a cross from Experiment II.
Free tries to keep at a distance but Experiment II has taken the fight into the clinch.
Experiment II works for underhooks and lands a body shot in the process.
A quick uppercut on the inside from Experiment II.
Experiment II lands with a short head shot on the inside.
Free stalling in the clinch but Experiment II improves position.
Experiment II working some nice short punches in the clinch.
Experiment II working some nice short punches in the clinch.
Experiment II lands with a left to the head.
Free has hold of a leg and is looking for a trip takedown. Experiment II avoids it nicely though and we remain in the clinch.
A short right from Experiment II on the inside.
A short body shot lands from Experiment II as the two fighters clinch.
Good body shot from Experiment II.
Experiment II lands punches inside but they're not really causing much damage.
Experiment II lands with a short shot to the head.

That's four minutes gone in the round.
Nice body punch from Experiment II.
Experiment II lands with a good tight uppercut to the head.
Experiment II lands with a left to the head.
Experiment II cracks Free with a nice body shot.
Experiment II scores with a shoulder strike.
Experiment II makes some space for himself and lands an uppercut.
Experiment II scores with an uppercut up the middle.
Experiment II lands a shoulder strike.
Experiment II lands with a right to the head.
A short body shot lands from Experiment II as the two fighters clinch.
A right hand to the body from Experiment II.
Experiment II scores with an uppercut up the middle.
Experiment II lands a shoulder strike.
Still in the clinch, Experiment II scores with a nice short uppercut.
Experiment II lands with a good tight uppercut to the head.
Experiment II keeps control of Free as he tries to wriggle out of the double underhooks.
A shot in the inside from Experiment II.
Experiment II lands a shoulder strike that jolts his opponent's head backwards.
Experiment II lands a body shot in the clinch.
The crowd applaud the fighters efforts here as the round comes to an end.
Experiment II lands a right hand.
Free can't break the clinch.
A body shot lands from Experiment II.
Experiment II lands with a good tight uppercut to the head.
Free has a body lock and is looking for a takedown. Experiment II is bouncing around trying to prevent the takedown and somehow he has indeed managed to stay on his feet.
Experiment II lands a shoulder strike.
A right hook to the body lands for Experiment II.
And thats the end of the round the fighters go back to their corners.
Russian Experiment II dominated that round.
The cut man is working on World B Free's cut.
The minute break is over - no more time for sponges and pep talks - back to the action!

Experiment II connects with a single shot there.
Experiment II throws a lazy uppercut
and Free counters with a good right hand that lands right on the jaw.
Experiment II scores to the head and body with a nice combination!
Experiment II looks to land a right hand but Free moved out of range.
Free looks for a takedown here. Will he get it? Experiment II is fending him off so far but Free persists. Nope, Experiment II circles away and we're back to standing.
Experiment II moves into the clinch.
Good body shot from Experiment II.
A short right from Experiment II on the inside.
Free has had enough of the clinch but Experiment II keeps him there for the moment.
Nice body punch from Experiment II.
A left hand lands to the body for Experiment II.
Experiment II lands a right uppercut that snaps the head of Free backwards.
Experiment II working on landing some head shots here - that one got through nicely.
Free can't find room to land a body shot as Experiment II controls the action.
Experiment II lands with a short punch from the clinch.
Experiment II lands on the inside with an uppercut.
Experiment II lands with a short head shot on the inside.
Experiment II lands a short shot on the inside that snaps the head of Free backwards.
Both fighters are absolutely exhausted here.
Free drops down for a takedown but doesn't get it.
Experiment II lands a right hand.
An uppercut to the body lands inside from Experiment II.
That's one minute gone in the round.
Experiment II cracks Free with a nice body shot.
Experiment II lands a shoulder strike that jolts his opponent's head backwards.
Experiment II lands a short shot on the inside that snaps the head of Free backwards.
Experiment II throws a blind hook that connects with the side of Frees head.
A quick uppercut on the inside from Experiment II.
Free looks to throw an elbow but misses.
Experiment II lands a body shot in the clinch.
Free tries to pull guard but Experiment II won't allow it.
Russian Experiment II has stuffed three takedown attempts in the round now. That's going to take a lot out of World B Free.
A nice right hand lands inside from Experiment II.
Experiment II lands punches inside but they're not really causing much damage.
Experiment II lands a body punch in the clinch.
Experiment II lands a body shot.
Experiment II lands a left hand that snaps the head of Free backwards.
Experiment II lands a hook that snaps the head of Free backwards.
Experiment II lands a hook to the side of the head.
Experiment II lands a body punch.
A quick uppercut on the inside from Experiment II.
A head punch on the inside from Free fails to land.
Experiment II throws a blind hook that connects with the side of Frees head.
Free tries to pull guard but Experiment II won't allow it.
Experiment II throws a head punch that misses.
Free looking to slow down the pace here.
A shot in the inside from Experiment II.
That's two minutes gone in the round.
Free wants to break free. God knows he wants to breaaaak freeee.
Experiment II lands a hook that snaps the head of Free backwards.
An uppercut on the inside fails to land for Experiment II.
Nice body punch from Experiment II.
Experiment II scores with an uppercut up the middle.
A short right from Experiment II on the inside.
Free trying to stall but Experiment II improves his position.
Experiment II misses with a hook from the clinch.
Experiment II softening up his opponent with strikes, against the cage.
Free drops to a knee looking for a takedown but Experiment II gets the underhooks and prevents it.
A nice left hand lands by Experiment II.
Experiment II prevents the takedown attempt.
Experiment II lands with a left to the head.
Free fails to pull the fight into his guard.
Free misses with a body punch.
Experiment II lands punches inside but they're not really causing much damage.
Free drops down looking for an ankle pick but Experiment II pulls his leg out and moves away.
Nice defenses there by Free.
Experiment II rushes forward with a series of wild hooks but Free moves out of range and avoids them all easily.
That's three minutes gone in the round.
Experiment II throws a right hand that misses
and Free counters with a three punch combo that has Experiment II backing up. Experiment II nods at Free to acknowledge the strikes.
Free tries to clinch
and Experiment II counters with a straight right hand.
Free thows a body shot but no joy.
Experiment II throws out a token jab with nothing on it.
Experiment II throws a two punch combo that lands nicely.
Experiment II swings wildly with a couple of big hooks
and Free counters with a two punch combo.
Experiment II misses the shot to the body.
Free ducks under a wild hook from Experiment II.
Nice body punch from Free.
Experiment II is looking to clinch but Free is avoiding it.
Jab, cross, leg kick. Nice combination by Free!
Free displaying good standup as he scores with a three punch combination.
Experiment II throws a jab, cross combination which is slipped
and Free counters with a lovely shot to the body.
Free lands a jab-cross combination.
Experiment II throws a combination that misses
and Free makes him pay by landing a nice hook to the body before moving out of range.
Experiment II misses with a combination

and Free counters with a nice double leg into half guard.
The fighters are pressed up against the cage, both looking to find a bit of space to work.
Free is thwarting Experiment II's attempts to control the position.
That's four minutes gone in the round.
Experiment II gets back to full guard.
Experiment II wants to stand up but Free is controlling him.
Experiment II seems keen to control rather than go for a submission, at least for now.
The ref warns both fighters not to hold the cage as they work up against the meshing.
This is a great period of action - very entertaining stuff!
Free trying to control but Experiment II is working from the bottom.
Experiment II wants to sweep here but Free controlling him for the moment.
The crowd applaud the fighters efforts here as the round comes to an end.

Free drops back, looking for a kneebar! Experiment II looks panicked! The fighters roll across the mat, one looking to finish, one looking to escape. Experiment II looks to have wriggled free... Yes, he's got his leg free and he's dived into side control! Good work there from Experiment II!
Experiment II takes a little break here. Free wants to take advantage but he is being controlled well.
And thats the end of the round the fighters go back to their corners.
Russian Experiment II dominated that second round.
The cut man is working on World B Free's cut.
That's time! Back to the action! This is the final round!

Experiment II avoids the clinch attempt nicely.
Experiment II throws a left and a right that both miss
and Free counters with a three punch combination, finished off with a leg kick. Nice work.
Experiment II throws a combination but it was largely blocked by Free.
Experiment II looks to score with a combo but nothing lands.
Experiment II fails to land with the punch combination there - jab, cross, hook, miss, miss, miss.
Free lands a head shot.
Nice shot by Free.
Experiment II moves into the clinch.
Experiment II lands with a short shot to the head.
Free tries to pull guard but Experiment II holds him up against the cage and eventually Free drops back down to his feet.
Free doesn't land with the attempted body shot.
Experiment II lands on the inside with an uppercut.
Free is trying to slow down the pace in the clinch, to catch his breath.
A short uppercut from Experiment II.
Experiment II lands a right hand.
Both fighters are breathing heavily.
Experiment II lands a right hand.
A left hand lands to the body for Experiment II.
That's one minute gone in the round.
Experiment II lands a body shot in the clinch.
Experiment II working some nice short punches in the clinch.
Nice body punch from Experiment II.
Experiment II lands a body shot in the clinch.
Experiment II lands with a short head shot on the inside.
A short uppercut from Experiment II.
A right hand to the body from Experiment II.
A right hook to the body lands for Experiment II.
Free can't break the clinch.
Free with an attempt at a knee that misses.
Experiment II lands a left hand.
A short body shot lands from Experiment II as the two fighters clinch.
Experiment II lands an uppercut.
Free wants to strike at distance but he can't break free of the clinch.
Experiment II lands with a good tight uppercut to the head.
Free looking to stall.
Experiment II lands a shot to the body.
Experiment II throws a blind hook that connects with the side of Frees head.
Experiment II cracks Free with a nice body shot.
A short uppercut from Experiment II.
Experiment II lands with a good tight uppercut to the head.
A short right from Experiment II.
Experiment II cracks Free with a nice body shot.
A nice right hand lands inside from Experiment II.
Experiment II lands an uppercut.
That's two minutes gone in the round.
A short body shot lands from Experiment II as the two fighters clinch.
Experiment II lands a shoulder strike.
Experiment II misses with a short punch on the inside.
Experiment II blocks a couple of punches on the inside.
Free tries to take the fight to the ground by pulling guard but can't manage it.
Free wants to break the clinch but can't.
Free can't get the takedown.
Russian Experiment II has stuffed three takedown attempts in the round now. That's going to take a lot out of World B Free.
Experiment II misses with the head strike.
Free blocks an uppercut.
Experiment II misses with the head strike.
Free blocks a couple of punches on the inside.
Free has had enough of the clinch but Experiment II keeps him there for the moment.
Free misses with a body punch.
Free wants to break the clinch but can't.
Experiment II lands a short shot on the inside that snaps the head of Free backwards.
Experiment II is leaning against Free and scores with a nice uppercut to the body.
Free blocks a couple of punches on the inside.
Experiment II lands with a quick shot inside that doesn't really do much damage.
Free misses with a punch on the inside.
Experiment II prevents a takedown attempt there.
Free has a body lock and is looking for a takedown. Experiment II is bouncing around trying to prevent the takedown and somehow he has indeed managed to stay on his feet.
Experiment II scores with a nice hook to the head.
Free misses with a hook from the clinch.
Free tries to pull guard but Experiment II won't allow it.
That's three minutes gone in the round.
Experiment II scores with a hook to the body.
Experiment II gets double underhooks to prevent a takedown attempt from Free.
Experiment II gets through Free's defenses to land a nice punch to the side of the head.
Experiment II lands with a left to the head.
Experiment II works on Free's body with a couple of short punches.
Experiment II lands with a good tight uppercut to the head.
A nice right hand lands inside from Experiment II.
A head punch on the inside from Free fails to land.
Experiment II lands with a light punch inside.
An uppercut on the inside fails to land for Free.
Good body shot from Experiment II.
A quick uppercut on the inside from Experiment II.
Experiment II lands a right hand.
A short right from Experiment II on the inside.
Experiment II lands a left hand.
Experiment II pushes Free back against the cage and lands a hook to the side of the head.
Experiment II lands a right hand that snaps the head of Free backwards.
Still in the clinch, Experiment II scores with a nice short uppercut.
Experiment II lands a left hand.
Experiment II lands a right hand that snaps the head of Free backwards.
Free wants to get back to striking at distance but Experiment II won't allow it.
A body shot lands from Experiment II.
Experiment II working on landing some head shots here - that one got through nicely.
That's four minutes gone in the round.
There's not a lot going on here and the crowd are letting the fighters know they're not willing to tolerate a lack of action.
Free misses with a hook to the ribs.
Experiment II lands a right uppercut that snaps the head of Free backwards.
A head punch on the inside from Free fails to land.
Experiment II lands an uppercut.
Experiment II working aggressively here.
Experiment II lands a right hand.
A hook to the body from Experiment II.
Russian Experiment II has scored more points in the clinch so far.
Free tries for a takedown but Experiment II manages to get underhooks.
Experiment II lands a body punch.
A left hand lands to the body for Experiment II.
A hook to the body from Experiment II.
Free stalling in the clinch but Experiment II improves position.
Experiment II lands a nice uppercut.
World B Free has stepped it up - he knows he needs a finish here!
Free misses with a body punch.
Free struggles to land a body shot inside as Experiment II controls his hands.
Experiment II can't find room to land a body shot as Free controls the action.
Free is trying to break free.
Free tries to pull guard but Experiment II holds him up against the cage and eventually Free drops back down to his feet.
Free tries for a takedown but Experiment II manages to get underhooks.
The crowd thankful this round is nearly over.
Experiment II makes some space for himself and lands an uppercut.
Experiment II lands with a left to the head.
Free misses with the head strike.
Experiment II lands a nice looking hook to the body, against the cage.
Experiment II lands a hook to the body. It's hard to tell if that hurt Free or not.
Experiment II prevents a body shot from Free.
And that's the end of the fight!
Russian Experiment II showed his dominance in that final round.
Well I reckon that's a shut out for Experiment II, winning every round. Will the judges agree? They are the ones who matter, even if they are often depressingly incompetent. Over to the ring announcer for the scorecards.
Ladies and gentlemen, after 3 rounds of action, we go to the scorecards for a decision.
Judge Andi Peters scores the fight 30:27
Judge Gordon Ramsey scores the fight 30:27
Judge Frank Skinner scores the fight 30:27
In favor of your winner, by unanimous decision... Russian Experiment II!
|
|
|
|
|
|
|
|
|
|
|
|
|
|
|
|
|
|
|
|
|
|
|
| S |
C
A |
G |
S |
C
B |
G |
|
S |
C |
G |
|
energy
A | B |
|
hype
A | B |
|
pop
A | B |
|
mgr
A | B |
|
FIGHT
RATING
71% |
|
|
|
|
|
|
