|
|
PBP Commentary |
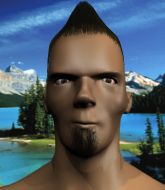
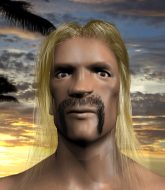
Coming up we have a lightweight MMA rules bout between Dave Higginbotham (ranked 0 p4p, 0 weight class) and Buck Buckmaster (ranked 0 p4p, 0 weight class). Buck Buckmaster is the more experienced fighter, so let's see if that makes a difference tonight.
 |
|
 |
| 174 cm
23
144 lbs
6 - 1 - 0 |
|
159 cm
25
135 lbs
6 - 1 - 0 |
BJJ Purple Belt
Brawler
KO power |
|
BJJ Brown Belt
Counter fighter
Knockout power |
|
| |
|
Ladies and gentlemen. This fight is 3 rounds, in the lightweight division.
Introducing the fighter to my left, fighting out of the red corner.
With a record of
6 - 1 - 0, fighting out of London, Dave Higginbotham!
And introducing the fighter to my right, fighting out of the blue corner.
With a record of
6 - 1 - 0, fighting out of Rio de Janeiro, Buck Buckmaster!
The judges for this bout are Frank Dennis, George Francis and Gwen Towbar.

The bell rings for round one and we are underway!

Higginbotham fakes a strike and closes the distance, dragging Buckmaster to the ground. Higginbotham is now in Buckmaster's guard.

Buckmaster throwing his legs up looking for a triangle.
Higginbotham not doing a lot at the moment. He'll have to show some more aggression or the fight will get stood up.
Buckmaster looking for submissions from the bottom here. Moving his hips around, possibly looking for an armbar.
Buckmaster throwing some rather feeble looking strikes off his back.
Higginbotham wants to control from the top but Buckmaster keeps moving.
Higginbotham will need to keep those long limbs tucked in whilst he's on the ground, to prevent any submissions.
Higginbotham is really struggling to control Buckmaster but he's trying to hold on to the position.
Buckmaster looking for submissions off his back, moving his hips, looking for an opening.
We've had a slow start to the round here - hopefully the action picks up.
Buckmaster is looking for a triangle here but Higginbotham uses the submission attempt to pass into side control.
Higginbotham controlling from side mount.

That's one minute gone in the round.
Higginbotham's ground tactics aren't going to win him many fans. Let's hope he's got fireworks for us if he gets back to his feet because he's not doing much on the ground.
The fighters are pressed up against the cage, both looking to find a bit of space to work.
Buckmaster is trying to get back to half guard.
Higginbotham trying to control the position but Buckmaster is working away.
Higginbotham gets to mount! Buckmaster was on the offensive and wasn't defending properly.
The ref warns both fighters not to hold the cage as they work up against the meshing.
Buckmaster slips a leg in and gets back to half guard.
Buckmaster looking for submissions off his back.
The fighters are going at a pretty good pace and they're both starting to sweat now.
Buckmaster looking to work for a kimura from the bottom.
Buckmaster looks winded!

That's two minutes gone in the round.
Higginbotham keeping composed on the top, looking to control the action.
Buckmaster has been taking part in the yoga sessions down at Turka Elite Gym. Presumably he's going to look for a slick submission... Or maybe he's looking to avoid one.
Higginbotham tries to pass the half guard into mount. Buckmaster knows what he's doing though and prevents the attempt.
Higginbotham keeping composed on the top, looking to control the action.
Higginbotham is pressing down on Buckmaster's thigh, looking to free his foot. Buckmaster is holding on for now.
Higginbotham is trying to control the action in half guard but Buckmaster is working away on the bottom, looking perhaps to get back to full guard.
Higginbotham with a momentary lay and pray from half guard.
Buckmaster is looking to regain full guard. Not this time though.
Buckmaster looking for submissions from an awkward position here.
Higginbotham is keen to just control but Buckmaster is a slippery customer.
Buckmaster tries to get to full guard but Higginbotham has control of the leg.

That's three minutes gone in the round.
Buckmaster looking to work for a kimura from the bottom.
Buckmaster looking for submissions off his back.
Higginbotham tries to pass to full mount but Buckmaster defends it.
Higginbotham trying to control the pace.
Buckmaster punching from the bottom.

The referee has stepped in and called for a break in the action. We'll restart on the feet.
Higginbotham defending well as Buckmaster loads up on a big left hand.
Buckmaster throws out a loose jab but Higginbotham uses good head movement to avoid it.
Higginbotham tries to clinch there but Buckmaster circles away.

That's four minutes gone in the round.
Neither fighter has done anything of merit for a good minute or two here and the crowd are not happy about it.
No luck for Higginbotham with that takedown attempt.
Higginbotham shoots and misses

and Buckmaster counters with a takedown into side control! That could mean trouble for Higginbotham!
Buckmaster is looking for a kimura. He might have it! No, Higginbotham has escaped the position, nice work there.
Buckmaster goes for an armbar! This could be all over! Wait, no, Higginbotham rolls with the submission and now he's on top in Buckmaster's guard! Nice work there by Higginbotham!
Higginbotham controls from within his opponent's guard.

Higginbotham decides he's had enough of playing guard and decides to stand. Come on Buckmaster, up you get!
The crowd thankful this round is nearly over.
A telegraphed takedown attempt from Higginbotham is defended easily by Buckmaster.
That's three failed takedown attempts in the round for Dave Higginbotham. That's going to take a lot out of him.
Higginbotham shoots in looking for a double leg takedown. Buckmaster defends it nicely.
And thats the end of the round the fighters go back to their corners.
A close round but Buck Buckmaster will probably get the nod.
The fighters' corners scream their final instructions, as the referee calls time. Here we go, back to the action!

Higginbotham goes for a double leg but Buckmaster avoids the attempt and the two fighters end up clinched against the cage as Buckmaster continues to drive forward.
Higginbotham tries to jump guard but he falls flat on his backside. Buckmaster smiles and moves away.
Buckmaster closes the distance and after a bit of a stuggle, scores a takedown into Higginbotham's guard.
Buckmaster has gone for a leg lock! Higginbotham slips out almost immediately though and dives into Buckmaster's guard.

Buckmaster is throwing his legs up, looking for submissions. Higginbotham is aware though and is defending well.
We've had a slow start to the round here - hopefully the action picks up.
Higginbotham avoids a guillotine attempt easily.
Higginbotham would like to get this fight back to the feet but can't get free from the closed guard.
That's one minute gone in the round.
Buckmaster had isolated an arm as going for a kimura. Higginbotham defends it easily.
Buckmaster is breathing heavily.
Buckmaster keeping moving, preventing Higginbotham from controlling successfully.
Buckmaster is looking for a triangle but Higginbotham pushes his legs off easily.
Buckmaster keeping moving, preventing Higginbotham from controlling successfully.
Buckmaster can't do much from the bottom at the moment, as Higginbotham controls the pace.
Buckmaster keeping moving, preventing Higginbotham from controlling successfully.
Buckmaster looking to sweep here. No luck so far.
That's two minutes gone in the round.
The crowd are hurling abuse towards the fighters... You can hardly blame them though because there isn't a lot going on in the fight.
Higginbotham looking to pass the guard.
Buckmaster has a loose triangle. He'll be looking to tighten that up but Higginbotham can see exactly what he's planning and manages to posture up and free himself.
Higginbotham advances to half guard.
Higginbotham is keen to just control but Buckmaster is a slippery customer.
Buckmaster is in trouble now - Higginbotham has advanced to mount!
Buckmaster keeping his composure momentarily, calmly looking to get back to half guard.
Higginbotham trying to control but Buckmaster is having none of it.
That's three minutes gone in the round.

Higginbotham is working on an americana here. Ooh, that looks pretty nasty! Nope, Buckmaster has managed to escape the submission attempt.
Higginbotham looking for an armbar but decides to keep the dominant position instead.
Buckmaster sneaks a leg back under and regains half guard and is working straight away to try and get back to guard. He hasn't managed just yet though.
Buckmaster wants to get back to full guard.
Buckmaster is looking to sinch up a guillotine here but Higginbotham pulls his head out easily.
Higginbotham is keen to just control but Buckmaster is a slippery customer.
Higginbotham is looking to pass the guard... He's managed it - he's now in full mount!
Buckmaster tries to reverse the position but Higginbotham maintains control.
That's four minutes gone in the round.
Buckmaster keeps trying to improve his position.
Buckmaster is squirming around, avoiding Higginbotham's attempts to control the action.
Buckmaster is looking to get to half guard.
Higginbotham looking to control but Buckmaster is working nicely, looking to advance position himself.
Buckmaster is desperately trying to get back to half guard.
Boooooooooooooooooooo!!! God, this has been a terrible round. Come on you two, sort yourselves out!
BOOM! Higginbotham connects with a massive shot to the dome!
Higginbotham trying to control but Buckmaster is having none of it.
BOOM! Higginbotham connects with a massive shot to the dome!
And thats the end of the round the fighters go back to their corners.
Dave Higginbotham dominated that second round.
The fighters get back to their feet, the hooter sounds and we're back to the action! This is the final round!

Buckmaster gets caught napping as Higginbotham dives in and scores a takedown. Buckmaster manages to retain guard.
Higginbotham pressing down on his opponent's thigh, looking to pass guard. Buckmaster is keeping the position for now.
Buckmaster throwing his legs up looking for a triangle.
Higginbotham is intent on slowing down the pace of the fight, simply looking to control.
Higginbotham avoids a guillotine attempt easily.
Buckmaster is looking for a triangle but Higginbotham pushes his legs off easily.
Dave Higginbotham overall seems to be getting the better of the ground position in the fight so far.
We've had a slow start to the round here - hopefully the action picks up.
Higginbotham wants to control from the top but Buckmaster keeps moving.
Buckmaster takes a big intake of breath there - he's definitely tired.
Higginbotham passes easily into side control. Nice work.
That's one minute gone in the round.
Higginbotham is maintaining the dominant position - no doubt Buckmaster will start to get frustrated soon if he's not already.
Higginbotham wants to lay and pray for a moment but Buckmaster keeps working.
Buckmaster is trying to improve his position.
Buckmaster is moving his hips around well on the bottom and has managed to get back to half guard.
Higginbotham is keen to just control but Buckmaster is a slippery customer.
Higginbotham is going to have to think about doing something other than just controlling because Buckmaster is managing to avoid having the position dictated to him.
Higginbotham is looking to advance position but Buckmaster won't allow it.
Buckmaster looking for submissions from an awkward position here.
That's two minutes gone in the round.
A few boos can be heard. I'm sure they will multiply if the fighters don't pick up the pace.
Higginbotham looks to score some points with some ground and pound.
Higginbotham wants to free his trapped foot but Buckmaster is holding on for dear life with his legs.
Higginbotham is looking to pass the guard... He's managed it - he's now in full mount!
Buckmaster flailing away with punches but nothing is landing.
Higginbotham trying to control but Buckmaster is having none of it.
Buckmaster keeping his composure momentarily, calmly looking to get back to half guard.
Higginbotham can't quite control the action as he would like just now, as Buckmaster is looking to escape.
That's three minutes gone in the round.
Higginbotham is working on an americana here. Ooh, that looks pretty nasty! Nope, Buckmaster has managed to escape the submission attempt.
Higginbotham working for a guillotine from mount but Buckmaster is in no mood to give up.
Higginbotham controlling the pace for now.
Buckmaster really trying hard to get back to half guard here.
Higginbotham tries to control but Buckmaster wriggling away.
Buckmaster keeping his composure momentarily, calmly looking to get back to half guard.
That's four minutes gone in the round.
Higginbotham can't quite control the action as he would like just now, as Buckmaster is looking to escape.
Buckmaster is working to get back to half guard.
Higginbotham is really dominating this fight. Is there anything that Buckmaster can do to turn this around?
Buckmaster gets back to half guard.
Buckmaster tries to get to full guard but Higginbotham has control of the leg.
Higginbotham seems content to maintain position for now, rather than mounting any offense.
Higginbotham seems to be looking for submissions.
Boooooooooooooooooooo!!! God, this has been a terrible round. Come on you two, sort yourselves out!
Buckmaster looking to work for a kimura from the bottom.
And that's the end of the fight!
Dave Higginbotham showed his dominance in that final round.
I think Higginbotham has won this one but let's see what the judges have to say. Over to the ring announcer for the scorecards.
Ladies and gentlemen, after 3 rounds of action, we go to the scorecards for a decision.
Judge Frank Dennis scores the fight 30:28
Judge George Francis scores the fight 29:28
Judge Gwen Towbar scores the fight 29:28
In favor of your winner, by unanimous decision... Dave Higginbotham!
|
|
|
|
|
|
|
|
|
|
|
|
|
|
|
|
|
|
|
|
|
|
|
| S |
C
A |
G |
S |
C
B |
G |
|
S |
C |
G |
|
energy
A | B |
|
hype
A | B |
|
pop
A | B |
|
mgr
A | B |
|
FIGHT
RATING
29% |
|
|
|
|
|
|
