|
|
PBP Commentary |
Coming up we have a featherweight MMA rules bout between Masa Wada (ranked 0 p4p, 0 weight class) and Toreo Morimoto (ranked 0 p4p, 0 weight class). Masa Wada has the better chin. Will he look to stand and bang today?
 |
|
 |
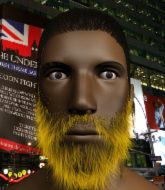
| 181 cm
18
149 lbs
4 - 0 - 0 |
|
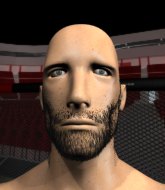
165 cm
24
150 lbs
4 - 0 - 0 |
BJJ Purple Belt
Brawler
Big heart |
|
BJJ Blue Belt
Basic striking
Enjoys gardening |
|
| |
|
Ladies and gentlemen. This fight is 3 rounds, in the featherweight division.
Introducing the fighter to my left, fighting out of the red corner.
With a record of
4 - 0 - 0, fighting out of Tokyo, Masa Wada!
And introducing the fighter to my right, fighting out of the blue corner.
With a record of
4 - 0 - 0, fighting out of Tokyo, Toreo Morimoto!
The judges for this bout are Kenichi Hosakawa, Shigeki Sano and Yukihiro Yamamoto.

The bell rings for round one and we are underway!
Wada shoots in for a takedown - he's clinched up with Morimoto but Morimoto pushes him off and we're back to square one.
Wada on the wrong end of a kick to the body.
Wada fakes high and shoots in for a takedown but Morimoto avoids it really well and circles away.
Morimoto catches Wada with a nice straight right. He seems pissed - ooooh, it's on now! On like donkey kong!
Morimoto lands a slapping body shot.

Wada closes the distance and pushes Morimoto back into the cage.
Morimoto unloads a knee to the mid-section.
We can't be sure of the tactics at this early stage but we have heard that Morimoto has been working on his takedowns a lot in the buildup to the fight and we can only assume he's going to look to take this to the mat.
Morimoto lands with a good tight uppercut to the head.
Wada swings wildly with an uppercut but Morimoto uses good head movement to avoid it.
The pace slowing considerably in the clinch, as Morimoto takes a break from that fighting nonsense to think about the finer things in life.
The crowd are loving this. Great action here.
Kneeeeees! The crowd are calling for knees to the body. Morimoto obliges.
Wada is breathing heavily.
A body shot lands from Morimoto.
Morimoto controlling the action here for a moment.
Morimoto pushes Wada back against the cage and unloads with a body punch.
Morimoto prevents a takedown attempt there.
That's three failed takedown attempts in the round for Masa Wada. That's going to take a lot out of him.
Morimoto connects with a nasty looking knee right to Wada's face.

That's one minute gone in the round.
Knees in the clinch landing for Morimoto.
Wada takes a knee to the side of the body.
Morimoto lands a damaging elbow.
Morimoto scores a nice knee to the body.
Morimoto lands an uppercut.
Morimoto landing knees to the head.
Morimoto utilising his Muay Thai to score with a knee to the body.
This is a great period of action - very entertaining stuff!
Morimoto landing knees to the body. They look like they could hurt.
Morimoto displaying some good clinch control by pressing Wada up against the cage.
Morimoto throws a blind hook that connects with the side of Wadas head.
Morimoto throws a blind hook that connects with the side of Wadas head.
Morimoto lands a nice uppercut.
Morimoto connects with a knee to the head.
Wada looks to be in better condition than last time we saw him fight. Obviously he's been working hard on his cardio.
Morimoto scores with a knee to the head.

Wada is rocked!
Morimoto landing knees to the head.
Oh Wada is still all over the place! His legs are completely gone! Will he be able to recover?!!
Knees in the clinch landing for Morimoto.
Morimoto lands a body shot.

That's two minutes gone in the round.
Wada wants to take the fight to the mat but Morimoto manages to get underhooks and keep the fight in the clinch.
Morimoto has Wada pressed against the cage.
Morimoto lands a glancing elbow in the clinch.
Wada tries for a takedown but Morimoto manages to get underhooks.
Wada seems to have got his legs back now.
Morimoto digs a right hand into Wada's ribs. Those have got to be taking their toll on Wada's gas tank.
Good body shot from Morimoto.
Morimoto stalling.
Wada drops down for a takedown but doesn't get it.
Knees in the clinch landing for Morimoto.
Morimoto with the Thai clinch, lands a knee to the head.
Morimoto working on landing some head shots here - that one got through nicely.
Morimoto creates a bit of space for himself and sneaks an elbow through Wada's defenses.
Morimoto lands an elbow inside.
Morimoto comes over the top with an elbow. That landed flush.
A shot in the inside from Morimoto.
Morimoto prevents a takedown attempt there.
Morimoto scores with a shot to the side of Wada's head.

That's three minutes gone in the round.
Wada has hold of a leg and is looking for a trip takedown. Morimoto avoids it nicely though and we remain in the clinch.
Morimoto lands an elbow inside that Wada shrugs off.
Morimoto lands with a right to the head.
Morimoto crunches a lovely knee into Wada's ribcage.
Morimoto working on landing some head shots here - that one got through nicely.
Morimoto scores with a hook to the body.
A right handed body shot lands from Morimoto.
An uppercut to the body lands inside from Morimoto.
Morimoto lands a nice looking hook to the body, against the cage.
Morimoto landing knees to the body.
The crowd are loving this. Great action here.
Morimoto has Wada pushed against the cage.
Wada really does look like a pencil wearing a pair of gloves. Let's hope he has a gameplan to suit that ridiculous body shape.
Morimoto lands a nice looking hook to the body, against the cage.
Morimoto with the Thai clinch, lands a knee to the head.
Knees to the body from Morimoto.
Nice elbow from Morimoto.
Morimoto lands with a short shot to the head.
Morimoto utilising his Muay Thai to score with a knee to the body.
Morimoto scores with a knee to the head.

That's four minutes gone in the round.
Morimoto is struggling to control the position.
Morimoto makes some space for himself and lands an uppercut.
The fighters are starting to get sweaty, which will make takedowns a bit more tricky.
Morimoto presses Wada against the cage and delivers a mid-strength body shot.
Morimoto landing some nice looking knees to the body.
Wada wants a takedown but no success here.
Morimoto lands a nice knee to the body.
Morimoto cracks Wada with a nice body shot.
Morimoto lands an elbow inside that Wada shrugs off.
Morimoto throws a blind hook that connects with the side of Wadas head.
Morimoto crunches a lovely knee into Wada's ribcage.
The crowd are going absolutely nuts as the round comes to an end - what a fantastic round of action!

Morimoto breaks the clinch.
Morimoto uses good footwork to get in and out, landing a nice hook.
Wada looks for a takedown here. Will he get it? Morimoto is fending him off so far but Wada persists. Nope, Morimoto circles away and we're back to standing.
Morimoto uses good footwork to get in and out and land a nice right hand before Wada has time to react.

Morimoto bobs and weaves into range and then changes levels and scores with a nice takedown into side control.
And thats the end of the round the fighters go back to their corners.
Toreo Morimoto dominated that round.
That's time! Back to the action!

Morimoto getting the better of the striking in that exchange.
Morimoto moves into range and connects with a jab.
Wada misses with a takedown attempt. He shot from a bit too far out.
Wada takes a solid shot to the body. That one hurt him but he's trying not to show it.
Morimoto throws a couple of head shots and lands with the final one - a decent hook, which struck Wada on the side of the head.
Masa Wada seems to be the more aggressive standup fighter in this bout.

Morimoto moves into the clinch successfully.
Morimoto lands with a left to the head.
Knees in the clinch landing for Morimoto.
Toreo Morimoto seems to be working more effectively in the clinch in the fight so far.
Morimoto lands a nice elbow.
Morimoto lands a left hand that snaps the head of Wada backwards.
Kneeeeees! The crowd are calling for knees to the body. Morimoto obliges.
Wooooo! Give it up for these two warriors! They are putting on a show!
Morimoto stalling the fight.
Morimoto lands a short shot on the inside that snaps the head of Wada backwards.
Morimoto utilising his Muay Thai to score with a knee to the body.
Morimoto lands a nice shot to the body.
Both fighters are absolutely exhausted here.
That's one minute gone in the round.
Morimoto lands a knee to the head there! That was nasty!
Morimoto slowing the pace effectively.

Morimoto drops Wada with a big knee straight up the middle! Wada is covering up against the cage but manages to escape and gets back to his feet!
Morimoto drives through and clinches with Wada against the cage.
A short body shot lands from Morimoto as the two fighters clinch.
Fantastic stuff here - a very entertaining period of action, which has drawn cheers from the crowd.
Wada changes levels and goes for a takedown here. Morimoto fights it off and pushes away nicely.
Morimoto's corner calls for a 1-2. Morimoto obliges with the 1 part as he scores the single shot and moves back out of range.
Morimoto looks to land a combination. Wada sees it coming but can only parry a couple of the shots.
Wada goes for a double leg but Morimoto avoids the attempt and the two fighters end up clinched against the cage as Morimoto continues to drive forward.
That's three failed takedown attempts in the round for Masa Wada. That's going to take a lot out of him.
A right hook to the body lands for Morimoto.
Nice elbow from Morimoto.
Morimoto content to slow the pace in the clinch.
That's two minutes gone in the round.
Morimoto lands with a short shot to the head.
Wada has hold of a leg and is looking for a trip takedown. Morimoto avoids it nicely though and we remain in the clinch.
Morimoto leaning his opponent against the cage.
Morimoto landing knees to the body. They look like they could hurt.
Morimoto scores with a nice hook to the head.
Wada is trying to drag Morimoto to the mat but Morimoto just about manages to keep his footing. He used the cage to his advantage there.
Morimoto lands a nice looking hook to the body, against the cage.
Morimoto is stalling here.
A nice right hand lands inside from Morimoto.
Morimoto gets through Wada's defenses to land a nice punch to the side of the head.
That's three minutes gone in the round.
Morimoto drops Wada with a big knee straight up the middle! Wada is covering up against the cage but manages to escape and gets back to his feet!
Morimoto moves into the clinch.
The referee is keeping an eye on Morimoto - much more stalling and he will separate the fighters.
Morimoto gets double underhooks to prevent a takedown attempt from Wada.
Fantastic stuff here - a very entertaining period of action, which has drawn cheers from the crowd.
Morimoto lands with a good tight uppercut to the head.
Morimoto scores with a shoulder strike.
A knee to the head by Morimoto.
Wada goes for a takedown in the clinch but Morimoto prevents it.
Morimoto cracks Wada on the chin with a massive knee! He's been separated from consciousness before he even hits the floor! Absolutely fantastic knee and a brutal finish!
Ladies and gentlemen, after 4:58 of round 2, we have a winner by way of KO (Knee). Toreo Morimoto!
A victorious Toreo Morimoto thanked his army of followers in his post fight interview, telling people to make sure they follow him on Twitter.
|
|
|
|
|
|
|
|
|
|
|
|
|
|
|
|
|
|
|
|
|
|
|
| S |
C
A |
G |
S |
C
B |
G |
|
S |
C |
G |
|
energy
A | B |
|
hype
A | B |
|
pop
A | B |
|
mgr
A | B |
|
FIGHT
RATING
100% |
|
|
|
|
|
|

