|
|
PBP Commentary |
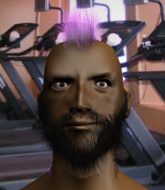
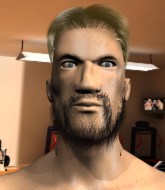
Coming up we have a light heavyweight MMA rules bout between Chad Griggs (ranked 0 p4p, 0 weight class) and James Mitchell (ranked 0 p4p, 0 weight class). Chad Griggs has the edge in experience - let's see if he can make that count tonight.
 |
|
 |
| 190 cm
26
209 lbs
8 - 8 - 0 |
|
185 cm
21
210 lbs
2 - 2 - 0 |
Good wrestling
Solid boxing
KO power |
|
Good wrestler
Excellent boxer
Good gas tank |
|
| |
|
Ladies and gentlemen. This fight is 3 rounds, in the light heavyweight division.
Introducing the fighter to my left, fighting out of the red corner.
With a record of
8 - 8 - 0, fighting out of Amsterdam, Chad Griggs!
And introducing the fighter to my right, fighting out of the blue corner.
With a record of
2 - 2 - 0, fighting out of Amsterdam, James Mitchell!
The judges for this bout are Aafke Stam, Paulsen Ambrosius and Radbod Blank.

The bell rings for round one and we are underway!
Griggs tries for a takedown but Mitchell circles away easily
and Mitchell counters with a lovely straight right hand!

It looks like Chad Griggs has been cut.
Griggs shoots in for a takedown but Mitchell shows good takedown defense there and keeps this one on the feet.
Griggs with a poor takedown
enabling Mitchell to counter with a crisp jab.
That's three failed takedown attempts in the round for Chad Griggs. That's going to take a lot out of him.
Griggs takes a body kick right on the floating rib. Ouchie.
Griggs shoots in looking for a takedown. Mitchell tries to sprawl out of it but Griggs keeps driving through. The fighters are pinned against the cage. Mitchell manages to get underhooks and after a bit of a struggle, circles away and we're back to standing.
Mitchell shoots in looking for a double leg takedown. Griggs defends it nicely.
Griggs doesn't succeed with the takedown
and Mitchell counters with a head kick. That will keep Griggs thinking before he tries any more sloppy attacks!
Chad Griggs seems to be the more aggressive standup fighter in this bout.
The crowd cheering loudly, showing their appreciation for the quality fight we're seeing here.
Mitchell misses with a few strikes there.

Griggs drives through with a really nice takedown into side control.
Mitchell gets back to half guard.
The fighters are pressed up against the cage, both looking to find a bit of space to work.

That's one minute gone in the round.
Mitchell gets back to full guard.
Mitchell is looking to stand up but Griggs isn't so interested in that idea.
Mitchell wants to sweep here but Griggs controlling him for the moment.
Mitchell has his hands on Griggs's head, controlling the position.
Griggs trying to control the position from guard on top but Mitchell is wriggling around, looking for whatever he can.
Mitchell manages to land a sweep and now he's in mount on top!

That's two minutes gone in the round.
Griggs sneaks a leg under to get to half guard.
Griggs trying to hold on to Mitchell's head to control him but Mitchell postures up.
Griggs avoiding damage under a succession of punches from Mitchell.
Griggs keeping control of the position.
Griggs trying to control here.
Griggs won't allow Mitchell to pass to mount.

That's three minutes gone in the round.
Griggs is looking to improve his position.
Griggs is concentrating on defense, preventing Mitchell from advancing position.

The ref stands the fighters back up because Chad Griggs just wasn't active enough.
Mitchell slaps away a takedown attempt from Griggs, before circling back to the center of the mat.
Griggs shoots in for a takedown but Mitchell shows good takedown defense there and keeps this one on the feet.
Mitchell throws a head kick that connects with a bit of head and a bit of hand.
Griggs misses with a takedown
and Griggs takes a counter punch right on the button for his troubles.
Griggs fails with a takedown attempt.

That's four minutes gone in the round.
Mitchell lands a jab-cross combination.
The fans in attendance giving it up for the two fighters, who have really let it all hang out in the last minute or so!
Griggs drives through with a takedown into Mitchell's guard. Let's see what he can do from the top position.
Mitchell wants to control here, rather than go for any submissions from the bottom. At least for now.
Mitchell lands an upkick as Griggs stands over him.
Mitchell seems keen to control rather than go for a submission, at least for now.
Mitchell keeping moving, preventing Griggs from controlling successfully.
The crowd are going absolutely nuts as the round comes to an end - what a fantastic round of action!
Mitchell bucks up whilst keeping hold of a body lock, managing to reverse the position. Now he's in top in Griggs's guard.
Mitchell looking to control the position here, rather than advance.
And that�s the end of the round � the fighters go back to their corners.
James Mitchell dominated that round.
The cut man is working on Chad Griggs's cut.
The corners get their ten second warning. Both fighters stand from their stools and stare eachother down, ready to get back to the action.

Griggs shoots in looking for a takedown. Mitchell tries to sprawl out of it but Griggs keeps driving through. The fighters are pinned against the cage. Mitchell manages to get underhooks and after a bit of a struggle, circles away and we're back to standing.
Mitchell tries to bum rush Griggs with a series of wild strikes but Griggs uses good footwork to avoid the assault.
Griggs tries for a takedown but Mitchell circles away easily
and Mitchell counters with a body kick.
Mitchell throws a right and a left that both miss.
Griggs with a lazy takedown attempt

and Mitchell counters with a shoot takedown. Griggs fights it but they end up in guard.
That's three failed takedown attempts in the round for Chad Griggs. That's going to take a lot out of him.
Mitchell postures up.
Mitchell content to stall in guard here.
This is a great period of action - very entertaining stuff!
Griggs keeping moving, preventing Mitchell from controlling successfully.
That's one minute gone in the round.
Mitchell stands and throws Griggs's legs to the side, diving into side control.
Griggs is not in a great position here, taking some shots.
Griggs is trying to improve his position.
Mitchell content to control the pace. The referee will try and keep them active though.
Griggs is looking to reverse the position.
That's two minutes gone in the round.
Mitchell scores with a couple of nice shots to the head there. The referee takes a look at Griggs to see if he's OK.
Griggs is trying to control Mitchell's posture but Mitchell avoids it.
Griggs is looking to reverse the position.
Griggs is moving his hips around well on the bottom and has managed to get back to half guard.
Griggs is looking to improve his position.
Mitchell stalling.
Griggs makes his way to full guard. A much better position for Griggs.
Fantastic stuff here - a very entertaining period of action, which has drawn cheers from the crowd.
Griggs wants to control but Mitchell passes easily into half guard.
That's three minutes gone in the round.
Mitchell trying to mount his opponent but Griggs defends it.
Mitchell prevents Griggs from improving his position.
Griggs on his back here. We all know that wrestlers don't like being on their back so let's see if Griggs tries to get out of the position.
Griggs has his hands clasped together around Mitchell's back. He's all about the action.
Griggs wants to get back to full guard.
Griggs wants to get back to full guard but Mitchell has mounted him!
Griggs can't escape the position.
Mitchell tries to control but Griggs wriggling away.
James Mitchell has got the better of the ground game so far.
That's four minutes gone in the round.

Mitchell with some aggressive grappling here. He's looking for submissions here, rather than waiting for the opportunity to counter.
Griggs tries to lock up and control but Mitchell gives him a forearm to the face and pushes him away.
Mitchell can't quite control the action as he would like just now, as Griggs is looking to escape.
Mitchell fakes a shot to the body and cracks his opponent in the head. Nice ground and pound there!
As the round comes to an end the crowd are showing their appreciation for a great round of action.
Griggs tries to reverse the position but Mitchell maintains control.
Griggs bucks up and manages to get a nice reversal! He's in guard on the top - nicely done!
And that�s the end of the round � the fighters go back to their corners.
James Mitchell showed his class in that round. I'd imagine he'll take it on all the scorecards.
The cut man is working on Chad Griggs's cut.
The fighters' corners scream their final instructions, as the referee calls time. Here we go, back to the action! This is the final round!

Griggs throws a right hand that Mitchell ducks under and follows up with a left that Mitchell also avoids with ease.
Mitchell stuffs a takedown. It's all about dictating where the fight takes place and Mitchell wants it to stay on the feet.
Mitchell misses with a two punch combination.
Griggs shoots in and drives through. Mitchell sprawls well.
Mitchell throws a head kick that connects with a bit of head and a bit of hand.
Griggs looks for a takedown but Mitchell sprawls well.
That's three failed takedown attempts in the round for Chad Griggs. That's going to take a lot out of him.
Mitchell gets taken down but at least he's managed to land in guard.
Mitchell had isolated an arm as going for a kimura. Griggs defends it easily.
Mitchell manages to sweep nicely, so he's now on top. Griggs manages to get himself to full guard.
That's one minute gone in the round.
Griggs bucks up whilst keeping hold of a body lock, managing to reverse the position. Now he's in top in Mitchell's guard.
Griggs won't allow Mitchell to sweep him here.
Griggs throws an elbow that misses. Mitchell uses the momentum to reverse the position. He's now in Griggs's guard. Nice move by Mitchell!
Mitchell won't allow Griggs to sweep him here.
Mitchell seems content to control from guard here. He's going to have to remain active though if he doesn't want to get stood back up.
Griggs is trying to control the position from the bottom.
That's two minutes gone in the round.
Mitchell stopping the sweep attempt from Griggs.
Mitchell trying to control but Griggs is working from the bottom.
We may be looking at a referee standup if the pace doesn't pick up soon.

It looks like we're going to have a standup here. Neither fighter is doing enough on the ground.
Griggs shoots in for a takedown and gets it.
Mitchell wants to control but Griggs is keeping busy and won't allow it.
Griggs seems to be taking a bit of a break to think of his next move. He lands a short punch in the meantime.
That's three minutes gone in the round.
Mitchell wants to sweep but Griggs has passed to side control!
Griggs working away.
Mitchell tries to buck Griggs off but Griggs is having none of it.
Griggs in the domination position with Mitchell hanging on.
Mitchell struggling a bit here.
Griggs wants to control but Mitchell is keeping him busy.
Griggs working away.
Griggs fails to land a wild elbow strike.
Mitchell is trying to control Griggs's posture but Griggs avoids it.
James Mitchell is fighting for a decision - hopefully he's judged it right and he's actually winning the fight.
That's four minutes gone in the round.
Mitchell might have to switch it up a bit here because his efforts to control Griggs haven't been going to plan, at least at the current moment in time.
Mitchell is moving his hips around well on the bottom and has managed to get back to half guard.
The fighters are battling for position here. Mitchell manages to regain full guard. Nice work.
Mitchell tries to land a sweep but no joy.
Griggs has to be careful here, sitting in the guard of a superior BJJ player.
Griggs trying to control but Mitchell is working from the bottom.
Mitchell manages to land a sweep and now he's in mount on top!
The crowd are loving this. Great action here.
Griggs is trying desperately to improve position.
And that's the end of the fight!
I would just about give that final round to James Mitchell.
Well Mitchell has outworked and out performed his opponent in all aspects of the game today. He was simply too good and the decision should be no more than a formality. Over to the ring announcer for the scorecards.
Ladies and gentlemen, after 3 rounds of action, we go to the scorecards for a decision.
Judge Aafke Stam scores the fight 27:30
Judge Paulsen Ambrosius scores the fight 27:30
Judge Radbod Blank scores the fight 27:30
In favor of your winner, by unanimous decision... James Mitchell!
Our winner, James Mitchell, made sure he spent some time buttering up the crowd during his post fight interview, which will no doubt bring him a few more fans.
|
|
|
|
|
|
|
|
|
|
|
|
|
|
|
|
|
|
|
|
|
|
|
| S |
C
A |
G |
S |
C
B |
G |
|
S |
C |
G |
|
energy
A | B |
|
hype
A | B |
|
pop
A | B |
|
mgr
A | B |
|
FIGHT
RATING
62% |
|
|
|
|
|
|
