|
|
PBP Commentary |
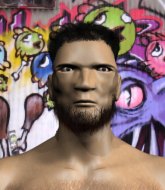
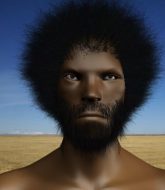
Coming up we have a welterweight MMA rules bout between Adam Ash (ranked 0 p4p, 0 weight class) and Rob Holmes (ranked 0 p4p, 0 weight class). Rob Holmes is the more experienced fighter, so let's see if that makes a difference tonight.
 |
|
 |
| 178 cm
21
168 lbs
1 - 1 - 0 |
|
200 cm
25
170 lbs
4 - 5 - 0 |
Decent wrestler
Basic striking
Granite chin |
|
BJJ Blue Belt
Solid Muay Thai
Solid chin |
|
| |
|
Ladies and gentlemen. This fight is 3 rounds, in the welterweight division.
Introducing the fighter to my left, fighting out of the red corner.
With a record of
1 - 1 - 0, fighting out of London, Adam Ash!
And introducing the fighter to my right, fighting out of the blue corner.
With a record of
4 - 5 - 0, fighting out of London, Rob Holmes!
The judges for this bout are Phil Schofield, Paul Tew and James Atkins.

The bell rings for round one and we are underway!
Holmes keeps the fight standing with a nice sprawl.

Ash gets a clinch.
Holmes stalling here - the referee won't stand for too much of that.

Holmes pushes off and circles away, back to the middle of the mat.
Ash tries to shoot in for a takedown. He's got hold of a leg but Holmes swivels and escapes.

Ash shoots in and gets a takedown into Holmes's guard.
Ash's corner is telling him to maintain position.
Holmes working the defensive guard well to avoid strikes from Ash.
Ash throws an elbow that misses. Holmes uses the momentum to reverse the position. He's now in Ash's guard. Nice move by Holmes!
Ash knows he needs to get back to his feet asap. He's simply no match for Holmes on the ground.
Ash wants to stand and escape but Holmes is having none of it.
Ash is doing well to control the posture of his opponent and prevent any damage.
Holmes passes Ash's right leg, so he's now in half guard.
The fighters are pressed up against the cage, both looking to find a bit of space to work.

That's one minute gone in the round.
Holmes is trying to control the action in half guard but Ash is working away on the bottom, looking perhaps to get back to full guard.
Ash is looking to regain full guard. Not this time though.

Ash looking to force a kimura from the bottom here. He's concentrating on that move too much though and Holmes pushes past his half guard into mount!
Holmes trying to control but he's not successful this time.
Ash is in all sorts of trouble here.
Ash wants to control but Holmes is having none of it.
Holmes controlling from mount.
Holmes avoids the attempt from Ash to control.

That's two minutes gone in the round.
Ash is squirming around, avoiding Holmes's attempts to control the action.
Ash might be looking to lock onto one of his opponent's long limbs for a submission, whilst we're on the ground.
Ash is flailing around like a fish out of water, trying to land strikes.
Ash is looking to get back to his feet - it's going to be hard from this position.
Holmes controlling the position easily from mount.
Holmes trying to control but Ash is having none of it.
Ash sneaks a leg back under and regains half guard and is working straight away to try and get back to guard. He hasn't managed just yet though.

That's three minutes gone in the round.
Holmes not doing much here.

OK we're going to have a standup here. Rob Holmes hasn't been effective enough on the ground and the referee wants a restart.
Ash closes the distance and clinches up with Holmes, looking for a takedown. Ash pushes Holmes against the cage but Holmes circles to the side and manages to break the clinch.
That's three failed takedown attempts in the round for Adam Ash. That's going to take a lot out of him.
Holmes shoots in for a takedown. "Ole!" shouts Ash as he jumps to the side.
Ash misses with a jab and misses with a cross straight after too.
Holmes doesn't manage to clinch there - Ash circles away.
Ash fakes a strike and closes the distance, dragging Holmes to the ground. Ash is now in Holmes's guard.
Ash trying to land body shots but he keeps hitting the mat.
Holmes keeping moving, preventing Ash from controlling successfully.
Ash trying to move into half guard but instead Holmes has managed to sweep!

That's four minutes gone in the round.
Holmes trying to control but Ash is working from the bottom.
Holmes won't allow Ash to sweep him here.
Holmes trying to control but Ash is working from the bottom.
Ash not looking particularly offensive just at the moment.
Ash striking off his back but it's not causing Holmes any problems.

Holmes stands and steps away. Ash gets to his feet too and we're back to the striking game.
The fans in attendance giving it up for the two fighters, who have really let it all hang out in the last minute or so!
Holmes leaves Ash with his face pressed against the mat as he sprawls beautifully, defending against a solid takedown attempt.
As the round comes to an end the crowd are showing their appreciation for a great round of action.
Ash avoids the clinch attempt nicely.
Holmes fails with a takedown attempt.
Ash clinches with his opponent.
And thats the end of the round the fighters go back to their corners.
Adam Ash dominated that round.
The corners get their ten second warning. Both fighters stand from their stools and stare eachother down, ready to get back to the action.

Ash tries to bum rush Holmes with a series of wild strikes but Holmes uses good footwork to avoid the assault.
Ash feints and as Holmes raises his hands in defense, Ash changes levels and drives through with a takedown into guard.

Holmes working for a triangle but Ash defends it easily.
Ash postures up to throw the ground and pound strikes but they don't connect.
Ash makes a bit of distance and scores with some ground and pound, still in guard.
Adam Ash overall seems to be getting the better of the ground position in the fight so far.
Ash is looking to work some ground and pound but Holmes has wrist control.
Holmes working a defensive guard here.
Ash trying to pass the guard but can't manage it just yet.
That's one minute gone in the round.
Ash advances to half guard.
Ash working over Holmes with some ground and pound. Holmes looks like he wants out of this position, which is understandable.
Ash sitting in half guard, looking to land shots. Holmes defending well though.
Ash works his foot free and advances to mount.
Ash trying to control but Holmes is having none of it.
Ash has his opponent pinned against the cage, landing some nasty ground and pound that is really making a bit of a mess out of Holmes's face.
Holmes is in all sorts of trouble here.
That's two minutes gone in the round.
Ash trying to control but Holmes is having none of it.
Ash thuds his fist into the canvas! Oooouch!
Ash avoids the attempt from Holmes to control.
Holmes is bucking up trying to escape but Ash cracks him with another couple of good strikes.
The crowd cheering loudly, showing their appreciation for the quality fight we're seeing here.
Holmes tries to lock up and control but Ash gives him a forearm to the face and pushes him away.
Ash punishing his opponent with strikes.
That's three minutes gone in the round.
Ash with the ground and pound from mount.
Ash controlling the position easily from mount.
Holmes is in a horrible position here. Ash smacks him with another shot as he tries to escape the position.
The ref warns both fighters not to hold the cage as they work up against the meshing.
Holmes is wriggling around trying to escape.
Ash looking to finish Holmes with some ground and pound. This is bad for Holmes!
Ash trying to control but he's not successful this time.
Ash landing strikes, looking to finish!
That's four minutes gone in the round.
We've seen a great period of action over the last minute or so - credit to both fighters for going all out!
Ash with shots to the head and body - Holmes looks very uncomfortable down there.
Ash is working for a guillotine from mount but Holmes frees his head quite easily.
Holmes sneaks a leg under to get to half guard.
Ash missing with the ground and pound from half guard.
Holmes is a painfully thin specimen of a man. You do wonder whether a good body kick would snap him clean in two.
As the round comes to an end the crowd are showing their appreciation for a great round of action.
Ash throwing punches and elbows but they're not doing any damage.
Ash seems to have lost interest with the ground game and is thinking about standing back up.
Holmes works his way to full guard. Good work.
And thats the end of the round the fighters go back to their corners.
Adam Ash dominated that second round.
The fighters get back to their feet, the hooter sounds and we're back to the action! This is the final round!

Ash shoots in but Holmes avoids the takedown attempt easily.

Holmes has managed to clinch.
Holmes is trying to break the clinch but Ash has him pressed against the cage.
Ash drops down looking for an ankle pick but Holmes pulls his leg out and moves away.
A telegraphed takedown attempt from Ash is defended easily by Holmes.
That's three failed takedown attempts in the round for Adam Ash. That's going to take a lot out of him.
Ash swings and misses with a hook to the body.
Holmes fails with a takedown attempt.
Horrible takedown by Ash or perhaps it was just good defense by Holmes which made him look bad.
Holmes shoots in but no luck this time.
That's one minute gone in the round.
Ash misses with a body shot. Nice footwork from Holmes.
Holmes keeps the fight standing with a nice sprawl.
Holmes stuffs the takedown attempt from Ash. Ash gets slowly back to his feet.
Both fighters are breathing heavily.
Ash stuffs the takedown.
Ash feints and then dives in with a takedown. That was a long way out but the feint bought him enough time to close the distance and complete the takedown. Now we'll play guard for a bit and see who can get the better of that position.
A real slowdown in the pace of the fight for a moment, as Holmes holds on and takes a little breather.
Holmes trying to control the position.
Holmes keeping moving, preventing Ash from controlling successfully.
That's two minutes gone in the round.
Ash throws a big elbow that misses.
Holmes working the defensive guard well to avoid strikes from Ash.
Holmes wants to get back to his feet but Ash passes into half guard.
Ash is stalling here. Holmes is in no mood to hang around though. He's locked up a kimura from the bottom! Ash seems to be keeping calm but he's forced to roll out of the hold and Holmes has ended up in side control on the top. Nice work.
Holmes staying calm.
Ash can't do much from the bottom here.
That's three minutes gone in the round.
Holmes tries to move to mount but Ash blocks the move with his legs.
Ash on his back here. We all know that wrestlers don't like being on their back so let's see if Ash tries to get out of the position.
Holmes decides to stand up, so the ref orders Ash to his feet.
Ash has a takedown stuffed.
Holmes shoots in for a takedown. He's persisting with it as Ash sprawls well. Ash wins this battle and keeps the fight standing. Holmes gets slowly back to his feet.
Ash fakes with an overhand right and moves in to clinch with Holmes, pushing him back against the cage.
Holmes is pressed up against the cage. Ash has hold of a leg and is looking to drag Holmes down to the mat. Holmes avoids the attempt though and has circled away. We're back to striking at a distance.
That's four minutes gone in the round.
Holmes defends well against a solid takedown attempt from Ash.
Holmes tries to close the distance and clinch but Ash swats him to one side with an open hand palm strike and circles away.
Adam Ash seems to be the more aggressive standup fighter in this bout.
Holmes throws a head kick but Ash moves out of range.
Crunch! Holmes slams his shin into Ash's torso.
Holmes tries to clinch but Ash moves out of range.
Ash throws a body kick that misses.
Holmes tries to clinch there but Ash circles away.
Holmes tries to keep at a distance but Ash has taken the fight into the clinch.
Ash can't get the takedown.
We've seen a great period of action over the last minute or so - credit to both fighters for going all out!
The crowd applaud the fighters efforts here as the round comes to an end.
Holmes has Ash pressed against the cage, preventing Ash from circling away and getting back to striking at range.
Knees to the body from Holmes.
Rob Holmes has stepped it up - he knows he needs a finish here!
Adam Ash is fighting for a decision here - he's started to take the cautious approach.
An uppercut to the body lands inside from Holmes.
And that's the end of the fight!
I would just about give that final round to Rob Holmes.
I think Ash has won this one but let's see what the judges have to say. Over to the ring announcer for the scorecards.
Ladies and gentlemen, after 3 rounds of action, we go to the scorecards for a decision.
Judge Phil Schofield scores the fight 29:28
Judge Paul Tew scores the fight 29:28
Judge James Atkins scores the fight 29:28
In favor of your winner, by unanimous decision... Adam Ash!
|
|
|
|
|
|
|
|
|
|
|
|
|
|
|
|
|
|
|
|
|
|
|
| S |
C
A |
G |
S |
C
B |
G |
|
S |
C |
G |
|
energy
A | B |
|
hype
A | B |
|
pop
A | B |
|
mgr
A | B |
|
FIGHT
RATING
60% |
|
|
|
|
|
|
