|
|
PBP Commentary |
Coming up we have a light heavyweight MMA rules bout between Michael Dunlap (ranked 0 p4p, 0 weight class) and Macadam Baird (ranked 0 p4p, 0 weight class). Dunlap comes to the cage accompanied by Forever. These two fighters really are very evenly matched on the feet - it will be fascinating to see who can assert themselves in that aspect of the fight.
 |
|
 |
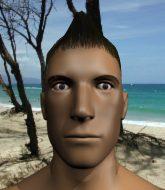
| 200 cm
23
220 lbs
1 - 0 - 0 |
|
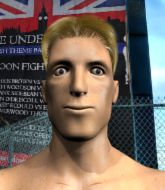
182 cm
18
190 lbs
1 - 0 - 0 |
BJJ Purple Belt
Counter striker
Cuts easily |
|
Good wrestler
Counter striker
Solid chin |
|
| |
|
Ladies and gentlemen. This fight is 3 rounds, in the light heavyweight division.
Introducing the fighter to my left, fighting out of the red corner.
With a record of
1 - 0 - 0, fighting out of Helsinki, Michael Dunlap!
And introducing the fighter to my right, fighting out of the blue corner.
With a record of
1 - 0 - 0, fighting out of New York, Macadam Baird!
The judges for this bout are Tarja Halkonen, Marco Blurström and Arvi Lind.

The bell rings for round one and we are underway!
Baird throws a series of punches but Dunlap moves out of range.
Dunlap moves out of range of the strikes.
Baird throws a series of punches but Dunlap moves out of range.

Baird shoots in for a takedown and gets it. Oh and he's advanced to full mount straight away.
Baird avoids the attempt from Dunlap to control.
Baird lands a big elbow.
The fighters are pressed up against the cage, both looking to find a bit of space to work.
Baird lands a shot to the body, followed up by a shot to the exposed head of his trapped opponent.
BOOM! Baird connects with a massive shot to the dome!
Baird fakes a shot to the body and cracks his opponent in the head. Nice ground and pound there!
This is a great period of action - very entertaining stuff!
Baird looking to ground and pound his opponent to a finish here.
Dunlap sneaks a leg under to get to half guard.

That's one minute gone in the round.
Baird missing with some ground and pound from the half guard.
Baird seems content to maintain position for now, rather than mounting any offense.
Baird tries to pass the half guard into mount. Dunlap knows what he's doing though and prevents the attempt.
Dunlap wants to improve his position but Baird is controlling well.
Baird is scoring with some nice ground and pound from the dominant position.

That's two minutes gone in the round.
Baird wants to control but Dunlap is keeping him busy.
Baird is just sitting in half guard, waiting for something to happen.
Baird is nestled in close to Dunlap, controlling him well. He's worked in a nice elbow to the side of the head as well, for good measure.
Baird with a momentary lay and pray from half guard.
Dunlap works his way to full guard. Good work.
Baird is looking to work some ground and pound but Dunlap has wrist control.
Baird seems content to control from guard here. He's going to have to remain active though if he doesn't want to get stood back up.

That's three minutes gone in the round.
Baird trying to move into half guard but instead Dunlap has managed to sweep!
Dunlap trying to control but Baird is working from the bottom.
Dunlap won't allow Baird to sweep him here.
Baird controlling Dunlap's posture.
The fighters are starting to get a bit slippery now, which will make submissions a bit more difficult.
Dunlap wants to control from the top but Baird keeps moving.

That's four minutes gone in the round.

The referee has ruled that neither fighter is active enough on the ground and has stood them back up.
Baird misses with a series of wild punches.
Dunlap gets his takedown attempt stuffed easily
and Baird counters with a stiff right hand.
Baird throws a hook but Dunlap blocks it.

Baird rushes Dunlap and pushes him back against the cage in a clinch.
As the round comes to an end the crowd are showing their appreciation for a great round of action.
Baird misses with a punch to the body.
Dunlap tries to pull guard but Baird holds him up against the cage and eventually Dunlap drops back down to his feet.
And thats the end of the round the fighters go back to their corners.
Macadam Baird dominated that round.
OK. That's time! The bell goes and we're back to the action.

Dunlap with a lazy takedown attempt
and Baird counters by moving into the clinch. Good anticipation by Baird.
Dunlap is trying to pull guard but Baird has him pressed against the cage.
Dunlap is working on a leg, looking for a takedown but Baird is defending well.
That's three failed takedown attempts in the round for Michael Dunlap. That's going to take a lot out of him.
Baird tries to throw a body punch but Dunlap avoids it by throwing Baird back against the cage.
A short left from Baird.
Baird taking a breather.
Baird lands a nice trip takedown into half guard.
Still in half guard, Baird seems content to control.
Dunlap wants to control but Baird is keeping busy.
Baird trying to advance position but Dunlap counters by regaining guard.
That's one minute gone in the round.
Baird with a couple of shots to the head there. Not particularly brutal.
Dunlap can't do much from the bottom at the moment, as Baird controls the pace.
Baird has the superior BJJ but he's also working some ground strikes into his gameplan.
Baird stands and throws Dunlap's legs to the side, diving into side control.
Baird trying to control the action but Dunlap is working from the bottom.
Baird grinds an elbow into Dunlap's temple.
That's two minutes gone in the round.
Dunlap tries to control the position but he's not in luck - Baird easily slips into full mount!
Dunlap is in a horrible position here. Baird smacks him with another shot as he tries to escape the position.
Dunlap really trying hard to get back to half guard here.
Baird is still in mount, landing shots to his trapped opponent. Dunlap can't stay in a position like this for much longer.
The crowd are loving this. Great action here.
Baird lands a big elbow.
Dunlap is working to get back to half guard.
Baird controlling his opponent.
That's three minutes gone in the round.
Baird with shots to the head and body - Dunlap looks very uncomfortable down there.
Baird with shots to the head and body - Dunlap looks very uncomfortable down there.
Baird tucks in and makes sure he doesn't lose the dominant position.
Baird looking to ground and pound his opponent to a finish here.
Baird can't quite control the action as he would like just now, as Dunlap is looking to escape.
Baird lands a big shot there that rocks Dunlap but he's holding on and managing to survive for now.
That's four minutes gone in the round.
Wooooo! Give it up for these two warriors! They are putting on a show!
Baird lands a couple of nice shots there from mount.
Baird punishing his opponent with strikes.

Dunlap is rocked!
Baird looking to control and managing it successfully.
Baird lands a shot to the body, followed up by a shot to the exposed head of his trapped opponent.
Oh Dunlap is still in real trouble! Will he be able to recover?!!
Baird breaks from Dunlap's wrist control and lands an elbow.
The crowd are going absolutely nuts as the round comes to an end - what a fantastic round of action!
Baird loads up on a couple of big shots to the head that have Dunlap scrambling to escape. He can't get free though and several more unanswered shots from Baird land to the head. The referee has no choice but to stop the fight. Baird stands and salutes the crowd.
Ladies and gentlemen, after 4:59 of round 2, we have a winner by way of TKO (Strikes). Macadam Baird!
|
|
|
|
|
|
|
|
|
|
|
|
|
|
|
|
|
|
|
|
|
|
|
| S |
C
A |
G |
S |
C
B |
G |
|
S |
C |
G |
|
energy
A | B |
|
hype
A | B |
|
pop
A | B |
|
mgr
A | B |
|
FIGHT
RATING
37% |
|
|
|
|
|
|
