|
|
PBP Commentary |
Coming up we have a middleweight MMA rules bout between Anthony Burgess (ranked 0 p4p, 0 weight class) and Aodhan o hAodha (ranked 0 p4p, 0 weight class). o hAodha has chosen Cursum Perficio by Enya as his entrance music. These two fighters really are very evenly matched on the feet - it will be fascinating to see who can assert themselves in that aspect of the fight.
 |
|
 |
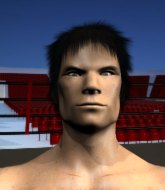
| 190 cm
29
196 lbs
18 - 9 - 2 |
|
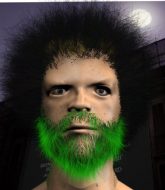
182 cm
33
200 lbs
17 - 18 - 0 |
Good wrestling
World class boxer
Cardio machine |
|
ADCC Champion
Good kicks
Good gas tank |
|
| |
|
Ladies and gentlemen. This fight is 3 rounds, in the middleweight division.
Introducing the fighter to my left, fighting out of the red corner.
With a record of
18 - 9 - 2, fighting out of Los Angeles, Anthony Burgess!
And introducing the fighter to my right, fighting out of the blue corner.
With a record of
17 - 18 - 0, fighting out of Hilo, Aodhan o hAodha!
The judges for this bout are Colin Fray, Ryoma Takatsuka and Josh West.

The bell rings for round one and we are underway!
o hAodha misses with a takedown attempt. He shot from a bit too far out.
Burgess will need to tighten up his combinations if he doesn't want to gas himself out, swinging at thin air.
Burgess throws a low kick but his opponent is out of range.
No luck with that takedown attempt from o hAodha.
o hAodha throws a nice looking combination but Burgess bobs and weaves to avoid any damage.
o hAodha is trying hard to land a takedown here. Burgess sprawls well and keeps this one on the feet.
Anthony Burgess has stuffed three takedown attempts in the round now. That's going to take a lot out of Aodhan o hAodha.
o hAodha looks to score with a jab to the body but Burgess is just out of range.
Burgess keeping his hands up high there, blocking the jab from o hAodha.
o hAodha shoots in with a takedown attempt and he has Burgess pinned against the cage. Burgess gets the underhooks and manages to circle away.
o hAodha slips under a jab.
o hAodha fails with the takedown
and Burgess counters with a two punch combo.
Burgess displays good takedown defense there as he swats away a double leg from o hAodha.
o hAodha shoots for a double leg takedown but Burgess sprawls well. He's pushed o hAodha's face into the mat and manages to get back to his feet relatively easily.

That's one minute gone in the round.
An inside leg kick from Burgess misses.
o hAodha shoots in for a takedown - he's clinched up with Burgess but Burgess pushes him off and we're back to square one.
o hAodha doesn't succeed with the takedown
and Burgess counters with a nice uppercut.
Burgess scores with a sloppy right hand. o hAodha should have avoided that one.

It looks like Aodhan o hAodha has been cut.
Burgess thuds his right hand into o hAodha's forehead from close range. That could be painful for both fighters.
Burgess jabs o hAodha to the body, keeping him at a distance.
o hAodha walks into a straight right hand from Burgess.
Fantastic stuff here - a very entertaining period of action, which has drawn cheers from the crowd.
Burgess punishes o hAodha's body with a nice straight punch.
No luck for o hAodha with that takedown attempt.
Burgess smiles there as he lands a nice right hand right on the button.

o hAodha shoots in and scores a nice double leg takedown into half guard.
Burgess is trying to stand.

o hAodha is working for a submission of some sort.

That's two minutes gone in the round.
o hAodha is trying to control. Burgess wants to improve his position but can't escape this time.
Burgess holds on for dear life, maintaining half guard for now.
Burgess trying to control but o hAodha postures up.
Burgess wants to improve his position but o hAodha is controlling well.
o hAodha working the head and body with strikes.
Burgess wants to control but o hAodha is keeping busy.
o hAodha is trying to work for a kimura but Burgess is defending well.
o hAodha is trying to work for a kimura but Burgess is defending well.
o hAodha is looking for a kimura but Burgess is holding onto that half guard position, so it's hard for o hAodha to get the leverage.

That's three minutes gone in the round.
Burgess tries to roll over but o hAodha keeps him under control.

Burgess has one foot on o hAodha's thigh - he pushes off and manages to get back to his feet.
o hAodha changes levels and drives through with a really nice takedown into side control. Burgess looks really pissed at himself for not defending that better.
o hAodha working hard here to secure a kimura but he's not really in the right position for it.
Burgess trying his best to control but o hAodha has mounted him.
o hAodha landing strikes from the mount.
o hAodha is in the full mount, landing strikes.
Fantastic stuff here - a very entertaining period of action, which has drawn cheers from the crowd.
Burgess is trying to escape the mount.
Burgess sneaks a leg back under and regains half guard and is working straight away to try and get back to guard. He hasn't managed just yet though.
Burgess tries to roll over but o hAodha keeps him under control.
Burgess trying to control but o hAodha postures up.

That's four minutes gone in the round.
o hAodha prevents Burgess from improving his position.
Burgess pushes o hAodha off looking to stand but o hAodha dives back in and keeps control.
Burgess is staying active underneath o hAodha, who seems content to just control the action from this position.
Burgess is looking to control o hAodha's leg but it's slowly edging free. Can Burgess avoid being mounted?
o hAodha thows a huge punch but Burgess dodges it nicely.
o hAodha missing with the ground and pound from half guard.
Burgess tries to get to full guard but o hAodha has control of the leg.
The crowd are going absolutely nuts as the round comes to an end - what a fantastic round of action!
The referee walks around the fighters to get a better view of the action. o hAodha lands a nice short elbow.
Burgess is trying to stand back up but o hAodha is controlling him
o hAodha is working for a kimura but Burgess is defending it quite comfortably.
And thats the end of the round the fighters go back to their corners.
That was a close round but I would say that Anthony Burgess will probably get the nod.
The cut man is working on Aodhan o hAodha's cut.
The corners get their ten second warning. Both fighters stand from their stools and stare eachother down, ready to get back to the action.

o hAodha is trying hard to land a takedown here. Burgess sprawls well and keeps this one on the feet.
o hAodha tries to shoot in for a takedown. He's got hold of a leg but Burgess swivels and escapes.
Burgess misses with a body shot.
Burgess gets caught flat footed, as o hAodha shoots in with a quick takedown into guard.
o hAodha is looking to work some ground and pound but Burgess has wrist control.
There's a bit of a scramble here and now Burgess is on top in guard.
Burgess postures up and lands some nice ground and pound.
Burgess in full guard, throwing the ground and pound. No damage this time.
Burgess postures up to throw the ground and pound strikes but they don't connect.
Burgess throws a big right hand that misses.
Burgess in full guard, throwing the ground and pound. No damage this time.
o hAodha is trying to control the position from the bottom.
o hAodha working for a triangle but Burgess defends it easily.
That's one minute gone in the round.
Burgess throws an elbow that misses. o hAodha uses the momentum to reverse the position. He's now in Burgess's guard. Nice move by o hAodha!
o hAodha throwing strikes but missing.
Burgess lands a beautiful switch and he's in full mount! That could spell trouble for o hAodha!
o hAodha is squirming around, avoiding Burgess's attempts to control the action.
Both fighters really going for it on the ground here!
o hAodha flailing away with punches but nothing is landing.
Burgess lands a nice shot to the head.
The crowd growing excited in anticipation of a finish here! Right on cue, Burgess cracks his opponent with a massive right hand that draws loud cheers!
o hAodha is desperately trying to get back to half guard.
o hAodha is persisting with the attempt to improve his position.
That's two minutes gone in the round.
Burgess looking to ground and pound his opponent to a finish here.
The crowd are loving this. Great action here.
Burgess lands a shot to the body, followed up by a shot to the exposed head of his trapped opponent.
o hAodha is trying to escape the mount.
o hAodha tries to lock up and control but Burgess gives him a forearm to the face and pushes him away.
Burgess fakes a shot to the body and cracks his opponent in the head. Nice ground and pound there!

o hAodha is rocked!
o hAodha has the superior BJJ but he's also working some ground strikes into his gameplan.
Burgess working the ground and pound effectively.
o hAodha is still in real trouble! Can Burgess finish him?
o hAodha is wriggling around trying to escape.
o hAodha wants to control but Burgess is having none of it.
Burgess landing strikes from the mount.
Anthony Burgess overall seems to be getting the better of the ground position in the fight so far.
o hAodha tries to lock up and control but Burgess gives him a forearm to the face and pushes him away.
Burgess unloading with bombs!
o hAodha takes a big shot to the dome and his eyes have rolled back in his head! Burgess's killer instinct has kicked in as he finishes the fight with more strikes. Impressive finish.
Ladies and gentlemen, after 3:58 of round 2, we have a winner by way of TKO (Strikes). Anthony Burgess!
|
|
|
|
|
|
|
|
|
|
|
|
|
|
|
|
|
|
|
|
|
|
|
| S |
C
A |
G |
S |
C
B |
G |
|
S |
C |
G |
|
energy
A | B |
|
hype
A | B |
|
pop
A | B |
|
mgr
A | B |
|
FIGHT
RATING
96% |
|
|
|
|
|
|
