|
|
PBP Commentary |
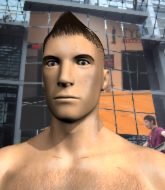
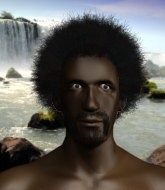
Coming up we have a middleweight MMA rules bout between David Hanson (ranked 0 p4p, 0 weight class) and Kemo Amos (ranked 0 p4p, 0 weight class). We have two fighters making their debuts here, so let's see who comes out of this one with their first professional victory.
 |
|
 |
| 185 cm
22
194 lbs
0 - 0 - 0 |
|
188 cm
18
188 lbs
0 - 0 - 0 |
BJJ Purple Belt
Solid Muay Thai
Cuts easily |
|
BJJ Blue Belt
Basic striking
Intelligent |
|
| |
|
Ladies and gentlemen. This fight is 3 rounds, in the middleweight division.
Introducing the fighter to my left, fighting out of the red corner.
With a record of
0 - 0 - 0, fighting out of Las Vegas, David Hanson!
And introducing the fighter to my right, fighting out of the blue corner.
With a record of
0 - 0 - 0, fighting out of Las Vegas, Kemo Amos!
The judges for this bout are Stewart Dunkirk, Chris Downing and Cecil Peabody.

The bell rings for round one and we are underway!

Amos darts in and clinches Hanson up against the cage.
Amos tries to circle away but Hanson has him pinned against the cage.
Hanson has Amos pressed against the cage, preventing Amos from circling away and getting back to striking at range.
Amos is trying to break the clinch but Hanson is controlling him.
Amos taking a break, stalling in the clinch.
Amos blocks an uppercut.
Hanson drops to a knee looking for a takedown but Amos gets the underhooks and prevents it.
Amos is looking to take this one to the mat.
Amos working hard to break the clinch.
Amos wants to break free but Hanson has control.
Amos tries to circle away but Hanson has him pinned against the cage.
Hanson is trying to force a seperation but Amos has the dominant position.
Amos wants to break free but Hanson has control.

Amos breaks the clinch.
Amos pushes forward with a 1-2 combination that forces Hanson back to the cage. Amos follows up with a solid lead hook to the liver.
Amos misses with a few strikes there.
Amos takes the fight into the clinch.

That's one minute gone in the round.
Amos blocks the elbow strike.
Amos is trying to break free.
Amos prevents a takedown attempt there.
Hanson is working for takedown but Amos is calmly controlling the position for now.
That's three failed takedown attempts in the round for David Hanson. That's going to take a lot out of him.
Hanson is working hard here but doesn't seem to be able to control effectively, up against the cage.
Amos lands a shoulder strike that jolts his opponent's head backwards.
Amos wants to get back to striking at distance but Hanson won't allow it.
Amos is looking to break free of the clinch but Hanson has double underhooks.
Hanson fails to pull guard.
Amos is trying to break the clinch but Hanson is controlling him.
Hanson is trying to work out of this bad position, with his back against the cage.
Hanson is pressed up against the cage. Amos has hold of a leg and is looking to drag Hanson down to the mat. Hanson avoids the attempt though and has circled away. We're back to striking at a distance.
Hanson tries to shoot in for a takedown. He's got hold of a leg but Amos swivels and escapes.

That's two minutes gone in the round.
Hanson looks to score with a jab to the body but Amos is just out of range.
Amos gets a clinch.
A frustrated look appears on Amos's face as he tries to break the clinch.
Amos is looking to break free of the clinch but Hanson has double underhooks.
Amos wants to push off and get back to the center of the mat but Hanson has him pressed against the cage.
A frustrated look appears on Amos's face as he tries to break the clinch.
Amos has Hanson pressed against the cage, preventing Hanson from circling away and getting back to striking at range.
Hanson goes for a takedown attempt but Amos pushes him away and we're back to fighting at a distance.
Hanson walks straight into an uppercut. Luckily it didn't land flush.
This is a great period of action - very entertaining stuff!
Amos throws a wild combination but nothing lands.
Amos moves into the clinch successfully.
Hanson has Amos pressed against the cage, preventing Amos from circling away and getting back to striking at range.
Hanson is trying to pull guard but Amos turns him against the cage and we stay in the clinch.

That's three minutes gone in the round.
Hanson tries to break the clinch but Amos is controlling the position.
Amos has had enough of the clinch but Hanson keeps him there for the moment.
Hanson missing with knees to the body.
Amos manages to break the clinch.
Amos misses with a jab, cross combination.
Nice sprawl there from Amos as Hanson shoots in.
Hanson shoots in for a takedown but Amos shows good takedown defense there and keeps this one on the feet.
Amos misses with a few strikes there.
Hanson avoids the head kick by Amos.
Amos avoids the head kick by Hanson.
Hanson is breathing heavily.
Amos throws a head kick that misses

and Hanson counters with a nice double leg into half guard.

Hanson is looking for a kimura but Amos is holding onto that half guard position, so it's hard for Hanson to get the leverage.
Hanson throwing shots but they're hitting the canvas more than the man.

That's four minutes gone in the round.
Fantastic stuff here - a very entertaining period of action, which has drawn cheers from the crowd.
Hanson wants to take a breather but Amos is having none of it.
Hanson seems to be working for a kimura but Amos defends the submission attempt.
The ref warns both fighters not to hold the cage as they work up against the meshing.
Hanson tries to stand and escape but Amos is controlling the position.
Amos really doesn't want to stay on the ground with Hanson. If he can't get it back to his feet, it's only a matter of time before he'll be tapping out.
Amos looks like he's trying to stand up.
As the round comes to an end the crowd are showing their appreciation for a great round of action.
Hanson is trying to control the action in half guard but Amos is working away on the bottom, looking perhaps to get back to full guard.
And thats the end of the round the fighters go back to their corners.
A close round but Kemo Amos will probably get the nod.
The minute break is over - no more time for sponges and pep talks - back to the action!

Amos throws a jab, cross combination which is slipped
and Hanson counters with a shoot takedown into half guard.
Hanson tries to pass to full mount but Amos defends it.
Amos tries to get to full guard but Hanson has control of the leg.
Hanson throwing shots but Amos is blocking nicely.
Amos wants to control but Hanson is keeping busy.
Hanson is trying to control. Amos wants to improve his position but can't escape this time.
That's one minute gone in the round.

The referee decides to stand the fighters back up, due to lack of activity on the part of David Hanson.
Hanson showing good head movement there, avoiding the strikes from Amos.
Amos swinging wildly here.
Amos looks to score with a combo but nothing lands.

Hanson closes the distance and pushes Amos back into the cage.
Amos is trying to break the clinch but Hanson is controlling him.
Amos just leaning against Hanson, taking a breather.
Hanson tries to score a body lock takedown but Amos shows good agility there to stay on his feet.
Hanson goes for a takedown attempt but Amos pushes him away and we're back to fighting at a distance.
Amos lands a body shot.
That's two minutes gone in the round.
Hanson ducks down and throws a hook to the body but Amos moves away.
Hanson is looking to take this fight into the clinch.
Hanson wants to clinch.
Hanson misses with a takedown attempt. He shot from a bit too far out.
That's three failed takedown attempts in the round for David Hanson. That's going to take a lot out of him.
Amos misses with a combination
and Hanson counters by moving into the clinch. Good anticipation by Hanson.
A frustrated look appears on Amos's face as he tries to break the clinch.
Amos wants to get back to striking at distance but Hanson won't allow it.
Hanson taking a breather.
Hanson is trying to work out of this bad position, with his back against the cage.
Hanson jumps guard but Amos turns him against the cage and keeps the fight standing.
That's three minutes gone in the round.
Amos is trying to work out of this bad position, with his back against the cage.
Hanson is trying to pull guard but Amos has him pressed against the cage.
Both fighters are absolutely exhausted here.
Amos wants to break free but Hanson has control.
Hanson tries to pull guard but can't drag his opponent to the mat. Amos just stands there and leans against the cage.
Amos is trying to push Hanson away but Hanson has him pressed against the cage, so he's going nowhere.
Amos lands a short shot on the inside that snaps the head of Hanson backwards.
Amos breaks the clinch and we return to the middle of the mat.
Amos misses with a leg kick
and Hanson counters with a nice double leg into guard.
Hanson trying to control but Amos is working from the bottom.
Amos wants to control here, rather than go for any submissions from the bottom. At least for now.
That's four minutes gone in the round.
We've seen a great period of action over the last minute or so - credit to both fighters for going all out!

It looks like we're going to have a standup here. Neither fighter is doing enough on the ground.
Amos throws a series of punches but Hanson moves out of range.
Hanson dives in and grabs Amos's left leg, looking for a takedown. Amos pushes down on Hanson's head and hops out.
Amos pivots, looking for a leg kick but Hanson is out of range and Amos settles back down.
A combination from Amos does no damage.
Hanson connects with a leg kick. Amos looked like he was expecting something else and didn't defend it.
Hanson fakes high and shoots in for a takedown but Amos avoids it really well and circles away.
Amos closes the distance and pushes Hanson back into the cage.
As the round comes to an end the crowd are showing their appreciation for a great round of action.
Hanson keeps the fight in the clinch, despite Amos's efforts to push away.
And thats the end of the round the fighters go back to their corners.
David Hanson dominated that second round.
The corners get their ten second warning. Both fighters stand from their stools and stare eachother down, ready to get back to the action. This is the final round!

Amos throws a combination but it was largely blocked by Hanson.
Hanson looks for a takedown but Amos sprawls well.
Amos looks to land a combination but Hanson avoids it well.
Hanson shoots in for a takedown but Amos shows good takedown defense there and keeps this one on the feet.
Hanson shoots in but Amos avoids the takedown attempt easily.
That's three failed takedown attempts in the round for David Hanson. That's going to take a lot out of him.
Amos throws a jab, cross combination which is slipped
and Hanson counters with a shoot takedown into half guard.
Amos is looking to improve his position.
Hanson tries to stand and escape but Amos is controlling the position.
Hanson thows a wild elbow that connects with the canvas.
That's one minute gone in the round.
Amos regains full guard. Nicely done.
Both fighters are breathing heavily.
Hanson stopping the sweep attempt from Amos.
Amos looking to control the pace of the fight rather than finish it.
David Hanson overall seems to be getting the better of the ground position in the fight so far.
That's two minutes gone in the round.

Amos had isolated an arm as going for a kimura. Hanson defends it easily.
Amos isolates an arm and boxes in a triangle. Hanson stacks Amos on his neck as he steps over and passes to the side. He's now in a much more dominant position where he can look to do some serious damage. Nice move by Hanson!
Amos struggling a bit here.
Hanson is looking to take a break and control but Amos is keeping him honest, looking to work from the bottom.
That's three minutes gone in the round.
Hanson is going to have to think about doing something other than just controlling because Amos is managing to avoid having the position dictated to him.
Hanson swings around for an armbar but Amos sees it coming a mile off and turns beautifully into Hanson's guard.
That's four minutes gone in the round.
Amos is intent on slowing down the pace of the fight, simply looking to control.
The ref stands the fighters back up because David Hanson just wasn't active enough.
Hanson blocks a head kick by Amos.
Amos tries to close the distance and clinch up but Hanson swats him away and circles back towards the center.
Hanson tries to clinch but Amos is having none of it.
A really sloppy takedown attempt there from Hanson.
Amos checks a leg kick nicely.
The crowd applaud the fighters efforts here as the round comes to an end.
No luck with that takedown attempt from Hanson.
Amos misses with a wild combination.
And that's the end of the fight!
That was a close round. You could make an argument for either fighter but I would give it to David Hanson.
I think Hanson has won this one but let's see what the judges have to say. Over to the ring announcer for the scorecards.
Ladies and gentlemen, after 3 rounds of action, we go to the scorecards for a decision.
Judge Stewart Dunkirk scores the fight 29:28
Judge Chris Downing scores the fight 29:28
Judge Cecil Peabody scores the fight 29:28
In favor of your winner, by unanimous decision... David Hanson!
|
|
|
|
|
|
|
|
|
|
|
|
|
|
|
|
|
|
|
|
|
|
|
| S |
C
A |
G |
S |
C
B |
G |
|
S |
C |
G |
|
energy
A | B |
|
hype
A | B |
|
pop
A | B |
|
mgr
A | B |
|
FIGHT
RATING
57% |
|
|
|
|
|
|
