|
|
PBP Commentary |
Coming up we have a heavyweight MMA rules bout between Hiroko Mayamoto (ranked 0 p4p, 0 weight class) and Crank Zero (ranked 0 p4p, 0 weight class). Hiroko Mayamoto has the edge in experience - let's see if he can make that count tonight.
 |
|
 |
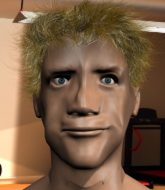
| 180 cm
22
220 lbs
2 - 4 - 0 |
|
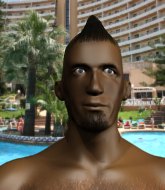
182 cm
20
275 lbs
0 - 0 - 0 |
BJJ Blue Belt
Solid Muay Thai
Experienced |
|
BJJ Purple Belt
Brawler
Tends to cut |
|
| |
|
Ladies and gentlemen. This fight is 3 rounds, in the heavyweight division.
Introducing the fighter to my left, fighting out of the red corner.
With a record of
2 - 4 - 0, fighting out of Tokyo, Hiroko Mayamoto!
And introducing the fighter to my right, fighting out of the blue corner.
With a record of
0 - 0 - 0, fighting out of Tokyo, Crank Zero!
The judges for this bout are Shigeki Fujiwara, Shirou Masuda and Hirohito Nitta.

The bell rings for round one and we are underway!

Zero changes levels and drives through with a really nice takedown into side control. Mayamoto looks really pissed at himself for not defending that better.
Zero wants to lay and pray for a moment but Mayamoto keeps working.
Zero misses with an attempted head punch from side control.
Zero wants to lay and pray for a moment but Mayamoto keeps working.
The fighters are pressed up against the cage, both looking to find a bit of space to work.
Mayamoto is trying to control Zero's posture but Zero avoids it.
Mayamoto tries to get back to half guard but can't.

Zero thinks about going for a far side armbar but bails out and retains the dominant position instead.
Mayamoto is trying to escape and get back to his feet.

That's one minute gone in the round.
Mayamoto defending against the ground and pound.
Mayamoto managing to avoid any damage from the strikes thrown by Zero.
Zero has knee on belly momentarily but Mayamoto bucks him off and regains half guard.
Zero is looking for an arm triangle, whilst trying to pass to side control. Mayamoto doesn't seem that keen to cooperate though. No luck this time Zero.

That's two minutes gone in the round.
Mayamoto is trying to maintain the position but Zero is very close to passing his half guard.
Zero looking for a kimura but he'll have to free his other leg if he wants to finish that. Perhaps he's just using it as a distraction technique.
Mayamoto trying to hold on to Zero's head to control him but Zero postures up.

That's three minutes gone in the round.
Zero works his way into side control.
Zero looking for an arm triangle but it's way too loose to do anything.
Zero wants to control but Mayamoto is keeping him busy.

That's four minutes gone in the round.
Zero throws an elbow but Mayamoto slips to the side and avoids it well.
Zero wants to lay and pray for a moment but Mayamoto keeps working.
Zero working the ground and pound but he's contacting the mat, not the fighter.
Mayamoto gets back to half guard.
Mayamoto blocking the ground and pound attempt from Zero.
Mayamoto blocking the ground and pound attempt from Zero.
And thats the end of the round the fighters go back to their corners.
Crank Zero dominated that round.
That's time! Back to the action!

Zero swats away the attempt to clinch by Mayamoto.
Zero shoots in for a double leg but Mayamoto sprawls well. That's going to sap some energy.
Zero shoots in for a takedown. He's persisting with it as Mayamoto sprawls well. Mayamoto wins this battle and keeps the fight standing. Zero gets slowly back to his feet.
Mayamoto misses with a takedown attempt. He shot from a bit too far out.

Mayamoto closes the distance, clinches up and gets a nice trip takedown into side control. Very smooth.
Zero is trying to buck Mayamoto off.
Mayamoto looking to control but instead Zero has slipped a leg in, to regain half guard.
Both fighters are absolutely exhausted here.
That's one minute gone in the round.
Mayamoto wants to control but Zero is keeping him busy.

Zero kicks Mayamoto off and gets back to his feet.
Mayamoto moves in looking to clinch but Zero pushes him off.
Zero misses with a takedown attempt

and Mayamoto holds on and brings the fighters into a clinch.
Hiroko Mayamoto has stuffed three takedown attempts in the round now. That's going to take a lot out of Crank Zero.
Zero tries for a takedown. No joy.
Mayamoto misses with a knee to the head.
Zero is looking for a takedown up against the cage. Mayamoto gets underhooks though and prevents the takedown attempt.
Mayamoto gets underhooks to prevent Zero's takedown attempt.
That's two minutes gone in the round.
Mayamoto manages to pull guard. Let's see whether he can land a sub off his back.
Mayamoto pulls Zero in to control the position.
Zero looking to pass the guard.
Zero preventing the sweep.
Zero trying to control the position from guard on top but Mayamoto is wriggling around, looking for whatever he can.

OK we're going to have a standup here. Crank Zero hasn't been effective enough on the ground and the referee wants a restart.
That kick from Mayamoto tenderised Zero's leg. Zero is trying to keep his angry face on.
That's three minutes gone in the round.
Zero looks for a takedown here. Will he get it? Mayamoto is fending him off so far but Zero persists. Nope, Mayamoto circles away and we're back to standing.
Zero stumbles momentarily as he takes a strong leg kick from Mayamoto.
Hiroko Mayamoto is looking to throw some combinations by the looks of things.
Mayamoto tries to close the distance and clinch but Zero swats him to one side with an open hand palm strike and circles away.
Mayamoto fakes a strike and closes the distance, dragging Zero to the ground. Mayamoto is now in Zero's guard.
Zero wants to stand but Mayamoto is controlling the position.
We're hearing some news coming in from back stage. It's official - Zero has eaten all the pies!
Mayamoto trying to control the position from guard on top but Zero is wriggling around, looking for whatever he can.

The ref stands the fighters back up because Hiroko Mayamoto just wasn't active enough.
Mayamoto moves in looking to clinch but Zero pushes him off.
That's four minutes gone in the round.
Zero shoots in but doesn't get the takedown
and Mayamoto counters with a shoot takedown into half guard.
The crowd are loving this. Great action here.
Still in half guard, Mayamoto seems content to control.
Zero trying to control but Mayamoto postures up.
The referee wants the fighters to be more active or he's going to reset them on the feet.

Neither fighter is doing enough for the referee's liking and he's decided to stand them back up.
Mayamoto fakes a strike and closes the distance, dragging Zero to the ground. Mayamoto is now in Zero's guard.
As the round comes to an end the crowd are showing their appreciation for a great round of action.
Zero tries to land a sweep but no joy.
And thats the end of the round the fighters go back to their corners.
Hiroko Mayamoto dominated that second round.
The minute break is over - no more time for sponges and pep talks - back to the action! This is the final round!

The fight moves into the clinch position.
Mayamoto pulls Zero into guard.
Zero throwing shots from guard but he's hitting more mat than opponent.
Zero trying to pass the guard but can't manage it just yet.
The ref warns both fighters not to hold the cage as they work up against the meshing.
A big thud reverberates around the arena there as Zero accidentally thumps the mat. Hopefully he's not broken his hand.
Zero wants to pass the guard but Mayamoto is keeping the position.
Both fighters are breathing heavily.
That's one minute gone in the round.
We must be close to a standup if these guys don't pick up the pace.
Zero working some ground and pound from guard but it's not doing any damage.
Zero trying to control but Mayamoto is working from the bottom.
The referee has ruled that neither fighter is active enough on the ground and has stood them back up.
Mayamoto shoots in for a takedown but Zero shows good takedown defense.
Zero scores a trip takedown into side control. Nice.
Zero is looking to take a break and control but Mayamoto is keeping him honest, looking to work from the bottom.
Zero throws a strike aimed at the side of Mayamoto's head but Mayamoto avoids it well.
That's two minutes gone in the round.
Zero controls the position from side control.
Mayamoto tries to improve position but can't.
Mayamoto taking punishment in the form of punches.
Zero gets to mount! Mayamoto was on the offensive and wasn't defending properly.
That's three minutes gone in the round.
Mayamoto tries to improve his position but instead Zero has taken his back!
Mayamoto is staying cool under pressure, defending well against the rear naked choke attempt from his opponent.
Zero missing with strikes.
Zero throwing wild punches that miss their target.
Mayamoto is trying to get back to his feet but Zero has full control of the position and if anything, Mayamoto has just worked his way into a worse spot.
That's four minutes gone in the round.
Zero scores with some strikes to the side of the head there. Good, points scoring shots.
The fans in attendance giving it up for the two fighters, who have really let it all hang out in the last minute or so!
Mayamoto is trying to get back to his feet but he's not managed it yet.
Zero has the rear naked choke here! This is very bad for Mayamoto! Can he survive? No! He's out! Zero gets to his feet and celebrates with his cornermen. He looks absolutely delighted. In the post fight interviews he takes time to thank his parents and everyone who has believed in him from the start. How sweet.
Ladies and gentlemen, after 4:40 of round 3, we have a winner by way of Submission (RNC). Crank Zero!
|
|
|
|
|
|
|
|
|
|
|
|
|
|
|
|
|
|
|
|
|
|
|
| S |
C
A |
G |
S |
C
B |
G |
|
S |
C |
G |
|
energy
A | B |
|
hype
A | B |
|
pop
A | B |
|
mgr
A | B |
|
FIGHT
RATING
46% |
|
|
|
|
|
|
