|
|
PBP Commentary |
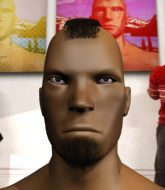
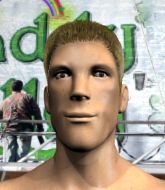
Coming up we have a lightweight MMA rules bout between Kongo Bongo (ranked 0 p4p, 0 weight class) and Naruto Uzumaki (ranked 0 p4p, 0 weight class). The fight MMA fans around the world have waited their entire lives for!
 |
|
 |
| 180 cm
22
160 lbs
1 - 2 - 0 |
|
180 cm
18
160 lbs
0 - 0 - 0 |
BJJ White Belt
Decent elbows
Good chin |
|
BJJ Blue Belt
Brawler
Determined |
|
| |
|
Ladies and gentlemen. This fight is 3 rounds, in the lightweight division.
Introducing the fighter to my left, fighting out of the red corner.
With a record of
1 - 2 - 0, fighting out of Tokyo, Kongo Bongo!
And introducing the fighter to my right, fighting out of the blue corner.
With a record of
0 - 0 - 0, fighting out of Tokyo, Naruto Uzumaki!
The judges for this bout are Sosuke Kotani, Taro Takaoka and Shigeki Sano.

The bell rings for round one and we are underway!
Bongo closes the distance but Uzumaki moves to the side

and Uzumaki decides to take the opportunity to score a takedown. He's landed in Bongo's guard.

Uzumaki stands and steps away. Bongo gets to his feet too and we're back to the striking game.
Uzumaki blocks a head kick by Bongo.
Uzumaki throws a loose over hand right and dives in with a double leg takedown. Bongo tries to sprawl but it's too late and the fighters hit the mat. Uzumaki is in Bongo's guard.
Uzumaki stands up from guard. Let's bang!
The crowd cheering loudly, showing their appreciation for the quality fight we're seeing here.
Uzumaki shoots in with a lovely double leg takedown. Bongo manages to land in full guard to minimise the damage.
Uzumaki stands up from guard. Let's bang!
Uzumaki closes the distance, clinches up and gets a nice trip takedown into side control. Very smooth.
Uzumaki has had enough of the ground for now and decides to stand.
Uzumaki shoots in looking for a takedown but Bongo manages to keep the fight standing, pushing Uzumaki's face into the canvas for good measure before circling away.

That's one minute gone in the round.
Uzumaki keeps the fight on the outside.
Bongo tries to clinch but Uzumaki is having none of it.
Bongo wants to clinch.

Bongo closes the distance and pushes Uzumaki back into the cage.
A knee to the head by Bongo.
Uzumaki gets double underhooks and manages to take the fight to the ground.
Bongo is trying to control the position but Uzumaki postures up.
Bongo managing to control the position.
Uzumaki decides he's had enough of playing guard and decides to stand. Come on Bongo, up you get!

That's two minutes gone in the round.
Bongo tries to clinch up but Uzumaki circles away and keeps his distance.
Bongo is looking to clinch but Uzumaki is avoiding it.
Bongo listening to his corner there, landing a nice uppercut.
Bongo closes the distance and clinches.
The crowd cheering loudly, showing their appreciation for the quality fight we're seeing here.
Uzumaki goes for a takedown in the clinch but Bongo prevents it.
Uzumaki is looking to take this one to the mat.
Kongo Bongo has stuffed three takedown attempts in the round now. That's going to take a lot out of Naruto Uzumaki.
Uzumaki looks gassed!
Uzumaki drops down for a takedown but doesn't get it.
Bongo lands an elbow inside.

Bongo has managed to pull guard. Let's see whether he can work an aggressive guard. It will also be interesting to see what tactics Uzumaki uses from the top position.
Uzumaki stops Bongo from standing up.
Uzumaki postures up.
Uzumaki gets to his feet. Bongo looking to butt scoot but the ref puts an end to that. On your feet son!

That's three minutes gone in the round.
Bongo fails with an attempt to clinch.
Bongo scores with a push kick.
Uzumaki shoots in for a takedown but Bongo shows good takedown defense there and keeps this one on the feet.
Bongo scores with a one two! Uzumaki had his feet all tangled up there and couldn't avoid the strikes.
Bongo gets in close and instigates a clinch.
The pace really dropping off here, momentarily.

Bongo pushes off and circles away, back to the middle of the mat.
Uzumaki shoots in for a takedown - he's clinched up with Bongo but Bongo pushes him off and we're back to square one.
Bongo fails with an attempt to clinch.
Bongo tries to clinch there but Uzumaki circles away.
Uzumaki avoids the clinch attempt nicely.
Bongo has managed to clinch.

That's four minutes gone in the round.
Bongo lands an elbow inside that Uzumaki shrugs off.
Bongo is looking for a takedown.
Bongo is trying to wear down his opponent with knees to the body.
The fighters are starting to get sweaty, which will make takedowns a bit more tricky.
Uzumaki is looking to take this one to the mat.
Bongo lands a nice elbow from the clinch.
Bongo's corner calls for him to break the clinch, which he does.
We've seen a great period of action over the last minute or so - credit to both fighters for going all out!
Bongo tries to close the distance and clinch but Uzumaki swats him to one side with an open hand palm strike and circles away.
Bongo pushes Uzumaki up against the cage in a clinch.
Bongo putting his Muay Thai to good use. He has Uzumaki in a tight clinch and is doing some damage with knees to the body.
Bongo jumps guard but Uzumaki turns him against the cage and keeps the fight standing.
Bongo escapes the clinch and we're back to striking.
Bongo tries to clinch but Uzumaki is having none of it.
Kongo Bongo seems to be the more aggressive standup fighter in this bout.
Bongo connects with the punch.
The crowd are going absolutely nuts as the round comes to an end - what a fantastic round of action!
Bongo fails with an attempt to clinch.
No luck with that takedown attempt from Uzumaki.
Bongo tries to clinch up.
And that�s the end of the round � the fighters go back to their corners.
A close round but Naruto Uzumaki will probably get the nod.
That's the end of the round. The referee orders the cornermen out of the cage so we can get back down to business.

Uzumaki on the wrong end of a nice low kick. He's acting like it's no big deal but he doesn't want to take many more of those.
Uzumaki chopped to the floor by a nice leg kick but he springs right back up before Bongo can pounce on him.
Uzumaki shoots in for a takedown. "I don't think so" says Bongo as he avoids it easily.
Bongo moves into the clinch.
Uzumaki gets a trip takedown into half guard.
Bongo trying to control here.
Uzumaki stands up out of the half guard.
Bongo moves in looking to clinch but Uzumaki pushes him off.
Kongo Bongo is looking to throw some combinations by the looks of things.
Bongo fails in his attempt to clinch.
Uzumaki is breathing heavily.
Uzumaki tries to score a power double leg takedown but Bongo sees that one coming and sprawls well. That will dishearten Uzumaki somewhat.
Uzumaki avoids the clinch attempt nicely.
That's one minute gone in the round.
A telegraphed takedown attempt from Uzumaki is defended easily by Bongo.
Kongo Bongo has stuffed three takedown attempts in the round now. That's going to take a lot out of Naruto Uzumaki.
Bongo gets a clinch.
Bongo lands a glancing elbow in the clinch.
Uzumaki tries to score a body lock takedown but Bongo shows good agility there to stay on his feet.
Bongo pushes off and circles away, back to the middle of the mat.
Bongo stuffs the takedown attempt from Uzumaki. Uzumaki gets slowly back to his feet.
Uzumaki avoids the clinch attempt nicely.
Bongo tries to clinch up against the cage, rushing in the close the distance. Uzumaki manages to break the clinch and circles back to the middle of the mat.
Bongo tries to close the distance and clinch up against the cage but Uzumaki paws at him with a jab and circles away.
Bongo connects with a lovely right hand, straight down the pipe.
Bongo cracks the inside of Uzumaki's front leg.
Uzumaki avoids the clinch attempt nicely.
Bongo forces Uzumaki back against the cage and clinches.
Bongo creates a bit of space for himself and sneaks an elbow through Uzumaki's defenses.
That's two minutes gone in the round.
A nice glancing elbow lands by Bongo.
Bongo is trying to pull guard but Uzumaki has him pressed against the cage.
Bongo using the Thai clinch to land knees to the body.
This is a great period of action - very entertaining stuff!
Bongo lands a nice looking hook to the body, against the cage.
Bongo with the Thai clinch, lands a knee to the head.
Bongo pushes off and circles away, back to the middle of the mat.
Bongo takes the fight into the clinch.
Bongo lands a left hand.
Uzumaki jumps guard but his hands slip and he falls flat on his back. Well, he's made himself look a right mug there, as Bongo walks away with a smile on his face. Uzumaki gets slowly back to his feet and shakes his head.
Bongo throws a nice inside leg kick.
Bongo wants to clinch up but Uzumaki keeps it at a distance.
Bongo moves in looking to clinch but Uzumaki pushes him off.
Bongo tries to clinch there but Uzumaki circles away.
Bongo doesn't manage to clinch there - Uzumaki circles away.
Bongo doesn't manage to clinch there - Uzumaki circles away.
Bongo has managed to clinch.
That's three minutes gone in the round.
Bongo softening up his opponent with strikes, against the cage.
Bongo lands a damaging elbow.
Nice elbow from Bongo.
Kongo Bongo has scored more points in the clinch so far.
Uzumaki changes levels and goes for a takedown here. Bongo fights it off and pushes away nicely.
Kongo Bongo is winning the standup battle so far.
Like a baseball bat into the meat of his leg there - nice leg kick by Bongo.
Uzumaki swats away the attempt to clinch by Bongo.
Bongo fails in his attempt to clinch.
Bongo scores with a push kick.
Bongo rushes Uzumaki and presses him up against the cage.
Bongo lands a nice elbow.
Bongo's corner calls for him to break the clinch, which he does.
Bongo gets a clinch.
Bongo lands an elbow just above Uzumaki 's eye.
Bongo breaks the clinch and we're back to striking at distance.
That's four minutes gone in the round.
Bongo tries to clinch up.
Bongo wants to clinch.
Bongo moves into the clinch successfully.
Uzumaki tries to pull guard but Bongo forces him back to his feet, against the cage.
Fantastic stuff here - a very entertaining period of action, which has drawn cheers from the crowd.
Bongo comes over the top with an elbow. That landed flush.
Bongo breaks the clinch and we return to the middle of the mat.
Uzumaki keeps the fight on the outside.
Bongo keeps his opponent at a distance with a nice jab.
Bongo tries to clinch up.
Bongo moves into range and clinches up with Uzumaki.
The crowd are going absolutely nuts as the round comes to an end - what a fantastic round of action!
Bongo gets an overhook and lands an elbow to the side of the head.
Bongo comes over the top with an elbow. That landed flush.
Uzumaki wants to take the fight to the mat but Bongo manages to get underhooks and keep the fight in the clinch.
Bongo lands a nice elbow.
Bongo breaks from the clinch.
And that�s the end of the round � the fighters go back to their corners.
Kongo Bongo dominated that second round.
The corners get their ten second warning. Both fighters stand from their stools and stare eachother down, ready to get back to the action. This is the final round!

Bongo is looking to clinch but Uzumaki is avoiding it.
Bongo gets caught napping as Uzumaki dives in and scores a takedown. Bongo manages to retain guard.
Uzumaki gets to his feet and steps away from his opponent.
Bongo tries to clinch but Uzumaki is having none of it.
The fight stays on the outside here - Bongo looks like he's thinking about clinching though.
Bongo scores with a kick to the midsection.
Uzumaki avoids the clinch attempt nicely.
Uzumaki fails miserably with a takedown attempt.
Uzumaki closes the distance, clinches up and gets a nice trip takedown into side control. Very smooth.
Uzumaki takes a big intake of breath there - he's definitely tired.
Uzumaki stands up.
This is a great period of action - very entertaining stuff!
Bongo digs a good body shot into Uzumaki's ribs.
Kongo Bongo is looking to keep the fight on the feet at all costs.
That's one minute gone in the round.
Bongo clinches.
Bongo landing knees to the head.
Bongo lands a knee to the head there! That was nasty!
Bongo escapes the clinch and we're back to striking.
Bongo tries to clinch but is not successful on this occasion.
Bongo rushes Uzumaki and presses him up against the cage.
Bongo digs a right hand underneath Uzumaki's ribcage. Uzumaki let out a lung full of air as it connected.
Bongo is trying to pull guard but Uzumaki has him pressed against the cage.
Bongo tries to pull guard but can't drag his opponent to the mat. Uzumaki just stands there and leans against the cage.
Bongo has managed to pull guard. Let's see whether he can work an aggressive guard. It will also be interesting to see what tactics Uzumaki uses from the top position.
Bongo is working an open guard here, looking to improve his position. No doubt that will leave him open to counters but at least he's being more offensive.
Naruto Uzumaki has got the better of the ground game so far.
That's two minutes gone in the round.
Uzumaki stands up from Bongo's guard - Uzumaki perhaps looking for a knockout.
Bongo rushes Uzumaki and pushes him back against the cage in a clinch.
Wooooo! Give it up for these two warriors! They are putting on a show!
Bongo can't break the clinch.
Uzumaki drops down for a takedown but doesn't get it.
Uzumaki fails to pull guard.
Kongo Bongo has stuffed three takedown attempts in the round now. That's going to take a lot out of Naruto Uzumaki.
Bongo lands a good knee to the midsection. Uzumaki won't want to take too many of those.
That's three minutes gone in the round.
Bongo trying to stall but Uzumaki improves his position.
Bongo lands an elbow inside that Uzumaki shrugs off.
Uzumaki wants a takedown but no success here.
Bongo manages to pull guard. Let's see whether he can land a sub off his back.
Bongo has a closed guard, preventing Uzumaki from standing up.
Uzumaki is using up a lot of energy trying to get back to his feet. Perhaps he should improve his position first.
That's four minutes gone in the round.
Bongo is trying to control the position from the bottom.
The ref warns both fighters not to hold the cage as they work up against the meshing.

The ref stands the fighters back up. Kongo Bongo wasn't doing enough on the ground.
Bongo clinches with his opponent.
Bongo is defending well against a takedown attempt.
Bongo drops down looking for an ankle pick but Uzumaki pulls his leg out and moves away.
Bongo moves into the clinch.
Bongo breaks the clinch and we return to the middle of the mat.
As the round comes to an end the crowd are showing their appreciation for a great round of action.
Bongo tries to clinch up.
Bongo tries to clinch up.
Bongo tries to close the distance and clinch up against the cage but Uzumaki paws at him with a jab and circles away.
And that's the end of the fight!
Kongo Bongo showed his dominance in that final round.
I think Bongo has won this one but let's see what the judges have to say. Over to the ring announcer for the scorecards.
Ladies and gentlemen, after 3 rounds of action, we go to the scorecards for a decision.
Judge Sosuke Kotani scores the fight 29:28
Judge Taro Takaoka scores the fight 29:28
Judge Shigeki Sano scores the fight 30:28
In favor of your winner, by unanimous decision... Kongo Bongo!
|
|
|
|
|
|
|
|
|
|
|
|
|
|
|
|
|
|
|
|
|
|
|
| S |
C
A |
G |
S |
C
B |
G |
|
S |
C |
G |
|
energy
A | B |
|
hype
A | B |
|
pop
A | B |
|
mgr
A | B |
|
FIGHT
RATING
89% |
|
|
|
|
|
|
