|
|
PBP Commentary |
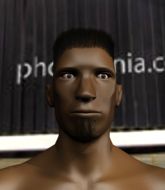
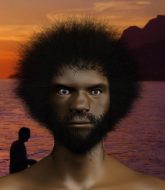
Coming up we have a light heavyweight MMA rules bout between Bob Barker (ranked 0 p4p, 0 weight class) and Miyamoto Usagi (ranked 0 p4p, 0 weight class). Barker comes to the cage accompanied by Remember The Name By Fort Minor. Bob Barker has the better chin. Will he look to stand and bang today?
 |
|
 |
| 190 cm
29
222 lbs
17 - 9 - 0 |
|
183 cm
26
215 lbs
12 - 9 - 0 |
Good wrestling
Excellent boxer
Very strong |
|
ADCC Champion
Decent boxing
Powerful |
|
| |
|
Ladies and gentlemen. This fight is 3 rounds, in the light heavyweight division.
Introducing the fighter to my left, fighting out of the red corner.
With a record of
17 - 9 - 0, fighting out of New York, Bob Barker!
And introducing the fighter to my right, fighting out of the blue corner.
With a record of
12 - 9 - 0, fighting out of New York, Miyamoto Usagi!
The judges for this bout are Dean Styles, Lou da Vinci and Franklyn Lucas.

The bell rings for round one and we are underway!
Usagi swinging wildly here.
Barker scores with a reasonable looking shot to the body. Usagi doesn't seem bothered though.
Barker just misses with a punch to the body.
Barker throws a looping overhand right but Usagi ducks down to avoid it.
Barker swinging wildly here.
Usagi changes levels and looks for a double leg takedown. Barker tries to avoid it but Usagi manages to keep hold of a leg and drag Barker to the ground. Barker escapes though and pops straight back up to his feet.
We've had a slow start to the round here - hopefully the action picks up.
Barker avoids the body shot from Usagi.
Usagi fails to land the takedown.
Barker wants to slow Usagi down by chopping away at his legs.

That's one minute gone in the round.
Usagi tries to close the distance and clinch up but Barker swats him away and circles back towards the center.
Barker displays some good footwork, moving neatly out of range as Usagi throws out the jab.
A swing and a miss from Usagi.
No luck for Usagi with that takedown attempt.
Bob Barker has stuffed three takedown attempts in the round now. That's going to take a lot out of Miyamoto Usagi.
Barker throws a combination but comes up with nothing but fresh air.

Barker gets caught on his heels momentarily as he allows Usagi to score an easy takedown into full guard.

That's two minutes gone in the round.
Barker trying to control the position.

Barker working from the bottom, still in full guard. He's managed to get a loose triangle. Usagi doesn't seem to be doing much to defend here, obviously he feels comfortable in the position. Usagi manages to throw the legs off his shoulder and he's back into guard - no problem.
Usagi passes Barker's right leg, so he's now in half guard.
Usagi is trying for a guillotine from the top but the pressure isn't in the right place so Barker is just riding it out for now. Usagi eventually gives up the hold.
Usagi is looking to take a break and control but Barker is keeping him honest, looking to work from the bottom.

That's three minutes gone in the round.
Usagi is looking for submissions but instead, Barker has regained full guard.
Usagi passes into half guard.
Barker has no desire to be mounted, so is trying to control. Usagi is working away from the top position though.
Usagi is working for a submission of some sort.
Barker slips a foot under and gets full guard. Nice work.

That's four minutes gone in the round.
Usagi thows a big elbow that misses.
Barker tries to land a sweep but no joy.
The fighters are pressed up against the cage, both looking to find a bit of space to work.

Barker pushes Usagi off and scrambles back to his feet.
Barker moves out of range of the body kick from Usagi.
The crowd thankful this round is nearly over.
Usagi throws the kick towards the body but Barker avoids it.
And thats the end of the round the fighters go back to their corners.
That was a close round but I would say that Bob Barker will probably get the nod.
The referee calls time. The cornermen exit stage left and we're back to business.

Usagi fails to land the takedown.
Usagi moves away from the strike by Barker.
Usagi slips under a jab.
Barker swats away the attempt to clinch by Usagi.
Usagi throws a looping left and ducks down for a takedown. He's got his arms around Barker's waist but Barker gets an underhook and avoids the takedown by throwing Usagi off to one side.
We've had a slow start to the round here - hopefully the action picks up.
Usagi moves out of range of the strikes.
Barker moves away from the strike by Usagi.
That's one minute gone in the round.
Barker pushing out the jab but it's not landing.
Barker lands a lovely overhand right.
Barker just misses with a punch to the body.
Usagi changes levels and looks for a double leg takedown. Barker tries to avoid it but Usagi manages to keep hold of a leg and drag Barker to the ground. Barker escapes though and pops straight back up to his feet.
Bob Barker has stuffed three takedown attempts in the round now. That's going to take a lot out of Miyamoto Usagi.
Usagi throws a body punch but Barker moves out of range.
Both fighters are looking to counter, which isn't making for the most exciting fight in the world.
Usagi shoots for a double leg takedown but Barker sprawls well. He's pushed Usagi's face into the mat and manages to get back to his feet relatively easily.
Miyamoto Usagi seems to be the more aggressive standup fighter in this bout.
Barker bobbing and weaving, closes the distance and lands a hook to the side of Usagi's head.
Usagi throws out a loose jab but Barker uses good head movement to avoid it.
That's two minutes gone in the round.
Barker pulls out of a head kick attempt.
Barker leaves Usagi with his face pressed against the mat as he sprawls beautifully, defending against a solid takedown attempt.
Usagi gets the takedown into side control.
Barker parries the strikes from Usagi easily there. Usagi is wary of posturing up too much because it might enable Barker to escape.
Barker is looking to regain half guard here but Usagi keeps moving and retains side control.
Usagi works a knee to the body and follows up with a nice elbow to the head.
Usagi tries to score with some ground and pound. Barker controls his posture well this time though and the shots don't do any damage.
Usagi wants to take a breather but Barker manages to regain guard - a lesson learnt for Usagi.
That's three minutes gone in the round.
Barker looking for submissions from the bottom here. Moving his hips around, possibly looking for an armbar.
Usagi looking to sit in guard and control but Barker gets the butterfly guard and sweeps. He's now in the guard on the top.
Barker wants to control from the top but Usagi keeps moving.
Usagi working a defensive guard but Barker passes into half guard.
Usagi is concentrating on defense, preventing Barker from advancing position.
Barker thows a wild elbow that connects with the canvas.
That's four minutes gone in the round.
The crowd are hurling abuse towards the fighters... You can hardly blame them though because there isn't a lot going on in the fight.
Barker is looking to stall here but Usagi recovers full guard.
Usagi looking to hit a scissor sweep but Barker is one step ahead there.
Usagi not looking particularly offensive just at the moment.
The crowd thankful this round is nearly over.
Usagi looking to sweep here. No luck so far.
Barker has to be careful here, sitting in the guard of a superior BJJ player.
Usagi is persisting with the attempt to improve his position.
Usagi is active off his back here, looking for submissions.
And thats the end of the round the fighters go back to their corners.
That was a close second round but I would say that Bob Barker will probably get the nod.
The minute break is over - no more time for sponges and pep talks - back to the action! This is the final round!

Usagi defending well as Barker loads up on a big left hand.
Barker swings away but doesn't land with a series of punches.
Barker misses with a hook.
Usagi misses with a body shot.
Barker scores with a straight right hand, right through his opponent's guard.
We've had a slow start to the round here - hopefully the action picks up.
Usagi lands a right hook to the body.
The fight stays on the outside here - Usagi looks like he's thinking about clinching though.
That's one minute gone in the round.
A jab from Barker misses.
Usagi looks to land a right hand but Barker moved out of range.
Horrible takedown by Usagi or perhaps it was just good defense by Barker which made him look bad.
Barker stooping low to avoid any incoming strikes and then lunges in with an uppercut come cross that lands flush.
Barker throws out a loose jab but Usagi uses good head movement to avoid it.
Barker displays good takedown defense there as he swats away a double leg from Usagi.
Usagi slips a jab and a cross from Barker.
That's two minutes gone in the round.
Usagi is looking to clinch.
A telegraphed takedown attempt from Usagi is defended easily by Barker.
Bob Barker has stuffed three takedown attempts in the round now. That's going to take a lot out of Miyamoto Usagi.
Barker keeping a good distance there, avoiding the body shot.
Barker waving his hands out in front of him, looking to distract Usagi.
Usagi walks straight into an uppercut. Luckily it didn't land flush.
That's three minutes gone in the round.
Usagi takes a body punch that cleary hurt but he's trying not to show any weakness.
Usagi misses with an uppercut. Barker saw that one coming.
Usagi throws out a loose jab but Barker uses good head movement to avoid it.
Usagi dives in and grabs Barker's left leg, looking for a takedown. Barker pushes down on Usagi's head and hops out.
Usagi misses with a takedown attempt - Barker sprawls well and throws a nice strike on the way out which just misses.
Bob Barker is fighting for a decision here - he's started to take the cautious approach.
Barker looks to score with a jab to the body but Usagi is just out of range.
That's four minutes gone in the round.
Usagi swings and misses with a shot to the body
enabling Barker to counter with a crisp jab.
Barker misses with a looping left.
Oooooooooooh, not good. A low kick from Barker lands where it shouldn't have, right in the... well, you know what he did? He kicked him in the penis. He's injured, injured bad. The referee sends both fighters to their corners and Usagi has 5 minutes to recover. He's OK now though... a thumbs up from Usagi and we're back underway with a touch of gloves.
Barker throws a lazy right hand but Usagi sees it coming a mile off and sidesteps it easily.
Usagi misses with a body shot
and Barker counters with a nice body shot.
Usagi tries to clinch but Barker moves out of range.
The crowd thankful this round is nearly over.
Usagi tries to clinch up against the cage, rushing in the close the distance. Barker manages to break the clinch and circles back to the middle of the mat.
Usagi tries to close the distance and clinch but Barker swats him to one side with an open hand palm strike and circles away.
And that's the end of the fight!
Bob Barker showed his dominance in that final round.
Well I reckon that's a shut out for Barker, winning every round. Will the judges agree? They are the ones who matter, even if they are often depressingly incompetent. Over to the ring announcer for the scorecards.
Ladies and gentlemen, after 3 rounds of action, we go to the scorecards for a decision.
Judge Dean Styles scores the fight 29:28
Judge Lou da Vinci scores the fight 29:29
Judge Franklyn Lucas scores the fight 30:28
In favor of your winner, by majority decision... Bob Barker!
|
|
|
|
|
|
|
|
|
|
|
|
|
|
|
|
|
|
|
|
|
|
|
| S |
C
A |
G |
S |
C
B |
G |
|
S |
C |
G |
|
energy
A | B |
|
hype
A | B |
|
pop
A | B |
|
mgr
A | B |
|
FIGHT
RATING
21% |
|
|
|
|
|
|
