|
|
PBP Commentary |
Coming up we have a bantamweight MMA rules bout between Dandy Bigglesworth (ranked 0 p4p, 0 weight class) and Marge Power (ranked 0 p4p, 0 weight class). Bigglesworth comes to the cage accompanied by Car Bomb by Negativland. Marge Power will no doubt be looking to use his reach advantage to good effect.
 |
|
 |
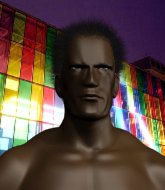
| 155 cm
25
135 lbs
12 - 2 - 0 |
|
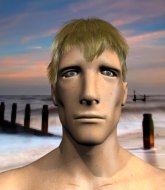
170 cm
25
130 lbs
19 - 9 - 0 |
BJJ Purple Belt
World class boxer
Very quick |
|
Good wrestler
Excellent MT
Fast |
|
| |
|
Ladies and gentlemen. This fight is 3 rounds, in the bantamweight division.
Introducing the fighter to my left, fighting out of the red corner.
With a record of
12 - 2 - 0, fighting out of Rio de Janeiro, Dandy Bigglesworth!
And introducing the fighter to my right, fighting out of the blue corner.
With a record of
19 - 9 - 0, fighting out of Rio de Janeiro, Marge Power!
The judges for this bout are Matheus Silva, Emerson Jorge and Edson Gomes.

The bell rings for round one and we are underway!
Power cracks Bigglesworth with an open hand slap.
A nice inside leg kick there by Power. That's going to slow Bigglesworth down.
Power lands a head kick!
Bigglesworth misses with a looping left.
Bigglesworth rushes in with a sloppy looking punch
enabling Power to counter with a crisp jab.
Bigglesworth throws a series of punches but Power avoids them all with ease.
Power misses the shot to the body.
Power avoids the clinch attempt nicely.
Bigglesworth swings away with a body shot that misses
and Power counters with a head kick.
Power misses with a head kick.
Power pulls out of a head kick attempt.
Bigglesworth misses with an uppercut
and Power counters with a nice body shot.
Power lands with a two punch combination before moving back out of range.
Power uses some good footwork to avoid the body shot by Bigglesworth.
Power tries a head kick but it misses.
Bigglesworth avoids the head kick by Power.
Power finds nothing but air with that leg kick attempt.
Power throws a one two combo.
Decent striking displayed by Bigglesworth there.

That's one minute gone in the round.
Power throws a sloppy head kick and Bigglesworth moves out of range easily.
Power bobs and weaves and throws out a fast jab that snaps Bigglesworth's head backwards.
Power throws a body kick the misses
and Bigglesworth cracks him with a counter punch right on the button.
Power keeps the fight on the outside.
Bigglesworth cracks a nice hook into Power's ribs.
Bigglesworth closes the distance and lands a one-two.
Marge Power is looking to keep the fight on the feet at all costs.
Power takes a swing at Bigglesworth's ribcage but misses.
Power throws a series of punches but Bigglesworth moves out of range.
Power misses with a head kick.
Bigglesworth lands with an overhand left.
Bigglesworth catches Power with a nice straight right. He seems pissed - ooooh, it's on now! On like donkey kong!
Power throws a wild combination but nothing lands.
Bigglesworth lands with an overhand left.
A punch combination from Bigglesworth misses.
Power lands a head kick. Bigglesworth smiles back at him and beckons him forward.
A swing and a miss from Bigglesworth.
Bigglesworth swings and misses with a hook to the body.

That's two minutes gone in the round.
Bigglesworth throws a hook to the body but it doesn't connect.
Bigglesworth lands a nice shot to the body.
Power fakes high and swings low for a body shot but Bigglesworth manages to avoid it.
Bigglesworth lands a nice shot to the body.
The crowd cheers as Power lands an impressive looking overhand right. Bigglesworth doesn't seem phased though.

Bigglesworth pushes Power up against the cage in a clinch.
Good body shot from Bigglesworth.
Power is looking to control Bigglesworth's arms but Bigglesworth gets an underhook and turns him. Now Power has his back to the cage.
Bigglesworth jumps guard but Power stands there with Bigglesworth around his waist. Bigglesworth gives up and drops back to his feet. We remain in the clinch.
Bigglesworth tries to pull guard but Power holds him up against the cage and eventually Bigglesworth drops back down to his feet.
Bigglesworth missing with knees to the body.
Bigglesworth swings wildly with an uppercut but Power uses good head movement to avoid it.
Power tries to land a knee to the body but he is off balance and Bigglesworth avoids it.
Bigglesworth goes for a takedown attempt but Power pushes him away and we're back to fighting at a distance.
That's three failed takedown attempts in the round for Dandy Bigglesworth. That's going to take a lot out of him.
Bigglesworth throws out a loose jab but Power uses good head movement to avoid it.

That's three minutes gone in the round.
Power tries a head kick but it misses.
Power looks to throw the jab but Bigglesworth is out of range.
Bigglesworth throws a combination that misses
and Bigglesworth takes a counter punch right on the button for his troubles.
Bigglesworth blocks a head kick by Power.
Bigglesworth lunges in with an uppercut that skims his opponent's chin.
Power fakes a jab and scores with a low kick.
Bigglesworth misses the body punch
and Power counters with a straight punch to the midsection.
Bigglesworth looks to land a left hand but Power moved out of range nicely.
Bigglesworth works the jab nicely.
Bigglesworth scores with a hook to the body. Power takes a step back and tries to catch his breath.
Power has used his reach advantage pretty well so far tonight.
Bigglesworth tries to land with a swinging hook to the body but Power was well out of range. Poor timing from Bigglesworth.
Bigglesworth swings for the body but Power moves out of range.
Bigglesworth swings wildly with a right hand that was never going to find it's target.
Bigglesworth blocks a head kick by Power.
Power fakes high and swings low for a body shot but Bigglesworth manages to avoid it.
A chopping leg kick lands by Power.

That's four minutes gone in the round.
Bigglesworth lands with an overhand left.
Power moves away from the strike by Bigglesworth.
Bigglesworth throws an uppercut from half a mile away. Power sees it coming and avoids it easily.
Power jabs Bigglesworth to the body, keeping him at a distance.
Bigglesworth cracks a nice hook into Power's ribs.
A jab from Bigglesworth does it's job there.
Power avoids the body shot from Bigglesworth.
Bigglesworth lands a straight punch to the body, keeping Power at a distance.
Power defending well as Bigglesworth loads up on a big left hand.
A looping hook to the body misses from Bigglesworth. Power does a little dance to reset his feet.
Power misses with a jab, cross combination.
Bigglesworth misses with a body shot. Nice footwork from Power.
Nice uppercut there from Power.
The crowd applaud the fighters efforts here as the round comes to an end.
Bigglesworth works Power's body with a nice hook.
Bigglesworth clinches.
A hook to the body from Bigglesworth.
Power pushes Bigglesworth back against the cage and lands a hook to the side of the head.
And thats the end of the round the fighters go back to their corners.
Marge Power dominated that round.
Well, the break between rounds is over. Let's get back to the scrappin!

Bigglesworth thuds his right hand into Power's forehead from close range. That could be painful for both fighters.
Bigglesworth swings wildly with a right hand that was never going to find it's target.
Bigglesworth rushes in with a sloppy looking punch
and Power counters with a nice jab to the body that keeps Bigglesworth thinking.
Bigglesworth throws a jab when Power was well out of range.
Bigglesworth fakes and then throws a beautiful body shot. Power looks a bit winded and takes a step backwards to take a breath.
We are yet to see a takedown attempt from Power in the fight. On paper you would think he is the more dominant ground fighter so let's see if these unusual tactics pay off.
Bigglesworth blocks a head kick by Power.
Bigglesworth takes a head kick and shrugs it off.
Bigglesworth pushes forward with a 1-2 combination that forces Power back to the cage. Bigglesworth follows up with a solid lead hook to the liver.
Bigglesworth takes a nice looking leg kick right on the meat of his thigh there.
Power throws a quick head kick that skims the top of Bigglesworth's head.
Bigglesworth works Power's body with a nice hook.
Power pulls out of a head kick attempt.
Power takes a shot to the body in his stride.
Bigglesworth misses with a wild body shot.
Dandy Bigglesworth seems to be the more aggressive standup fighter in this bout.
Bigglesworth misses with a double jab
and Power counters with a nice body kick.
Bigglesworth misses with an uppercut.
That's one minute gone in the round.
Power throws a head kick that misses.
Bigglesworth takes a big uppercut there. He seems a bit wobbly but no, he's OK.
Bigglesworth throws a jab, cross combination which is slipped
and Power counters with a nice body kick.
Bigglesworth shoots in for a takedown - he's clinched up with Power but Power pushes him off and we're back to square one.
Bigglesworth fails with an attempt to clinch.
Power misses with a half-hearted attempt at a head kick.
Bigglesworth throws the left hand but Power avoids the punch easily.
Power slips under a jab.
Power tries to land a front kick but Bigglesworth steps back. That was a bit too telegraphed.
Bigglesworth looks to land a right hand but Power moved out of range.
Bigglesworth throws a body kick, spinning off balance
and Power counters with a nice body kick.
Bigglesworth connects with a good right hand that stumbles Power. Power circles away out of range and recomposes himself.
Bigglesworth tries to land with a swinging hook to the body but Power was well out of range. Poor timing from Bigglesworth.
Power fakes with a right hand and throws a good leg kick, right into the thigh. That had to hurt Bigglesworth.
A head kick misses from Power.
A telegraphed right hand from Bigglesworth misses the target.
That's two minutes gone in the round.
Power throws a right high kick that is partially blocked by Bigglesworth.
Power throws a combination but comes up with nothing but fresh air.
Power punishes Bigglesworth's body with a nice straight punch.
Power connects with a high kick.
Power misses with a half-hearted attempt at a head kick.
Bigglesworth missing with a left hand there. Power was out of range so wasted energy throwing that one.
Bigglesworth takes a head kick and shrugs it off.
Bigglesworth avoids a kick to the body.
Power takes a swing at Bigglesworth's ribcage but misses.
Bigglesworth throws a shot from downtown. Power moves away and avoids it.
Power tries a switch kick but it misses it's target.
Bigglesworth misses with a lunging right hand
and Power counters with a kick to the head that grazes his opponent. Bigglesworth is lucky that one didn't land flush.
Power fakes high and swings low for a body shot but Bigglesworth manages to avoid it.
Power throws a head kick but Bigglesworth moves out of range.
Bigglesworth misses with a straight right.
Bigglesworth misses the shot to the body.
Marge Power seems to be getting the better of the standup.
That's three minutes gone in the round.
Bigglesworth pushing out the jab but it's not landing.
Power connects with a body shot.
Power is throwing a lot of body shots here, looking to wear down Bigglesworth rather than just go for the knockout.
Power jabs away that one connects to the head of his opponent.
Bigglesworth misses with a body shot. Nice footwork from Power.
Power throws a combination but it was largely blocked by Bigglesworth.
Power misses with a body kick.
The fight stays on the outside here - Bigglesworth looks like he's thinking about clinching though.
Power throws a head kick that misses and slips in the process. He scrambles back to his feet and the fighters circle.
Power slips a jab from Bigglesworth.
Bigglesworth misses with a body punch
and Power counters nicely by changing levels and landing a hook to the body.
Power throws a head kick but Bigglesworth moves out of range.
Bigglesworth tries to clinch there but Power circles away.
Power throws a head kick that misses and slips in the process. He scrambles back to his feet and the fighters circle.
Power misses with a body shot.
Bigglesworth avoids the head kick by Power.
Power thows a body shot but no joy.
That's four minutes gone in the round.
Well. There's a bit of a lull in the action here and the crowd are starting to get restless.
Power scores with a head kick.
Power moves into range and lands a nice body kick.
Bigglesworth throws a head kick but Power moves out of range.
Bigglesworth closes the distance but Power moves to the side
and Power makes him pay by landing a thudding low kick.
Power pulls out of a head kick attempt.
The fighters are going at a pretty good pace and they're both starting to sweat now.
Bigglesworth ducks down and throws a hook to the body but Power moves away.
Power bobs and weaves and then throws a good body kick.
Power scores with a head kick. Bigglesworth tried to block it but didn't get his arm up in time.
Power ducks down and throws a hook to the body but Bigglesworth moves away.
Power has his hands up protecting his head but a hook from Bigglesworth finds it's way round the side to connect with Power's head.
Bigglesworth tries to grapple but his opponent circles
and Power counters with a kick to the head that grazes his opponent. Bigglesworth is lucky that one didn't land flush.
Power connects with a leg kick. He turned his hip over nicely there.
Marge Power is looking to throw some combinations by the looks of things.
The crowd applaud the fighters efforts here as the round comes to an end.

Bigglesworth drops down and drives through with a powerful takedown into guard.
And thats the end of the round the fighters go back to their corners.
Marge Power showed his class in that round. I'd imagine he'll take it on all the scorecards.
The fighters get back to their feet, the hooter sounds and we're back to the action! This is the final round!

Power throws a sloppy head kick and Bigglesworth moves out of range easily.
Bigglesworth throws a combination that misses
enabling Power to counter with a crisp jab.
Power tries a switch kick but it misses it's target.
Power looks to land a left hand but Bigglesworth moved out of range nicely.
Power lets loose with a powerful body kick. Bigglesworth will feel that in the morning.
Power needs to keep his hands up - Bigglesworth had a free shot at his head there.
Bigglesworth throws a series of punches but Power moves out of range.
Bigglesworth with a body punch. A glancing blow.
Power misses with a double jab.
Bigglesworth misses with a jab, cross combination.
Bigglesworth cracks a nice hook into Power's ribs.
Power looks to land a left hand but Bigglesworth moved out of range nicely.
Power lands a head kick. Bigglesworth smiles back at him and beckons him forward.
Bigglesworth has a takedown stuffed.
Bigglesworth will be looking to protect his midsection after taking some solid kicks to the body.
Power fakes a jab and scores with a low kick.
Bigglesworth throws a sloppy body shot
and Power counters with a flying knee. Nice.
That's one minute gone in the round.
Power misses with a two punch combination.
Power misses with a head kick.
A combination from Power does no damage.
Power throws a jab, cross combination which is slipped
and Bigglesworth counters with a left to the body.
Bigglesworth closes the distance and pushes Power back into the cage.
Power blocking some punches.
A real battle for position is taking place between these two warriors.
Power blocking some punches.
Power has a couple of punches blocked by Bigglesworth.
Power lands a body shot in the clinch.
Bigglesworth wants a takedown but no success here.
Bigglesworth tried to land a shot to the body but connects with Power's elbow.
Power comes over the top with an elbow. That landed flush.
Bigglesworth avoids a wild elbow strike from Power.
Power blocks a punch to the side of the head.
Bigglesworth misses with a short punch on the inside.
Power is working hard here but doesn't seem to be able to control effectively, up against the cage.
That's two minutes gone in the round.
There's not a lot going on here and the crowd are letting the fighters know they're not willing to tolerate a lack of action.
Power blocks a punch to the side of the head.
Bigglesworth tries a shoulder strike but it doesn't do any damage.
A head punch blocked on the inside by Power.
Stalling in the clinch from Power.
Power blocks a couple of punches on the inside.
Bigglesworth is hobbling a little on that front leg after taking quite a few leg kicks so far in this fight.
Bigglesworth misses with a punch to the body.
Power is struggling to control the position.
Bigglesworth has a couple of punches blocked by Power.
Bigglesworth looking to throw knees to the head but Power is blocking nicely.
Power slowing the pace effectively.
Bigglesworth with an attempt at a knee that misses.
Bigglesworth misses with a hook from the clinch.
Bigglesworth misses with a short punch on the inside.
Bigglesworth misses with the head strike.
Bigglesworth fails to land with a short punch on the inside.
Power misses with the head strike.
A hook to the body from Power.
That's three minutes gone in the round.
Power is looking to control Bigglesworth's arms but Bigglesworth gets an underhook and turns him. Now Power has his back to the cage.
Bigglesworth misses with some punches.
Power gets through Bigglesworth's defenses to land a nice punch to the side of the head.
Bigglesworth doesn't land with the attempted body shot.
Bigglesworth throws a head punch that misses.
Bigglesworth lands a right hand that snaps the head of Power backwards.
Power tries to land knees in the clinch but Bigglesworth avoids the damage to the body.
A short uppercut from Power.
Power with the Thai clinch, lands a knee to the head.
A hook to the body from Bigglesworth.
Bigglesworth tries to land a shot to the body but it's blocked.
Power blocks a punch to the side of the head.
Power effectively controlling the action here.
Bigglesworth misses with a shot to the kidneys.
Bigglesworth swings wildly with an uppercut but Power uses good head movement to avoid it.
Bigglesworth prevents a body shot from Power.
That's four minutes gone in the round.
There's not a lot going on here and the crowd are letting the fighters know they're not willing to tolerate a lack of action.
Power tries a knee to the head but he's missed.
Power can't find room to land a body shot as Bigglesworth controls the action.
A head punch on the inside from Bigglesworth fails to land.
Power blocks a couple of punches on the inside.
Power leaning against his opponent.
Power pushes Bigglesworth back against the cage and lands a hook to the side of the head.
Bigglesworth is working on a single leg takedown against the cage. Power can't fight it off and eventually Bigglesworth manages to take the fight to the floor. Power looks annoyed but at least he's managed to land in guard.
The fighters are pressed up against the cage, both looking to find a bit of space to work.
Power wants to sweep here but Bigglesworth controlling him for the moment.
Dandy Bigglesworth has stepped it up - he knows he needs a finish here!
Bigglesworth trying to control but Power is working from the bottom.
And that's the end of the fight!
I would just about give that final round to Marge Power.
I've got Power winning every round here. Surely the decision will go his way and he'll pick up a well deserved decision victory. Over to the ring announcer for the scorecards.
Ladies and gentlemen, after 3 rounds of action, we go to the scorecards for a decision.
Judge Matheus Silva scores the fight 27:30
Judge Emerson Jorge scores the fight 27:30
Judge Edson Gomes scores the fight 28:30
In favor of your winner, by unanimous decision... Marge Power!
|
|
|
|
|
|
|
|
|
|
|
|
|
|
|
|
|
|
|
|
|
|
|
| S |
C
A |
G |
S |
C
B |
G |
|
S |
C |
G |
|
energy
A | B |
|
hype
A | B |
|
pop
A | B |
|
mgr
A | B |
|
FIGHT
RATING
57% |
|
|
|
|
|
|
