|
|
PBP Commentary |
Coming up we have a bantamweight MMA rules bout between Maxwell Smart (ranked 0 p4p, 0 weight class) and Katsu Yamamoto (ranked 0 p4p, 0 weight class). Both these guys have solid standup skills and neither is particularly fantastic on the ground, so let's hope for a nice standup war!
 |
|
 |
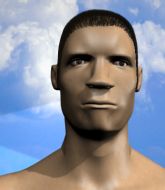
| 178 cm
21
143 lbs
7 - 3 - 0 |
|
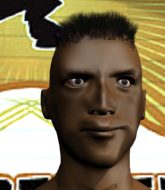
163 cm
24
143 lbs
10 - 9 - 0 |
Good wrestling
Solid boxing
Granite chin |
|
BJJ Purple Belt
Good kicks
Powerful |
|
| |
|
Ladies and gentlemen. This fight is 3 rounds, in the bantamweight division.
Introducing the fighter to my left, fighting out of the red corner.
With a record of
7 - 3 - 0, fighting out of St Petersburg, Maxwell Smart!
And introducing the fighter to my right, fighting out of the blue corner.
With a record of
10 - 9 - 0, fighting out of St Petersburg, Katsu Yamamoto!
The judges for this bout are Ivan Kurochkin, Konstantin Menshow and Sergei Dronov.

The bell rings for round one and we are underway!
Smart with a body punch. A glancing blow.
Yamamoto cracks Smart with an open hand slap.
Yamamoto lunges in with swinging rights and lefts but Smart circles away quickly and effectively.
Yamamoto moves into range and lands a nice leg kick.
A big left from Yamamoto misses.
Yamamoto throws a head kick that misses and slips in the process. He scrambles back to his feet and the fighters circle.
Yamamoto fakes high and swings low for a body shot but Smart manages to avoid it.
Smart scores with a hook.
Yamamoto throws a low kick, looking for Smart's leg but Smart calmly moves out of range.
A looping hook to the body misses from Yamamoto. Smart does a little dance to reset his feet.
Yamamoto takes a jab on the nose. He smiles like he loves it and keeps coming.
Yamamoto cracks a nice hook into Smart's ribs.
Smart connects with a body shot.
Smart moves into range and connects with a jab.
Nice straight punches there by Smart. You know Roy Jones Jr respects the hands of Smart.
Yamamoto moves out of range of the body kick from Smart.
Maxwell Smart seems to be the more aggressive standup fighter in this bout.
Smart avoids the clinch attempt nicely.
Smart swings and misses with a hook to the body.
Yamamoto throws a combination but it was largely blocked by Smart.
Smart avoids the clinch attempt nicely.
Yamamoto throws an overhand right that lands on Smart's shoulder, as Smart tries to avoid the shot.
Smart takes a shot right to the liver - Bas would have been proud of that punch.
Yamamoto rushes forward with a series of wild hooks but Smart moves out of range and avoids them all easily.

That's one minute gone in the round.
Smart lands a slapping body shot.
Smart is looking to land body kicks.
Yamamoto is the aggressor but that punch slipped nicely by Smart.
Smart has a takedown stuffed.
Yamamoto tries to clinch but Smart is having none of it.
Yamamoto tries to close the distance and clinch but Smart swats him to one side with an open hand palm strike and circles away.
Smart lands a head shot.
Yamamoto moves in looking to clinch but Smart pushes him off.
Katsu Yamamoto is looking to keep the fight on the feet at all costs.

Smart clinches up with Yamamoto and pushes him back against the cage.
Yamamoto leaning against his opponent.
Smart tries for a takedown. No joy.

Yamamoto escapes the clinch and we're back to striking.

Smart darts in and lands a nice takedown into half guard.

Yamamoto makes some distance and scrambles quickly back to his feet. Nice work!
Yamamoto takes a step back and watches a body kick go sailing past his mid section.
Smart is using his reach advantage well here, landing the more effective single shots from range.
Smart connects with a right hand. Yamamoto shakes it off.
Yamamoto defends well against a solid takedown attempt from Smart.
That's three failed takedown attempts in the round for Maxwell Smart. That's going to take a lot out of him.

That's two minutes gone in the round.
Smart shoots in for a takedown but Yamamoto shows good takedown defense.
Yamamoto pushes Smart up against the cage in a clinch.
Yamamoto escapes the clinch and we're back to striking.
Smart moves out of range of the body kick from Yamamoto.
Yamamoto misses with a jab, cross combination.
Yamamoto throws a head kick but Smart moves out of range.
Smart looks frustrated there after his takedown attempt is stuffed easily.
Smart clinches up against the cage.
Smart can't break the clinch.
Smart has dropped down and is working for a takedown. Yamamoto is trying to keep an underhook but Smart manages to get the takedown into half guard.
Yamamoto tries to kick Smart off but Smart keeps his base steady and stays in half guard.
Yamamoto works his way to full guard. Good work.
This has been an exciting period of action!
Smart tries to free his leg and advance position but Yamamoto is retaining full guard.
Yamamoto is looking to stand up but Smart isn't so interested in that idea.
Smart pressing down on his opponent's thigh, looking to pass guard. Yamamoto is keeping the position for now.
Yamamoto preventing the ground and pound from doing any damage.

That's three minutes gone in the round.
Yamamoto is looking to stand up but Smart isn't so interested in that idea.
Smart content to strike from guard, landing some decent shots.
Smart prevents Yamamoto from getting back to his feet.
Yamamoto keeping moving, preventing Smart from controlling successfully.

The referee has ruled that neither fighter is active enough on the ground and has stood them back up.
Smart scores with a three punch combo!
Yamamoto displays good takedown defense there as he swats away a double leg from Smart.
Yamamoto throws a body punch but Smart moves out of range.
Smart shoots in for a takedown but Yamamoto shows good takedown defense.
Yamamoto throws a body kick that digs right into the meat.
Yamamoto is throwing a lot of body shots here, looking to wear down Smart rather than just go for the knockout.
Smart looks for a takedown. He's got it. We're now in half guard.
Smart is breathing heavily.
Smart lands with an elbow from half guard - that looked like it hurt.

That's four minutes gone in the round.
Smart is looking to advance position but Yamamoto won't allow it.
The ref warns both fighters not to hold the cage as they work up against the meshing.
Yamamoto is trying to control but can't.
Yamamoto is trying to stand up here but Smart is controlling him well.
Smart sitting in half guard, looking to land shots. Yamamoto defending well though.
The referee calls for the fighters to work.
Yamamoto works his way to full guard. Good work.
Smart stops Yamamoto from standing up.
The crowd applaud the fighters efforts here as the round comes to an end.
Smart wants to control from the top but Yamamoto keeps moving.
Smart postures up and scores with a shot to the body and a follow up elbow to the head.
And thats the end of the round the fighters go back to their corners.
That was a close round but I would say that Maxwell Smart will probably get the nod.
That's the end of the interval. I'm sure that seemed a lot quicker than a minute for our two fighters! Back to the action.

Yamamoto takes a swing at Smart's ribcage but misses.
A nice combination there by Smart.
Yamamoto will need to tighten up his combinations if he doesn't want to gas himself out, swinging at thin air.
Smart fails with the takedown.
Smart will have to do better than that with his takedown attempts.
Smart lands a nice shot to the body.
A head kick misses from Yamamoto.
Smart thows a body shot but no joy.
Smart dips down and scores with a jab to the body.
Smart shoots in for a takedown but Yamamoto shows good takedown defense there and keeps this one on the feet.
That's three failed takedown attempts in the round for Maxwell Smart. That's going to take a lot out of him.
Yamamoto listening to his corner there, landing a nice uppercut.
Smart moves forwards but Yamamoto connects with a nice, crisp jab.
Yamamoto takes a shot right to the liver - Bas would have been proud of that punch.
Smart is trying hard to land a takedown here. Yamamoto sprawls well and keeps this one on the feet.
Smart scores with a nice looking left hook and follows it up with an uppercut!
Smart shoots in for a takedown but Yamamoto shows good takedown defense there and keeps this one on the feet.
Both fighters are absolutely exhausted here.
Yamamoto fails to land with a series of punches.
That's one minute gone in the round.
Smart moves in looking to clinch but Yamamoto pushes him off.
Smart misses with a body shot. Nice footwork from Yamamoto.
Smart is using his height advantage well here, landing a good percentage of his punches.
Smart fakes high and swings low for a body shot but Yamamoto manages to avoid it.
Yamamoto swings and misses with a hook to the body.
Yamamoto throws a series of punches but Smart avoids them all with ease.
Smart has taken the fight to the clinch.
Yamamoto connects with a knee to the head.
Yamamoto escapes the clinch and we're back to striking.
Yamamoto tries to clinch up.
Smart is looking to clinch.
Yamamoto takes a body punch that cleary hurt but he's trying not to show any weakness.
Smart changes levels and looks for a double leg takedown. Yamamoto tries to avoid it but Smart manages to keep hold of a leg and drag Yamamoto to the ground. Yamamoto escapes though and pops straight back up to his feet.
Yamamoto throws a jab, cross combination which is slipped
and Smart counters with a nice shoot takedown that brings the fighters to the ground.
Yamamoto seems keen to control Smart's posture.
Smart stands up and waves to Yamamoto to follow him.
Smart lands three nice shots there - that looked like it hurt!
That's two minutes gone in the round.
Smart slips in close and lands a nice hook before moving back out of range.
A clash of legs there as Smart blocks the low kick.
Smart swings away with a body shot that misses
and Yamamoto counters with a crisp hook to the side of the head.
Yamamoto throws a right hand that Smart ducks under and follows up with a left that Smart also avoids with ease.
No luck with that takedown attempt from Smart.
Smart slips a jab and a cross from Yamamoto.
Smart changes levels and scores with a jab to the body.
Smart shoots in for a takedown but Yamamoto shows good takedown defense.
Yamamoto takes a step towards his opponent and connects with a left hand, before circling away.
Smart chopped to the floor by a nice leg kick but he springs right back up before Yamamoto can pounce on him.
Fantastic stuff here - a very entertaining period of action, which has drawn cheers from the crowd.
Smart circles away from the clinch attempt
and Smart counters with a driving takedown into guard. Nice work there by Smart.
Smart throwing strikes from guard but Yamamoto blocks nicely.
Yamamoto seems keen to control Smart's posture.
That's three minutes gone in the round.
Smart trying to control the position from guard on top but Yamamoto is wriggling around, looking for whatever he can.
Yamamoto utilising some decent striking defenses from the guard, preventing the ground and pound.
Yamamoto keeping moving, preventing Smart from controlling successfully.
Smart trying to pass the guard but can't manage it just yet.
Yamamoto pulls Smart in close to prevent any damage.
Yamamoto manages to sweep nicely, so he's now on top. Smart manages to get himself to full guard.
Smart will need to keep those long limbs tucked in whilst he's on the ground, to prevent any submissions.
That's four minutes gone in the round.
Neither fighter has done anything of merit for a good minute or two here and the crowd are not happy about it.
Yamamoto trying to control the position from guard on top but Smart is wriggling around, looking for whatever he can.
Smart looking for a sweep. Not yet Smart, not yet.
Yamamoto decides to stand up and beckons his opponent to follow.
Smart moves into the clinch.
Smart lands a shot to the body.
Yamamoto is trying to force a seperation but Smart has the dominant position.
Yamamoto throws an elbow that misses.
Yamamoto is trying to break the clinch but Smart is controlling him.
Yamamoto looking to throw knees to the head but Smart is blocking nicely.
Smart's corner calls for him to break the clinch, which he does.
Yamamoto looking to take his opponent's legs away with the low kicks.
The crowd applaud the fighters efforts here as the round comes to an end.
Yamamoto misses with an attempted mid kick.
Yamamoto is looking to clinch.
Smart misses with a takedown attempt. He shot from a bit too far out.
Smart lands a head shot.
And thats the end of the round the fighters go back to their corners.
Maxwell Smart dominated that second round.
OK. That's time! The bell goes and we're back to the action. This is the final round!

Smart with a lazy takedown attempt
and Yamamoto counters with a two punch combo.
Yamamoto fakes a jab and throws a low kick but Smart checks it well.
Yamamoto misses with a kick to the body.
Yamamoto tries to close the distance and clinch up against the cage but Smart paws at him with a jab and circles away.
Smart throws a looping left and ducks down for a takedown. He's got his arms around Yamamoto's waist but Yamamoto gets an underhook and avoids the takedown by throwing Smart off to one side.
Yamamoto fails to land with the punch combination there - jab, cross, hook, miss, miss, miss.
Smart with a poor takedown
and Yamamoto counters with a nice body kick.
That's three failed takedown attempts in the round for Maxwell Smart. That's going to take a lot out of him.
Smart shoots in for a takedown and gets it. Oh and he's advanced to full mount straight away.
Yamamoto wants to try and get back to his feet.
Smart looking to control but Yamamoto is working nicely, looking to advance position himself.
A nice elbow there by Smart.
Smart working the ground and pound effectively.
Both fighters are breathing heavily.
Smart pausing momentarily but resumes with a couple of decent strikes that do a bit of damage.
Yamamoto wants to control but Smart is having none of it.
That's one minute gone in the round.
The crowd growing excited in anticipation of a finish here! Right on cue, Smart cracks his opponent with a massive right hand that draws loud cheers!
Yamamoto working to try and regain half guard.
Smart working Yamamoto over with strikes here.
Yamamoto is working to get back to half guard.
Smart wants to control the pace but Yamamoto is squirming around nicely.
Yamamoto is trying to stand up.
Yamamoto taking shots to the head.
The crowd growing excited in anticipation of a finish here! Right on cue, Smart cracks his opponent with a massive right hand that draws loud cheers!
Yamamoto tries to hold on but Smart postures up.
Yamamoto really trying hard to get back to half guard here.
That's two minutes gone in the round.
A lull in the action here being met with boos from the crowd.

Smart working for a guillotine from mount but Yamamoto is in no mood to give up.
Yamamoto really trying hard to get back to half guard here.
Smart working for a submission but Yamamoto is keeping him at bay.
Yamamoto tries to get back to half guard but can't.
Smart unloading with bombs!
The crowd growing excited in anticipation of a finish here! Right on cue, Smart cracks his opponent with a massive right hand that draws loud cheers!
Yamamoto holds of for dear life.
That's three minutes gone in the round.
Smart with good strikes from the mount here!
The fighters are pressed up against the cage, both looking to find a bit of space to work.
BOOM! Smart connects with a massive shot to the dome!
Smart lands a heavy elbow.
Smart scoring with some good ground and pound from mount here. Will he manage to finish Yamamoto?
Yamamoto can't escape the position.
Smart has his opponent pinned against the cage, landing some nasty ground and pound that is really making a bit of a mess out of Yamamoto's face.
Smart punishing his opponent with strikes.
Yamamoto is in all sorts of trouble here.
Yamamoto is bucking up trying to escape but Smart cracks him with another couple of good strikes.
BOOM! Smart connects with a massive shot to the dome!
Yamamoto holding onto his opponent's waist for dear life, as Smart tries to land some strikes to get him to release his grip.
Yamamoto tries to buck Smart off but he can't manage it.
That's four minutes gone in the round.
Yamamoto is looking to get to half guard.
Yamamoto wants to get back to his feet.
Maxwell Smart overall seems to be getting the better of the ground position in the fight so far.
Yamamoto takes a big shot to the head but keeps on trying to improve his position.
Smart punishing his opponent with strikes.
Smart trying to control but he's not successful this time.
Yamamoto tries to buck Smart off but he can't manage it.
Smart raining down shots from the mount!
Yamamoto wants to hold on but Smart pushes him away.
Katsu Yamamoto has stepped it up - he knows he needs a finish here!
And that's the end of the fight!
Maxwell Smart showed his dominance in that final round.
Well I reckon that's a shut out for Smart, winning every round. Will the judges agree? They are the ones who matter, even if they are often depressingly incompetent. Over to the ring announcer for the scorecards.
Ladies and gentlemen, after 3 rounds of action, we go to the scorecards for a decision.
Judge Ivan Kurochkin scores the fight 30:27
Judge Konstantin Menshow scores the fight 30:27
Judge Sergei Dronov scores the fight 30:27
In favor of your winner, by unanimous decision... Maxwell Smart!
|
|
|
|
|
|
|
|
|
|
|
|
|
|
|
|
|
|
|
|
|
|
|
| S |
C
A |
G |
S |
C
B |
G |
|
S |
C |
G |
|
energy
A | B |
|
hype
A | B |
|
pop
A | B |
|
mgr
A | B |
|
FIGHT
RATING
66% |
|
|
|
|
|
|
