|
|
PBP Commentary |
Coming up we have a heavyweight MMA rules bout between Mack Jamison (ranked 0 p4p, 0 weight class) and Marc Wreaver (ranked 0 p4p, 0 weight class). Mack Jamison has the edge in experience - let's see if he can make that count tonight.
 |
|
 |
| 192 cm
22
265 lbs
8 - 1 - 0 |
|
195 cm
25
265 lbs
5 - 0 - 0 |
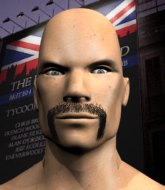
Decent wrestler
Solid boxing
Granite chin |
|
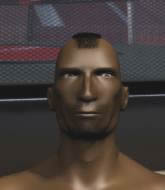
BJJ Purple Belt
Good kicks
Powerful |
|
| |
|
Ladies and gentlemen. This fight is 3 rounds, in the heavyweight division.
Introducing the fighter to my left, fighting out of the red corner.
With a record of
8 - 1 - 0, fighting out of Montreal, Mack Jamison!
And introducing the fighter to my right, fighting out of the blue corner.
With a record of
5 - 0 - 0, fighting out of New York, Marc Wreaver!
The judges for this bout are Lou da Vinci, John Roberts and Alyssa Summers.

The bell rings for round one and we are underway!
Wreaver scores with a reasonable looking shot to the body. Jamison doesn't seem bothered though.
A looping hook to the body misses from Wreaver. Jamison does a little dance to reset his feet.
Jamison uses good footwork to avoid the strikes from Wreaver.
Jamison keeping a good distance there, avoiding the body shot.
Horrible takedown by Jamison or perhaps it was just good defense by Wreaver which made him look bad.
Jamison defending well as Wreaver loads up on a big left hand.
Wreaver lands with a shot to the body.
Wreaver misses with an attempted mid kick.
Wreaver throws a sloppy head kick and Jamison moves out of range easily.
Wreaver tries a head kick but it misses.
Jamison keeping a good distance there, avoiding the body shot.
Wreaver lands with a slapping head kick.

It looks like Mack Jamison has been cut.
Marc Wreaver seems to be the more aggressive standup fighter in this bout.
This has been an exciting period of action!
Wreaver misses with a straight left.
Jamison moving in and out of range nicely, whilst landing the scoring shot.
Jamison avoids a punch combination nicely.
Wreaver fakes high and swings low for a body shot but Jamison manages to avoid it.

That's one minute gone in the round.
Wreaver wants to land a leg kick but Jamison is out of range.

Jamison shoots in for a takedown and gets it. Let's see what he's got on the mat.
Jamison in full guard, throwing the ground and pound. No damage this time.
Wreaver preventing the ground and pound from doing any damage.
Jamison throws a strike but Wreaver rolls with it and manages to sweep. Now he's in guard on top.
The fighters are pressed up against the cage, both looking to find a bit of space to work.
Jamison has Wreaver pulled in close to control his posture.

That's two minutes gone in the round.
Wreaver is stalling in the full guard.
Jamison keeping moving, preventing Wreaver from controlling successfully.

That's three minutes gone in the round.
Jamison can't do much from the bottom at the moment, as Wreaver controls the pace.
Wreaver is looking to work some ground and pound but Jamison has wrist control.

That's four minutes gone in the round.
My god... these two guys really need to pick up the pace or everyone will leave to go get a beer.
Jamison controls Wreaver momentarily but Wreaver frees himself.
Jamison looking for a sweep. Not yet Jamison, not yet.
And thats the end of the round the fighters go back to their corners.
Marc Wreaver dominated that round.
The cut man is working on Mack Jamison's cut.
That's time! Jamison's corner gives him a slap on the ass as he gets ready to fight.

Excellent takedown into side control there by Jamison.
Jamison throwing strikes but Wreaver manages to buck up and roll into a nice reversal - now he's on top in side control!
Wreaver tries to score with some ground and pound. Jamison controls his posture well this time though and the shots don't do any damage.
A lull in the action here as Wreaver stalls from top position.
Jamison is pushing Wreaver's head away, looking to escape. Wreaver manages to hold on to the position though.
That's one minute gone in the round.
Jamison trying to remain calm as Wreaver controls from the top position.
Jamison gets back to half guard.
Wreaver throwing shots but Jamison is blocking nicely.
That's two minutes gone in the round.
My god... these two guys really need to pick up the pace or everyone will leave to go get a beer.
Jamison is controlling Wreaver's trapped leg to prevent Wreaver from advancing to side control.
Jamison is looking to control Wreaver's leg but it's slowly edging free. Can Jamison avoid being mounted?
That's three minutes gone in the round.
Wreaver tries to pass to full mount but Jamison defends it.
Jamison is doing well to avoid being mounted. He's controlling the position at the moment.
Jamison on his back here. We all know that wrestlers don't like being on their back so let's see if Jamison tries to get out of the position.
That's four minutes gone in the round.
Neither fighter has done anything of merit for a good minute or two here and the crowd are not happy about it.
Wreaver tries to stand and escape but Jamison is controlling the position.
The ref warns both fighters not to hold the cage as they work up against the meshing.
Wreaver controlling the action here.
Boooooooooooooooooooo!!! God, this has been a terrible round. Come on you two, sort yourselves out!
The fighters are battling for position here. Jamison manages to regain full guard. Nice work.
And thats the end of the round the fighters go back to their corners.
Mack Jamison dominated that second round.
The cut man is working on Mack Jamison's cut.
The referee calls time. The cornermen exit stage left and we're back to business. This is the final round!

Wreaver throws a jab but it's blocked by Jamison.
Jamison uses good head movement to avoid the hook from Wreaver.
Jamison looks for a takedown here. Will he get it? Wreaver is fending him off so far but Jamison persists. Nope, Wreaver circles away and we're back to standing.
Wreaver throws an uppercut from half a mile away. Jamison sees it coming and avoids it easily.
Some bone on bone action there as Jamison checks a low kick. Luckily it wasn't a particularly hard one.
The fighters circling - Jamison throws out the jab but it was never going to land.
Wreaver tried to score with a low kick but Jamison checks it.
Wreaver bobs and weaves well there to avoid the strikes.
Wreaver tries a head kick but it misses.
Jamison dives in and grabs Wreaver's left leg, looking for a takedown. Wreaver pushes down on Jamison's head and hops out.
Jamison thows a body shot but no joy.
We've had a slow start to the round here - hopefully the action picks up.
The crowd cheers as Wreaver lands an impressive looking overhand right. Jamison doesn't seem phased though.
Jamison shoots in for a takedown! He's got it and he's managed to land in full mount! That's better than Jamison was expecting from the takedown attempt, I'm sure!
Wreaver manages to regain half guard whilst avoiding the strikes.
That's one minute gone in the round.
Jamison missing with some ground and pound from the half guard.
Wreaver trying to control here.
Jamison thows a wild elbow that connects with the canvas.
Wreaver taking some punishment here, with Jamison in his half guard.
Jamison throws a strike but Wreaver avoids it easily and moves to full guard.
Wreaver controlling the position.
Jamison throws a big right hand that misses.
Jamison throwing strikes but missing.
Jamison postures up to throw the ground and pound strikes but they don't connect.
That's two minutes gone in the round.
My god... these two guys really need to pick up the pace or everyone will leave to go get a beer.
Jamison throws a strike but Wreaver rolls with it and manages to sweep. Now he's in guard on top.
Jamison keeping full guard, as Wreaver tries to pass.
That's three minutes gone in the round.
Wreaver throwing strikes from guard but Jamison blocks nicely.

Wreaver decides to stand up and beckons his opponent to follow.
That's four minutes gone in the round.
A lull in the action here being met with boos from the crowd.
Wreaver misses with a wild combination.
Jamison misses with a takedown attempt - Wreaver sprawls well and throws a nice strike on the way out which just misses.
That's three failed takedown attempts in the round for Mack Jamison. That's going to take a lot out of him.
Jamison misses with a straight right.
A looping hook to the body misses from Wreaver. Jamison does a little dance to reset his feet.
Wreaver jabs at Jamison's body.
Wreaver lands a head kick!
Both fighters are breathing heavily.
Jamison closes the distance and clinches up with Wreaver, looking for a takedown. Jamison pushes Wreaver against the cage but Wreaver circles to the side and manages to break the clinch.
Wreaver misses with a body shot. Nice footwork from Jamison.
Jamison swinging wildly here.
A lazy left from Wreaver finds it's target.
And that's the end of the fight!
Marc Wreaver comfortably won the final round on my scorecard.
I think Wreaver has won this one but let's see whether the judges agree with me. Over to the ring announcer for the scorecards.
Ladies and gentlemen, after 3 rounds of action, we go to the scorecards for a decision.
Judge Lou da Vinci scores the fight 28:29
Judge John Roberts scores the fight 28:29
Judge Alyssa Summers scores the fight 28:29
In favor of your winner, by unanimous decision... Marc Wreaver!
|
|
|
|
|
|
|
|
|
|
|
|
|
|
|
|
|
|
|
|
|
|
|
| S |
C
A |
G |
S |
C
B |
G |
|
S |
C |
G |
|
energy
A | B |
|
hype
A | B |
|
pop
A | B |
|
mgr
A | B |
|
FIGHT
RATING
30% |
|
|
|
|
|
|
