|
|
PBP Commentary |
Coming up we have a heavyweight MMA rules bout between Jon Wood (ranked 0 p4p, 0 weight class) and Joey Hamilton (ranked 0 p4p, 0 weight class). Wood's entrance music is Nobody gets out alive. A fine choice. Both these guys have really solid chins. Will we see a standup war or will they both decide that a knockout is unlikely and try to win the fight elsewhere?
 |
|
 |
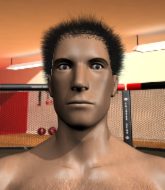
| 193 cm
26
265 lbs
12 - 4 - 0 |
|
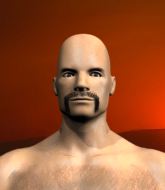
192 cm
25
245 lbs
9 - 2 - 1 |
Good wrestling
Excellent boxer
Very strong |
|
Decent wrestler
Excellent MT
Powerful |
|
| |
|
Ladies and gentlemen. This fight is 5 rounds, for the heavyweight championship of the world!
Introducing the champion to my left, fighting out of the red corner.
With a record of
12 - 4 - 0, fighting out of Montreal, Jon Wood!
And introducing the challenger to my right, fighting out of the blue corner.
With a record of
9 - 2 - 1, fighting out of Montreal, Joey Hamilton!
The judges for this bout are Gregory Folan, Steve Smith and Elvis Blanc.

The bell rings for round one and we are underway!
Wood scores with a nice head shot.

It looks like Joey Hamilton has been cut.
Hamilton shoots in but no luck this time.
Hamilton fails to land the takedown.
Hamilton tries to clinch up but Wood circles away and keeps his distance.

Hamilton has taken the fight to the clinch.
Hamilton creates a bit of space for himself and sneaks an elbow through Wood's defenses.
It looks like Jon Wood has been cut.
Wood digs a right hand underneath Hamilton's ribcage. Hamilton let out a lung full of air as it connected.
The fans in attendance giving it up for the two fighters, who have really let it all hang out in the last minute or so!
Hamilton blocks an uppercut.
Wood lands on the inside with an uppercut.
Wood gets through Hamilton's defenses to land a nice punch to the side of the head.
Hamilton looks gassed!
Wood tries to score a body lock takedown but Hamilton shows good agility there to stay on his feet.
A shot in the inside from Wood.
Wood lands a body shot.
Still in the clinch, Wood scores with a nice short uppercut.

Wood lands a nice trip takedown into half guard.
Wood thumps the canvas. Not on purpose obviously - he just missed Hamilton's head.
Wood throwing shots but Hamilton is blocking nicely.
Wood is scoring with some nice ground and pound from the dominant position.
Hamilton blocking the ground and pound attempt from Wood.
The ref warns both fighters not to hold the cage as they work up against the meshing.
Wood lands strikes from half guard.
The fighters are pressed up against the cage, both looking to find a bit of space to work.

That's one minute gone in the round.
Wood thows a huge punch but Hamilton dodges it nicely.
Wood looks towards his corner to check for any instructions. The corner give him nothing to work with, so he cracks Hamilton with a short hammerfist. I guess that's as good as any advice he could get in this position.
We get told so often about how wrestlers don't like to be on their backs. Let's see if Hamilton can do anything to dispel that myth.
Wood throwing shots but Hamilton is blocking nicely.
Wood drops an elbow to the side of Hamilton's head.
Hamilton tries to kick Wood off but Wood keeps his base steady and stays in half guard.
Wood thows a huge punch but Hamilton dodges it nicely.
Hamilton wants to get back to his feet.
Wood trying to pass the guard but Hamilton defending well.
Wood throwing shots but they're hitting the canvas more than the man.
Wood not landing any meaningful shots this time.
Wood trying to control from half guard but Hamilton is working away.

That's two minutes gone in the round.
Wood wants to free his trapped foot but Hamilton is holding on for dear life with his legs.

The referee decides to stand the fighters back up.
Hamilton tries to score a power double leg takedown but Wood sees that one coming and sprawls well. That will dishearten Hamilton somewhat.
Jon Wood has stuffed three takedown attempts in the round now. That's going to take a lot out of Joey Hamilton.
Wood shoots in for a double leg but Hamilton sprawls well. That's going to sap some energy.
Hamilton is looking to clinch.
Wow, both these guys are really going for it!
Hamilton tries to close the distance and clinch but Wood swats him to one side with an open hand palm strike and circles away.
Hamilton moves away from the strike by Wood.
Wood on the wrong end of a vicious looking body shot.
Hamilton throws a looping left and ducks down for a takedown. He's got his arms around Wood's waist but Wood gets an underhook and avoids the takedown by throwing Hamilton off to one side.
Nice sprawl there from Hamilton as Wood shoots in.
Wood fails to land with the punch combination there - jab, cross, hook, miss, miss, miss.
Hamilton tries to clinch but Wood moves out of range.
Hamilton fails with an attempt to clinch.
Wood throws a looping overhand right but Hamilton ducks down to avoid it.
Hamilton fails in his attempt to clinch.

That's three minutes gone in the round.
Hamilton fails with an attempt to clinch.
Hamilton has Wood up against the cage in a clinch.
Hamilton unloads a knee to the mid-section. Wood lets out a prehistoric sounding urrrrgh.
Hamilton blocks a knee to the body. He'll have a nicely bruised forearm in the morning.
Hamilton lands a damaging elbow.
Hamilton lands a glancing elbow in the clinch.
A head punch blocked on the inside by Hamilton.
Wood scores with a nice hook to the head.
Hamilton lands an elbow that stopped Wood in his tracks for a moment.
Hamilton will no doubt start fighting again in a minute but for now he's just having a little rest, leaning Wood up against the cage.
Hamilton with an attempt at a knee that misses.
A battle for position here, against the cage.
Wood takes a knee to the side of the body.
Hamilton lands a good knee to the midsection. Wood won't want to take too many of those.
We've seen a great period of action over the last minute or so - credit to both fighters for going all out!
Hamilton working Wood over with knees to the body.
A knee to the head by Hamilton.
Hamilton tries to land a knee to the head but misses.
Hamilton utilising his Muay Thai to score with a knee to the body.
A knee to the head by Hamilton.
Hamilton comes over the top with an elbow. That landed flush.

That's four minutes gone in the round.
Wood takes an elbow to the forehead.
Wood takes an elbow to the temple.
Wood swings away with an uppercut that misses.
A body shot lands from Wood.
Wood struggles to land a body shot inside as Hamilton controls his hands.
A short right from Wood.
Hamilton gets an overhook and lands an elbow to the side of the head.
Hamilton tries a knee to the head but Wood blocks it.
Hamilton scores with a knee to the head.
Jon Wood's cut is getting worse.
Wood misses with a shot to the kidneys.
Hamilton lands an elbow that stopped Wood in his tracks for a moment.
Wood digs a right hand into Hamilton's ribs. Those have got to be taking their toll on Hamilton's gas tank.
Wood avoids a wild elbow strike from Hamilton.
Wood lands a body shot.
A nice right hand lands inside from Wood.
A short right from Wood on the inside.
Wood gets a trip takedown into half guard.
Wood tries to pass to full mount but Hamilton defends it.
The crowd are going absolutely nuts as the round comes to an end - what a fantastic round of action!
Hamilton moves his hips nicely and gets into full guard.
Wood is pushing down on Hamilton's leg trying to pass to half guard. Hamilton is fighting to maintain full guard but Wood has managed to sneak the leg through.
And thats the end of the round the fighters go back to their corners.
Jon Wood dominated that round.
Both fighters have cut men working on them during the interval.
That's time! Wood's corner gives him a slap on the ass as he gets ready to fight.

Some wild striking there from Hamilton.
Hamilton tries to clinch but Wood moves out of range.
Wood looks to score with a combo but nothing lands.
Hamilton feints and then dives in with a takedown. That was a long way out but the feint bought him enough time to close the distance and complete the takedown. Now we'll play guard for a bit and see who can get the better of that position.
Wood wants to get back to his feet but Hamilton is in a dominant position and won't allow it.

Wood has his feet on Hamilton's hips. He pushes off and gets to his feet. Nice work.
Hamilton is looking to clinch but Wood is avoiding it.
Jon Wood is looking to throw some combinations by the looks of things.
Wood fails with a takedown attempt.
Wood misses with a jab and misses with a cross straight after too.
Both fighters are absolutely exhausted here.
Hamilton fails in his attempt to clinch.
Hamilton looks for a takedown here. Will he get it? Wood is fending him off so far but Hamilton persists. Nope, Wood circles away and we're back to standing.
Hamilton tries to close the distance and clinch up against the cage but Wood paws at him with a jab and circles away.
Wood looks to land a left hand but Hamilton moved out of range nicely.
That's one minute gone in the round.
Hamilton is looking to take this fight into the clinch.
Hamilton doesn't manage to clinch there - Wood circles away.
Wood keeps the fight on the outside.
Wood will need to tighten up his combinations if he doesn't want to gas himself out, swinging at thin air.
Hamilton tries to clinch up but Wood circles away and keeps his distance.
Wood misses with a few strikes there.
Hamilton shoots in for a takedown but Wood shows good takedown defense.
Hamilton moves in looking to clinch but Wood pushes him off.
Wood fails to land with a series of punches.
Wood swings for the body but Hamilton moves out of range.
Hamilton wants to clinch.
Wood throws a wild combination but nothing lands.
Hamilton is trying hard to land a takedown here. Wood sprawls well and keeps this one on the feet.
Jon Wood has stuffed three takedown attempts in the round now. That's going to take a lot out of Joey Hamilton.
Hamilton tries to clinch but is not successful on this occasion.
Hamilton tries to close the distance and clinch up against the cage but Wood paws at him with a jab and circles away.
That's two minutes gone in the round.
A lull in the action here being met with boos from the crowd.
Hamilton misses with a wild combination.
Wood misses with a jab, cross combination.
Hamilton bobs and weaves well there to avoid the strikes.
Hamilton tries to clinch but Wood moves out of range.
Hamilton is looking to take this fight into the clinch.
Hamilton tries to close the distance and clinch but Wood swats him to one side with an open hand palm strike and circles away.
Hamilton avoids a punch combination nicely.
Hamilton tries to clinch but Wood moves out of range.
Wood cracks Hamilton with a hook to the jaw. Both fighters smile at eachother and high-five before getting back down to business.
Hamilton tries to clinch up but Wood circles away and keeps his distance.
Hamilton showing good head movement there, avoiding the strikes from Wood.
Wood tries to land with a swinging hook to the body but Hamilton was well out of range. Poor timing from Wood.
Hamilton is looking to clinch but Wood is avoiding it.
Hamilton is looking to clinch but Wood is avoiding it.
Hamilton tries to close the distance and clinch up but Wood swats him away and circles back towards the center.
That's three minutes gone in the round.
Hamilton has managed to clinch.
Wood misses with a shot to the kidneys.
Wood avoids the elbow strike from Hamilton, against the cage.
Hamilton lands a knee to the body.
Wood misses with a short punch on the inside.
Wood misses with a body punch.
Wood throws a hook to the body. More of an arm punch but it's all scoring with the judges.
Hamilton putting his Muay Thai to good use. He has Wood in a tight clinch and is doing some damage with knees to the body.
Hamilton with a knee to the head.
Hamilton is trying to wear down his opponent with knees to the body.
Kneeeeees! The crowd are calling for knees to the body. Hamilton obliges.
Hamilton utilising his Muay Thai to score with a knee to the body.
Hamilton is trying to wear down his opponent with knees to the body.
Hamilton connects with a nasty looking knee right to Wood's face.
Hamilton lands an elbow that stopped Wood in his tracks for a moment.
Kneeeeees! The crowd are calling for knees to the body. Hamilton obliges.
Hamilton is trying to wear down his opponent with knees to the body.
The crowd cheering loudly, showing their appreciation for the quality fight we're seeing here.
Wood misses with a shot to the kidneys.
Both fighters working to control the clinch.
Joey Hamilton seems to be working more effectively in the clinch in the fight so far.
Wood lands a shot to the body.
Hamilton lands an elbow just above Wood 's eye.
Kneeeeees! The crowd are calling for knees to the body. Hamilton obliges.
Wood takes an elbow to the temple.
Hamilton utilising his Muay Thai to score with a knee to the body.
That's four minutes gone in the round.
Hamilton blocking some punches.
Hamilton throws a vicious knee straight up the middle but Wood blocks it with crossed arms.
Wood looking for a takedown.
Knees to the body from Hamilton.
A short left from Wood.
Hamilton lands an elbow inside that Wood shrugs off.
Hamilton lands a nice elbow from the clinch.
Hamilton connects with a nasty looking knee right to Wood's face.
Wood softening up his opponent with strikes, against the cage.
Hamilton lands a glancing elbow in the clinch.
Hamilton tries to land a knee to the head but Wood blocks with his arms.
Wood is working for takedown but Hamilton is calmly controlling the position for now.
Hamilton lands a knee to the body.
Hamilton lands an elbow just above Wood 's eye.
Wood works for the underhooks and manages to get a trip takedown into guard.
Wood has been looking to land a fair amount of strikes on the ground. He might be looking to soften his opponent up in order to work for a submission.
Wood won't allow Hamilton to sweep him here.
The crowd applaud the fighters efforts here as the round comes to an end.
Hamilton has butterfly guard. He's looking to stand up here. He pushes Wood off him and springs to his feet nicely. The crowd applauds.
Hamilton doesn't manage to clinch there - Wood circles away.
Wood pushing out the jab but it's not landing.
And thats the end of the round the fighters go back to their corners.
Joey Hamilton showed his class in that round. I'd imagine he'll take it on all the scorecards.
Both fighters have cut men working on them during the interval.
The fighters get back to their feet, the hooter sounds and we're back to the action!

Wood fails with a rather predictable takedown attempt.
Hamilton fails with an attempt to clinch.
Wood misses with a body shot.
Hamilton gets in close and instigates a clinch.
Nice elbow from Hamilton.
Hamilton blocks a punch to the side of the head.
A head punch blocked on the inside by Hamilton.
A knee to the head by Hamilton.
Wood presses Hamilton against the cage and delivers a mid-strength body shot.
Hamilton is trying to wear down his opponent with knees to the body.
Hamilton with a knee to the head.
Jon Wood's cut is bleeding quite badly. He's got to try and protect it.
Wood letting Hamilton take a breather here.
Hamilton lands an elbow inside.
Hamilton landing some nice looking knees to the body.
Hamilton connects with a knee to the head.
Hamilton lands an elbow just above Wood 's eye.
Hamilton with a knee to the head.
Hamilton tries a knee to the head but he's missed.
Both fighters are breathing heavily.
With the fighters clinched against the cage, Wood creates a bit of distance for himself and scores with a nice uppercut.
Hamilton with an attempt at a knee that misses.
Wood misses with a shot to the kidneys.
Hamilton pushes off an throws an elbow but Wood leans to the side and avoids it. We're back to clinching against the cage.
That's one minute gone in the round.
Hamilton using the Thai plumb to throw knees but Wood has his back arched nicely, preventing the strike.
Wood has a body lock and is looking for a takedown. Hamilton is bouncing around trying to prevent the takedown and somehow he has indeed managed to stay on his feet.
Wood is trying to work for a single leg takedown but Hamilton pulls him back up using the underhooks.
That's three failed takedown attempts in the round for Jon Wood. That's going to take a lot out of him.
Hamilton misses the knee to the body. Nice hip positioning from Wood.
Hamilton throws an elbow but it misses.
Wood takes an elbow to the temple.
Hamilton blocks a couple of punches on the inside.
Wood avoids a wild elbow strike from Hamilton.
A nice glancing elbow lands by Hamilton.
Wood misses with a body punch.
Wood misses with the head strike.
Hamilton lands an elbow just above Wood 's eye.
Wood blocks a knee to the body. He'll have a nicely bruised forearm in the morning.
Hamilton stalling in the clinch but Wood improves position.
Wood softening up his opponent with strikes, against the cage.
Wood gets through Hamilton's defenses to land a nice punch to the side of the head.
A battle for position here, against the cage.
Wood misses with a hook from the clinch.
Wood misses with a body punch.
Wood managing to block the knees to the body from Hamilton.
Hamilton throws an elbow that misses.
With the fighters up against the cage, Hamilton throws an elbow but misses.
A shot in the inside from Wood.
That's two minutes gone in the round.
The crowd are starting to boo a lack of action.
A hook to the body from Wood.
A right hook to the body lands for Wood.
Wood tries a shoulder strike but it doesn't do any damage.
Wood misses with the head strike.
Wood misses with a punch on the inside.
Hamilton trying to land knees to the body.
A left hand lands to the body for Wood.
Wood tries for a takedown but Hamilton manages to get underhooks.
Wood scores with an uppercut up the middle.
Hamilton lands an elbow inside.
Wood tries a knee to the head but Hamilton blocks it.
Wood takes a knee right on the jaw!
Hamilton with a knee to the head.
Hamilton pushes off and fires off an elbow that misses, before clinching up again, against the cage.
Wood throws a knee to the head but misses.
Hamilton with an attempt at a knee that misses.
Wood lands a right hand.
Wood blocks the elbow strike.
With the fighters clinched against the cage, Wood creates a bit of distance for himself and scores with a nice uppercut.
Hamilton comes over the top with an elbow. That landed flush.
Hamilton lands a damaging elbow.
Hamilton gets an overhook and lands an elbow to the side of the head.
A short left from Wood.
A short right from Wood on the inside.
Wood lands with a good tight uppercut to the head.
That's three minutes gone in the round.
Hamilton using the Thai plumb to throw knees but Wood has his back arched nicely, preventing the strike.
Wood blocks an elbow strike from Hamilton.
Wood is working Hamilton over against the cage.
A nice right hand lands inside from Wood.
Wood misses with a body punch.
Hamilton missing with knees to the body.
Wood lands punches inside but they're not really causing much damage.
Nice elbow from Hamilton.
Wood lands a body shot in the clinch.
Hamilton blocks a punch to the side of the head.
Wood throws a hook to the body. More of an arm punch but it's all scoring with the judges.
Hamilton prevents a body shot from Wood.
Wood makes some space for himself and lands an uppercut.
Wood looking for a takedown.
Hamilton lands a nice elbow from the clinch.
Hamilton lands a good knee to the midsection. Wood won't want to take too many of those.
Wood misses with a hook from the clinch.
Hamilton lands a nice knee to the body.
Wood lands a short shot on the inside that snaps the head of Hamilton backwards.
Hamilton tries to land knees in the clinch but Wood avoids the damage to the body.
Wood missing with knees to the body.
Hamilton landing some nice looking knees to the body.
Hamilton creates a bit of space for himself and sneaks an elbow through Wood's defenses.
Wood on the defensive, avoiding the knees to the body.
That's four minutes gone in the round.
Wood lands a hook that snaps the head of Hamilton backwards.
Hamilton utilising his Muay Thai to score with a knee to the body.
Wood tries a shoulder strike but it doesn't do any damage.
Hamilton with the Thai clinch. He's looking to land a big knee but he's not managed it this time.
Wood goes for a takedown attempt but Hamilton pushes him away and we're back to fighting at a distance.
Hamilton clinches with his opponent.
Good body shot from Wood.
Hamilton utilising his Muay Thai to score with a knee to the body.
Wood takes a knee right on the jaw!
Hamilton tries to land a knee to the body but he is off balance and Wood avoids it.
Hamilton avoiding damage as Wood throws knees to the body.
Good anti-grappling being displayed by Wood as Hamilton tries to tie him up.
Wood tried to land a shot to the body but connects with Hamilton's elbow.
Wood on the defensive, avoiding the knees to the body.
Wood throws a punch but it's blocked by Hamilton.
Hamilton misses with a knee to the head.
Wood scores with a nice hook to the head.
A left hand lands to the body for Wood.
And thats the end of the round the fighters go back to their corners.
Joey Hamilton really dominated that round.
Both fighters have cut men working on them during the interval.
That's the end of the interval. I'm sure that seemed a lot quicker than a minute for our two fighters! Back to the action.

Hamilton moves out of range of the strikes.
Hamilton misses with a takedown attempt - Wood sprawls well and throws a nice strike on the way out which just misses.
Hamilton is looking to clinch but Wood is avoiding it.
Wood thows a body shot but no joy.
Wood takes a swing at Hamilton's ribcage but misses.
Wood lands with a nice body punch.
Wood's corner calls for a 1,2 combination and Wood duly obliges.
Hamilton forces Wood back against the cage and clinches.
Wood trying to land knees to the body.
Wood swings wildly with an uppercut but Hamilton uses good head movement to avoid it.
Wood lands a nice shot to the body.
Wood lands with a right to the head.
Hamilton tries to land a knee to the head but misses.
Hamilton with the Thai clinch. He's looking to land a big knee but he's not managed it this time.
Wood lands a nice shot to the body.
Wood lands a right uppercut that snaps the head of Hamilton backwards.
Hamilton tries to land a knee to the body but he is off balance and Wood avoids it.
Wood using the Thai clinch to land knees to the body.
It's got to the stage where if one of these guys blows hard enough, the other might fall over.
Wood scores with a shot to the side of Hamilton's head.
A shot in the inside from Wood.
That's one minute gone in the round.
A short body shot lands from Wood as the two fighters clinch.
Wood works on Hamilton's body with a couple of short punches.
Wood misses with a short punch on the inside.
Hamilton blocks an uppercut.
Wood works on Hamilton's body with a couple of short punches.
Wood gets double underhooks and manages to take the fight to the ground.
Hamilton avoiding any damage from the ground and pound.
Hamilton keeping moving, preventing Wood from controlling successfully.
Hamilton working the defensive guard well to avoid strikes from Wood.
Hamilton wants to stand and escape but Wood is having none of it.
Hamilton working the defensive guard well to avoid strikes from Wood.
Hamilton has butterfly guard. He's looking to stand up here. He pushes Wood off him and springs to his feet nicely. The crowd applauds.
Wood scores with a sloppy punch to the body. Not much technique there but it did the business.
That's two minutes gone in the round.
Wood misses with a jab and misses with a cross straight after too.
Wood scores with a body shot.
Wood uses good head movement to avoid the hook from Hamilton.
Hamilton fails in his attempt to clinch.
Hamilton wants to clinch up but Wood keeps it at a distance.
Wood cracks Hamilton with a good jab.
Hamilton tries to clinch there but Wood circles away.
Wood throws a two punch combo that lands nicely.
Hamilton tries to clinch there but Wood circles away.
Hamilton misses with a takedown attempt. He shot from a bit too far out.
Wood scores to the head and body with a nice combination!
Wood scores with a body shot.
Wood lands a head shot.
Wood jabbing away but nothing is landing.
Wood circles away from the clinch attempt.
Wood looks to land a combination but Hamilton avoids it well.
Hamilton has closed the distance and engaged Wood in a clinch.
That's three minutes gone in the round.
Wood tries a shoulder strike but it doesn't do any damage.
Hamilton lands a nice elbow.
Hamilton lands a knee to the head.
Wood drops to a knee looking for a takedown but Hamilton gets the underhooks and prevents it.
Hamilton scores a nice knee to the body.
Hamilton crunches a lovely knee into Wood's ribcage.
Wood struggles to land a body shot inside as Hamilton controls his hands.
Knees to the body from Hamilton.
Wood letting Hamilton take a breather here.
Wood using the Thai plumb to throw knees but Hamilton has his back arched nicely, preventing the strike.
A head punch on the inside from Wood fails to land.
Hamilton crunches a lovely knee into Wood's ribcage.
Hamilton lands a knee to the head there! That was nasty!
Hamilton pushes off an throws an elbow but Wood leans to the side and avoids it. We're back to clinching against the cage.
Wood lands an uppercut.
Hamilton crunches a lovely knee into Wood's ribcage.
Hamilton is fighting off a takedown attempt but Wood is just too persistent for him and manages to trip Hamilton to the mat. Hamilton regains guard as soon as the fighters hit the mat.
Woodis looking to pass into half guard but Hamilton pushes him away with his feet and jumps on top - now Hamilton is in guard.
Hamilton stands up from Wood's guard - Hamilton perhaps looking for a knockout.
That's four minutes gone in the round.
Hamilton tries to clinch up.
Hamilton gets taken down but at least he's managed to land in guard.
Jon Wood overall seems to be getting the better of the ground position in the fight so far.
Wood trying to control but Hamilton is working from the bottom.
Hamilton trying to keep a closed guard but Wood is proving a slippery customer.
Wood trying to land body shots but he keeps hitting the mat.
As the round comes to an end the crowd are showing their appreciation for a great round of action.
Wood controls the pace of the fight for a moment.
The fans in attendance giving it up for the two fighters, who have really let it all hang out in the last minute or so!
Wood thows a big elbow that misses.
A big thud reverberates around the arena there as Wood accidentally thumps the mat. Hopefully he's not broken his hand.
And thats the end of the round the fighters go back to their corners.
Jon Wood had his way with Joey Hamilton in that round.
Both fighters have cut men working on them during the interval.
That's the end of the round. The referee orders the cornermen out of the cage so we can get back down to business. Let's hear some noise people - this is the final round!

Wood takes a jab on the nose there. A little bit of blood seems to be coming out. Hopefully that won't affect his breathing.
Hamilton is looking to clinch but Wood is avoiding it.
Hamilton connects with a looping right hand.
Wood connects with a good right hand that stumbles Hamilton. Hamilton circles away out of range and recomposes himself.
Wood bobs and weaves into range and then changes levels and scores with a nice takedown into side control.
Wood scores with a couple of short elbows.
Wood fails to land a wild elbow strike.
Wood wants to take a breather but Hamilton manages to regain guard - a lesson learnt for Wood.
Hamilton wants to stand but Wood is controlling the position.
Wood in full guard, throwing the ground and pound. No damage this time.
Wood trying to land body shots but he keeps hitting the mat.
Both of our modern day gladiators look out of it here - an gruelling 5 rounds of action taking it's toll on them, no doubt.
That's one minute gone in the round.
Wood postures up and lands some nice ground and pound.
Wood postures up in Hamilton's guard and throws a big left but Hamilton blocks it.
A big thud reverberates around the arena there as Wood accidentally thumps the mat. Hopefully he's not broken his hand.
Wood trying to control the position from guard on top but Hamilton is wriggling around, looking for whatever he can.
Wood throws a big right hand that misses.
Well, the referee has seen enough. Neither fighter is active enough on the ground so he's stood them back up.
Wood avoids the clinch attempt nicely.
Hamilton is looking to clinch.
Nice body punch from Wood.
Hamilton tries to clinch but Wood moves out of range.
Hamilton moves into range and clinches up with Wood.
Nice elbow from Hamilton.
Wood misses with some punches.
Good body shot from Wood.
Hamilton creates a bit of distance and throws an elbow that only just misses.
That's two minutes gone in the round.
Wood tries to land a knee to the body but he is off balance and Hamilton avoids it.
Hamilton utilising his Muay Thai to score with a knee to the body.
Knees in the clinch landing for Hamilton.
Hamilton lands a damaging elbow.
Hamilton is trying to wear down his opponent with knees to the body.
Hamilton throws a knee to the head but misses.
Hamilton blocks a body shot from Wood.
Hamilton scores a nice knee to the body.
Hamilton landing knees to the body.
Hamilton tries to stall but Wood uses the opportunity to gain a better position.
Wood blocks a knee to the body. He'll have a nicely bruised forearm in the morning.
Nice body punch from Wood.
Hamilton prevents a takedown attempt there.
Wood with the Thai clinch. He's looking to land a big knee but he's not managed it this time.
Hamilton lands a nice knee to the body.
Hamilton stalling in the clinch but Wood improves position.
Hamilton lands a nice elbow.
Wood is looking to score with knees to the body. Maybe he'll change it up and go body then head. Hamilton is defending well for now.
Wood misses with a hook from the clinch.
Hamilton lands a glancing elbow in the clinch.
Hamilton connects with a knee to the head.
Wood tries to land a shot to the body but it's blocked.
That's three minutes gone in the round.
A short body shot lands from Wood as the two fighters clinch.
A nice right hand lands inside from Wood.
Wood is trying to drag Hamilton to the mat but Hamilton just about manages to keep his footing. He used the cage to his advantage there.
Hamilton lands a glancing elbow in the clinch.
Hamilton working Wood over with knees to the body.
Wood misses with a body punch.
Hamilton using the Thai clinch to land knees to the body.
Hamilton scores a nice knee to the body.
Hamilton tries to land knees in the clinch but Wood avoids the damage to the body.
Wood throws a hook to the body. More of an arm punch but it's all scoring with the judges.
Hamilton throws a vicious knee straight up the middle but Wood blocks it with crossed arms.
Wood is working for takedown but Hamilton is calmly controlling the position for now.
That's three failed takedown attempts in the round for Jon Wood. That's going to take a lot out of him.
An uppercut on the inside fails to land for Wood.
Hamilton lands a damaging elbow.
Hamilton on the defensive, avoiding the knees to the body.
Hamilton lands a nice knee to the body.
Wood doesn't land with the attempted body shot.
Hamilton is trying to wear down his opponent with knees to the body.
Hamilton blocks a couple of punches on the inside.
Hamilton lands a damaging elbow.
Hamilton throws an elbow but it misses.
Hamilton stalling the fight.
Wood tries to score a body lock takedown but Hamilton shows good agility there to stay on his feet.
That's four minutes gone in the round.
Wood throws a punch but it's blocked by Hamilton.
Nice elbow from Hamilton.
Hamilton lands an elbow inside.
Hamilton lands an elbow inside that Wood shrugs off.
Hamilton tries to land a knee to the body but he is off balance and Wood avoids it.
Wood misses with a punch on the inside.
Hamilton prevents a takedown attempt there.
Hamilton slowing the pace effectively.
Hamilton with an attempt at a knee that misses.
Wood can't find room to land a body shot as Hamilton controls the action.
Wood working aggressively here.
Hamilton working Wood over with knees to the body.
Hamilton lands a good knee to the midsection. Wood won't want to take too many of those.
Wood wants a takedown but no success here.
Wood managing to block the knees to the body from Hamilton.
Wood lands a right hand.
With the fighters up against the cage, Hamilton throws an elbow but misses.
The crowd applaud the fighters efforts here as the round comes to an end.
Hamilton is pressed up against the cage. Wood has hold of a leg and is looking to drag Hamilton down to the mat. Hamilton avoids the attempt though and has circled away. We're back to striking at a distance.
Hamilton fails to land the takedown.
Wood rushes forward with a series of wild hooks but Hamilton moves out of range and avoids them all easily.
Hamilton tries to clinch but Wood is having none of it.
And that's the end of the fight!
Joey Hamilton comfortably won the final round on my scorecard.
I think Hamilton has won this one but let's see whether the judges agree with me. Over to the ring announcer for the scorecards.
Ladies and gentlemen, after 5 rounds of action, we go to the scorecards for a decision.
Judge Gregory Folan scores the fight 47:48
Judge Steve Smith scores the fight 47:48
Judge Elvis Blanc scores the fight 47:48
In favor of your winner, by unanimous decision... Joey Hamilton!
Joey Hamilton is the new heavyweight champion!
|
|
|
|
|
|
|
|
|
|
|
|
|
|
|
|
|
|
|
|
|
|
|
| S |
C
A |
G |
S |
C
B |
G |
|
S |
C |
G |
|
energy
A | B |
|
hype
A | B |
|
pop
A | B |
|
mgr
A | B |
|
FIGHT
RATING
100% |
|
|
|
|
|
|

