|
|
PBP Commentary |
Coming up we have a heavyweight MMA rules bout between Tix Pain (ranked 0 p4p, 0 weight class) and Mr Bigglesworth (ranked 0 p4p, 0 weight class). Pain is coming into this fight with a significant injury, which will no doubt have an effect on his cardio. Mr Bigglesworth has the better chin. Will he look to stand and bang today?
 |
|
 |
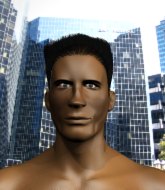
| 192 cm
22
270 lbs
0 - 1 - 0 |
|
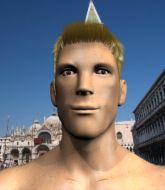
192 cm
19
250 lbs
2 - 1 - 1 |
BJJ Brown Belt
Basic striking
Big heart |
|
BJJ Purple Belt
Basic striking
Granite chin |
|
| |
|
Ladies and gentlemen. This fight is 3 rounds, in the heavyweight division.
Introducing the fighter to my left, fighting out of the red corner.
With a record of
0 - 1 - 0, fighting out of Tokyo, Tix Pain!
And introducing the fighter to my right, fighting out of the blue corner.
With a record of
2 - 1 - 1, fighting out of Tokyo, Mr Bigglesworth!
The judges for this bout are Sosuke Kotani, Shigeki Sano and Hirohito Nitta.

The bell rings for round one and we are underway!
Bigglesworth is looking to take this fight into the clinch.
Pain is breathing heavily.
Pain tries for a takedown but Bigglesworth sees it coming a mile off and avoids it easily.
Bigglesworth misses with a takedown attempt - Pain sprawls well and throws a nice strike on the way out which just misses.
A punch combination from Bigglesworth misses.
Pain tries to score a power double leg takedown but Bigglesworth sees that one coming and sprawls well. That will dishearten Pain somewhat.
Bigglesworth fails with a takedown attempt.
Bigglesworth misses with a low kick.
Pain changes levels and looks for a double leg takedown. Bigglesworth tries to avoid it but Pain manages to keep hold of a leg and drag Bigglesworth to the ground. Bigglesworth escapes though and pops straight back up to his feet.
That's three failed takedown attempts in the round for Tix Pain. That's going to take a lot out of him.
Pain takes a step back and watches a body kick go sailing past his mid section.

Bigglesworth closes the distance and pushes Pain back into the cage.
Some stalling of biblical proportions here from Bigglesworth.

Bigglesworth escapes the clinch and we're back to striking.
Pain on the wrong end of an overhand right that came out of nowhere.
Bigglesworth's corner calls for a 1,2 combination and Bigglesworth duly obliges.
Bigglesworth moves into range and throws a combination. A nice jab followed by a hook to the body.
We've seen a great period of action over the last minute or so - credit to both fighters for going all out!
Pain circles away from the clinch attempt.
Bigglesworth pushes Pain up against the cage in a clinch.
Bigglesworth breaks the clinch and we return to the middle of the mat.
A leg kick checked by Pain.

Bigglesworth drives through with a really nice takedown into side control.

Bigglesworth tries for an arm triangle. That looks pretty tight to me. Is this one over!?! Possibly, maybe, no Bigglesworth has let go of the choke. Obviously it wasn't as tight as we thought!

That's one minute gone in the round.
Bigglesworth is trying to get an arm triangle but Pain is defending well.
Pain is not in a great position here, taking some shots.
Bigglesworth trying to control the action but Pain is working from the bottom.
Bigglesworth working hard here to secure a kimura but he's not really in the right position for it.
Pain struggling a bit here.
Bigglesworth is working Pain over with some ground and pound from side control.

That's two minutes gone in the round.
Bigglesworth looking for an arm triangle but it's way too loose to do anything.
Bigglesworth tries for a kimura. Not really close to a finish though.
Pain struggling a bit here.
Pain tries to improve position but can't.

Bigglesworth decides to stand back up.
Bigglesworth lands a jab, followed by a cross and another cross, as Pain backs up against the cage.
Bigglesworth fails miserably with a takedown attempt.
Bigglesworth shoots in for a takedown but Pain shows good takedown defense there and keeps this one on the feet.
Pain scores with a nice takedown into half guard. Let's see what he's got on the ground.

That's three minutes gone in the round.
Bigglesworth tries to roll over but Pain keeps him under control.
Pain is trying to control. Bigglesworth wants to improve his position but can't escape this time.
Bigglesworth is looking to control Pain's leg but it's slowly edging free. Can Bigglesworth avoid being mounted?
Pain looking to pass the half guard. Not this time.
Bigglesworth is looking to escape.
Pain is working for submissions here but there's nothing on.
Pain seems to be working for a kimura but Bigglesworth defends the submission attempt.

It looks like we're going to have a standup here. Neither fighter is doing enough on the ground.
Bigglesworth doesn't manage to clinch there - Pain circles away.
Pain takes a punch to the jaw and another one to the bread basket.
Bigglesworth lands a two punch combo.
Bigglesworth pivots, looking for a leg kick but Pain is out of range and Bigglesworth settles back down.

That's four minutes gone in the round.
My god... these two guys really need to pick up the pace or everyone will leave to go get a beer.
Bigglesworth fails with a rather predictable takedown attempt.
Wow, both these guys are really going for it!
Pain fails with the takedown.
Pain keeps the fight on the outside.
Bigglesworth scores with a nice one two combo and darts back out of range to avoid anything coming in the opposite direction.
Bigglesworth's corner calls for a 1,2 combination and Bigglesworth duly obliges.
Bigglesworth tries to close the distance and clinch but Pain swats him to one side with an open hand palm strike and circles away.
Bigglesworth attempts a leg kick but it's missed by a good margin.
Bigglesworth works over Pain's head and body with a nice combination.
Pain takes one to the chin there.
Bigglesworth forces Pain back against the cage and clinches.
Pain fails to pull the fight into his guard.
Pain tries to pull guard but Bigglesworth holds him up against the cage and eventually Pain drops back down to his feet.
The crowd applaud the fighters efforts here as the round comes to an end.
Bigglesworth breaks the clinch and we're back to striking at distance.
Bigglesworth instigates a clinch.
Bigglesworth stops a takedown attempt from Pain.
Bigglesworth breaks the clinch and we return to the middle of the mat.
And thats the end of the round the fighters go back to their corners.
Mr Bigglesworth dominated that round.
The corners get their ten second warning. Both fighters stand from their stools and stare eachother down, ready to get back to the action.

Bigglesworth moves into range and throws a lovely three punch combination.
Pain showing good head movement there, avoiding the strikes from Bigglesworth.
Pain tries to shoot in for a takedown. He's got hold of a leg but Bigglesworth swivels and escapes.
Pain could do with loosing a few pounds - he looks very soft around the mid section, to put it politely.
Pain checks a leg kick.
Bigglesworth tries to bum rush Pain with a series of wild strikes but Pain uses good footwork to avoid the assault.
Bigglesworth closes the distance and clinches.
The step up in weight doesn't seem to be a problem for Bigglesworth. He's performing admirably here against the bigger man.
Bigglesworth manages to break the clinch.
Bigglesworth tries to clinch there but Pain circles away.
Pain takes a punch to the jaw and another one to the bread basket.
Bigglesworth shoots in for a takedown but doesn't get it.
Bigglesworth lands three nice shots there - that looked like it hurt!
Bigglesworth scores with a nice strike.
Bigglesworth throws a head kick but Pain moves out of range.
Bigglesworth moves into range and throws a combination. A nice jab followed by a hook to the body.
Bigglesworth attempts a low kick but it misses it's target.
Bigglesworth moves into the clinch successfully.
Both fighters are absolutely exhausted here.
Bigglesworth gets underhooks to prevent Pain's takedown attempt.
Bigglesworth's corner calls for him to break the clinch, which he does.
That's one minute gone in the round.
Bigglesworth's corner calls for a 1,2 combination and Bigglesworth duly obliges.
Bigglesworth scores with a takedown into Pain's guard.
The fighters are pressed up against the cage, both looking to find a bit of space to work.
Pain keeping moving, preventing Bigglesworth from controlling successfully.
Pain not looking particularly offensive just at the moment.
Bigglesworth trying to control but Pain is working from the bottom.
Bigglesworth wants to pass the guard but Pain is keeping the position.
Bigglesworth is looking to work some ground and pound but Pain has wrist control.
Pain manages to sweep nicely, so he's now on top. Bigglesworth manages to get himself to full guard.
Bigglesworth throwing his legs up looking for a triangle.
Pain stands up and looks to throw the legs aside to pass to side control. Bigglesworth swivels though and keeps the full guard.
That's two minutes gone in the round.
Pain is working hard here to advance position.
Pain thinks about going for a leg but decides against it, in order to maintain the position.
Bigglesworth pushes a forearm under Pain's chin to create some space. He's escaped his hips and pivoted quickly for an armbar! Can he extend the arm? Yes, Pain is tapping out! Damn, that was fast!
Ladies and gentlemen, after 2:34 of round 2, we have a winner by way of Submission (Armbar). Mr Bigglesworth!
|
|
|
|
|
|
|
|
|
|
|
|
|
|
|
|
|
|
|
|
|
|
|
| S |
C
A |
G |
S |
C
B |
G |
|
S |
C |
G |
|
energy
A | B |
|
hype
A | B |
|
pop
A | B |
|
mgr
A | B |
|
FIGHT
RATING
89% |
|
|
|
|
|
|
