|
|
PBP Commentary |
Coming up we have a light heavyweight MMA rules bout between Keith Higham (ranked 0 p4p, 0 weight class) and Alexander Karellin (ranked 0 p4p, 0 weight class). Alexander Karellin has the power to score a knockout today if he connects clean with Keith Higham's chin.
 |
|
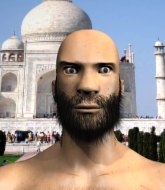 |
| 200 cm
20
215 lbs
5 - 0 - 0 |
|
205 cm
23
215 lbs
4 - 0 - 0 |
Good wrestling
Counter striker
Very strong |
|
BJJ White Belt
Excellent boxer
Heavy handed |
|
| |
|
Ladies and gentlemen. This fight is 3 rounds, in the light heavyweight division.
Introducing the fighter to my left, fighting out of the red corner.
With a record of
5 - 0 - 0, fighting out of Hilo, Keith Higham!
And introducing the fighter to my right, fighting out of the blue corner.
With a record of
4 - 0 - 0, fighting out of Hilo, Alexander Karellin!
The judges for this bout are , and .

The bell rings for round one and we are underway!
Karellin scores with a leg kick.

Higham shoots in for a takedown and gets it.

Higham is looking for an arm triangle, whilst trying to pass to side control. Karellin doesn't seem that keen to cooperate though. No luck this time Higham.
Higham is looking for a kimura here.
Higham seems to be working for a kimura but Karellin defends the submission attempt.

That's one minute gone in the round.
Karellin is working for an escape here. He's hooked one of Higham's legs and he's managed to sneak out and take Higham's back!
So, who will make the next big move? In this position it could be crucial.
Karellin struggling to keep hold of the position.
Higham manages to reverse the position and now he's in Karellin's guard. Nice work there by Higham.
Karellin manages to land a sweep and now he's in mount on top!

That's two minutes gone in the round.
Karellin can't quite control the action as he would like just now, as Higham is looking to escape.
Higham is looking to improve his position but Karellin isn't that keen on the idea.
Karellin sitting in mount, just looking to control for the moment.
Karellin avoids the attempt from Higham to control.
Karellin really doesn't want to stay on the ground with Higham. If he can't get it back to his feet, it's only a matter of time before he'll be tapping out.
Karellin tucks in and makes sure he doesn't lose the dominant position.

That's three minutes gone in the round.
Karellin looking to control but Higham is working nicely, looking to advance position himself.
Higham is looking to improve his position but Karellin isn't that keen on the idea.
Higham tries to hold on but Karellin pushes him away.
Karellin looking to control and managing it successfully.

Despite being in the dominant position, Alexander Karellin just isn't active enough and the referee decides to stand the fighters back up.
Karellin thuds a left hand into Higham's body.
Karellin swings and misses with a hook to the body.
Alexander Karellin seems to be the more aggressive standup fighter in this bout.

That's four minutes gone in the round.
Karellin throws out a loose jab but Higham uses good head movement to avoid it.
Higham shoots in for a takedown but Karellin shows good takedown defense.
Higham shoots in for a takedown but doesn't get it.
Higham shoots in for a double leg but Karellin sprawls well. That's going to sap some energy.
That's three failed takedown attempts in the round for Keith Higham. That's going to take a lot out of him.
Karellin keeps the fight standing with a nice sprawl.
Higham is on the wrong end of a nice combination from Karellin.
Higham tries to score a power double leg takedown but Karellin sees that one coming and sprawls well. That will dishearten Higham somewhat.
Karellin throws a body punch but Higham moves out of range.
And thats the end of the round the fighters go back to their corners.
Alexander Karellin dominated that round.
The minute break is over - no more time for sponges and pep talks - back to the action!

Higham misses with a takedown attempt. He shot from a bit too far out.
Higham will have to do better than that with his takedown attempts.
A really sloppy takedown attempt there from Higham.
That's three failed takedown attempts in the round for Keith Higham. That's going to take a lot out of him.
Karellin takes a swing at Higham's ribcage but misses.
Karellin tries to bum rush Higham with a series of wild strikes but Higham uses good footwork to avoid the assault.
Higham on the wrong end of an overhand right that came out of nowhere.
Karellin doesn't manage to clinch there - Higham circles away.
Higham swats away the attempt to clinch by Karellin.
Higham gets cracked there but stands up to it.
That's one minute gone in the round.

Karellin cracks Higham with a big right hand that sends him to the floor! Higham looks wobbly but he's sprung back up to his feet straight away
can Karellin finish him?

Higham is rocked!
A looping hook to the body misses from Karellin. Higham does a little dance to reset his feet.
Higham looking for a takedown here - he's got it.
Higham drops back for a leg but he's not going to get it - he lets go and Karellin dives on top into guard.
Karellin stands up and looks to throw the legs aside to pass to side control. Higham swivels though and keeps the full guard.
Higham trying to control the position.
Karellin is a painfully thin specimen of a man. You do wonder whether a good body kick would snap him clean in two.
Karellin stands up and looks to throw the legs aside to pass to side control. Higham swivels though and keeps the full guard.
That's two minutes gone in the round.
Karellin got a little sloppy there for a moment and Higham has worked his way into a loose triangle - can he finish it?! No, Karellin has managed to get both his arms back between Higham's legs - danger averted.
Higham working for a triangle but Karellin defends it easily.
Karellin sitting in guard here, content to control.
Higham keeping moving, preventing Karellin from controlling successfully.
Higham is working actively off his back, looking to secure an arm or perhaps work for a triangle.
Higham keeping moving, preventing Karellin from controlling successfully.
That's three minutes gone in the round.
Karellin controlling from the top position.
Karellin trying to control but Higham is working from the bottom.
Karellin got a little sloppy there for a moment and Higham has worked his way into a loose triangle - can he finish it?! No, Karellin has managed to get both his arms back between Higham's legs - danger averted.
Karellin pressing down on his opponent's thigh, looking to pass guard. Higham is keeping the position for now.
Higham is throwing his legs up, looking for submissions. Karellin is aware though and is defending well.
That's four minutes gone in the round.
The crowd are showing their displeasure at the lack of action as loud boos ring out around the arena.
Higham controls Karellin momentarily but Karellin frees himself.
Higham is throwing his legs up, looking for submissions. Karellin is aware though and is defending well.
Both fighters are absolutely exhausted here.
Karellin looking to pass the guard.
Karellin not doing a lot at the moment. He'll have to show some more aggression or the fight will get stood up.
The fighters are trapped in the ropes so we're going to have a reposition here. The ref calls for a break and repositions the fighters in the center of the ring.
The fighters are tangled up in the ropes here. We might need a restart if the fighters can't break free themselves.
Karellin wants to control from the top but Higham keeps moving.
Karellin has decided he wants to stand but the closed guard of Higham is proving hard to escape from.
And thats the end of the round the fighters go back to their corners.
Alexander Karellin showed his class in that round. I'd imagine he'll take it on all the scorecards.
OK. That's time! The bell goes and we're back to the action. Ladies and gentlemen, this is the final round!

The fighters circle momentarily. Karellin darts into range and connects with a nice straight punch.
Higham shoots in for a takedown. "I don't think so" says Karellin as he avoids it easily.
Karellin throws a hook to the body but it doesn't connect.
Karellin stuns Higham with a nice body shot, before stepping back out of range.
Horrible takedown by Higham or perhaps it was just good defense by Karellin which made him look bad.

Karellin has taken the fight to the clinch.
Higham wants a takedown.
That's three failed takedown attempts in the round for Keith Higham. That's going to take a lot out of him.
Karellin is trying to break free.
Karellin wants to break free. God knows he wants to breaaaak freeee.
Karellin lands a nice uppercut.
Higham is working for takedown but Karellin is calmly controlling the position for now.
A right handed body shot lands from Karellin.
Both fighters are breathing heavily.
Higham goes for a takedown in the clinch but Karellin prevents it.
That's one minute gone in the round.
Higham is working for a takedown up against the ropes. He can't get it on this occasion though.
Higham looking for a takedown.
Higham is trying to work for a single leg takedown but Karellin pulls him back up using the underhooks.
Good body shot from Karellin.
Karellin is trying to break free.
A right hand to the body from Karellin.
Karellin lands a body punch - he's looking to wear down Higham.
Karellin scores with a shoulder strike.
A right hand to the body from Karellin.

Karellin escapes the clinch and we're back to striking.
Karellin looks to throw the jab but Higham is out of range.
Higham moves into the clinch successfully.
A nice left hand lands by Karellin.
Nice body punch from Karellin - that landed with a thud.
The fans in attendance giving it up for the two fighters, who have really let it all hang out in the last minute or so!
Karellin wants to stall.
Higham's head jolts backwards as he takes an uppercut right on the button!
Karellin lands with a left to the head.
Karellin breaks the clinch and we're back to striking at distance.
A shot to de liver by Karellin. Beautiful body shot.
Karellin changes levels and scores with a jab to the body.
Karellin is throwing a lot of body shots here, looking to wear down Higham rather than just go for the knockout.
That's two minutes gone in the round.
Higham drops his hands and takes a jab to the jaw for his troubles.
Good work by Higham as he checks the leg kick.
Good standup being displayed there by Karellin as he connects with a hook.
Higham is trying hard to land a takedown here. Karellin sprawls well and keeps this one on the feet.
Karellin misses with a body shot.
Karellin tries to clinch but Higham is having none of it.
Karellin smiles there as he lands a nice right hand right on the button.
Karellin misses with a series of wild punches.
Higham shoots in and drives through. Karellin sprawls well.
Alexander Karellin seems to be getting the better of the standup.
That's three minutes gone in the round.
Karellin drops Higham with a beautiful combination! Higham stares up at his opponent, who ushers him back to his feet - Karellin is looking for the KO!
Oh Higham is still all over the place! His legs are completely gone! Will he be able to recover?!!
Decent striking displayed by Karellin there.
Karellin keeps the fight standing with a nice sprawl.
Higham seems to have got his legs back now.
Karellin is looking to clinch but Higham is avoiding it.
Karellin has taken the fight to the clinch.
The two fighters are working to gain dominance in the clinch.
Higham wants a takedown.
Karellin works for underhooks and lands a body shot in the process.
Karellin breaks the clinch and we return to the middle of the mat.
Karellin lands a nice shot to the body.
The fans in attendance giving it up for the two fighters, who have really let it all hang out in the last minute or so!
Nice sprawl there from Karellin as Higham shoots in.
Karellin tries to close the distance and clinch up but Higham swats him away and circles back towards the center.
Alexander Karellin is fighting for a decision here - he's started to take the cautious approach.
That's four minutes gone in the round.
Karellin closes the distance and presses his opponent up against the ropes.
Alexander Karellin seems to be working more effectively in the clinch in the fight so far.
Karellin stalling here - the referee won't stand for too much of that.
Higham drops down looking for an ankle pick but Karellin pulls his leg out and moves away.
Karellin darts in and clinches Higham up against the ropes.
Keith Higham has stepped it up - he knows he needs a finish here!
Higham drops down for a takedown but doesn't get it.
The crowd are going absolutely nuts as the round comes to an end - what a fantastic round of action!
Higham tries to land knees in the clinch but Karellin avoids the damage to the body.
Karellin dodges an elbow strike from Higham.
Karellin breaks the clinch and we're back to striking at distance.
And that's the end of the fight!
Alexander Karellin comfortably won the final round on my scorecard.
I've got Karellin winning every round here. Surely the decision will go his way and he'll pick up a well deserved decision victory. Over to the ring announcer for the scorecards.
Ladies and gentlemen, after 3 rounds of action, we go to the scorecards for a decision.
Judge Andi Peters scores the fight 26:30
Judge Gordon Ramsey scores the fight 26:30
Judge Frank Skinner scores the fight 26:30
In favor of your winner, by unanimous decision... Alexander Karellin!
|
|
|
|
|
|
|
|
|
|
|
|
|
|
|
|
|
|
|
|
|
|
|
| S |
C
A |
G |
S |
C
B |
G |
|
S |
C |
G |
|
energy
A | B |
|
hype
A | B |
|
pop
A | B |
|
mgr
A | B |
|
FIGHT
RATING
84% |
|
|
|
|
|
|
