|
|
PBP Commentary |
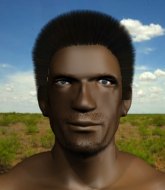
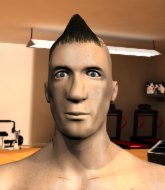
Coming up we have a super heavyweight MMA rules bout between Bob Buckinham (ranked 0 p4p, 0 weight class) and John Candy (ranked 0 p4p, 0 weight class). Over to our ring announcer for the fighter introductions!
 |
|
 |
| 225 cm
18
300 lbs
2 - 1 - 0 |
|
210 cm
18
300 lbs
0 - 1 - 0 |
BJJ White Belt
Solid boxing
Good chin |
|
Dangerous GnP
Basic striking
Tends to cut |
|
| |
|
Ladies and gentlemen. This fight is 3 rounds, in the super heavyweight division.
Introducing the fighter to my left, fighting out of the red corner.
With a record of
2 - 1 - 0, fighting out of London, Bob Buckinham!
And introducing the fighter to my right, fighting out of the blue corner.
With a record of
0 - 1 - 0, fighting out of London, John Candy!
The judges for this bout are James Glass, Sam Margolis and Richard Clark.

The bell rings for round one and we are underway!
Buckinham lands with a two punch combination before moving back out of range.

It looks like John Candy has been cut.
Buckinham misses with a double jab.
Buckinham throws a right and a left that Candy avoids nicely.

Buckinham gets caught on his heels momentarily as he allows Candy to score an easy takedown into full guard.
Candy is looking to work some ground and pound but Buckinham has wrist control.
Buckinham wants to stand and escape but Candy is having none of it.
Candy working some ground and pound from guard but it's not doing any damage.
Buckinham is looking to stand up but Candy isn't so interested in that idea.
The ref warns both fighters not to hold the cage as they work up against the meshing.
Candy sneaks a leg through and gets to half guard. That was like a knife through butter how easily he passed Buckinham's guard.
Buckinham pushes Candy off looking to stand but Candy dives back in and keeps control.
Candy working over Buckinham with some ground and pound. Buckinham looks like he wants out of this position, which is understandable.
Candy thows a huge punch but Buckinham dodges it nicely.
Candy is nestled in close to Buckinham, controlling him well. He's worked in a nice elbow to the side of the head as well, for good measure.
Buckinham is looking to escape.

That's one minute gone in the round.
Candy is scoring with some nice ground and pound from the dominant position.
Buckinham wants to get back to his feet.
Candy is nestled in close to Buckinham, controlling him well. He's worked in a nice elbow to the side of the head as well, for good measure.
Candy working Buckinham over with strikes.
Candy prevents Buckinham from standing back up.

Buckinham kicks Candy off and gets back to his feet.
Buckinham throws a series of punches but Candy moves out of range.
Buckinham is breathing heavily.
Candy dodges the punch combination from Buckinham.
Buckinham gets taken down but at least he's managed to land in guard.
Buckinham wants to stand and escape but Candy is having none of it.
Candy cracks Buckinham with a solid left hand.

That's two minutes gone in the round.
Candy in full guard, throwing the ground and pound. No damage this time.
Buckinham is trying to stand up but he's not managed so far.
Buckinham pushes Candy off and gets back to his feet.
Candy fails with a takedown attempt.
Buckinham misses with a series of wild punches.
Candy dives in and grabs Buckinham's left leg, looking for a takedown. Buckinham pushes down on Candy's head and hops out.
Buckinham scores with a one two! Candy had his feet all tangled up there and couldn't avoid the strikes.
The fans in attendance giving it up for the two fighters, who have really let it all hang out in the last minute or so!
Buckinham misses with a few strikes there.
Buckinham lands a jab, followed by a cross and another cross, as Candy backs up against the cage.
Buckinham throws a right and a left that both miss.
Bob Buckinham is looking to keep the fight on the feet at all costs.

That's three minutes gone in the round.
Candy fails to land the takedown.
Bob Buckinham has stuffed three takedown attempts in the round now. That's going to take a lot out of John Candy.
Buckinham works over Candy's head and body with a nice combination.
Buckinham throws a wild combination but nothing lands.
Candy dodges the punch combination from Buckinham.
Buckinham misses with the combination.
Buckinham scores with a one two! Candy had his feet all tangled up there and couldn't avoid the strikes.
Candy shoots in for a takedown but doesn't get it.
Buckinham scores with a nice looking left hook and follows it up with an uppercut!
Buckinham swings away but doesn't land with a series of punches.
Buckinham's corner calls for a 1,2 combination and Buckinham duly obliges.
Buckinham is working the combinations to good effect here.
A combination from Buckinham does no damage.
Wow, both these guys are really going for it!
Danga de danga de dang - Buckinham scores with a four punch combination!
Buckinham scores with a nice looking left hook and follows it up with an uppercut!

Candy is rocked!
Buckinham misses with a series of wild punches.
Candy is still on wobbly legs! Can Buckinham finish him?
Buckinham misses with a wild combination.
Candy seems to have recovered his senses.

That's four minutes gone in the round.
Buckinham throws a two punch combo that lands nicely.
Buckinham tries to bum rush Candy with a series of wild strikes but Candy uses good footwork to avoid the assault.
Buckinham scores with a nice one two combo and darts back out of range to avoid anything coming in the opposite direction.
Candy tries to score a power double leg takedown but Buckinham sees that one coming and sprawls well. That will dishearten Candy somewhat.
Wooooo! Give it up for these two warriors! They are putting on a show!
Buckinham throws a right and a left that Candy avoids nicely.
A nice combination there by Buckinham.
Candy moves into range and throws a combination. A nice jab followed by a hook to the body.
Buckinham misses with a wild combination.
Buckinham will need to tighten up his combinations if he doesn't want to gas himself out, swinging at thin air.
As the round comes to an end the crowd are showing their appreciation for a great round of action.
Buckinham scores with a nice looking left hook and follows it up with an uppercut!
Candy fails with a rather predictable takedown attempt.
Jab, cross, leg kick. Nice combination by Buckinham!
And thats the end of the round the fighters go back to their corners.
Bob Buckinham dominated that round.
The cut man is working on John Candy's cut.
The fighters' corners scream their final instructions, as the referee calls time. Here we go, back to the action!

Candy shoots in for a takedown. "I don't think so" says Buckinham as he avoids it easily.
Candy shoots in for a takedown. He's persisting with it as Buckinham sprawls well. Buckinham wins this battle and keeps the fight standing. Candy gets slowly back to his feet.
Buckinham connects with a jab and follows up with a big overhand right! Oh that's hurt Candy! He's out on his feet! Buckinham rushes in and drops Candy with another big right hand, forcing the referee to stop the fight!
Ladies and gentlemen, after 0:12 of round 2, we have a winner by way of TKO (Punches). Bob Buckinham!
|
|
|
|
|
|
|
|
|
|
|
|
|
|
|
|
|
|
|
|
|
|
|
| S |
C
A |
G |
S |
C
B |
G |
|
S |
C |
G |
|
energy
A | B |
|
hype
A | B |
|
pop
A | B |
|
mgr
A | B |
|
FIGHT
RATING
100% |
|
|
|
|
|
|
