|
|
PBP Commentary |
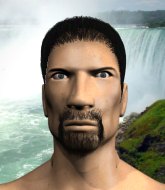
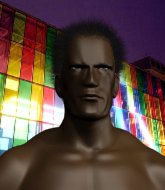
Coming up we have a welterweight MMA rules bout between Gareth Blackmore (ranked 3932 p4p, 2162 weight class) and Maddox Mason (ranked 355 p4p, 256 weight class). Maddox Mason acknowledges the crowd's support as he enters the cage.
 |
|
 |
| 190 cm
25
185
0 - 0 - 0 |
|
190 cm
24
170
2 - 0 - 0 |
BJJ Blue Belt
Brawler
Big heart |
|
Good wrestler
Great elbows
Solid chin |
|
| |
|
Ladies and gentlemen. This fight is 3 rounds, in the welterweight division.
Introducing the fighter to my left, fighting out of the red corner.
With a record of 0 - 0 - 0, fighting out of Las Vegas, Gareth Blackmore!
And introducing the fighter to my right, fighting out of the blue corner.
With a record of 2 - 0 - 0, fighting out of Sydney, Maddox Mason!
The judges for this bout are Chris Downing, Alan Glass and Tiny Johnson.

The bell rings for round one and we are underway!
Sloppy strikes from Blackmore. Those never looked like landing.
Mason tries to move into range but Blackmore moves to the side and lands with a nice right hand.
Mason lands with a head kick! That's gotta hurt.
No luck with that takedown attempt from Blackmore.
Blackmore misses with a takedown attempt. He shot from a bit too far out.
Blackmore avoids the clinch attempt nicely.
Blackmore misses with a half-hearted attempt at a head kick.
Mason darts in trying to clinch
and Blackmore counters with a left to the body.
We've had a slow start to the round here - hopefully the action picks up.
Mason tries to clinch up but Blackmore circles away and keeps his distance.
Blackmore keeps the fight on the outside.
Mason is a painfully thin specimen of a man. You do wonder whether a good body kick would snap him clean in two.
Mason tries to clinch up.
Blackmore shoots in for a takedown - he's clinched up with Mason but Mason pushes him off and we're back to square one.
Despite the aggression on Mason's face he doesn't fully commit to the counter.
That's three failed takedown attempts in the round for Gareth Blackmore. That's going to take a lot out of him.

That's one minute gone in the round.

Mason moves into the clinch successfully.
Blackmore wants a takedown.
Blackmore drops down for a takedown but doesn't get it.
Mason lands a glancing elbow in the clinch.
Blackmore is working for a takedown up against the cage. He can't get it on this occasion though.

Mason escapes the clinch and we're back to striking.
Nice takedown defense from Blackmore. No joy for Mason on that attempt.
Blackmore swung with a counter right hand that didn't connect.
Blackmore dives in and grabs Mason's left leg, looking for a takedown. Mason pushes down on Blackmore's head and hops out.
Blackmore throws a head kick that misses and slips in the process. He scrambles back to his feet and the fighters circle.
Mason tries to close the distance and clinch but Blackmore swats him to one side with an open hand palm strike and circles away.
Mason throws a head kick that misses and slips in the process. He scrambles back to his feet and the fighters circle.
Mason tries to clinch but is not successful on this occasion.
Blackmore shoots in for a takedown - he's clinched up with Mason but Mason pushes him off and we're back to square one.

That's two minutes gone in the round.
Mason tries to clinch up.
Sloppy strikes from Blackmore. Those never looked like landing.
Blackmore dives in for a single leg takedown but Mason sprawls and the fighters end up clinched against the cage.
Mason breaks the clinch and we're back to striking at distance.
Mason wants to clinch up but Blackmore keeps it at a distance.
A head kick misses from Mason.
Mason tries to close the distance and clinch up against the cage but Blackmore paws at him with a jab and circles away.
Mason dodges the punch combination from Blackmore.
Wooooo! Give it up for these two warriors! They are putting on a show!
The fight stays on the outside here - Mason looks like he's thinking about clinching though.
Blackmore throws the kick towards the body but Mason avoids it.
Mason tries to clinch but is not successful on this occasion.
A combination from Blackmore does no damage.

That's three minutes gone in the round.
Blackmore misses with a head kick.
Mason tries to clinch but is not successful on this occasion.
Mason just manages to avoid a counter high kick fromBlackmore.
Blackmore shoots in for a takedown but Mason shows good takedown defense there and keeps this one on the feet.
Mason wants to clinch.
Mason tries a switch kick but it misses it's target.
Blackmore fakes a head shot and lands one to the body.
Blackmore swings for the body but Mason moves out of range.
Mason fails with an attempt to clinch.
Mason changes levels and looks for a double leg takedown. Blackmore tries to avoid it but Mason manages to keep hold of a leg and drag Blackmore to the ground. Blackmore escapes though and pops straight back up to his feet.
Mason shoots in looking for a takedown but Blackmore manages to keep the fight standing, pushing Mason's face into the canvas for good measure before circling away.
The fight moves into the clinch position.
Mason lands a good knee to the midsection. Blackmore won't want to take too many of those.

That's four minutes gone in the round.
Blackmore managing to block the knees to the body from Mason.
Come on Mason - let's have some action - none of this stalling nonsense.
Mason comes over the top with an elbow. That landed flush.
Blackmore avoiding damage as Mason throws knees to the body.
Blackmore wants to take the fight to the mat but Mason manages to get underhooks and keep the fight in the clinch.
We've been informed that Mason has been working hard on his conditioning in the buildup to the fight.
Blackmore is working on a leg, looking for a takedown but Mason is defending well.

Blackmore drags the fight down to the ground.
The fans in attendance giving it up for the two fighters, who have really let it all hang out in the last minute or so!

Mason avoids a guillotine attempt easily.
Blackmore is working the butterfly guard. He manages to land a nice scissor sweep and is now in half guard on the top. Nice move.

Mason looks like he's trying to stand up.
And that is the end of the round. The fighters go back to their corners.
That was a close round but I would say that Gareth Blackmore will probably get the nod.
That's time! Blackmore's corner gives him a slap on the ass as he gets ready to fight.

Mason is looking to clinch.
Mason turns his hip over beautifully as he lands a nice leg kick.
Mason avoids the head kick by Blackmore.
Mason wants to clinch up but Blackmore keeps it at a distance.
Blackmore fails with a takedown attempt.
Mason only half commits to the counter leg kick.
Blackmore throws a loose over hand right and dives in with a double leg takedown. Mason tries to sprawl but it's too late and the fighters hit the mat. Blackmore is in Mason's guard.

Mason manages to wriggle out and sneak his way back up to his feet, so the fighters are now clinched up against the cage.
We've had a slow start to the round here - hopefully the action picks up.
Mason will no doubt start fighting again in a minute but for now he's just having a little rest, leaning Blackmore up against the cage.
Mason putting his Muay Thai to good use. He has Blackmore in a tight clinch and is doing some damage with knees to the body.
That's one minute gone in the round.
Blackmore tries for a takedown. No joy.
Blackmore avoiding damage as Mason throws knees to the body.
Mason gets underhooks to prevent Blackmore's takedown attempt.
That's three failed takedown attempts in the round for Gareth Blackmore. That's going to take a lot out of him.
Blackmore can't break the clinch.
The fighters are starting to perspire pretty heavily.
Blackmore wants a takedown.
Blackmore takes an elbow to the temple.
Mason effectively controlling the action here.
Blackmore looking for a takedown.
Mason is clearly stalling here... Pick up the pace son.
Blackmore is working on a leg, looking for a takedown but Mason is defending well.
Mason lands an elbow just above Blackmore 's eye.
Blackmore looking for a takedown.
Mason lands a nice elbow from the clinch.
That's two minutes gone in the round.
Mason gets double underhooks to prevent a takedown attempt from Blackmore.
Both fighters are absolutely exhausted here.
Mason leaning against his opponent.
Mason breaks the clinch and we return to the middle of the mat.
Mason tries to close the distance and clinch up against the cage but Blackmore paws at him with a jab and circles away.
Mason fakes high and shoots in for a takedown but Blackmore avoids it really well and circles away.
Mason is looking to take this fight into the clinch.
Mason tries to clinch but Blackmore moves out of range.
Blackmore lets the fists fly and connects with a left straight followed by a right hook.
The fans in attendance giving it up for the two fighters, who have really let it all hang out in the last minute or so!
Mason avoids the head kick by Blackmore.
Mason fails in his attempt to clinch.
That's three minutes gone in the round.
Blackmore throws a series of punches but Mason moves out of range.
Mason moves into the clinch successfully.
Maddox Mason seems to be working more effectively in the clinch in the fight so far.
Mason manages to break the clinch.
Mason doesn't manage to clinch there - Blackmore circles away.
As Mason looks to move away, Blackmore throws a big counter combo but Mason just gets out of the way.
Blackmore throws a body punch but Mason moves out of range.
Mason misses with a half-hearted attempt at a head kick.
Mason is looking to clinch.
Blackmore appears to be looking for a big counter.
Blackmore closes the distance and clinches up with Mason, looking for a takedown. Blackmore pushes Mason against the cage but Mason circles to the side and manages to break the clinch.
A head kick misses from Mason.
A telegraphed takedown attempt from Blackmore is defended easily by Mason.
Blackmore misses with a wild body shot.
Gareth Blackmore is looking to throw some combinations by the looks of things.
Mason shoots in and drives through. Blackmore sprawls well.
That's four minutes gone in the round.
Mason takes a punch to the jaw and another one to the bread basket.
Blackmore fails with a rather predictable takedown attempt.
Mason showing good head movement there, avoiding the strikes from Blackmore.
Blackmore is looking to land body kicks.
Blackmore shuffles to his left behind two crisp jabs. Mason eats them both and turns towards Blackmore to reposition himself and eats a stinging right hand-left hook combo.
The fans in attendance giving it up for the two fighters, who have really let it all hang out in the last minute or so!
Mason tries to close the distance and clinch up against the cage but Blackmore paws at him with a jab and circles away.
Blackmore tries for a takedown but Mason sees it coming a mile off and avoids it easily.
Mason tries to clinch there but Blackmore circles away.
Mason is looking to take this fight into the clinch.
Mason lands a high kick!
And that is the end of the round. The fighters go back to their corners.
A close second round but Maddox Mason will probably get the nod - 10:9.
That's time! Blackmore's corner gives him a slap on the ass as he gets ready to fight. This is the final round!

Mason goes for a high kick. It partially lands.
Blackmore misses with a double jab.
Blackmore lands a really nice looking cross but Mason seems unphased.
Gareth Blackmore is winning the standup battle so far.
Mason tries to clinch up against the cage, rushing in to close the distance. Blackmore manages to break the clinch and circles back to the middle of the mat.
Mason moves into range and clinches up with Blackmore.
Mason lands a knee to the body.
Blackmore is working on a leg, looking for a takedown but Mason is defending well.
Mason tries to land knees in the clinch but Blackmore avoids the damage to the body.
Mason unloads a knee to the mid-section.
Mason content to slow the pace in the clinch.
Come on Mason - let's have some action - none of this stalling nonsense.
We've had a slow start to the round here - hopefully the action picks up.
Mason misses the knee to the body. Nice hip positioning from Blackmore.
Mason working Blackmore over with knees to the body.
Mason lands a nice elbow.
Both fighters are breathing heavily.
Wooooo! Give it up for these two warriors! They are putting on a show!
Mason breaks the clinch and we return to the middle of the mat.
That's one minute gone in the round.
Blackmore leaves Mason with his face pressed against the mat as he sprawls beautifully, defending against a solid takedown attempt.
Both fighters circling a little - Blackmore finishes the exchange with a kick to the body.
Blackmore ducks down and throws a hook to the body.
Mason tries to clinch but is not successful on this occasion.
Blackmore went nuts there looking for a big combo counter but none of the flurry connected.
Mason tries to clinch but is not successful on this occasion.
Blackmore avoids the clinch attempt nicely.
Mason changes levels and looks for a double leg takedown. Blackmore tries to avoid it but Mason manages to keep hold of a leg and drag Blackmore to the ground. Blackmore escapes though and pops straight back up to his feet.
Mason gets caught napping as Blackmore dives in and scores a takedown. Mason manages to retain guard.
Blackmore drops back for a leg! It's a sloppy attempt though and Blackmore jumps back into guard quickly, to retain the dominant position.
Gareth Blackmore overall seems to be getting the better of the ground position in the fight so far.
Mason keeping moving, preventing Blackmore from controlling successfully.
That's two minutes gone in the round.
Blackmore thinks about going for a leg but decides against it, in order to maintain the position.
Blackmore is in close to Mason's body, working some short punches and elbows.
Blackmore wants to control from the top but Mason keeps moving.
Mason is trying to control the position from the bottom.

Blackmore gets to his feet and steps away from his opponent.
That's three minutes gone in the round.
Blackmore closes the distance and looks for a trip takedown... aaaand he's got it - Blackmore lands in his opponent's guard.
Mason has his feet on Blackmore's hips. He pushes off and gets to his feet. Nice work.
Blackmore shoots in but Mason avoids the takedown attempt easily.
Mason fails with an attempt to clinch.
Blackmore throwing a counter right hand but Mason manages to avoid it.
Mason fails with a takedown attempt.
Gareth Blackmore has stuffed three takedown attempts in the round now. That's going to take a lot out of Maddox Mason.
Blackmore scores a trip takedown into side control. Nice.
Fantastic stuff here - a very entertaining period of action, which has drawn cheers from the crowd.
Mason tries to get back to his feet but has found himself mounted instead. Damn, that's gotta suck.
That's four minutes gone in the round.
Blackmore is working on an americana here. Ooh, that looks pretty nasty! Nope, Mason has managed to escape the submission attempt.
Mason is working to get back to half guard.
Blackmore quickly switches position and commits to an armbar! It's a big risk for Blackmore but it's paid off an Mason is forced to tap! Nice work by Blackmore.
Ladies and gentlemen, after 4:54 of round 3, we have a winner by way of Submission (Armbar). Gareth Blackmore!
Gareth Blackmore opened up his post fight interview with a scream to camera that he wants a title shot! Whether he deserves the shot will be up to the management of the organization, so I guess he'll have to wait and see.
|
|
|
|
|
|
|
|
|
|
|
|
|
|
|
|
|
|
|
|
|
|
|
| S |
C
A |
G |
S |
C
B |
G |
|
S |
C |
G |
|
energy
A | B |
|
hype
A | B |
|
pop
A | B |
|
mgr
A | B |
|
FIGHT
RATING
67% |
|
|
|
|
|
|
