|
|
PBP Commentary |
Coming up we have a super heavyweight MMA rules bout between The Doctor (ranked 706 p4p, 971 weight class) and Datsuro Sato (ranked 14 p4p, 22 weight class). Doctor kept the crowd waiting but all that was forgotten when his ring entrance music started. The incomparable musical genius that is $uicideboy$ - The Thin Grey Line. Well, the cameraman is lingering on a pretty young lady for a bit too long there. Keep your eyes on the prize buddy or you'll miss the fighter intros!
 |
|
 |
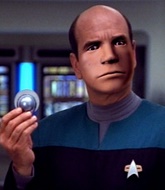
| 178 cm
25
157
8 - 2 - 0 |
|
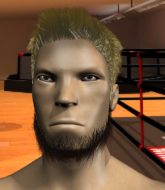
175 cm
25
157
10 - 6 - 0 |
Abu Dhabi Champ
Lethal high kicks
Cardio machine |
|
BJJ Brown Belt
World class boxer
Good gas tank |
|
| |
|
Ladies and gentlemen. This fight is 3 rounds, in the super heavyweight division.
Introducing the fighter to my left, fighting out of the red corner.
With a record of 8 - 2 - 0, fighting out of Las Vegas, The Doctor!
And introducing the fighter to my right, fighting out of the blue corner.
With a record of 10 - 6 - 0, fighting out of New York, Datsuro Sato!
The judges for this bout are Gwen Towbar, George Francis and Robert Twigg.

The bell rings for round one and we are underway!
Good shot there by Sato.
Doctor throws a nice inside leg kick.
Doctor misses with an uppercut.
Sato jabbing away but nothing is landing.
Doctor attempts a counter takedown but Sato avoids it well and moves away.
Sato misses with a jab and misses with a cross straight after too.
Doctor works Sato's body with a nice hook.
A really sloppy takedown attempt there from Sato.
Sato is looking to clinch but Doctor is avoiding it.
Doctor throws out a token jab with nothing on it.
Sato is clearly trying to counter these attacks from Doctor with a body shot.
Doctor moves out of range as Sato strikes.
Doctor appears to be looking for a counter takedown.
Sato looks to land a right hand but Doctor moved out of range.
Sato uses some good footwork to avoid the body shot by Doctor.
Sato throws a looping overhand right but Doctor ducks down to avoid it.
Doctor misses with a hook.
Doctor throws out a token jab with nothing on it.
Sato feints the counter takedown.
Doctor uses good footwork to avoid the strikes from Sato.
Donk. Doctor catches Sato right on the button with a cross.
Sato misses with a left hand
and Sato takes a counter punch right on the button for his troubles.
The fans in attendance giving it up for the two fighters, who have really let it all hang out in the last minute or so!
Sato tries to bum rush Doctor with a series of wild strikes but Doctor uses good footwork to avoid the assault.
Doctor turns his hip over beautifully as he lands a nice leg kick.

That's one minute gone in the round.
Sato throws a lazy uppercut

and Doctor counters with a nice double leg into half guard.
Doctor seems to be taking a bit of a break to think of his next move. He lands a short punch in the meantime.

Sato looking for submissions from an awkward position here.
Sato on the receiving end of some nice ground and pound.
Sato on the receiving end of some nice ground and pound.
Sato tries to roll over but Doctor keeps him under control.
Doctor looking to pass the half guard. Not this time.
Doctor with a momentary lay and pray from half guard.
Doctor trying to control from half guard but Sato is working away.
Sato trying to hold on to Doctor's head to control him but Doctor postures up.
Sato has guillotine here! It looks pretty tight! Could this be all over! No, Doctor escapes and passes into side control at the same time. Nice work there by Doctor!
Doctor has been looking to land a fair amount of strikes on the ground. He might be looking to soften his opponent up in order to work for a submission.

Doctor thinks about going for a far side armbar but bails out and retains the dominant position instead.

That's two minutes gone in the round.
Sato manages to land a sweep and he's now on top! Lovely Jiu Jitsu!
The crowd are loving this. Great action here.
Doctor is staying active underneath Sato, who seems content to just control the action from this position.
Doctor's coaches at House Of Pain have been working on his defensive grappling in preparation for this fight so let's see if he can get out of this tricky position.
Doctor is trying to control but can't.
Sato is trying for a guillotine from the top but the pressure isn't in the right place so Doctor is just riding it out for now. Sato eventually gives up the hold.
Sato wants to work for an arm triangle but Doctor is really keeping half guard well and defending the submission attempt.
Doctor looking for submissions off his back.

That's three minutes gone in the round.
The fighters are starting to perspire pretty heavily.
Doctor trying to control but Sato postures up.
Doctor keeping control of the leg, stopping his opponent passing to mount.
Sato trying to control the action but Doctor is working from the bottom.
Sato is just sitting in half guard, waiting for something to happen.
Doctor is trying to get back to full guard.

That's four minutes gone in the round.
My god... these two guys really need to pick up the pace or everyone will leave to go get a beer.
Sato looking to pass the half guard. Not this time.
Sato wants to stand up but Doctor has a hold of him and won't allow it.
Doctor trying to hold on to Sato's head to control him but Sato postures up.
Doctor has his hands clasped together around Sato's back. He's all about the action.
Sato seems to be working for a kimura but Doctor defends the submission attempt.
Doctor trying to control from the bottom.

The referee has motioned to the fighters to stand back up.
And that is the end of the round. The fighters go back to their corners.
The Doctor dominated that round.
That's time! Back to the action!

Sato throws a jab, cross combination which is slipped
and Doctor finishes the little exchange by landing a big kick to the body.
A big left from Sato misses.
It looked like Doctor wanted to counter with a hook but didn't fully commit.
Doctor throws a quick head kick that skims the top of Sato's head.
Doctor bobs and weaves and unloads with a good uppercut.
Doctor dips down and scores with a jab to the body.
Sato misses with a wild body shot.
Doctor avoids a punch combination nicely.
Sato throws an uppercut from half a mile away. Doctor sees it coming and avoids it easily.
Sato's coach down at Tran MMA Gym was telling us pre-fight that they have been working on Sato's balance. Obviously they view that as a key factor in the outcome of this fight.
Doctor drives through with a takedown into guard.
Doctor is intent on slowing down the pace of the fight, simply looking to control.
Doctor lands a couple of digs.
The fighters are pressed up against the cage, both looking to find a bit of space to work.
We've seen a great period of action over the last minute or so - credit to both fighters for going all out!
Doctor makes a bit of distance and scores with some ground and pound, still in guard.
Doctor scoring with some ground and pound.
Sato throws his legs up looking to secure a triangle. Oh, that looks pretty tight, I gotta say! Doctor escapes and throws Sato's legs to the side, diving into side control!
Sato takes a nasty elbow to the side of the head.
That's one minute gone in the round.
Sato is working to avoid the ground and pound but Doctor connects with a decent elbow.
Doctor passes to full mount! That's big trouble for Sato!
Doctor is really dominating this fight. Is there anything that Sato can do to turn this around?
Sato keeping his composure momentarily, calmly looking to get back to half guard.
Doctor with shots to the head and body - Sato looks very uncomfortable down there.

Sato is rocked!
Sato tries to reverse the position but Doctor maintains control.
Sato regains half guard.
Doctor is looking to take a break and control but Sato is keeping him honest, looking to work from the bottom.
Sato is looking to sinch up a guillotine here but Doctor pulls his head out easily.
Doctor looks over to his corner - he wants some instructions but his corner are not responding.
Sato is trying to maintain the position but Doctor is very close to passing his half guard.
Doctor prevents Sato from improving his position.
Sato looking for submissions off his back.
That's two minutes gone in the round.
Doctor takes advantage of the dominant position to land a couple of big hammer fists.
Sato is staying active underneath Doctor, who seems content to just control the action from this position.
Doctor lands strikes from half guard.
Doctor wants to work for an arm triangle but Sato is really keeping half guard well and defending the submission attempt.
Sato gets full guard.
Doctor makes a bit of distance and scores with some ground and pound, still in guard.
Doctor got a little sloppy there for a moment and Sato has worked his way into a loose triangle - can he finish it?! No, Doctor has managed to get both his arms back between Sato's legs - danger averted.
Sato has his foot on Doctor's thigh. He's trying to push off and get in position for a triangle, I think. Doctor works his way back into a safe position though.
Sato is trying to control the position but Doctor postures up.
The ref warns both fighters not to hold the cage as they work up against the meshing.
Doctor got a little sloppy there for a moment and Sato has worked his way into a loose triangle - can he finish it?! No, Doctor has managed to get both his arms back between Sato's legs - danger averted.
Doctor connects with a couple of short punches.
The crowd are loving this. Great action here.
Doctor seems content to control from guard here. He's going to have to remain active though if he doesn't want to get stood back up.
That's three minutes gone in the round.
Doctor pressing down on his opponent's thigh, looking to pass guard. Sato is keeping the position for now.
Sato has momentary wrist control but Doctor slips an elbow through the middle.
Sato working for a triangle but Doctor defends it easily.
Doctor got a little sloppy there for a moment and Sato has worked his way into a loose triangle - can he finish it?! No, Doctor has managed to get both his arms back between Sato's legs - danger averted.
Doctor makes a bit of distance and scores with some ground and pound, still in guard.
Doctor slips effortlessly into side control - very nice.
Doctor working the ground and pound.
Sato tries to work a leg under to get back to half guard but Doctor wriggles his own leg back out and remains in side control.
Sato manages to work his way to half guard, despite Doctor's best efforts.
Doctor lands a big shot. The thud that echoes around the arena is like music to the fans' ears.
That's four minutes gone in the round.
Doctor lands with an elbow from half guard - that looked like it hurt.
Sato looking for submissions from an awkward position here.
Sato is trying to control but can't.
Doctor is nestled in close to Sato, controlling him well. He's worked in a nice elbow to the side of the head as well, for good measure.
Sato works his way to full guard. Good work.
Doctor trying to control but Sato is working from the bottom.
Doctor stays in close to Sato's body and controls the position.
Doctor scoring with some ground and pound.
Doctor got a little sloppy there for a moment and Sato has worked his way into a loose triangle - can he finish it?! No, Doctor has managed to get both his arms back between Sato's legs - danger averted.
Doctor avoids a guillotine attempt easily.
Sato is breathing heavily.
Doctor postures up and lands a big shot to Sato's brow.
And that is the end of the round. The fighters go back to their corners.
The Doctor dominated that second round.
That's time! Back to the action! The crowd applaud as we get ready to start the final round!

Sloppy strikes from Sato. Those never looked like landing.
Doctor appears to be looking for a counter takedown.
The Doctor is fighting for a decision here - he's started to take the cautious approach.
Decent striking displayed by Doctor there.
Doctor throws a big shot that misses.
Doctor getting the better of the striking in that exchange.
Doctor throws a nice inside leg kick.
Doctor works Sato's body with a nice hook.
Sato scores with a crisp jab that stopped Doctor in his tracks.
Datsuro Sato seems to be the more aggressive standup fighter in this bout.
Doctor lands three nice shots there - that looked like it hurt!
Sato jabs Doctor right on the nose. Doctor blinks but takes it well.
Doctor works Sato's body with a nice hook.
This is a great period of action - very entertaining stuff!
Sloppy strikes from Sato. Those never looked like landing.
The Doctor is winning the standup battle so far.
Sato throws a big shot that misses.
It looked like Doctor wanted to counter with a hook but didn't fully commit.
Sato misses with a hook
and Doctor counters with a quick right hand to the jaw.
Sato misses with a series of wild punches.

Doctor clinches with his opponent.
Doctor tries to pull guard but Sato won't allow it.
That's one minute gone in the round.
Doctor throws a head punch that misses.
Doctor lands a right hand that snaps the head of Sato backwards.
Doctor jumps guard and drags Sato to the mat. He's obviously going to be looking for submissions off his back.
Sato pressing down on his opponent's thigh, looking to pass guard. Doctor is keeping the position for now.
Doctor pulls Sato in to control the position.
Doctor is trying to control the position from the bottom.
Doctor keeping moving, preventing Sato from controlling successfully.
Doctor controls Sato momentarily but Sato frees himself.
That's two minutes gone in the round.
Doctor has a closed guard, preventing anything of note from happening. Perhaps he's looking to stall.
Sato trying to stand up but can't free himself from Doctor's guard.
We may be looking at a referee standup if the pace doesn't pick up soon.
Doctor working a defensive guard here.
The referee decides to stand the fighters back up.
Sato throws a series of punches but Doctor moves out of range.
Sato throws a jab but it's blocked by Doctor.
Sato uses some good footwork to avoid the body shot by Doctor.
Sato swinging wildly here.
Doctor swings for the body but Sato moves out of range.
Doctor looking to shoot here. He's gone for it and he's landed a takedown into side control! Oh, that's bad for Sato!
That's three minutes gone in the round.
Doctor taking a breather here.
Doctor trying to control the position but Sato is working away.
Doctor advances to full mount.
Doctor looking to control but Sato is working nicely, looking to advance position himself.
Doctor takes a little breather and maintains the position. The referee will be looking for him to stay active from such a dominant position though.
Sato is writhing around trying to get back to his feet.
That's four minutes gone in the round.
Sato is squirming around, avoiding Doctor's attempts to control the action.
Datsuro Sato has stepped it up - he knows he needs a finish here!
Sato slips a leg in and gets back to half guard.
Sato is looking to sinch up a guillotine here but Doctor pulls his head out easily.
Doctor performing his best blanket impression for a moment.
Sato actively working from the bottom here.
Doctor lands with an elbow from half guard - that looked like it hurt.
Doctor stalling.
And that's the end of the fight!
The Doctor showed his dominance in that final round.
Well Doctor has outscored his opponent in every aspect of the fight today. Only a scarily incompetent judge or two will keep him from a well deserved win... Over to the ring announcer for the scorecards.
Ladies and gentlemen, after 3 rounds of action, we go to the scorecards for a decision.
Judge Gwen Towbar scores the fight 30:27
Judge George Francis scores the fight 30:27
Judge Robert Twigg scores the fight 30:27
In favor of your winner, by unanimous decision... The Doctor!
The Doctor decided to go for the less than humble approach in his post fight interview, telling everyone how he is going to conquer the world. The crowd seemed to like it when really that sort of approach could have gone either way.
|
|
|
|
|
|
|
|
|
|
|
|
|
|
|
|
|
|
|
|
|
|
|
| S |
C
A |
G |
S |
C
B |
G |
|
S |
C |
G |
|
energy
A | B |
|
hype
A | B |
|
pop
A | B |
|
mgr
A | B |
|
FIGHT
RATING
44% |
|
|
|
|
|
|
