|
|
PBP Commentary |
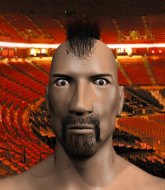
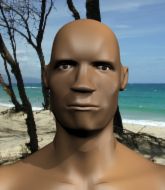
Coming up we have a lightweight MMA rules bout between Keisuke Atoshi (ranked 0 p4p, 0 weight class) and Bue Buxley (ranked 0 p4p, 0 weight class). Keisuke Atoshi has the edge in experience - let's see if he can make that count tonight.
 |
|
 |
| 170 cm
19
153 lbs
1 - 6 - 0 |
|
225 cm
18
155 lbs
0 - 2 - 0 |
BJJ Purple Belt
Basic striking
Experienced |
|
Good wrestler
Basic striking
Tends to cut |
|
| |
|
Ladies and gentlemen. This fight is 3 rounds, in the lightweight division.
Introducing the fighter to my left, fighting out of the red corner.
With a record of
1 - 6 - 0, fighting out of Tokyo, Keisuke Atoshi!
And introducing the fighter to my right, fighting out of the blue corner.
With a record of
0 - 2 - 0, fighting out of Tokyo, Bue Buxley!
The judges for this bout are Yukihiro Shimada, Yasuomi Hirokawa and Shigeki Sano.

The bell rings for round one and we are underway!
Atoshi displays good takedown defense there as he swats away a double leg from Buxley.
Atoshi looks exhausted already! Oh dear, he should have come in in better shape than this!
Horrible takedown by Buxley or perhaps it was just good defense by Atoshi which made him look bad.
Atoshi keeps the fight standing with a nice sprawl.
Keisuke Atoshi has stuffed three takedown attempts in the round now. That's going to take a lot out of Bue Buxley.
Atoshi tries for a takedown but Buxley circles away easily

and Buxley decides to take the opportunity to score a takedown. He's landed in Atoshi's guard.

Buxley gets to his feet. Atoshi looking to butt scoot but the ref puts an end to that. On your feet son!
Buxley scores with a takedown into Atoshi's guard.
Buxley must be cautious of submissions here, given that his opponent has the superior Jiu Jitsu.
Atoshi throwing strikes off his back to little effect.
Buxley would like to get this fight back to the feet but can't get free from the closed guard.
Atoshi is working an open guard so Buxley takes the opportunity to get back to his feet.
Buxley looks for a takedown. He's got it. We're now in half guard.
Buxley really doesn't want to stay on the ground with Atoshi. If he can't get it back to his feet, it's only a matter of time before he'll be tapping out.
We've seen a great period of action over the last minute or so - credit to both fighters for going all out!
Buxley decides to stand up.
Buxley shoots in looking for a single leg takedown. Atoshi is trying to defend but Buxley finishes it well and ends up in half guard. Let's see if he can advance position further.

That's one minute gone in the round.
Buxley wants to get back to his feet.
Both fighters really going for it on the ground here!
Buxley is using up a lot of energy trying to get back to his feet. Perhaps he should improve his position first.
Buxley postures up and decides to stand up, from the half guard. The ref calls for Atoshi to stand up.
Buxley has a takedown stuffed.
Buxley fails with a rather predictable takedown attempt.
Buxley is looking for a takedown here. He's shot in and has managed to get it, finishing up in Atoshi's half guard.

That's two minutes gone in the round.
Buxley stands, ready to strike. The ref makes him back up and allows Atoshi to get to his feet.
Buxley darts in and lands a nice takedown into half guard.
Atoshi trying to hold on to Buxley's head to control him but Buxley postures up.
It looks like Buxley is going to stand back up.
The fighters are pressed up against the cage, both looking to find a bit of space to work.
Atoshi is trying to stand back up but Buxley is controlling him
Buxley decides to stand up.
Atoshi gets caught flat footed, as Buxley shoots in with a quick takedown into guard.
Buxley is looking to stand up but Atoshi won't let him.

That's three minutes gone in the round.
Buxley won't allow Atoshi to get back to his feet.
Buxley stands up from guard. Let's bang!
Buxley shoots in for a takedown! He's got it and he's managed to land in full mount! That's better than Buxley was expecting from the takedown attempt, I'm sure!
Buxley is trying to stand up but he's being controlled by his opponent.
Buxley controlling the position easily from mount.
Atoshi tries to lock up and control but Buxley gives him a forearm to the face and pushes him away.
Buxley is standing up, even though he is in mount.
Buxley closes the distance and gets a double leg, slamming Atoshi to the mat! Atoshi manages to get full guard.

That's four minutes gone in the round.

Atoshi is looking for a triangle but Buxley pushes his legs off easily.
Buxley would like to get this fight back to the feet but can't get free from the closed guard.
Atoshi looking for submissions off his back, moving his hips, looking for an opening.
Buxley decides he's had enough of playing guard and decides to stand. Come on Atoshi, up you get!
As the round comes to an end the crowd are showing their appreciation for a great round of action.
Buxley tries to shoot in for a takedown. He's got hold of a leg but Atoshi swivels and escapes.
Buxley fails to land the takedown.
And thats the end of the round the fighters go back to their corners.
Bue Buxley dominated that round.
That's time! Back to the action!

Excellent takedown into side control there by Buxley.
Buxley decides to stand back up. Buxley steps back and let's Atoshi get back to his feet.
Buxley shoots in looking for a single leg takedown. Atoshi is trying to defend but Buxley finishes it well and ends up in half guard. Let's see if he can advance position further.
Buxley is trying to get back to his feet now but his leg is trapped.
Both fighters are absolutely exhausted here.
Atoshi looking to work for a kimura from the bottom.
Buxley postures up and decides to stand up, from the half guard. The ref calls for Atoshi to stand up.
That's one minute gone in the round.
Atoshi throws a combination but it was largely blocked by Buxley.
Buxley changes levels and looks for a double leg takedown. Atoshi tries to avoid it but Buxley manages to keep hold of a leg and drag Atoshi to the ground. Atoshi escapes though and pops straight back up to his feet.
Buxley gets the takedown into side control.
Buxley has had enough of the ground for now and decides to stand.
Buxley drives through with a really nice takedown into side control.
Buxley decides to stand back up. Buxley steps back and let's Atoshi get back to his feet.
Atoshi shoots in for a double leg but Buxley sprawls well. That's going to sap some energy.
Buxley dives in and grabs Atoshi's left leg, looking for a takedown. Atoshi pushes down on Buxley's head and hops out.
Atoshi throws a right and a left that both miss.
Buxley shoots in with a takedown attempt and he has Atoshi pinned against the cage. Atoshi gets the underhooks and manages to circle away.
Keisuke Atoshi has stuffed three takedown attempts in the round now. That's going to take a lot out of Bue Buxley.
That's two minutes gone in the round.
Buxley closes this distance looking for a takedown but Atoshi circles away.
Keisuke Atoshi is looking to throw some combinations by the looks of things.
Buxley fails with the takedown.
Atoshi misses with a series of wild punches.
Atoshi leaves Buxley with his face pressed against the mat as he sprawls beautifully, defending against a solid takedown attempt.
Buxley shoots in and drives through. Atoshi sprawls well.
Buxley looks for a takedown but Atoshi sprawls well.
That's three minutes gone in the round.
Atoshi shoots in but doesn't get the takedown
and Buxley decides to take the opportunity to score a takedown. He's landed in Atoshi's guard.
Buxley wants to get up but he can't break Atoshi's closed guard. He needs to be careful trying to break the legs open, as he's open to submissions here.
The ref warns both fighters not to hold the cage as they work up against the meshing.
Buxley stands up and waves to Atoshi to follow him.
Atoshi tries to shoot in for a takedown. He's got hold of a leg but Buxley swivels and escapes.
Buxley looking to shoot here. He's gone for it and he's landed a takedown into mount! Oh, that's bad for Atoshi!
Buxley takes a little breather and maintains the position. The referee will be looking for him to stay active from such a dominant position though.
Atoshi wants to control but Buxley is having none of it.
Atoshi keeping his composure momentarily, calmly looking to get back to half guard.
That's four minutes gone in the round.
Buxley is standing up out of mount! Strange tactic there - he must really want this one on the feet!
Buxley shoots for a double leg takedown but Atoshi sprawls well. He's pushed Buxley's face into the mat and manages to get back to his feet relatively easily.
Atoshi tries for a takedown but Buxley circles away easily
and Buxley decides to take the opportunity to score a takedown. He's landed in Atoshi's guard.
We've seen a great period of action over the last minute or so - credit to both fighters for going all out!
Buxley has decided he wants to stand but the closed guard of Atoshi is proving hard to escape from.
Atoshi looking to hit a scissor sweep but Buxley is one step ahead there.
Buxley wants to get up but he can't break Atoshi's closed guard. He needs to be careful trying to break the legs open, as he's open to submissions here.
The crowd applaud the fighters efforts here as the round comes to an end.
Atoshi throwing his legs up looking for a triangle.
Atoshi wants to sweep but no luck.
And thats the end of the round the fighters go back to their corners.
Bue Buxley showed his class in that round. I'd imagine he'll take it on all the scorecards.
The fighters get back to their feet, the hooter sounds and we're back to the action! The crowd applaud as we get ready to start the final round!

Atoshi stuffs the takedown attempt from Buxley. Buxley gets slowly back to his feet.
Buxley shoots in looking for a single leg takedown. Atoshi is trying to defend but Buxley finishes it well and ends up in half guard. Let's see if he can advance position further.
Buxley tries to stand but his arm is trapped.
Atoshi looks like he's trying to stand up.
Buxley wants to stand up but Atoshi has a hold of him and won't allow it.
Atoshi actively working from the bottom here.
Both fighters are breathing heavily.
Buxley tries to stand but his arm is trapped.
That's one minute gone in the round.
Atoshi looks like he's trying to stand up.

The referee decides to stand the fighters back up.
Atoshi tries to bum rush Buxley with a series of wild strikes but Buxley uses good footwork to avoid the assault.
Buxley shoots in looking for a double leg takedown. Atoshi defends it nicely.
Buxley will have to do better than that with his takedown attempts.
Keisuke Atoshi has stuffed three takedown attempts in the round now. That's going to take a lot out of Bue Buxley.
Buxley shoots in but Atoshi avoids the takedown attempt easily.
Buxley is a painfully thin specimen of a man. You do wonder whether a good body kick would snap him clean in two.
Buxley shoots in for a takedown. "I don't think so" says Atoshi as he avoids it easily.
That's two minutes gone in the round.
A few boos can be heard. I'm sure they will multiply if the fighters don't pick up the pace.
A nice combination there by Atoshi.
Buxley shoots for a double leg takedown but Atoshi sprawls well. He's pushed Buxley's face into the mat and manages to get back to his feet relatively easily.
Atoshi keeps the fight standing with a nice sprawl.
Buxley fails with a takedown attempt from distance.
The fight stays on the outside here - Atoshi looks like he's thinking about clinching though.
Buxley dives in and grabs Atoshi's left leg, looking for a takedown. Atoshi pushes down on Buxley's head and hops out.
No joy there for Atoshi, who threw a few shots but didn't land.
Buxley scores with a nice takedown into half guard. Let's see what he's got on the ground.
Buxley decides he's had enough of the ground and stands up.
That's three minutes gone in the round.
Atoshi dances in quickly and lands a nice inside leg kick on Buxley. That did some damage!
Atoshi gets caught on his heels momentarily as he allows Buxley to score an easy takedown into full guard.
Buxley stands up and waves to Atoshi to follow him.
Atoshi works Buxley's body with a nice hook.
Buxley decides to change it up a bit and drives through with a nice takedown into half guard.
Buxley decides to stand up.
Atoshi tries to clinch there but Buxley circles away.
Buxley has been the more effective fighter overall so far.
That's four minutes gone in the round.
Atoshi is looking to take this fight into the clinch.
Buxley scores a trip takedown into side control. Nice.
Buxley has had enough of the ground for now and decides to stand.
A solid leg kick lands there for Atoshi.
Buxley shoots in looking for a takedown. Atoshi tries to sprawl out of it but Buxley keeps driving through. The fighters are pinned against the cage. Atoshi manages to get underhooks and after a bit of a struggle, circles away and we're back to standing.
Buxley shoots in and scores a nice double leg takedown into half guard.
Keisuke Atoshi has stepped it up - he knows he needs a finish here!
The crowd cheering loudly, showing their appreciation for the quality fight we're seeing here.
Buxley stands, ready to strike. The ref makes him back up and allows Atoshi to get to his feet.
And that's the end of the fight!
Bue Buxley comfortably won the final round on my scorecard.
I've got Buxley winning every round here. Surely the decision will go his way and he'll pick up a well deserved decision victory. Over to the ring announcer for the scorecards.
Ladies and gentlemen, after 3 rounds of action, we go to the scorecards for a decision.
Judge Yukihiro Shimada scores the fight 27:30
Judge Yasuomi Hirokawa scores the fight 27:30
Judge Shigeki Sano scores the fight 27:30
In favor of your winner, by unanimous decision... Bue Buxley!
|
|
|
|
|
|
|
|
|
|
|
|
|
|
|
|
|
|
|
|
|
|
|
| S |
C
A |
G |
S |
C
B |
G |
|
S |
C |
G |
|
energy
A | B |
|
hype
A | B |
|
pop
A | B |
|
mgr
A | B |
|
FIGHT
RATING
79% |
|
|
|
|
|
|
