|
|
PBP Commentary |
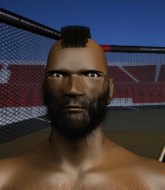
Coming up we have a welterweight MMA rules bout between James Darwin (ranked 1441 p4p, 1098 weight class) and Winter Scarletwound (ranked 188 p4p, 144 weight class). Both fighters look fresh as a daisy as they make their way towards the cage.
 |
|
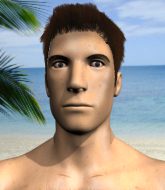 |
| 176 cm
27
170
8 - 5 - 0 |
|
183 cm
29
175
12 - 7 - 0 |
Great wrestler
Excellent boxer
Cardio machine |
|
Good wrestler
World class MT
Good gas tank |
|
| |
|
Ladies and gentlemen. This fight is 3 rounds, in the welterweight division.
Introducing the fighter to my left, fighting out of the red corner.
With a record of 8 - 5 - 0, fighting out of St Petersburg, James Darwin!
And introducing the fighter to my right, fighting out of the blue corner.
With a record of 12 - 7 - 0, fighting out of Helsinki, Winter Scarletwound!
The judges for this bout are Tatsuya Matsuyama, Taro Takaoka and Yasuomi Hirokawa.

The bell rings for round one and we are underway!
Scarletwound lands a straight punch to the body, keeping Darwin at a distance.
Scarletwound moving in and out of range nicely, whilst landing the scoring shot.
Scarletwound cracks Darwin with a good jab.

It looks like James Darwin has been cut.
Scarletwound misses with an uppercut

and Darwin counters with a nice double leg into side control. Scarletwound won't be happy with that.

Scarletwound explodes and escapes back to his feet! Nice escape there!
Wooooo! Give it up for these two warriors! They are putting on a show!
Darwin takes a jab on the nose there. A little bit of blood seems to be coming out. Hopefully that won't affect his breathing.
Scarletwound throws the left hand but Darwin avoids the punch easily.
Scarletwound throws out a loose jab but Darwin uses good head movement to avoid it.
Jab by Scarletwound.
Darwin walks into a stiff left hand from Scarletwound.
Darwin is looking for a takedown here. He's shot in and has managed to get it, finishing up in Scarletwound's half guard.
Scarletwound wants to get back to full guard.

Darwin seems to be looking for submissions.
Darwin prevents Scarletwound from improving his position.
Scarletwound really doesn't want to stay on the ground with Darwin. If he can't get it back to his feet, it's only a matter of time before he'll be tapping out.

That's one minute gone in the round.
Darwin seems to be working for a kimura but Scarletwound defends the submission attempt.
The fighters are pressed up against the cage, both looking to find a bit of space to work.
Scarletwound is defending against the submission attempts here by Darwin.
Darwin is working for a submission of some sort.
Scarletwound is controlling Darwin's trapped leg to prevent Darwin from advancing to side control.
Darwin thows a huge punch but Scarletwound dodges it nicely.

That's two minutes gone in the round.
The crowd are starting to boo a lack of action.
Darwin not landing any meaningful shots this time.
Darwin has been looking to land a fair amount of strikes on the ground. He might be looking to soften his opponent up in order to work for a submission.
Darwin is working for submissions here but there's nothing on.
Darwin is trying for a guillotine from the top but the pressure isn't in the right place so Scarletwound is just riding it out for now. Darwin eventually gives up the hold.
Darwin not landing any meaningful shots this time.
Darwin is working for submissions here but there's nothing on.
Darwin is sneakily working for an arm triangle but Scarletwound sees it coming and defends easily.
Darwin throwing shots but they're hitting the canvas more than the man.
Scarletwound wants to get back to full guard.
Darwin slips a nice elbow through Scarletwound's hands, connecting with Scarletwound's forehead.

That's three minutes gone in the round.
The fighters are battling for position here. Scarletwound manages to regain full guard. Nice work.
Darwin is fighting to break Scarletwound's control of his arms but Scarletwound is doing a good job of controlling the position at the moment.
Darwin connects with a couple of short punches.
Darwin trying to control but Scarletwound is working from the bottom.
The ref warns both fighters not to hold the cage as they work up against the meshing.
Scarletwound has control of Darwin's left arm, preventing Darwin from doing any damage.
Darwin cracks Scarletwound with a solid left hand.
Darwin with a flurry of punches that miss.
Scarletwound is pulling down on Darwin's head. It's preventing any offense from Darwin, at least for the moment.
Scarletwound looking to control.

That's four minutes gone in the round.
Darwin wants to control from the top but Scarletwound keeps moving.
Darwin cracks Scarletwound with a solid left hand.
Scarletwound trying to control the position.
Darwin pushes down on Scarletwound's leg and manages to get into half guard.
Scarletwound avoiding damage under a succession of punches from Darwin.
Darwin throwing shots but they're hitting the canvas more than the man.
Scarletwound is defending against the submission attempts here by Darwin.
Scarletwound is looking to control Darwin's leg but it's slowly edging free. Can Scarletwound avoid being mounted?
And that is the end of the round. The fighters go back to their corners.
A close round but Winter Scarletwound will probably get the nod.
The cut man is working on James Darwin's cut.
That's the end of the round. The referee orders the cornermen out of the cage so we can get back down to business.

Scarletwound lands the left hand.
Scarletwound scores with a sloppy punch to the body. Not much technique there but it did the business.
Scarletwound misses with a half-hearted attempt at a head kick.
Darwin feinted with a counter takedown.
Scarletwound throws a sloppy head kick
and Darwin counters with a nice double leg into half guard.
Scarletwound kicks Darwin off and gets back to his feet.
Scarletwound throws a jab, cross combination which is slipped
letting Darwin counter with a right hand.
This is a great period of action - very entertaining stuff!
Darwin slips under a jab from Scarletwound.
Darwin is trying to close the distance and clinch up, after that failed offence from Scarletwound.
Scarletwound lunges in with an uppercut that skims his opponent's chin.
Scarletwound swings wildly with a hook that is half blocked by Darwin.
Darwin looks to have improved his striking defense since last time we saw him fight.
The fighters circle momentarily. Scarletwound darts into range and connects with a nice straight punch.
Scarletwound dips down and scores with a jab to the body.
Scarletwound throws a hook to the body but it doesn't connect.
Darwin looks for a takedown here. Will he get it? Scarletwound is fending him off so far but Darwin persists. Nope, Scarletwound circles away and we're back to standing.
Scarletwound lands a head shot.
That's one minute gone in the round.
Scarletwound throws a couple of head shots and lands with the final one - a decent hook, which struck Darwin on the side of the head.
Darwin avoids the head kick by Scarletwound.
Darwin takes a shot to the eye socket. That's gotta hurt.
Jab, jab by Scarletwound - just one landing.
Scarletwound misses with an uppercut. Darwin saw that one coming.
Scarletwound looks to land a right hand but Darwin moved out of range.
Darwin appears to be looking for a counter takedown.
Darwin fails with a takedown attempt.
Darwin throws a looping left and ducks down for a takedown. He's got his arms around Scarletwound's waist but Scarletwound gets an underhook and avoids the takedown by throwing Darwin off to one side.
That's three failed takedown attempts in the round for James Darwin. That's going to take a lot out of him.
Scarletwound lands a jab to the nose.
James Darwin is looking to throw some combinations by the looks of things.
Scarletwound throws the left hand but Darwin avoids the punch easily.
Darwin wants to take advantage of his opponent's missed offense by moving into the clinch.
A jab from Scarletwound misses.
Darwin was looking to counter that move with a punch but didn't quite pull the trigger.
That's two minutes gone in the round.
Darwin shoots for a double leg takedown but Scarletwound sprawls well. He's pushed Darwin's face into the mat and manages to get back to his feet relatively easily.
A head kick misses from Scarletwound.
A punch combination from Scarletwound misses.
Winter Scarletwound seems to be getting the better of the standup.
Darwin walks straight into an uppercut. Luckily it didn't land flush.
Scarletwound might want to mix his strikes up a bit more. He's just going for head shots at the moment and that can become a bit predictable.
Fantastic stuff here - a very entertaining period of action, which has drawn cheers from the crowd.
Darwin changes levels and looks for a double leg takedown. Scarletwound tries to avoid it but Darwin manages to keep hold of a leg and drag Scarletwound to the ground. Scarletwound escapes though and pops straight back up to his feet.
Darwin staying out of range there.
Scarletwound dips down and scores with a jab to the body.
Darwin takes a solid shot to the body. That one hurt him but he's trying not to show it.
Scarletwound fakes a head punch and goes low to the body. Nicely done.
Winter Scarletwound is looking to keep the fight on the feet at all costs.
Scarletwound scores with a hook.

Darwin is rocked!
Darwin avoids a punch combination nicely.
Scarletwound throws a hook but Darwin blocks it.
That's three minutes gone in the round.
Darwin lunges in with swinging rights and lefts but Scarletwound circles away quickly and effectively.
Scarletwound scores with a jab to the jaw of his opponent.
Darwin dodges the punch combination from Scarletwound.
Darwin is looking for a counter combo.
Darwin walks into a jab.
Scarletwound throws a nice head kick!
Oh Darwin is still all over the place! His legs are completely gone! Will he be able to recover?!!
Scarletwound throws a nice looking combination but Darwin bobs and weaves to avoid any damage.
Darwin takes one to the chin there.
Darwin keeping a good distance there, avoiding the body shot.
Scarletwound jabs. That one connects to the head of his opponent.
Darwin closes the distance and scores a nice trip takedown into half guard. Scarletwound did well to prevent Darwin getting side control.
Scarletwound has managed to escape just enough to sneak back to his feet but Darwin is on him like a limpet, forcing Scarletwound back against the cage.
That's four minutes gone in the round.
Fantastic stuff here - a very entertaining period of action, which has drawn cheers from the crowd.
Scarletwound stalling the fight.
Darwin seems to have got his legs back now.
Darwin has a body lock and is looking for a takedown. Scarletwound is bouncing around trying to prevent the takedown and somehow he has indeed managed to stay on his feet.
Scarletwound trying to control the position but instead, Darwin has worked for underhooks and has pushed Scarletwound into the cage.

Scarletwound escapes the clinch and we're back to striking.
A telegraphed right hand from Scarletwound misses the target.
Scarletwound has been working his punching technique in the buildup to the fight and it appears to be paying off.
Scarletwound lands a high kick!
Darwin steps to the side to avoid the strikes from Scarletwound.
Darwin tries to counter with a takedown but Scarletwound is quick to defend against it.
Scarletwound misses with a wild body shot.
Darwin feinted with a counter takedown.
The crowd applaud the fighters' efforts here as the round comes to an end.
No luck with that takedown attempt from Darwin.
Scarletwound throws the left hand but Darwin avoids the punch easily.
Darwin closes this distance looking for a takedown but Scarletwound circles away.
Scarletwound looks like he wants to counter punch here.
And that is the end of the round. The fighters go back to their corners.
Winter Scarletwound showed his class in that round. I'd imagine he'll take it on all the scorecards.
The cut man is working on James Darwin's cut.
OK. That's time! The bell goes and we're back to the action. Ladies and gentlemen, this is the final round!

Scarletwound throws a body punch but Darwin moves out of range.
Darwin fails in his attempt to clinch.
Scarletwound has been the more effective fighter overall so far.
Scarletwound missing with a left hand there. Darwin was out of range so wasted energy throwing that one.
Darwin takes a solid shot to the body. That one hurt him but he's trying not to show it.
Darwin shoots in for a takedown and gets it.
Scarletwound pushes Darwin off and gets back to his feet.
Darwin takes one to the chin there.
Darwin looks like he's developed a pretty tasty lump over his left eye. He'll need to avoid taking much more damage to that.
This has been an exciting period of action!
Scarletwound throws a right and a left that both miss.
Darwin takes a really solid shot there but just smiles back and shrugs his shoulders.
Darwin ducks under a wild hook from Scarletwound.
Scarletwound looks to throw the jab but Darwin is out of range.
Scarletwound fails to land with a series of punches.
That's one minute gone in the round.
Darwin has a takedown stuffed.
Scarletwound misses with a wild body shot.
Darwin takes one on the chin but keeps coming.
A slow jab from Scarletwound misses its intended target.
Winter Scarletwound seems to be the more aggressive standup fighter in this bout.
Scarletwound digs a good body shot into Darwin's ribs.
Darwin showing good head movement there, avoiding the strikes from Scarletwound.

Darwin has managed to clinch.
Darwin tries for a takedown. No joy.
Scarletwound is defending well against a takedown attempt.
That's three failed takedown attempts in the round for James Darwin. That's going to take a lot out of him.
Darwin is working for a takedown up against the cage. He can't get it on this occasion though.
That's two minutes gone in the round.
Scarletwound's corner calls for him to break the clinch, which he does.
Scarletwound throws a head kick but Darwin moves out of range.
Darwin takes one to the side of the head.
Scarletwound works Darwin's body with a nice hook.
Scarletwound cracks a nice hook into Darwin's ribs.
Fantastic stuff here - a very entertaining period of action, which has drawn cheers from the crowd.
Scarletwound scores with a nice looking left hook and follows it up with an uppercut!
Scarletwound lands a head shot.
A cross from Scarletwound lands.
Darwin tries to clinch up but Scarletwound circles away and keeps his distance.
Scarletwound looks to throw the jab but Darwin is out of range.
Scarletwound throws a body punch but Darwin moves out of range.
Jab, jab by Scarletwound - just one landing.
Scarletwound has used his reach advantage pretty well so far tonight.
Scarletwound throws a hook but Darwin blocks it.
That's three minutes gone in the round.
Darwin gets cracked there but stands up to it.
Scarletwound swings and misses with a hook to the body.
Scarletwound defends well against a solid takedown attempt from Darwin.
Scarletwound lands a powerful looking uppercut that connected with his opponent's jaw.
Scarletwound stooping low to avoid any incoming strikes and then lunges in with an uppercut come cross that lands flush.

Scarletwound cracks Darwin with a big right hand that sends him to the floor! Darwin looks wobbly but he's sprung back up to his feet straight away
can Scarletwound finish him?
This is a great period of action - very entertaining stuff!
Darwin feints and then dives in with a takedown. That was a long way out but the feint bought him enough time to close the distance and complete the takedown. Now we'll play guard for a bit and see who can get the better of that position.
Scarletwound is wriggling around but Darwin manages to pass to half guard.

James Darwin overall seems to be getting the better of the ground position in the fight so far.
Darwin is trying to work for a kimura but Scarletwound is defending well.
Both fighters are breathing heavily.
Scarletwound is looking to control Darwin's leg but it's slowly edging free. Can Scarletwound avoid being mounted?
That's four minutes gone in the round.
Darwin scoring with strikes to the body and head.
Scarletwound blocking the ground and pound attempt from Darwin.
Scarletwound holds on for dear life, maintaining half guard for now.
Scarletwound won't allow Darwin to pass to mount.
Scarletwound is trying to maintain the position but Darwin is very close to passing his half guard.
Scarletwound keeping his head moving to avoid the ground and pound.
Darwin is working for submissions here but there's nothing on.
Darwin is working hard to pass the guard. He's done it - he's now in full mount! Trouble for Scarletwound!
James Darwin has stepped it up - he knows he needs a finish here!
Winter Scarletwound is fighting for a decision - hopefully he's judged it right and he's actually winning the fight.
Darwin looking to finish with strikes here!
And that's the end of the fight!
Winter Scarletwound comfortably won the final round on my scorecard.
I've got Scarletwound winning every round here. Surely the decision will go his way and he'll pick up a well deserved decision victory. Over to the ring announcer for the scorecards.
Ladies and gentlemen, after 3 rounds of action, we go to the scorecards for a decision.
Judge Tatsuya Matsuyama scores the fight 28:30
Judge Taro Takaoka scores the fight 27:30
Judge Yasuomi Hirokawa scores the fight 27:30
In favor of your winner, by unanimous decision... Winter Scarletwound!
In defeat, James Darwin stepped up to the mic, saying 'totally unexpected...'.
|
|
|
|
|
|
|
|
|
|
|
|
|
|
|
|
|
|
|
|
|
|
|
| S |
C
A |
G |
S |
C
B |
G |
|
S |
C |
G |
|
energy
A | B |
|
hype
A | B |
|
pop
A | B |
|
mgr
A | B |
|
FIGHT
RATING
67% |
|
|
|
|
|
|
