|
|
PBP Commentary |
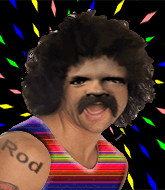
Coming up we have a bantamweight MMA rules bout between Frenk Casteel (ranked 514 p4p, 360 weight class) and Rod Stiffington Iv (ranked 50 p4p, 36 weight class). Stiffington Iv has chosen The Bee Gee’s as his entrance music. Frenk Casteel has a significant reach advantage - let's see if he can make it count.
 |
|
 |
| 178 cm
29
145
11 - 3 - 0 |
|
150 cm
22
138
8 - 1 - 0 |
Great wrestler
Excellent boxer
Cardio machine |
|
Olympic wrestler
Decent boxing
Good gas tank |
|
| |
|
Ladies and gentlemen. This fight is 3 rounds, in the bantamweight division.
Introducing the fighter to my left, fighting out of the red corner.
With a record of 11 - 3 - 0, fighting out of London, Frenk Casteel!
And introducing the fighter to my right, fighting out of the blue corner.
With a record of 8 - 1 - 0, fighting out of Las Vegas, Rod Stiffington Iv!
The judges for this bout are Colin Fotheringham, William Gold and James Ackerman.

The bell rings for round one and we are underway!
Stiffington Iv throws an uppercut from half a mile away. Casteel sees it coming and avoids it easily.
Casteel looks to land a right hand but Stiffington Iv moved out of range.
Casteel lands with a nice body punch.
Stiffington Iv ducks under a wild hook from Casteel.
Stiffington Iv slips a straight right by Casteel.
Stiffington Iv ducks under an overhand right and circles away with a smile on his face.
Stiffington Iv tries a counter takedown but it's more of a dummy move, and he uses it to push himself away.
We've had a slow start to the round here - hopefully the action picks up.
Casteel throws an ugly left hook that misses

and Stiffington Iv counters with a nice double leg into side control. Casteel won't be happy with that.
Stiffington Iv misses with the ground and pound.

Casteel throws Stiffington Iv to one side and escapes!
Wooooo! Give it up for these two warriors! They are putting on a show!
Casteel tries to land with a swinging hook to the body but Stiffington Iv was well out of range. Poor timing from Casteel.

That's one minute gone in the round.
Casteel scores with a nice strike.
We've been told by Casteel's head coaches at WillyQuay MMA that he's been working on his takedown defense in preparation for this fight.
Casteel fakes and then throws a beautiful body shot. Stiffington Iv looks a bit winded and takes a step backwards to take a breath.
Stiffington Iv closes the distance and scores a nice trip takedown into half guard. Casteel did well to prevent Stiffington Iv getting side control.
Casteel makes some distance and scrambles quickly back to his feet. Nice work!
Casteel misses with a straight left.
Stiffington Iv closes the distance and clinches up with Casteel, looking for a takedown. Stiffington Iv pushes Casteel against the cage but Casteel circles to the side and manages to break the clinch.
Fantastic stuff here - a very entertaining period of action, which has drawn cheers from the crowd.
Stiffington Iv dodges the punch combination from Casteel.
Casteel throws out a token jab with nothing on it.
Stiffington Iv has done a lot of speed work in the buildup to this fight.

That's two minutes gone in the round.
Casteel swings and misses with a hook to the body.
A swing and a miss from Casteel.
Frenk Casteel is looking to keep the fight on the feet at all costs.
Casteel misses with a double jab
and Stiffington Iv counters with a straight right hand.
Casteel drops his hands and takes a jab to the jaw for his troubles.
Casteel throws an off balance right hand
and Stiffington Iv counters with a takedown into side control! That could mean trouble for Casteel!

Stiffington Iv tries for a kimura. Not really close to a finish though.
Casteel is trying to stand back up. He's worked his way up against the cage but Stiffington Iv has just dragged him back down to the mat.
Casteel knows he needs to get back to his feet asap. He's simply no match for Stiffington Iv on the ground.

That's three minutes gone in the round.
Stiffington Iv trying to control the action but Casteel is working from the bottom.
Stiffington Iv has the superior BJJ but he's also working some ground strikes into his gameplan.
Stiffington Iv advances to full mount.
Casteel wants to get back to his feet.
Stiffington Iv has control of Casteel's right arm, working for a kimura. It's a bit of a token attempt though and Casteel regains control of the situation pretty easily.
Stiffington Iv has hold of Casteel's left arm, perhaps looking for a submission. The two fighters tussle over control of the isolated limb and Casteel manages to get his arm back to his side and away from danger.
You get the feeling that Casteel really doesn't like being in this position too much.
The fighters are pressed up against the cage, both looking to find a bit of space to work.

That's four minutes gone in the round.
Stiffington Iv throwing shots from mount but they're not landing.
Casteel is trying to get to the cage to help him get back to his feet.
Casteel defends a decent attempt at a guillotine from Stiffington Iv.
Casteel is trying to get to the cage to help him get back to his feet.
Casteel trying desperately to get back to his feet here but he's not having any joy at all. He's going to tire himself out if he's not careful.
Stiffington Iv working for a submission but Casteel is keeping him at bay.
Casteel tries to buck Stiffington Iv off but he can't manage it.
Stiffington Iv with some aggressive grappling here. He's looking for submissions here, rather than waiting for the opportunity to counter.
Stiffington Iv with good strikes from the mount here!
Wooooo! Give it up for these two warriors! They are putting on a show!
Casteel is trying to get back to his feet but can't.
And that is the end of the round. The fighters go back to their corners.
A close round but Rod Stiffington Iv will probably get the nod.
The fighters get back to their feet, the hooter sounds and we're back to the action!

Casteel throws a jab but it's blocked by Stiffington Iv.
Casteel throws a left and a right that both miss
so Stiffington Iv counters with a double leg into guard. Good agility.
Casteel is trying to stand up but he's not managed so far.
Casteel keeping moving, preventing Stiffington Iv from controlling successfully.
Stiffington Iv advances position into side control!
Casteel on his back here. We all know that wrestlers don't like being on their back so let's see if Casteel tries to get out of the position.
Stiffington Iv working hard here to secure a kimura but he's not really in the right position for it.
Casteel is trying to escape and get back to his feet.
We've had a slow start to the round here - hopefully the action picks up.
That's one minute gone in the round.
Stiffington Iv is looking for a kimura. He might have it! No, Casteel has escaped the position, nice work there.
Stiffington Iv looking for an arm triangle but it's way too loose to do anything.
Stiffington Iv working hard here to secure a kimura but he's not really in the right position for it.
Casteel is trying to stand back up. He's worked his way up against the cage but Stiffington Iv has just dragged him back down to the mat.
Stiffington Iv wants to lay and pray for a moment but Casteel keeps working.
Casteel tries to get back to his feet but has found himself mounted instead. Damn, that's gotta suck.
Casteel is trying to escape but when you're mounted that's not too easy.
That's two minutes gone in the round.
Casteel bucks Stiffington Iv off and manages to get back to his feet!
Stiffington Iv on the wrong end of a vicious looking body shot.
Casteel misses with a looping left.
Casteel throws a shot to the body.
Casteel connects with a nice looking jab.
The crowd are loving this. Great action here.
A big right from Casteel misses.
Casteel misses with a hook. Stiffington Iv ducked under it nicely.
Stiffington Iv is trying to avoid his opponent's strikes and get into the clinch.
That's three minutes gone in the round.
Stiffington Iv looks shocked there as he takes a right hand to the temple.
Stiffington Iv uses good footwork to get in and out and land a nice right hand before Casteel has time to react.
Casteel throws a body punch but Stiffington Iv moves out of range.
Jab by Stiffington Iv.
Casteel uses decent footwork to sidestep a right hand from Stiffington Iv.
Casteel throws a right hand that Stiffington Iv ducks under and follows up with a left that Stiffington Iv also avoids with ease.
Stiffington Iv closes the distance and clinches up, looking for a takedown. He shifts his weight and gets a nice trip into half guard.
Casteel is staying active underneath Stiffington Iv, who seems content to just control the action from this position.
That's four minutes gone in the round.
Casteel is trying to stand up here but Stiffington Iv is controlling him well.
Stiffington Iv looking to pass the half guard. Not this time.
Stiffington Iv is working for a kimura but Casteel is defending it quite comfortably.
Casteel is trying to stand up here but Stiffington Iv is controlling him well.
The ref warns both fighters not to hold the cage as they work up against the meshing.
Stiffington Iv frees up his trapped foot and advances to mount.
Wooooo! Give it up for these two warriors! They are putting on a show!
Stiffington Iv tries to control but Casteel wriggling away.
You get the feeling that Casteel really doesn't like being in this position too much.
Stiffington Iv is in full mount, looking to secure a guillotine but Casteel is surviving well by controlling Stiffington Iv's body position as best he can.
Casteel's corner are shouting for him to stand up but that's bad cornering - how is he meant to stand up when he's mounted? He should be looking to improve his position on the ground before trying to stand back up.
And that is the end of the round. The fighters go back to their corners.
Rod Stiffington Iv showed his class in that round. I'd imagine he'll take it on all the scorecards.
The minute break is over - no more time for sponges and pep talks - back to the action! Ladies and gentlemen, this is the final round!

Stiffington Iv shoots in looking for a takedown. Casteel tries to sprawl out of it but Stiffington Iv keeps driving through. The fighters are pinned against the cage. Casteel manages to get underhooks and after a bit of a struggle, circles away and we're back to standing.
Casteel swings and misses with a hook to the body.
Casteel throws a shot from downtown. Stiffington Iv moves away and avoids it.
Casteel tries to land with a swinging hook to the body but Stiffington Iv was well out of range. Poor timing from Casteel.
Stiffington Iv is definitely looking for the counter takedowns here.
We've had a slow start to the round here - hopefully the action picks up.
A looping hook to the body misses from Casteel. Stiffington Iv does a little dance to reset his feet.
Stiffington Iv misses with a body shot. Nice footwork from Casteel.
That's one minute gone in the round.
Casteel swings wildly with a right hand that was never going to find it's target.
Stiffington Iv drops down looking to force a counter takedown but Casteel defends it well.
Stiffington Iv lands with a shot to the body.
Casteel avoids a lazy jab quite easily.
Casteel with a body punch. A glancing blow.
Frenk Casteel seems to be the more aggressive standup fighter in this bout.
Casteel misses with a body shot. Nice footwork from Stiffington Iv.
Stiffington Iv keeping his hands up high there, blocking the jab from Casteel.
Casteel lands with a hook. Stiffington Iv tried to avoid it but it clipped the top of his head.
Casteel throws a body shot but no joy.
That's two minutes gone in the round.
Casteel throws a hook to the body but it doesn't connect.
Stiffington Iv gets cracked there but stands up to it.

It looks like Rod Stiffington Iv has been cut.
Casteel throws the left hand but Stiffington Iv avoids the punch easily.
Stiffington Iv scores with the left hand. Casteel knows he should have avoided that one.
Frenk Casteel is winning the standup battle so far.
Casteel keeping a good distance there, avoiding the body shot.
Stiffington Iv fails in his attempt to clinch.
Casteel tries to counter by clinching up but Stiffington Iv breaks away and moves out of range.
Stiffington Iv misses with a wild body shot.
Stiffington Iv slips under a jab.
And Stiffington Iv tries to counter it with a takedown but Casteel pushes his down on his head and steps out.
Rod Stiffington Iv is fighting for a decision - hopefully he's judged it right and he's actually winning the fight.
That's three minutes gone in the round.
Casteel paws at his opponent with the jab and then lunges in with a straight, right on the button.
This fight brought to you by 5M nutrition - it's mmmmm tasty. Nice jab by Stiffington Iv.
Casteel throws a jab when Stiffington Iv was well out of range.
Stiffington Iv shakes his hands off, looking to compose himself, but takes a jab to the jaw whilst he does it.

Stiffington Iv is rocked!
Stiffington Iv tries to close the distance and clinch but Casteel swats him to one side with an open hand palm strike and circles away.
Casteel is looking to counter the offense by Stiffington Iv and move into the clinch.
Stiffington Iv is still on wobbly legs! Can Casteel finish him?
Casteel drops Stiffington Iv with a straight left! Oh this is bad for Stiffington Iv! Casteel dives in and starts dropping bombs - the referee has no choice but to step in and save him!
Ladies and gentlemen, after 3:44 of round 3, we have a winner by way of TKO (Strikes). Frenk Casteel!
Frenk Casteel decided to thank the fans in attendance for making a great atmosphere. It seemed to go down pretty well.
|
|
|
|
|
|
|
|
|
|
|
|
|
|
|
|
|
|
|
|
|
|
|
| S |
C
A |
G |
S |
C
B |
G |
|
S |
C |
G |
|
energy
A | B |
|
hype
A | B |
|
pop
A | B |
|
mgr
A | B |
|
FIGHT
RATING
58% |
|
|
|
|
|
|
