|
|
TWGC 45 (265lbs, D4): New York Qualifier - Round 1 PBP Commentary |
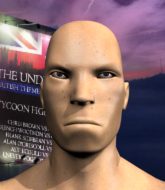
This TWGC bout is 1 fifteen minute round in the heavyweight division. Introducing today's competitors. In the red corner, competing out of London, with a TWGC record of 0 wins and 0 losses; Bilgo Babbins! And in the blue corner, fighting out of New York, with a TWGC record of 1 wins and 1 losses; Jack Dynamo!
The judges for this bout are Russell Pearce, Lou da Vinci and Alyssa Summers.
The official calls the fighters to the middle and the contest is under way.

Dynamo rushes Babbins and pushes him back against the cage in a clinch.
Dynamo gets double underhooks to prevent a takedown attempt from Babbins.
Dynamo goes for a takedown in the clinch but Babbins prevents it.

Dynamo pulls guard effortlessly.
Babbins controlling from the top position.
Dynamo is trying to control the position but Babbins postures up.
We've had a slow start to the round here - hopefully the action picks up.

Dynamo escapes his hips to the side and looks to be working for an armbar. Babbins gives him a little smile and shakes his head. No chance.
Babbins won't allow Dynamo to sweep him here.

That's one minute gone in the round.
Babbins looking to pass the guard.
Dynamo has his foot on Babbins's thigh. He's trying to push off and get in position for a triangle, I think. Babbins works his way back into a safe position though.
There's a bit of a scramble here and now Dynamo is on top in guard.
Score +2 for sweep to guard / half guard: Babbins (0) vs (2) Dynamo
Dynamo wants to control from the top but Babbins keeps moving.
Dynamo pressing down on his opponent's thigh, looking to pass guard. Babbins is keeping the position for now.
Dynamo seems content to control from guard here. He's going to have to remain active though if he doesn't want to get stood back up.
The fighters are pressed up against the cage, both looking to find a bit of space to work.

That's two minutes gone in the round.
Babbins looking to sweep here. No luck so far.
Babbins keeping full guard, as Dynamo tries to pass.
Dynamo is still trying to improve position.
Dynamo trying to control the position from guard on top but Babbins is wriggling around, looking for whatever he can.
Dynamo works a leg free and moves into half guard.

That's three minutes gone in the round.
Babbins is looking to regain full guard. Not this time though.
Dynamo wants to work for an arm triangle but Babbins is really keeping half guard well and defending the submission attempt.
Dynamo trying to control from half guard but Babbins is working away.
Babbins knows he needs to get back to his feet asap. He's simply no match for Dynamo on the ground.
Babbins has no desire to be mounted, so is trying to control. Dynamo is working away from the top position though.
Babbins tries to roll over but Dynamo keeps him under control.
Babbins is working hard here to advance position.

That's four minutes gone in the round.
Dynamo wants to lay and pray for a moment but Babbins keeps working.
The fighters are starting to perspire pretty heavily.
Babbins wants to sweep but Dynamo has passed to side control! Score +3 for passing guard: Babbins (0) vs (5) Dynamo
Babbins is trying to control Dynamo's posture but Dynamo avoids it.
Babbins is trying to improve his position.
A lull in the action here.
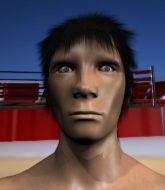
Babbins could do with losing a few pounds - he looks very soft around the mid section, to put it politely.

That's five minutes gone in the round.
Babbins tries to get back to half guard but can't.
Dynamo happy to just control the position for now.
Babbins is looking for a sweep.
Babbins is trying to control Dynamo's posture but Dynamo avoids it.
Dynamo tries for an arm triangle. That looks pretty tight to me. Is this one over!?! Possibly, maybe, no Dynamo has let go of the choke. Obviously it wasn't as tight as we thought!

That's six minutes gone in the round.
Dynamo is looking to finish here, going for an Americana. Babbins knows the correct defense though, so he's OK.
Babbins is positioning himself to get back to half guard.
Dynamo trying to control the action but Babbins is working from the bottom.
Dynamo tries for a kimura. Not really close to a finish though.

That's seven minutes gone in the round.
Dynamo controlling from side mount.
You can see the frustration on Babbins's face, being in this tough position on the bottom.
Dynamo tries for an arm triangle. That looks pretty tight to me. Is this one over!?! Possibly, maybe, no Dynamo has let go of the choke. Obviously it wasn't as tight as we thought!
Babbins definitely looks more muscular than last time we saw him fight.

That's eight minutes gone in the round.
Babbins is trying to control Dynamo's posture but Dynamo avoids it.
Dynamo slows the pace down.
Babbins tries to buck Dynamo off but Dynamo is having none of it.
Babbins is letting Dynamo control him for a moment.
Dynamo trying to control the position but Babbins is working away.
Babbins manages to get one leg in to regain half guard.

That's nine minutes gone in the round.
Babbins keeping control of the leg, stopping his opponent passing to mount.
Dynamo controlling the action here.
Babbins tries to roll over but Dynamo keeps him under control.
Dynamo is pressing down on Babbins's thigh, looking to free his foot. Babbins is holding on for now.

That's ten minutes gone in the round.
Dynamo is taking a breather. Babbins says something to him but it's hard to make out. Perhaps he's telling him to get on with it and actually do something.
Babbins gets full guard.
Babbins is trying to hold Dynamo in close to prevent damage but Dynamo has managed to pass into half guard.
Babbins trying to keep hold of his opponent's head but Dynamo manages to pass to mount!
Score +3 for passing guard: Babbins (0) vs (8) Dynamo
Dynamo is working on an americana here. Ooh, that looks pretty nasty! Nope, Babbins has managed to escape the submission attempt.
Dynamo tries to control but Babbins wriggling away.

That's eleven minutes gone in the round.
Dynamo with some aggressive grappling here. He's looking for submissions here, rather than waiting for the opportunity to counter.
The ref warns both fighters not to hold the cage as they work up against the meshing.
Dynamo trying to control but he's not successful this time.

That's twelve minutes gone in the round.
Dynamo controlling from mount.
Dynamo trying to control but he's not successful this time.
Babbins is controlling an arm, preventing Dynamo from taking his back. Although keeping him in mount is no better to be honest.
Babbins wants to hold on but Dynamo pushes him away.

That's thirteen minutes gone in the round.
Dynamo looking to control and managing it successfully.
Dynamo moves to back control. Score +3 for taking back: Babbins (0) vs (11) Dynamo
Babbins tries to break free.
Dynamo looking for the choke but no joy.
Dynamo is working hard for the rear naked choke here.

That's fourteen minutes gone in the round.
Dynamo keeps control of the position as Babbins tries to break free.
Dynamo looking to break Babbins's wrist control so he can sink in the choke. Babbins remaining controlled and patient though - he really has to keep calm otherwise Dynamo will wrap this one up with the rear naked choke!
Babbins is trying to break free.
Boooooooooooooooooooo!!! God, this has been a terrible round. Come on you two, sort yourselves out!
And that's the end of the fight!
Dynamo wins on points by 11 to 0.
In his post fight interview, Jack Dynamo started talking himself up. Luckily his charisma kept the crowd on side and gave him a good reception. |
|
|
|
|
|