|
|
PBP Commentary |
Coming up we have a welterweight MMA rules bout between Trystan Bradford (ranked 4873 p4p, 26071 weight class) and Ryuhei Sawamura (ranked 0 p4p, 0 weight class). Rumors backstage are that the fighters have been paid to keep it standing but we know that would never happen in MMA!
 |
|
 |
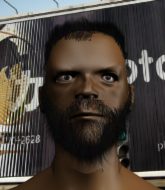
| 190 cm
19
171
0 - 3 - 0 |
|
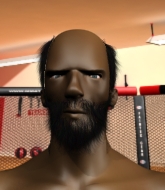
172 cm
24
170
0 - 4 - 0 |
BJJ White Belt
Excellent MT
KO power |
|
BJJ Blue Belt
Excellent MT
Determined |
|
| |
|
Ladies and gentlemen. This fight is 3 rounds, in the welterweight division.
Introducing the fighter to my left, fighting out of the red corner.
With a record of 0 - 3 - 0, fighting out of Sydney, Trystan Bradford!
And introducing the fighter to my right, fighting out of the blue corner.
With a record of 0 - 4 - 0, fighting out of Tokyo, Ryuhei Sawamura!
The judges for this bout are Ben Hemmingworth, Donatello Bradman and Francis DeMontford.

The bell rings for round one and we are underway!
A head kick misses from Sawamura.

Sawamura shoots in for a takedown and gets it. Let's see what he's got on the mat.
We could do with one of the fighters taking the initiative a bit more on the ground - they're both waiting to capitalize on a mistake.

Sawamura decides to stand up and beckons his opponent to follow.
Bradford just misses with a punch to the body.
Sawamura with a nice looking leg kick. You could hear that one land in a back row.

Sawamura drives through and clinches with Bradford against the cage.
Bradford is looking to control Sawamura's arms but Sawamura gets an underhook and turns him. Now Bradford has his back to the cage.
Sawamura prevents a takedown attempt there.

Sawamura breaks the clinch.
We've had a slow start to the round here - hopefully the action picks up.
Sawamura closes the distance and clinches.
Bradford changes levels and goes for a takedown here. Sawamura fights it off and pushes away nicely.
Sawamura misses with a jab, cross combination.
Sawamura takes the fight into the clinch.
Fantastic stuff here - a very entertaining period of action, which has drawn cheers from the crowd.
Sawamura throws an elbow but it's blocked.

That's one minute gone in the round.
Sawamura misses with a hook to the ribs.
Sawamura gets control of Bradford's arms and successfully pulls guard. Sawamura will no doubt be looking for submissions off his back.
Bradford will need to keep those long limbs tucked in whilst he's on the ground, to prevent any submissions.

Sawamura throwing his legs up looking for a triangle.

Sawamura pushes Bradford off and scrambles back to his feet.
Bradford shoots in but Sawamura avoids the takedown attempt easily.
That's three failed takedown attempts in the round for Trystan Bradford. That's going to take a lot out of him.
A head kick misses from Sawamura.
Sawamura throws a body kick, spinning off balance

and Bradford counters with a shoot takedown. Sawamura fights it but they end up in guard.

Sawamura wriggles free and stands up.

That's two minutes gone in the round.
This is a great period of action - very entertaining stuff!
Bradford fails with a takedown attempt.
Bradford avoids a punch combination nicely.
Bradford tries to clinch but Sawamura moves out of range.
Sawamura pulls out of a head kick attempt.
Sloppy strikes from Sawamura. Those never looked like landing.
Sawamura paws at his opponent with the jab and then lunges in with a straight, right on the button.

It looks like Trystan Bradford has been cut.
The fight moves into the clinch position.
Sawamura keeps the fight in the clinch, despite Bradford's efforts to push away.
Bradford tries to take the fight to the ground by pulling guard but can't manage it.

That's three minutes gone in the round.
Sawamura creates a bit of distance and throws an elbow that only just misses.
Sawamura throws an elbow but it misses.
Bradford trying to control the position but instead, Sawamura has worked for underhooks and has pushed Bradford into the cage.
Sawamura prevents Bradford from breaking the clinch.
Sawamura manages to break the clinch.
Bradford shoots in for a takedown. "I don't think so" says Sawamura as he avoids it easily.
Sawamura tries to score with an inside leg kick but telegraphs it and Bradford is able to avoid easily.
Bradford takes a head kick and keeps coming.
Sawamura pulls out of a head kick attempt.
As Sawamura tries to get set, Bradford tries to push him back and clinch up but Sawamura manages to avoid the attempt.
Bradford doesn't manage to clinch there - Sawamura circles away.
Sawamura darts in and clinches Bradford up against the cage.

That's four minutes gone in the round.
Bradford blocks an elbow strike.
Sawamura is pushing Bradford up against the cage, for a bit of lean and pray action. Action being used the in the loosest possible sense of the word.
Both guys are working to get underhooks.
Bradford can't break the clinch.
Sawamura keeps control of Bradford as he tries to wriggle out of the double underhooks.
Sawamura has managed to pull guard. Let's see whether he can work an aggressive guard. It will also be interesting to see what tactics Bradford uses from the top position.
Sawamura striking off his back but it's not causing Bradford any problems.
Sawamura is actively looking for submissions from his back. He's worked himself a little space on the bottom and seems to be going for a triangle. No, he's switched into an armbar! That was slick! Bradford rolls with it to try and escape but Sawamura cranks on the arm and Bradford is forced to tap out! This one is aaaaaaaaall over!
Ladies and gentlemen, after 4:55 of round 1, we have a winner by way of Submission (Armbar). Ryuhei Sawamura!
|
|
|
|
|
|
|
|
|
|
|
|
|
|
|
|
|
|
|
|
|
|
|
| S |
C
A |
G |
S |
C
B |
G |
|
S |
C |
G |
|
energy
A | B |
|
hype
A | B |
|
pop
A | B |
|
mgr
A | B |
|
FIGHT
RATING
47% |
|
|
|
|
|
|
