|
|
PBP Commentary |
Coming up we have a lightweight MMA rules bout between Kotetsu Yama (ranked 2796 p4p, 2742 weight class) and Lubomir Sultsina (ranked 314 p4p, 307 weight class). Lubomir Sultsina has the power to score a knockout today if he connects clean with Kotetsu Yama's chin.
 |
|
 |
| 168 cm
20
159
2 - 0 - 0 |
|
175 cm
23
166
3 - 2 - 0 |
Good takedowns
Basic striking
Big right hand |
|
BJJ Blue Belt
Decent boxing
Powerful |
|
| |
|
Ladies and gentlemen. This fight is 3 rounds, in the lightweight division.
Introducing the fighter to my left, fighting out of the red corner.
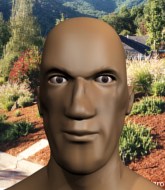
With a record of 2 - 0 - 0, fighting out of St Petersburg, Kotetsu Yama!
And introducing the fighter to my right, fighting out of the blue corner.
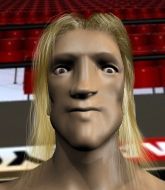
With a record of 3 - 2 - 0, fighting out of Amsterdam, Lubomir Sultsina!
The judges for this bout are Roosa Järviläinen, Arvi Lind and Tarja Halkonen.

The bell rings for round one and we are underway!
Yama takes a shot right to the liver - Bas would have been proud of that punch.
Sultsina keeping a good distance there, avoiding the body shot.
Sultsina misses with an uppercut.
Yama looks to have improved his striking defense since last time we saw him fight.
Yama cracks Sultsina with a right hand to the side of the head.
No joy there for Sultsina, who threw a few shots but didn't land.
Yama throws a body punch but Sultsina moves out of range.
Sultsina moves in looking to clinch but Yama pushes him off.
Sultsina doesn't manage to clinch there - Yama circles away.
Yama lunges at Sultsina with a hook that half lands and is half blocked by Sultsina's hand.
Sultsina tries a switch kick but it misses it's target.
Sultsina tries to clinch there but Yama circles away.
We've had a slow start to the round here - hopefully the action picks up.
A slapping leg kick lands for Sultsina.
Sultsina looks to throw the jab but Yama is out of range.
Yama keeps the fight on the outside.
Yama misses the shot to the body.
Sultsina misses with a series of wild punches.

That's one minute gone in the round.

Sultsina gets to the clinch - let's see what his plan is here.

Sultsina breaks the clinch.
Sultsina scores with the left hand. Yama knows he should have avoided that one.
Sultsina tries to clinch up but Yama circles away and keeps his distance.
Sultsina tries to clinch up but Yama circles away and keeps his distance.
Sultsina forces Yama back against the cage and clinches.
Yama lands punches inside but they're not really causing much damage.
Sultsina putting his Muay Thai to good use. He has Yama in a tight clinch and is doing some damage with knees to the body.
Sultsina stalling.
Yama stalling.
Yama wants to take the fight to the mat but Sultsina manages to get underhooks and keep the fight in the clinch.
Sultsina utilising his Muay Thai to score with a knee to the body.
Yama is breathing heavily.
Yama stalls.
A short right from Sultsina on the inside.

That's two minutes gone in the round.
A short left from Yama.
Wooooo! Give it up for these two warriors! They are putting on a show!
Sultsina breaks the clinch and we return to the middle of the mat.
Sultsina misses with a jab and misses with a cross straight after too.
Sultsina tries to clinch but is not successful on this occasion.
Yama tries for a takedown but Sultsina circles away easily
and Sultsina counters with a slapping leg kick.
Sultsina tries to clinch up but Yama circles away and keeps his distance.
Sultsina ducks right into an uppercut from Yama.
Yama avoids a punch combination nicely.
Sultsina moves into the clinch.
Sultsina tries to land a knee to the head but misses.
Sultsina breaks the clinch and we return to the middle of the mat.
Sultsina moves his head to the side to avoid a jab but walks straight into a cross.

That's three minutes gone in the round.
Sultsina pulls out of a head kick attempt.
Sultsina tries to score a power double leg takedown but Yama sees that one coming and sprawls well. That will dishearten Sultsina somewhat.
Sultsina lunges in with swinging rights and lefts but Yama circles away quickly and effectively.
Yama attempts a counter takedown but Sultsina avoids it well and moves away.
We've been informed that Sultsina has been working hard on his conditioning in the buildup to the fight.
Yama swings for the body but Sultsina moves out of range.
Sultsina tries to clinch up against the cage, rushing in to close the distance. Yama manages to break the clinch and circles back to the middle of the mat.
Sultsina throws a leg kick but Yama checks it.
Sultsina looks to land a right hand but Yama moved out of range.
Sultsina looking to land some kicks to the body here.
Sultsina fails in his attempt to clinch.
Sultsina tries to close the distance and clinch up but Yama swats him away and circles back towards the center.
Yama throws a hook to the body but it doesn't connect.

That's four minutes gone in the round.
Yama throws a hook to the body but it doesn't connect.
Yama ducks down and throws a hook to the body but Sultsina moves away.
Sultsina forces Yama back against the cage and clinches.
Yama has Sultsina pressed against the cage.
Yama tries to work over Sultsina's body with a swooping hook but it only glances the target.
Yama manages to get underhooks and slows down the pace for a moment.
Sultsina pushes off and circles away, back to the middle of the mat.
Sultsina slips under a jab.
Yama lands a nice shot to the body.
Sultsina lands a leg kick. The shin dug right into the meat of the thigh.
Yama shoots in for a double leg but Sultsina sprawls well. That's going to sap some energy.
That's three failed takedown attempts in the round for Kotetsu Yama. That's going to take a lot out of him.
Sultsina takes a body punch but keeps moving.
This has been an exciting period of action!
Yama lands with a straight right. Sultsina didn't see that one coming.
And that is the end of the round. The fighters go back to their corners.
Lubomir Sultsina dominated that round.
That's the end of the interval. I'm sure that seemed a lot quicker than a minute for our two fighters! Back to the action.

Sultsina throws a head kick but Yama moves out of range.
Sultsina tries to clinch up against the cage, rushing in to close the distance. Yama manages to break the clinch and circles back to the middle of the mat.
Sultsina scores with a sloppy right hand. Yama should have avoided that one.
Yama scores with the left hand. Sultsina knows he should have avoided that one.
Sultsina doesn't manage to clinch there - Yama circles away.
Yama moving in and out of range nicely, whilst landing the scoring shot.
Sultsina moves into the clinch.
Yama works on Sultsina's body with a couple of short punches.
Yama scores with a nice hook to the head.
Sultsina misses with an elbow strike.
Yama slowing the pace effectively.
We've had a slow start to the round here - hopefully the action picks up.
Sultsina is trying to slow down the pace of the fight but Yama is keeping busy.
Yama avoids a wild elbow strike from Sultsina.
Sultsina creates a bit of distance and throws an elbow that only just misses.
Sultsina is trying to stall.
Yama effectively controlling the action here.
That's one minute gone in the round.
Yama lands with a left to the head.
Yama misses with a body punch.
Sultsina tries to land a knee to the body but he is off balance and Yama avoids it.
Lubomir Sultsina seems to be working more effectively in the clinch in the fight so far.
Sultsina missing with knees to the body.
Sultsina throws a nice elbow but it doesn't land.
Yama lands a short shot on the inside that snaps the head of Sultsina backwards.
Yama works for underhooks and lands a body shot in the process.
Yama stalling.
Yama just leaning against Sultsina, taking a breather.

Yama lands a nice trip takedown into half guard.
Sultsina has hold of Yama's hands but Yama slips his arm to the side and lands an elbow.
Yama prevents Sultsina from standing back up.
Yama looks towards his corner to check for any instructions. The corner give him nothing to work with, so he cracks Sultsina with a short hammerfist. I guess that's as good as any advice he could get in this position.
Yama is figuring out what he wants to do next.
The fighters are starting to perspire pretty heavily.
Yama wants to lay and pray for a moment but Sultsina keeps working.
That's two minutes gone in the round.
Sultsina has hold of Yama's hands but Yama slips his arm to the side and lands an elbow.
The crowd are loving this. Great action here.
Sultsina avoiding damage under a succession of punches from Yama.
Yama is nestled in close to Sultsina, controlling him well. He's worked in a nice elbow to the side of the head as well, for good measure.
Yama looks to score some points with some ground and pound.
Yama working some ground and pound from close in. He's looking to maintain this position and strike for a while by the looks of things... although he'll probably advance to full mount in a minute now I've said that.
Sultsina is trying to stand up here but Yama is controlling him well.
Yama is controlling the pace.
Yama looks to score some points with some ground and pound.
Yama working some ground and pound from close in. He's looking to maintain this position and strike for a while by the looks of things... although he'll probably advance to full mount in a minute now I've said that.
Yama takes advantage of the dominant position to land a couple of big hammer fists.
That's three minutes gone in the round.
Sultsina is looking to control Yama's leg but it's slowly edging free. Can Sultsina avoid being mounted?
Yama landing with strikes to the body and head, softening up his opponent.
The ref warns both fighters not to hold the cage as they work up against the meshing.
Yama working Sultsina over with strikes.
Sultsina looks like he's trying to stand up.
Yama looking to pass the half guard. Not this time.
Sultsina is trying to defend against the ground and pound but Yama scores with a couple of nice shots.
Yama prevents Sultsina from standing back up.
Kotetsu Yama overall seems to be getting the better of the ground position in the fight so far.
Yama lands a big shot. The thud that echoes around the arena is like music to the fans' ears.
Yama seems very keen to just sit and control from half guard but Sultsina does not like that idea so much and is remaining active off his back.
Yama working some ground and pound from close in. He's looking to maintain this position and strike for a while by the looks of things... although he'll probably advance to full mount in a minute now I've said that.
Sultsina pushes Yama off looking to stand but Yama dives back in and keeps control.
That's four minutes gone in the round.
Sultsina is refusing to be controlled, as Yama sits in half guard.
Sultsina is trying to defend against the ground and pound but Yama scores with a couple of nice shots.
Sultsina wants to get back to his feet.
Yama keeping composed on the top, looking to control the action.
Sultsina really doesn't want to stay on the ground with Yama. If he can't get it back to his feet, it's only a matter of time before he'll be tapping out.
Sultsina preventing any damage for now, controlling his opponent's head.
Sultsina is looking to escape.

Yama is thinking about going for an arm triangle but he can't free his leg.
And that is the end of the round. The fighters go back to their corners.
Kotetsu Yama dominated that second round.
That's time! Back to the action! This is the final round!

Yama misses with a body shot. Nice footwork from Sultsina.
Sultsina keeps Yama at a distance using the push kick.
Lubomir Sultsina seems to be getting the better of the standup.
Sultsina misses with a two punch combination.
Sultsina is looking to clinch.
Yama checks the leg kick nicely there.
Good exchange - Yama coming out on top.
Yama avoids the head kick by Sultsina.
Sultsina cracks Yama with a nice right hand that draws applause from the crowd.
Sultsina tries to close the distance and clinch up against the cage but Yama paws at him with a jab and circles away.
We've had a slow start to the round here - hopefully the action picks up.
Sultsina tries to clinch up but Yama circles away and keeps his distance.
Sultsina scores with a spinning back kick!
Sultsina takes a body punch but keeps moving.
A clash of legs there as Yama blocks the low kick.
Yama misses with a takedown
and Sultsina counters with a good right hand that lands right on the jaw.
That's one minute gone in the round.
Yama decides to change it up a bit and drives through with a nice takedown into half guard.
Sultsina wants to get back to his feet.
The fighters are pressed up against the cage, both looking to find a bit of space to work.
Yama working Sultsina over with strikes.
Sultsina looks like he's trying to stand up.
Yama seems very keen to just sit and control from half guard but Sultsina does not like that idea so much and is remaining active off his back.
Yama working over Sultsina with some ground and pound. Sultsina looks like he wants out of this position, which is understandable.
Sultsina is looking to escape.
That's two minutes gone in the round.
Yama working some ground and pound from close in. He's looking to maintain this position and strike for a while by the looks of things... although he'll probably advance to full mount in a minute now I've said that.
Sultsina pushes Yama off looking to stand but Yama dives back in and keeps control.
Yama is scoring with some nice ground and pound from the dominant position.
Sultsina is looking to escape.
Yama is scoring with some nice ground and pound from the dominant position.
Yama has been looking to land a fair amount of strikes on the ground. He might be looking to soften his opponent up in order to work for a submission.
Sultsina is defending against the submission attempts here by Yama.
Yama is really dominating this fight. Is there anything that Sultsina can do to turn this around?
Yama passes to full mount!
The referee warns Sultsina that he has to improve his position here as he takes two more clean shots to the head.
That's three minutes gone in the round.
Yama fakes a shot to the body and cracks his opponent in the head. Nice ground and pound there!
Yama landing strikes from the mount.
Yama with shots to the head and body - Sultsina looks very uncomfortable down there.
Yama has his opponent pinned against the cage, landing some nasty ground and pound that is really making a bit of a mess out of Sultsina's face.
You get the feeling that Sultsina really doesn't like being in this position too much.
Yama trying to control but he's not successful this time.
Yama dominating with strikes here.

Sultsina is rocked!
Sultsina tries to reverse the position but Yama maintains control.
Yama raining down hammerfists from mount.
Sultsina is still in real trouble! Can Yama finish him?
A big strike lands for Yama! That's really hurt Sultsina and he's turned his back - Yama keeps firing away and the ref dives in to stop the fight! Yama jumps to his feet to celebrate the victory!
Ladies and gentlemen, after 4:56 of round 3, we have a winner by way of TKO (Strikes). Kotetsu Yama!
|
|
|
|
|
|
|
|
|
|
|
|
|
|
|
|
|
|
|
|
|
|
|
| S |
C
A |
G |
S |
C
B |
G |
|
S |
C |
G |
|
energy
A | B |
|
hype
A | B |
|
pop
A | B |
|
mgr
A | B |
|
FIGHT
RATING
66% |
|
|
|
|
|
|
