|
|
PBP Commentary |
Coming up we have a middleweight MMA rules bout between Chris Pauschi (ranked 6446 p4p, 24997 weight class) and Jonesy McGuffin (ranked 619 p4p, 684 weight class). Over to our ring announcer for the fighter introductions!
 |
|
 |
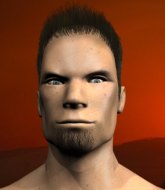
| 182 cm
22
200
0 - 0 - 0 |
|
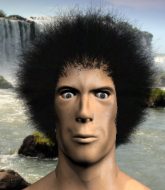
182 cm
20
184
1 - 1 - 0 |
BJJ White Belt
Great elbows
Granite chin |
|
BJJ White Belt
Decent boxing
Granite chin |
|
| |
|
Ladies and gentlemen. This fight is 3 rounds, in the middleweight division.
Introducing the fighter to my left, fighting out of the red corner.
With a record of 0 - 0 - 0, fighting out of Amsterdam, Chris Pauschi!
And introducing the fighter to my right, fighting out of the blue corner.
With a record of 1 - 1 - 0, fighting out of Las Vegas, Jonesy McGuffin!
The judges for this bout are Steve Montenegro, Russell Pearce and Jorge Garcia.

The bell rings for round one and we are underway!
McGuffin misses with a series of wild punches.
Pauschi stuffs the takedown.
Pauschi bobs and weaves well there to avoid the strikes.
McGuffin with a nice looking leg kick. You could hear that one land in a back row.
McGuffin fails miserably with a takedown attempt.
McGuffin shoots in for a takedown. "I don't think so" says Pauschi as he avoids it easily.
Chris Pauschi has stuffed three takedown attempts in the round now. That's going to take a lot out of Jonesy McGuffin.
McGuffin connects with a slap. Keep your fist closed son.
McGuffin swings wildly with a right hand that was never going to find it's target.
Donk. McGuffin catches Pauschi right on the button with a cross.

McGuffin closes the distance and presses his opponent up against the cage.
We've had a slow start to the round here - hopefully the action picks up.
A battle for position here, against the cage.

McGuffin breaks the clinch.
McGuffin shoots in for a double leg but Pauschi sprawls well. That's going to sap some energy.
Pauschi wants to clinch.

That's one minute gone in the round.
Pauschi shoots in for a takedown. He's persisting with it as McGuffin sprawls well. McGuffin wins this battle and keeps the fight standing. Pauschi gets slowly back to his feet.
Pauschi throws a head kick that misses and slips in the process. He scrambles back to his feet and the fighters circle.
McGuffin shoots in but no luck this time.
Pauschi blocks a head kick by McGuffin.
McGuffin throws a looping overhand right but Pauschi ducks down to avoid it.
Pauschi drops down looking for a counter takedown but McGuffin sprawls and moves away.
McGuffin circles away from the clinch attempt
and McGuffin cracks him with a counter punch right on the button.
McGuffin gets his takedown attempt stuffed easily
and Pauschi counters nicely by changing levels and landing a hook to the body.
McGuffin shoots in for a takedown but Pauschi shows good takedown defense there and keeps this one on the feet.
Pauschi takes a body punch but keeps moving.
A jab from McGuffin misses.

That's two minutes gone in the round.
McGuffin closes the distance and clinches.
With the fighters clinched against the cage, McGuffin creates a bit of distance for himself and scores with a nice uppercut.
Pauschi is trying to break the clinch but McGuffin has him pressed against the cage.
McGuffin pushes off and circles away, back to the middle of the mat.
Pauschi shoots in but no luck this time.
McGuffin darts in and clinches Pauschi up against the cage.
The crowd cheering loudly, showing their appreciation for the quality fight we're seeing here.
McGuffin lands a hook to the side of the head.

Pauschi breaks the clinch and we're back to striking at distance.
McGuffin fails to land the takedown.
McGuffin scores with a jab. Pauschi acknowledges it with a nod of the head.
Pauschi goes for a double leg but McGuffin avoids the attempt and the two fighters end up clinched against the cage as McGuffin continues to drive forward.
McGuffin is loading up here, looking for a big counter of his own.
McGuffin tries a shoulder strike but it doesn't do any damage.
Pauschi tries to pull guard but McGuffin holds him up against the cage and eventually Pauschi drops back down to his feet.
A short right from McGuffin on the inside.

That's three minutes gone in the round.
McGuffin tries to score a body lock takedown but Pauschi shows good agility there to stay on his feet.
Pauschi blocks an elbow strike.
McGuffin working aggressively here.
Pauschi is leaning against McGuffin and scores with a nice uppercut to the body.

Pauschi ties up his opponent against the cage and manages to drag the fight down to the ground. Pauschi no doubt will be looking to work submissions from his guard.
Pauschi keeping full guard, as McGuffin tries to pass.
McGuffin trying to control the position from guard on top but Pauschi is wriggling around, looking for whatever he can.
McGuffin with a flurry of punches that miss.

Pauschi is throwing his legs up, looking for submissions. McGuffin is aware though and is defending well.
McGuffin won't allow Pauschi to sweep him here.
The ref warns both fighters not to hold the cage as they work up against the meshing.
Pauschi utilising some decent striking defenses from the guard, preventing the ground and pound.

McGuffin is holding a leg here, probably looking for an ankle lock - he drops back and goes for it! Pauschi is in trouble! Is it all over??? No! Pauschi has escaped and now he's on top!

McGuffin keeping moving, preventing Pauschi from controlling successfully.

That's four minutes gone in the round.
McGuffin working for a triangle but Pauschi defends it easily.
Pauschi missing there with some ground and pound from the guard.
McGuffin looking for submissions from the bottom but instead Pauschi passes into side control.
McGuffin wants to control but Pauschi postures up.
McGuffin tries to bench press Pauschi off him but Pauschi keeps the position.
McGuffin keeps trying to improve his position.
McGuffin tries to strike but it doesn't land.
And that is the end of the round. The fighters go back to their corners.
Jonesy McGuffin dominated that round.
The corners get their ten second warning. Both fighters stand from their stools and stare each other down, ready to get back to the action.

McGuffin takes the fight into the clinch.
McGuffin is clearly stalling here... Pick up the pace son.
McGuffin has been the more effective fighter overall so far.
McGuffin lands with a short punch from the clinch.
Pauschi is trying to pull guard but being pressed up against the cage enables McGuffin to keep the fight standing.
McGuffin is defending well against a takedown attempt.
Pauschi can't get the takedown.
That's three failed takedown attempts in the round for Chris Pauschi. That's going to take a lot out of him.
A short right from McGuffin on the inside.
McGuffin is stalling here.
Pauschi wants to take the fight to the mat but McGuffin manages to get underhooks and keep the fight in the clinch.
We've had a slow start to the round here - hopefully the action picks up.
McGuffin wants a takedown.
McGuffin lands a right hand that snaps the head of Pauschi backwards.
McGuffin lands a shoulder strike that jolts his opponent's head backwards.
McGuffin misses with the head strike.
That's one minute gone in the round.
McGuffin is working on a leg, looking for a takedown but Pauschi is defending well.
Pauschi drops to a knee looking for a takedown but McGuffin gets the underhooks and prevents it.
McGuffin pushes off an throws an elbow but Pauschi leans to the side and avoids it. We're back to clinching against the cage.
Pauschi avoids the elbow strike from McGuffin, against the cage.
Pauschi drags the fight down to the ground.
McGuffin pressing down on his opponent's thigh, looking to pass guard. Pauschi is keeping the position for now.
McGuffin postures up as if he's going to throw some strikes but drops back for an ankle! Pauschi is in big trouble! He looks ready to tap! But no, he's escaped and dives on top of McGuffin, into his guard.
McGuffin looking for subs off his back but Pauschi has passed one foot through into half guard.
McGuffin wants to control but Pauschi is keeping busy.
That's two minutes gone in the round.
McGuffin is trying to control but Pauschi manages to pass to mount!
McGuffin tries to hold on but Pauschi postures up.
We get told so often about how wrestlers don't like to be on their backs. Let's see if McGuffin can do anything to dispel that myth.
McGuffin is squirming around, avoiding Pauschi's attempts to control the action.
McGuffin swinging wildly from the bottom but he's not landing.
Pauschi tries to control but McGuffin wriggling away.
Pauschi working for a guillotine from mount but McGuffin is in no mood to give up.
McGuffin can't escape the position.
The fighters are pressed up against the cage, both looking to find a bit of space to work.
That's three minutes gone in the round.
Pauschi avoids the attempt from McGuffin to control.
Pauschi looking to finish with strikes here!
McGuffin is desperately trying to get back to half guard.
McGuffin tries to improve his position but instead Pauschi has taken his back!
McGuffin tries to roll but Pauschi sticks to his back.
Pauschi is persistently looking for the submission but McGuffin is defending it well.
McGuffin rolls and manages to get back to half guard. Nicely done.
Chris Pauschi overall seems to be getting the better of the ground position in the fight so far.
McGuffin is looking to sinch up a guillotine here but Pauschi pulls his head out easily.
McGuffin really doesn't want to stay on the ground with Pauschi. If he can't get it back to his feet, it's only a matter of time before he'll be tapping out.
That's four minutes gone in the round.
Pauschi is looking to pass the guard... He's managed it - he's now in full mount!
McGuffin wants to control but Pauschi is having none of it.
Pauschi prevents McGuffin from getting the reversal.
McGuffin wants to improve position but instead he's given up his back.
McGuffin is trying to get back to his feet but he's not managed it yet.
A lull in the action here.
Pauschi keeps control of the position as McGuffin tries to break free.
The crowd thankful this round is nearly over.
McGuffin is trying to stand back up.
And that is the end of the round. The fighters go back to their corners.
Chris Pauschi dominated that second round.
That's time! Back to the action! The crowd applaud as we get ready to start the final round!

Horrible takedown attempt by McGuffin or perhaps it was just good defense by Pauschi, which made it look bad.
McGuffin lands with an uppercut that bounces Pauschi off the cage and back into range.
Pauschi has a takedown stuffed.
Chris Pauschi is looking to throw some combinations by the looks of things.
McGuffin misses with a jab, cross combination.

Pauschi pushes McGuffin up against the cage in a clinch.
Pauschi drags the fight down to the ground.
Pauschi escapes his hips to the side and looks to be working for an armbar. McGuffin gives him a little smile and shakes his head. No chance.
McGuffin stands over his opponent and dives in with a flying punch! Pauschi throws up his legs and catches McGuffin in a triangle! Oh this looks tight! McGuffin tries to escape but he's forced to tap! Wow, fantastic work there by Pauschi! That came out of nowhere!
Ladies and gentlemen, after 0:57 of round 3, we have a winner by way of Submission (Triangle Choke). Chris Pauschi!
A victorious Chris Pauschi thanked his army of followers in his post fight interview, telling people to make sure they follow him on Twitter.
|
|
|
|
|
|
|
|
|
|
|
|
|
|
|
|
|
|
|
|
|
|
|
| S |
C
A |
G |
S |
C
B |
G |
|
S |
C |
G |
|
energy
A | B |
|
hype
A | B |
|
pop
A | B |
|
mgr
A | B |
|
FIGHT
RATING
49% |
|
|
|
|
|
|
