|
|
PBP Commentary |
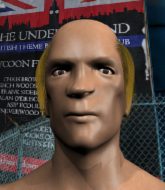
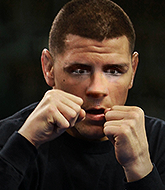
Coming up we have a welterweight MMA rules bout between William Smyth (ranked 23670 p4p, 22986 weight class) and Sid Murrdock (ranked 0 p4p, 0 weight class). Both fighters look fresh as a daisy as they make their way towards the cage.
 |
|
 |
| 183 cm
25
180
3 - 11 - 1 |
|
175 cm
43
182
20 - 16 - 0 |
BJJ Purple Belt
Solid boxing
KO power |
|
Olympic wrestler
Excellent MT
Granite chin |
|
| |
|
Ladies and gentlemen. This fight is 3 rounds, in the welterweight division.
Introducing the fighter to my left, fighting out of the red corner.
With a record of 3 - 11 - 1, fighting out of London, William Smyth!
And introducing the fighter to my right, fighting out of the blue corner.
With a record of 20 - 16 - 0, fighting out of Las Vegas, Sid Murrdock!
The judges for this bout are Chris Edwards, Phil Schofield and Daniel Bishop.

The bell rings for round one and we are underway!
Murrdock shoots in but Smyth avoids the takedown attempt easily.
Smyth appears to be looking for a big counter.
Murrdock looks frustrated there after his takedown attempt is stuffed easily.
Smyth throws a big counter combination but Murrdock scrambles out of danger and avoids any damage.
Murrdock dives in for a single leg takedown but Smyth sprawls and the fighters end up clinched against the cage.
As Murrdock looks to move away, Smyth throws a big counter combo but Murrdock just gets out of the way.
William Smyth has stuffed three takedown attempts in the round now. That's going to take a lot out of Sid Murrdock.
Murrdock shoots in looking for a takedown but Smyth manages to keep the fight standing, pushing Murrdock's face into the canvas for good measure before circling away.
A really sloppy takedown attempt there from Murrdock.
No luck with that takedown attempt from Murrdock.
Smyth seem to be loading up, looking for a big counter.
We've had a slow start to the round here - hopefully the action picks up.
Murrdock shoots in for a double leg but Smyth sprawls well. That's going to sap some energy.
Smyth seem to be loading up, looking for a big counter.
Murrdock tries to shoot in for a takedown. He's got hold of a leg but Smyth swivels and escapes.
Smyth swung with a counter right hand that didn't connect.
Smyth stuffs the takedown attempt from Murrdock. Murrdock gets slowly back to his feet.

That's one minute gone in the round.
Murrdock darts in looking for a takedown but Smyth gets double underhooks and turns Murrdock into the cage.
Murrdock tries to score a power double leg takedown but Smyth sees that one coming and sprawls well. That will dishearten Murrdock somewhat.
Smyth looks to have improved his striking defense since last time we saw him fight.
Murrdock fails with a takedown attempt.
Smyth went nuts there looking for a big combo counter but none of the flurry connected.
Murrdock shoots in looking for a takedown. Smyth tries to sprawl out of it but Murrdock keeps driving through. The fighters are pinned against the cage. Smyth manages to get underhooks and after a bit of a struggle, circles away and we're back to standing.
As Murrdock looks to move away, Smyth throws a big counter combo but Murrdock just gets out of the way.
Murrdock tries to drive through with a takedown attempt but Smyth defends well and Murrdock ends up having to push Smyth into the cage where they will battle it out in the clinch.

That's two minutes gone in the round.
Murrdock doesn't manage to clinch there - Smyth circles away.

Murrdock pushes Smyth up against the cage in a clinch.
Murrdock wants to take the fight to the mat but Smyth manages to get underhooks and keep the fight in the clinch.
Smyth is trying to force a seperation but Murrdock has the dominant position.
A frustrated look appears on Smyth's face as he tries to break the clinch.
Murrdock is looking for a takedown.

Murrdock turns his back and goes for a hip toss. It's a bit messy but it gets the job done and Murrdock manages to end up in side control.
Smyth is trying to control Murrdock's posture but Murrdock avoids it.
Murrdock tries to advance to mount but Smyth denies him.

Murrdock is looking for a kimura. He might have it! No, Smyth has escaped the position, nice work there.

That's three minutes gone in the round.
Murrdock tries to advance to mount but can't.
Murrdock wants to lay and pray for a moment but Smyth keeps working.
Murrdock tries for a kimura but Smyth is defending well.
Smyth is trying to escape the position but Murrdock is controlling the position.
Smyth wants to control but Murrdock postures up.
Smyth is not content to let Murrdock control the position.

That's four minutes gone in the round.
Neither fighter has done anything of merit for a good minute or two here and the crowd are not happy about it.
Smyth prevents Murrdock from improving position.
Murrdock working hard here to secure a kimura but he's not really in the right position for it.
Smyth sneaks back into half guard.
Boooooooooooooooooooo!!! God, this has been a terrible round. Come on you two, sort yourselves out!
Murrdock takes a deep breath and rests his weight momentarily on top of his opponent, to control the position.
And that is the end of the round. The fighters go back to their corners.
William Smyth dominated that round.
Well, the break between rounds is over. Let's get back to the scrappin!

Smyth defends well against a solid takedown attempt from Murrdock.
Smyth is looking for a counter combo.
Murrdock tries to score a power double leg takedown but Smyth sees that one coming and sprawls well. That will dishearten Murrdock somewhat.
Smyth appears to be looking for a big counter.
A really sloppy takedown attempt there from Murrdock.
William Smyth has stuffed three takedown attempts in the round now. That's going to take a lot out of Sid Murrdock.
Murrdock closes the distance and clinches.
We've had a slow start to the round here - hopefully the action picks up.
Smyth is looking to break free of the clinch but Murrdock has double underhooks.
Murrdock tries for a takedown. No joy.

Smyth breaks from the clinch.
Murrdock clinches.
Smyth is looking to break free of the clinch but Murrdock has double underhooks.
That's one minute gone in the round.
Murrdock drops down looking for an ankle pick but Smyth pulls his leg out and moves away.
Murrdock tries to score a power double leg takedown but Smyth sees that one coming and sprawls well. That will dishearten Murrdock somewhat.
Smyth appears to be looking for a big counter.
Smyth leaves Murrdock with his face pressed against the mat as he sprawls beautifully, defending against a solid takedown attempt.
Murrdock looks for a takedown but Smyth sprawls well.
Murrdock shoots in looking for a double leg takedown. Smyth defends it nicely.
Smyth went nuts there looking for a big combo counter but none of the flurry connected.
Smyth displays good takedown defense there as he swats away a double leg from Murrdock.
That's two minutes gone in the round.
Murrdock shoots in looking for a double leg takedown. Smyth defends it nicely.
Smyth seem to be loading up, looking for a big counter.
Murrdock shoots in for a takedown. He's persisting with it as Smyth sprawls well. Smyth wins this battle and keeps the fight standing. Murrdock gets slowly back to his feet.
Smyth throws a big counter combination but Murrdock scrambles out of danger and avoids any damage.
Murrdock closes the distance and clinches up with Smyth, looking for a takedown. Murrdock pushes Smyth against the cage but Smyth circles to the side and manages to break the clinch.
As Murrdock looks to move away, Smyth throws a big counter combo but Murrdock just gets out of the way.
The fight stays on the outside here - Murrdock looks like he's thinking about clinching though.
It looked like Smyth was looking amped, ready to throw a big counter but didn't commit.
Murrdock shoots in with a takedown attempt and he has Smyth pinned against the cage. Smyth gets the underhooks and manages to circle away.
Smyth seem to be loading up, looking for a big counter.
That's three minutes gone in the round.
Murrdock changes levels and looks for a double leg takedown. Smyth tries to avoid it but Murrdock manages to keep hold of a leg and drag Smyth to the ground. Smyth escapes though and pops straight back up to his feet.
Smyth throws a big counter combination but Murrdock scrambles out of danger and avoids any damage.
Murrdock goes for a double leg but Smyth avoids the attempt and the two fighters end up clinched against the cage as Smyth continues to drive forward.
As Murrdock looks to move away, Smyth throws a big counter combo but Murrdock just gets out of the way.
Murrdock fails with the takedown.
Murrdock is breathing heavily.
No luck with that takedown attempt from Murrdock.
Murrdock looks for a takedown here. Will he get it? Smyth is fending him off so far but Murrdock persists. Nope, Smyth circles away and we're back to standing.
As Murrdock looks to move away, Smyth throws a big counter combo but Murrdock just gets out of the way.
Smyth stuffs the takedown.
An attempted straight right counter from Smyth misses the target.
Murrdock looks for a takedown but Smyth sprawls well.
Smyth is looking to counter punch.
That's four minutes gone in the round.
Murrdock changes levels and looks for a double leg takedown. Smyth tries to avoid it but Murrdock manages to keep hold of a leg and drag Smyth to the ground. Smyth escapes though and pops straight back up to his feet.
Smyth appears to be looking for a big counter.
Murrdock shoots in for a takedown but doesn't get it.
Murrdock fails with a takedown attempt.
As Murrdock looks to move away, Smyth throws a big counter combo but Murrdock just gets out of the way.
Murrdock shoots and misses
and Smyth counters with a two punch combo.
Smyth stuffs the takedown attempt from Murrdock. Murrdock gets slowly back to his feet.
Smyth seem to be loading up, looking for a big counter.
Murrdock changes levels and looks for a double leg takedown. Smyth tries to avoid it but Murrdock manages to keep hold of a leg and drag Smyth to the ground. Smyth escapes though and pops straight back up to his feet.
Boooooooooooooooooooo!!! God, this has been a terrible round. Come on you two, sort yourselves out!
Murrdock misses with a takedown attempt. He shot from a bit too far out.
Murrdock fails with the takedown.
It looked like Smyth was looking amped, ready to throw a big counter but didn't commit.
And that is the end of the round. The fighters go back to their corners.
William Smyth dominated that second round.
The fighters get back to their feet, the hooter sounds and we're back to the action! This is the final round!

Murrdock tries to clinch but Smyth moves out of range.
Smyth throws a big counter combination but Murrdock scrambles out of danger and avoids any damage.
Murrdock shoots in for a takedown but doesn't get it.
Murrdock shoots in for a takedown but doesn't get it.
Smyth went nuts there looking for a big combo counter but none of the flurry connected.
A telegraphed takedown attempt from Murrdock is defended easily by Smyth.
William Smyth has stuffed three takedown attempts in the round now. That's going to take a lot out of Sid Murrdock.
Murrdock dives in for a single leg takedown but Smyth sprawls and the fighters end up clinched against the cage.
Sid Murrdock seems to be the more aggressive standup fighter in this bout.
Smyth defends well against a solid takedown attempt from Murrdock.
We've had a slow start to the round here - hopefully the action picks up.
Murrdock fails miserably with a takedown attempt.
Murrdock is looking to clinch.
Murrdock takes a big intake of breath there - he's definitely tired.
Murrdock fails with a takedown attempt.
Smyth went nuts there looking for a big combo counter but none of the flurry connected.
That's one minute gone in the round.
Murrdock tries to score a power double leg takedown but Smyth sees that one coming and sprawls well. That will dishearten Murrdock somewhat.
Smyth tries to keep at a distance but Murrdock has taken the fight into the clinch.
Smyth gets underhooks to prevent Murrdock's takedown attempt.
Murrdock is trying to work for a single leg takedown but Smyth pulls him back up using the underhooks.
Murrdock is trying to work for a single leg takedown but Smyth pulls him back up using the underhooks.
Murrdock has hold of a leg and is looking for a trip takedown. Smyth avoids it nicely though and we remain in the clinch.
Sid Murrdock has stepped it up - he knows he needs a finish here!
That's two minutes gone in the round.
Murrdock looking for a takedown.
Smyth tries to break the clinch but Murrdock is controlling the position.
Smyth wants to push off and get back to the center of the mat but Murrdock has him pressed against the cage.
Smyth stops a takedown attempt from Murrdock.
Smyth looks like he'd prefer to be striking at range right now.
Smyth tries to break the clinch but Murrdock is controlling the position.
Smyth is trying to break free.
Murrdock is trying to drag Smyth to the mat but Smyth just about manages to keep his footing. He used the cage to his advantage there.
Murrdock has hold of a leg and is looking for a trip takedown. Smyth avoids it nicely though and we remain in the clinch.
William Smyth is fighting for a decision here - he's started to take the cautious approach.
Smyth gets underhooks to prevent Murrdock's takedown attempt.
Smyth tries to break the clinch but Murrdock is controlling the position.
Smyth is trying to work out of this bad position, with his back against the cage.
That's three minutes gone in the round.
Murrdock goes for a takedown in the clinch but Smyth prevents it.
Smyth is defending well against a takedown attempt.
Smyth gets underhooks to prevent Murrdock's takedown attempt.
Murrdock lands with a quick shot inside that doesn't really do much damage.
Murrdock has hold of a leg and is looking for a trip takedown. Smyth avoids it nicely though and we remain in the clinch.
Smyth is trying to work out of this bad position, with his back against the cage.
Smyth prevents the takedown attempt.
Smyth gets underhooks to prevent Murrdock's takedown attempt.
Murrdock keeps the fight in the clinch, despite Smyth's efforts to push away.
Smyth wants to strike at distance but he can't break free of the clinch.
That's four minutes gone in the round.
The crowd are getting on the fighters' backs, as the pace has dropped off in the last minute or so.
Murrdock is looking to take this one to the mat.
Smyth manages to break the clinch.
Smyth is really dominating this fight. Is there anything that Murrdock can do to turn this around?
Murrdock closes this distance looking for a takedown but Smyth circles away.
Murrdock tries to drive through with a takedown attempt but Smyth defends well and Murrdock ends up having to push Smyth into the cage where they will battle it out in the clinch.
As Murrdock looks to move away, Smyth throws a big counter combo but Murrdock just gets out of the way.
Smyth stuffs the takedown attempt from Murrdock. Murrdock gets slowly back to his feet.
Smyth appears to be looking for a big counter.
A really sloppy takedown attempt there from Murrdock.
Murrdock closes this distance looking for a takedown but Smyth circles away.
Boooooooooooooooooooo!!! God, this has been a terrible round. Come on you two, sort yourselves out!
Smyth avoids the body shot from Murrdock.
Murrdock shoots in but no luck this time.
Murrdock doesn't succeed with the takedown
and Smyth counters with a series of strikes. Murrdock will be more careful next time no doubt.
And that's the end of the fight!
William Smyth showed his dominance in that final round.
Well I reckon that's a shut out for Smyth, winning every round. Will the judges agree? They are the ones who matter, even if they are often depressingly incompetent. Over to the ring announcer for the scorecards.
Ladies and gentlemen, after 3 rounds of action, we go to the scorecards for a decision.
Judge Chris Edwards scores the fight 30:27
Judge Phil Schofield scores the fight 30:27
Judge Daniel Bishop scores the fight 30:27
In favor of your winner, by unanimous decision... William Smyth!
An out of breath William Smyth thanked his loyal fans in his post fight interview, giving them credit for his success over the course of his career.
|
|
|
|
|
|
|
|
|
|
|
|
|
|
|
|
|
|
|
|
|
|
|
| S |
C
A |
G |
S |
C
B |
G |
|
S |
C |
G |
|
energy
A | B |
|
hype
A | B |
|
pop
A | B |
|
mgr
A | B |
|
FIGHT
RATING
25% |
|
|
|
|
|
|
