|
|
PBP Commentary |
Coming up we have a middleweight MMA rules bout between Hotrod Sizemore (ranked 3074 p4p, 3135 weight class) and DJ Killeshaw (ranked 423 p4p, 432 weight class). Sizemore comes to the cage accompanied by stone cold theme song classic. The key to victory for Hotrod Sizemore has got to be keeping the fight on the feet.
 |
|
 |
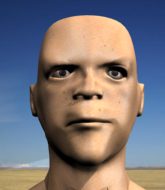
| 191 cm
26
180
2 - 1 - 0 |
|
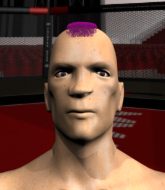
185 cm
25
189
2 - 0 - 0 |
BJJ White Belt
Decent elbows
Good chin |
|
BJJ Purple Belt
Counter fighter
Solid chin |
|
| |
|
Ladies and gentlemen. This fight is 3 rounds, in the middleweight division.
Introducing the fighter to my left, fighting out of the red corner.
With a record of 2 - 1 - 0, fighting out of Sydney, Hotrod Sizemore!
And introducing the fighter to my right, fighting out of the blue corner.
With a record of 2 - 0 - 0, fighting out of Los Angeles, DJ Killeshaw!
The judges for this bout are Marco Blurström, Roosa Järviläinen and Ben Zyskovitsi.

The bell rings for round one and we are underway!

Killeshaw has Sizemore up against the cage in a clinch.
Sizemore misses with a body punch.

Sizemore breaks the clinch and we're back to striking at distance.
Sizemore displays good takedown defense there as he swats away a double leg from Killeshaw.
Sizemore throws a quick counter kick to the body but Killeshaw avoids it.

Sizemore clinches.
Nice body punch from Sizemore - that landed with a thud.
Sizemore lands a hook to the side of the head.
Sizemore is leaning against Killeshaw and scores with a nice uppercut to the body.
Sizemore breaks the clinch.
We've had a slow start to the round here - hopefully the action picks up.
Sizemore lands with a slapping head kick.
Sizemore jabs Killeshaw right on the nose. Killeshaw blinks but takes it well.
Sizemore scores with a reasonable looking shot to the body. Killeshaw doesn't seem bothered though.
Sizemore moves into the clinch successfully.
We've seen a great period of action over the last minute or so - credit to both fighters for going all out!
Killeshaw lands with a good tight uppercut to the head.

That's one minute gone in the round.
Killeshaw throws a punch but it's blocked by Sizemore.
The two fighters are working to gain dominance in the clinch.
Sizemore blocks an uppercut.
A quick uppercut on the inside from Sizemore.
Sizemore lands with a left to the head.
A nice right hand lands inside from Sizemore.
We can't be sure of the tactics at this early stage but we have heard that Killeshaw has been working on his takedowns a lot in the buildup to the fight and we can only assume he's going to look to take this to the mat.
Sizemore lands a good knee to the midsection. Killeshaw won't want to take too many of those.
Sizemore utilising his Muay Thai to score with a knee to the body.
Killeshaw looks winded!
Sizemore cracks Killeshaw with a nice body shot.
Sizemore breaks the clinch and we're back to striking at distance.
Sizemore moves into the clinch.
Still in the clinch, Sizemore scores with a nice short uppercut.
Sizemore effectively controlling the action here.

That's two minutes gone in the round.
Sizemore stalling in the clinch.
We've seen a great period of action over the last minute or so - credit to both fighters for going all out!
Sizemore throws a blind hook that connects with the side of Killeshaws head.
Sizemore lands a body punch in the clinch.
Killeshaw looks like he'd prefer to be striking at range right now.
Sizemore lands an elbow inside that Killeshaw shrugs off.

It looks like DJ Killeshaw has been cut.
Sizemore tries a knee to the head but he's missed.
Some stalling of biblical proportions here from Sizemore.
Sizemore breaks the clinch and we're back to striking at distance.
Sizemore with a body punch. A glancing blow.
Sizemore looking to take his opponent's legs away with the low kicks.
That kick from Sizemore tenderised Killeshaw's leg. Killeshaw is trying to keep his angry face on.
Killeshaw takes a head kick and shrugs it off.

That's three minutes gone in the round.
Killeshaw takes a push kick to the midsection and stumbles backwards.
Sizemore fakes a head punch and goes low to the body. Nicely done.
Sizemore lunges at Killeshaw with a hook that half lands and is half blocked by Killeshaw's hand.
Sizemore lands a straight punch to the body, keeping Killeshaw at a distance.
Sizemore drives through and clinches with Killeshaw against the cage.
Sizemore tries to land a shot to the body but it's blocked.
Sizemore pushes off and circles away, back to the middle of the mat.
Killeshaw keeps the fight on the outside.
Sizemore takes the fight into the clinch.
Killeshaw drops down for a takedown but doesn't get it.
A knee to the head by Sizemore.

That's four minutes gone in the round.
Sizemore lands a nice knee to the body.
Sizemore is stalling here. The referee will be looking to step in if he doesn't pick up the pace.
This is a great period of action - very entertaining stuff!
A nice glancing elbow lands by Sizemore.
Killeshaw takes a knee to the side of the body.
Sizemore landing knees to the head.
Killeshaw throws a head punch that misses.
Sizemore scores with a knee to the head.
Sizemore is stalling here. The referee will be looking to step in if he doesn't pick up the pace.
Sizemore's corner calls for him to break the clinch, which he does.
Sizemore moves into the clinch.
Sizemore scores a nice knee to the body.
And that is the end of the round. The fighters go back to their corners.
Hotrod Sizemore dominated that round.
The cut man is working on DJ Killeshaw's cut.
The fighters' corners scream their final instructions, as the referee calls time. Here we go, back to the action!

Sizemore moves into range and clinches up with Killeshaw.
Sizemore breaks the clinch.
Sizemore fakes a head shot and lands one to the body.
Hotrod Sizemore seems to be the more aggressive standup fighter in this bout.
Killeshaw fails with the takedown.
Killeshaw's hands are dropping dangerously low here and Sizemore connects clean with a right hook that sends him down to one knee! Killeshaw scrambles back to his feet.
Good leg kick by Sizemore.
Killeshaw thows a leg kick but Sizemore checks it
and Sizemore counters with a three punch combination, finished off with a leg kick. Nice work.
Sizemore has Killeshaw up against the cage in a clinch.
Sizemore blocks an uppercut.
A head punch on the inside from Killeshaw fails to land.
Sizemore pushes off and circles away, back to the middle of the mat.

Killeshaw drives through with a takedown into guard.
Killeshaw is standing up over Sizemore. Sizemore looks to escape but Killeshaw dives into side control.
Killeshaw is breathing heavily.
That's one minute gone in the round.

Sizemore is looking for a sweep.
The fighters are pressed up against the cage, both looking to find a bit of space to work.
Killeshaw lands a decent elbow from side control.
Sizemore is trying to get back to half guard.
Sizemore is working hard here to advance position.
Killeshaw working away diligently from side control. Landing strikes effectively there - that will score him some points on the judges scorecards.
Sizemore manages to work his way to half guard, despite Killeshaw's best efforts.
Sizemore tries to roll over but Killeshaw keeps him under control.
Killeshaw has the superior BJJ but he's also working some ground strikes into his gameplan.
That's two minutes gone in the round.
Sizemore taking some punishment here, with Killeshaw in his half guard.
The two fighters exchange a few words. I couldn't hear what they were saying but maybe it's more fun if you make it up yourself. Killeshaw connects with a nice short shot to Sizemore's temple.

Killeshaw is working for submissions here but there's nothing on.
Sizemore is controlling Killeshaw's trapped leg to prevent Killeshaw from advancing to side control.
Sizemore tries to get to full guard but Killeshaw has control of the leg.
Sizemore on his back here. We all know that wrestlers don't like being on their back so let's see if Sizemore tries to get out of the position.
Killeshaw scores with a couple of good hammerfists.
Sizemore is trying to stand back up but Killeshaw is controlling him
Sizemore has no desire to be mounted, so is trying to control. Killeshaw is working away from the top position though.
Killeshaw wants to control but Sizemore is keeping him busy.
Sizemore is trying to control but can't.
That's three minutes gone in the round.
Sizemore gets back to full guard.
Killeshaw postures up.
Sizemore working a defensive guard but Killeshaw manages to pass into side control anyway.
Killeshaw working away.
Sizemore is trying to get back to half guard.
The ref warns both fighters not to hold the cage as they work up against the meshing.
Killeshaw lands a knee to the body and follows it up with some ground and pound to the head. That will wear Sizemore down.
Killeshaw wants to lay and pray for a moment but Sizemore keeps working.
Sizemore is trying to control Killeshaw's posture but Killeshaw avoids it.
Killeshaw has worked his way into a potential kimura here. Sizemore is trying to get out of the position but his squirming has just got him deeper into trouble. Killeshaw yanks on the arm and Sizemore is forced to tap due to a very painful looking submission! Nice work by Killeshaw.
Ladies and gentlemen, after 4:57 of round 2, we have a winner by way of Submission (Kimura). DJ Killeshaw!
Our winner, DJ Killeshaw, made sure he spent some time buttering up the crowd during his post fight interview, which will no doubt bring him a few more fans.
|
|
|
|
|
|
|
|
|
|
|
|
|
|
|
|
|
|
|
|
|
|
|
| S |
C
A |
G |
S |
C
B |
G |
|
S |
C |
G |
|
energy
A | B |
|
hype
A | B |
|
pop
A | B |
|
mgr
A | B |
|
FIGHT
RATING
58% |
|
|
|
|
|
|
