|
|
CACC 215 PBP Commentary |
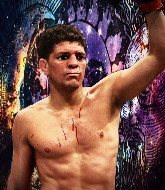
This TWGC bout is 1 fifteen minute round in the lightweight division. Introducing today's competitors. In the red corner, competing out of Las Vegas, with a TWGC record of 1 wins and 5 losses; Fujii Yusuke! And in the blue corner, fighting out of Amsterdam, with a TWGC record of 2 wins and 5 losses; Arlo Rochester!
The judges for this bout are Cecil Peabody, George Francis and Stewart Dunkirk.
The fighters connect hands in the middle of the mat and we are under way.

Yusuke gets a clinch.

Yusuke drags the fight down to the ground.
We could do with one of the fighters taking the initiative a bit more on the ground - they're both waiting to capitalize on a mistake.
Rochester advances to half guard.
Yusuke keeping control of the position.
Rochester takes a deep breath and rests his weight momentarily on top of his opponent, to control the position.

Yusuke looking to work for a kimura from the bottom.
Yusuke is refusing to be controlled, as Rochester sits in half guard.
We've had a slow start to the round here - hopefully the action picks up.
Rochester is in a good position here but he's just trying to control... And he's not even managing to do that successfully.
The ref warns both fighters not to hold the cage as they work up against the meshing.
Yusuke has no desire to be mounted, so is trying to control. Rochester is working away from the top position though.
Rochester trying to mount his opponent but Yusuke defends it.

That's one minute gone in the round.
Yusuke looking for submissions from an awkward position here.
Rochester looking to pass the half guard. Not this time.
Rochester is a painfully thin specimen of a man. You do wonder whether a good body kick would snap him clean in two.
Rochester is keen to just control but Yusuke is a slippery customer.
Yusuke is looking to improve his position.
Yusuke is trying to control but Rochester passes into side control!
Score +3 for passing guard: Yusuke (0) vs (3) Rochester

Rochester thinks about going for a far side armbar but bails out and retains the dominant position instead.

That's two minutes gone in the round.
Yusuke manages to get back to half guard.
Rochester is looking for a kimura but he's never going to get it from there.
Yusuke is not content to let Rochester control the position.
Rochester is looking for a kimura. It's going to be difficult to finish that from half guard though and Yusuke defends it well.
Rochester content to control rather than advance.
Yusuke is looking to sinch up a guillotine here but Rochester pulls his head out easily.

That's three minutes gone in the round.
Rochester is looking for an arm triangle, whilst trying to pass to side control. Yusuke doesn't seem that keen to cooperate though. No luck this time Rochester.
Rochester wants to free his trapped foot but Yusuke is holding on for dear life with his legs.
Yusuke looking for submissions from an awkward position here.
Rochester is trying to control the action in half guard but Yusuke is working away on the bottom, looking perhaps to get back to full guard.
Rochester is trying to work for a kimura. This could be trouble! No, Yusuke has managed to free his arm - good work.
Yusuke looking to work for a kimura from the bottom.

That's four minutes gone in the round.
Rochester wants to take a breather but Yusuke is having none of it.
Yusuke actively working from the bottom here.
Yusuke looking to work for a kimura from the bottom.
Rochester trying to mount his opponent but Yusuke defends it.
Rochester is trying to control. Yusuke wants to improve his position but can't escape this time.

That's five minutes gone in the round.
Yusuke actively working from the bottom here.
Yusuke is looking to sinch up a guillotine here but Rochester pulls his head out easily.
Rochester is working hard to pass the guard. He's done it - he's now in full mount! Trouble for Yusuke! Score +3 for passing guard: Yusuke (0) vs (6) Rochester
Yusuke working to try and regain half guard.
Yusuke prevents Rochester from taking his back.
Yusuke really trying hard to get back to half guard here.
Rochester looking to control but Yusuke is working nicely, looking to advance position himself.
Rochester fails to take his opponent's back.

That's six minutes gone in the round.
Yusuke tries to get back to half guard but can't.
Rochester trying to control but he's not successful this time.
Rochester jumps to side control looking for an arm triangle but Yusuke manages to avoid the submission attempt.
Rochester working away.
Rochester gets to mount! Yusuke was on the offensive and wasn't defending properly. Score +2 for reaching mount: Yusuke (0) vs (8) Rochester
Yusuke is desperately trying to get back to half guard.
Rochester is in full mount, looking to secure a guillotine but Yusuke is surviving well by controlling Rochester's body position as best he can.

That's seven minutes gone in the round.
Rochester moves to take his opponent's back. Score +3 for taking back: Yusuke (0) vs (11) Rochester
Yusuke might be looking to lock onto one of his opponent's long limbs for a submission, whilst we're on the ground.
Rochester trying to control momentarily.
Rochester has his hand under the chin of his opponent looking for the choke. He's nearly got it! This one could be all over! But no, Yusuke has freed his hand and lives to survive another
well, another couple of seconds at least!
Yusuke is really stuck here.
Rochester looking for the choke but no joy.
Yusuke manages to reverse the position and now he's in Rochester's guard. Nice work there by Yusuke.
Score +2 for sweep to guard / half guard: Yusuke (2) vs (11) Rochester

That's eight minutes gone in the round.
Yusuke preventing the sweep.
Rochester has his foot on Yusuke's thigh. He's trying to push off and get in position for a triangle, I think. Yusuke works his way back into a safe position though.
Yusuke wants to control from the top but Rochester keeps moving.
Yusuke stands up and looks to throw the legs aside to pass to side control. Rochester swivels though and keeps the full guard.
Rochester keeping moving, preventing Yusuke from controlling successfully.
Yusuke tries to free his leg and advance position but Rochester is retaining full guard.
Yusuke drops back for a leg but he's not going to get it - he lets go and Rochester dives on top into guard. Score +2 for sweep to guard / half guard: Yusuke (2) vs (13) Rochester

That's nine minutes gone in the round.
Rochester wants to control from the top but Yusuke keeps moving.
Yusuke keeping full guard, as Rochester tries to pass.
Rochester controlling from the top position.
Rochester trying to control the position from guard on top but Yusuke is wriggling around, looking for whatever he can.
Yusuke had isolated an arm as going for a kimura. Rochester defends it easily.
Yusuke is working actively off his back, looking to secure an arm or perhaps work for a triangle.

That's ten minutes gone in the round.
Rochester looking to pass the guard.
Rochester slips effortlessly into side control - very nice. Score +3 for passing guard: Yusuke (2) vs (16) Rochester
Yusuke is not content to let Rochester control the position.
Yusuke tries to bench press Rochester off him but Rochester keeps the position.
My spies in Defiant MMA inform me that Rochester has been getting involved in the gym's BJJ sparring sessions. Let's see whether that pays dividends!
Rochester tries for a kimura. Not really close to a finish though.

That's eleven minutes gone in the round.
Rochester is looking to finish here, going for an Americana. Yusuke knows the correct defense though, so he's OK.
Yusuke is positioning himself to get back to half guard.
Rochester wants to lay and pray for a moment but Yusuke keeps working.
Yusuke is trying to get back to half guard. He's pushing on Rochester's leg. He's managed it. Nice work.

That's twelve minutes gone in the round.
Yusuke looking for submissions from an awkward position here.
Yusuke looking for a kimura from the bottom but Rochester passes into side control! Score +3 for passing guard: Yusuke (2) vs (19) Rochester
Rochester is trying to get an arm triangle but Yusuke is defending well.
Rochester tries for an arm triangle. That looks pretty tight to me. Is this one over!?! Possibly, maybe, no Rochester has let go of the choke. Obviously it wasn't as tight as we thought!
Rochester is looking to finish here, going for an Americana. Yusuke knows the correct defense though, so he's OK.
Yusuke manages to work his way to half guard, despite Rochester's best efforts.

That's thirteen minutes gone in the round.
Yusuke actively working from the bottom here.
Rochester works his foot free and advances to mount. Score +3 for passing guard: Yusuke (2) vs (22) Rochester
Rochester looking to control and managing it successfully.
Rochester trying to control but he's not successful this time.

That's fourteen minutes gone in the round.
Yusuke prevents Rochester from taking his back.
Rochester tries to control but Yusuke wriggling away.
Yusuke wants to hold on but Rochester pushes him away.
Yusuke slips a leg in and gets back to half guard.
Rochester wants to control but Yusuke is keeping him busy.
Boooooooooooooooooooo!!! God, this has been a terrible round. Come on you two, sort yourselves out!
Yusuke is defending against the submission attempts here by Rochester.
Yusuke looking for submissions off his back.
And that's the end of the fight!
Rochester wins on points by 22 to 2.
Arlo Rochester seemed lost for words in his post fight interview but he remembered to thank his fans and directed everyone to his website. |
|
|
|
|
|